Happy Cinco de Mayo! | Key Lime Beergaritas

Beergaritas | Once Upon a Recipe

Happy (almost) Cinco de Mayo, friends! I am in the midst of a busy weekend with friends, but wanted to pop in real quick to share a holiday worthy cocktail with you. I first spotted these beergaritas on Iowa Girl Eats last summer. They reminded me a little bit of one of my favorite drinks to order at a local Mexican restaurant, called a Bulldog. A Bulldog is basically a blended margarita with a bottle of beer turned upside down into it – as you drink the margarita, the beer slowly continues to empty, providing the perfect balance of margarita and beer.

It’s highly scientific. 😉

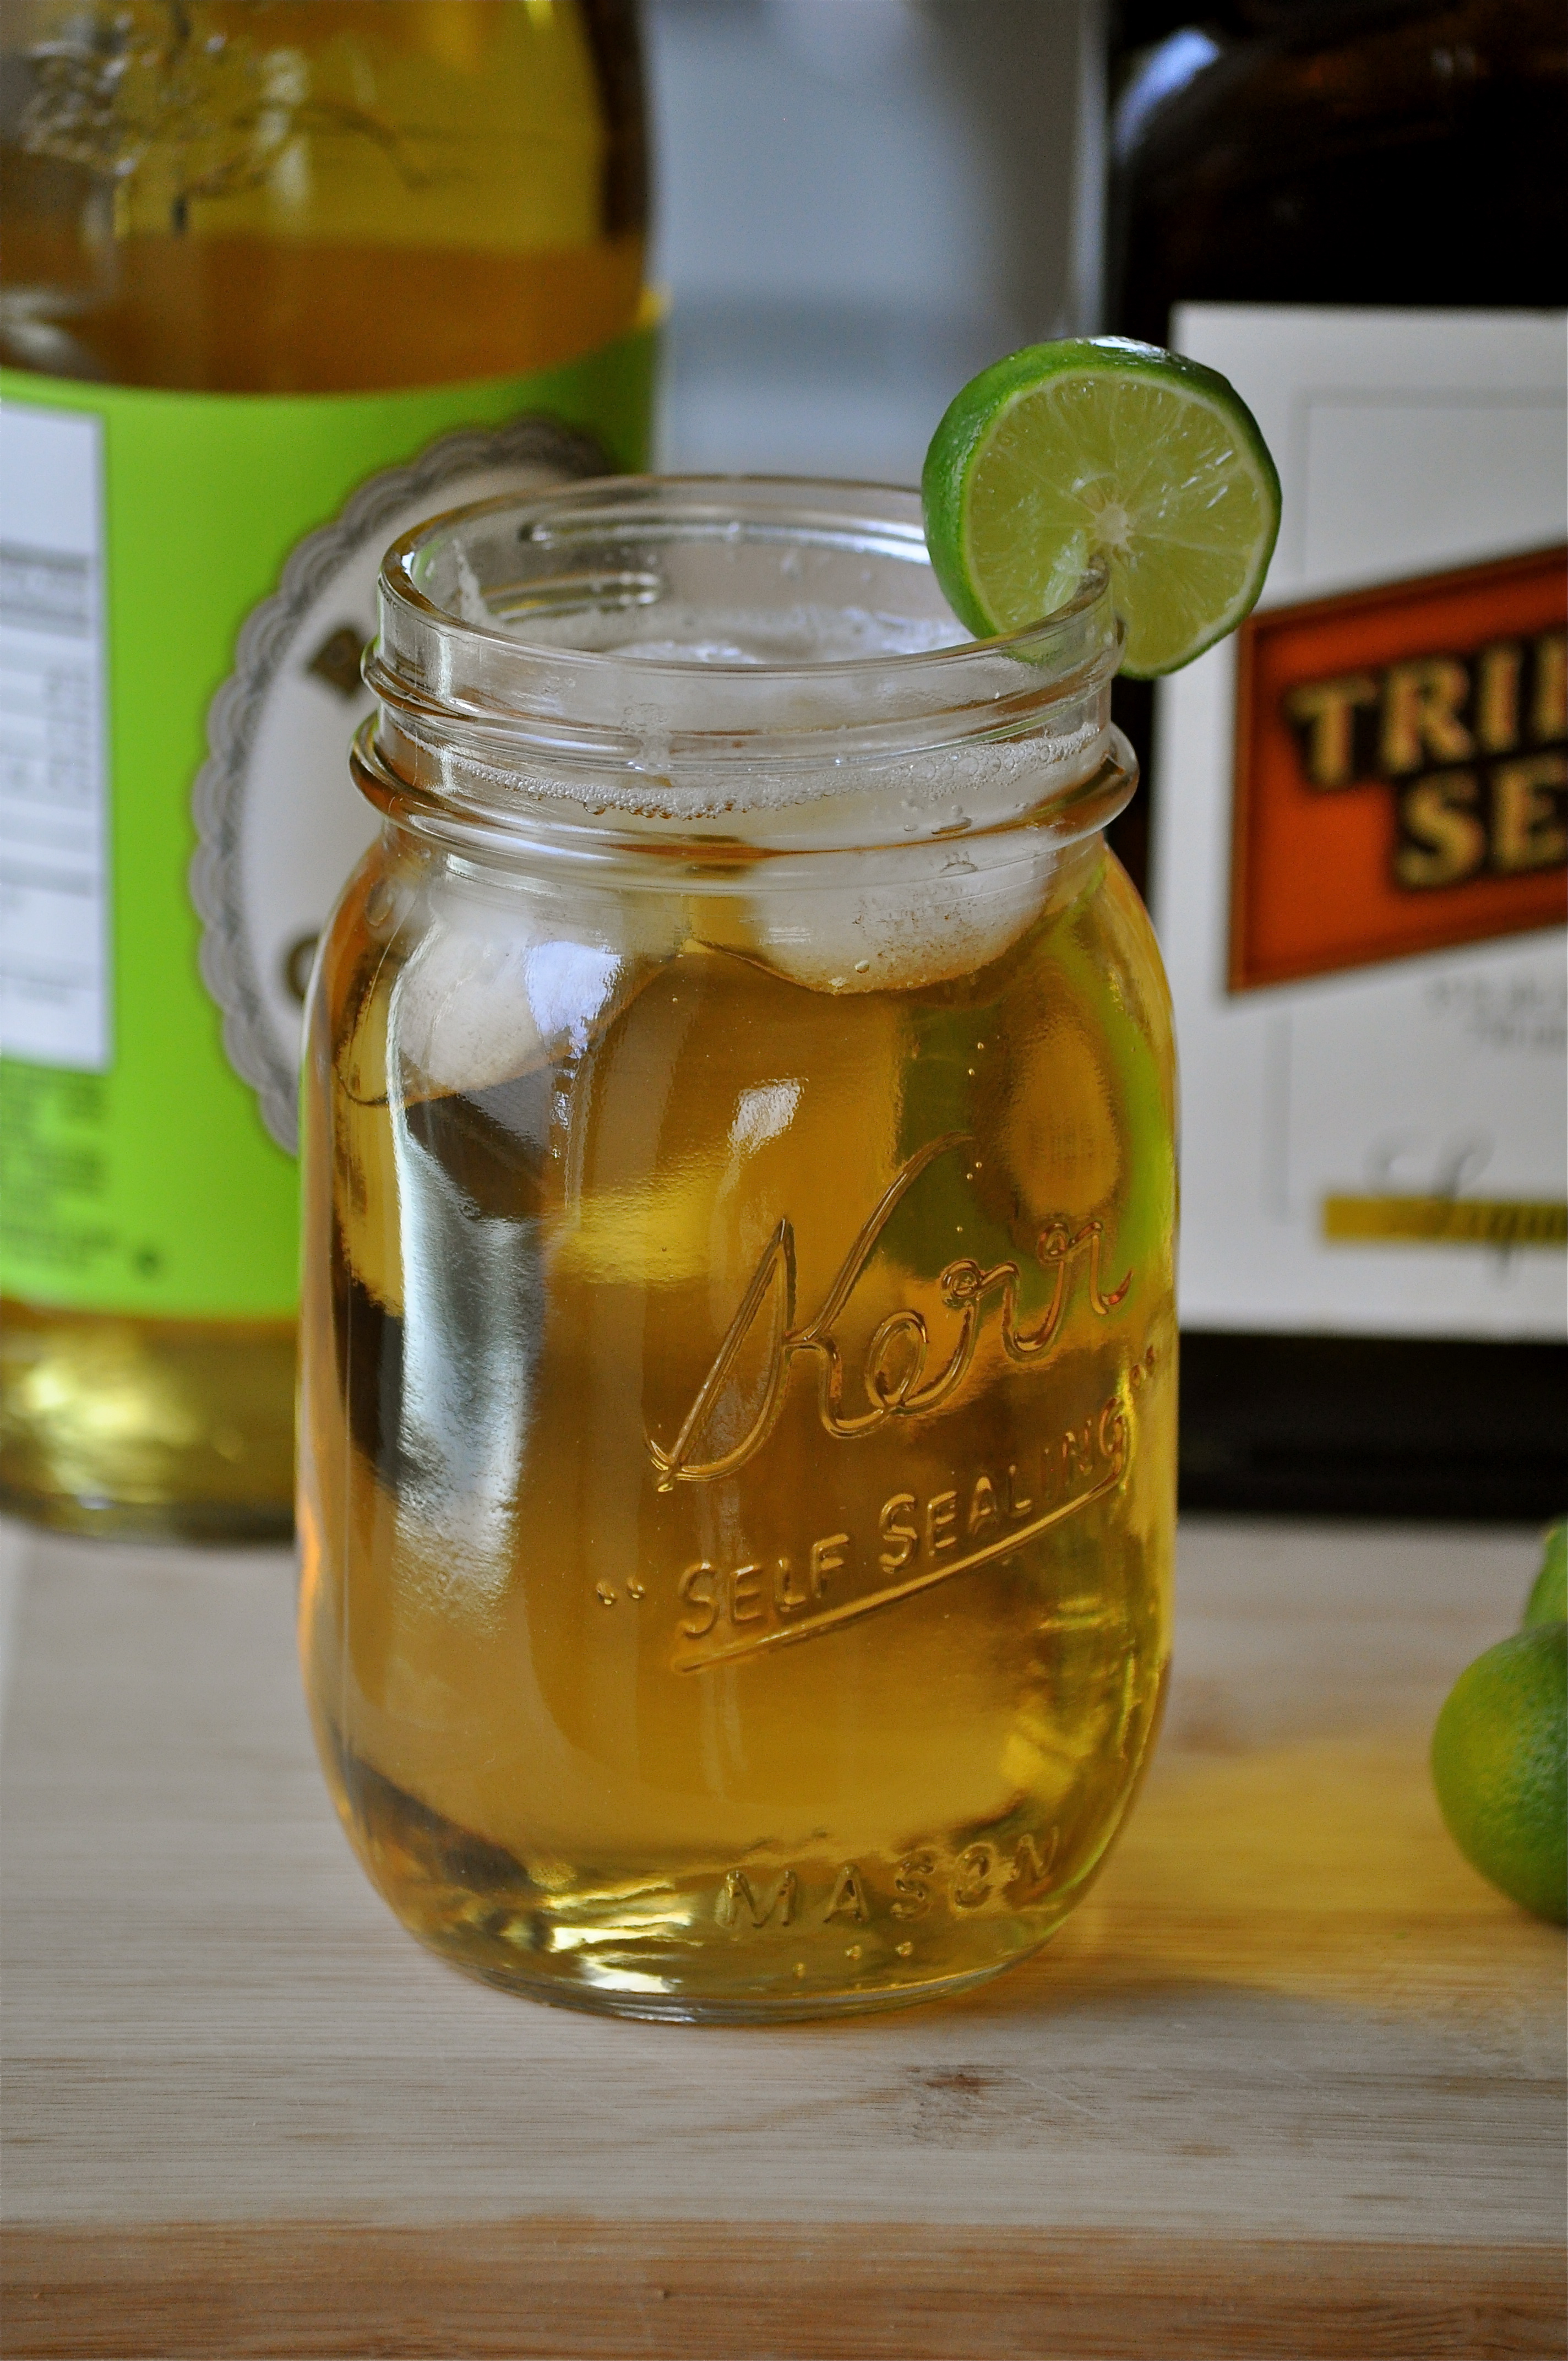
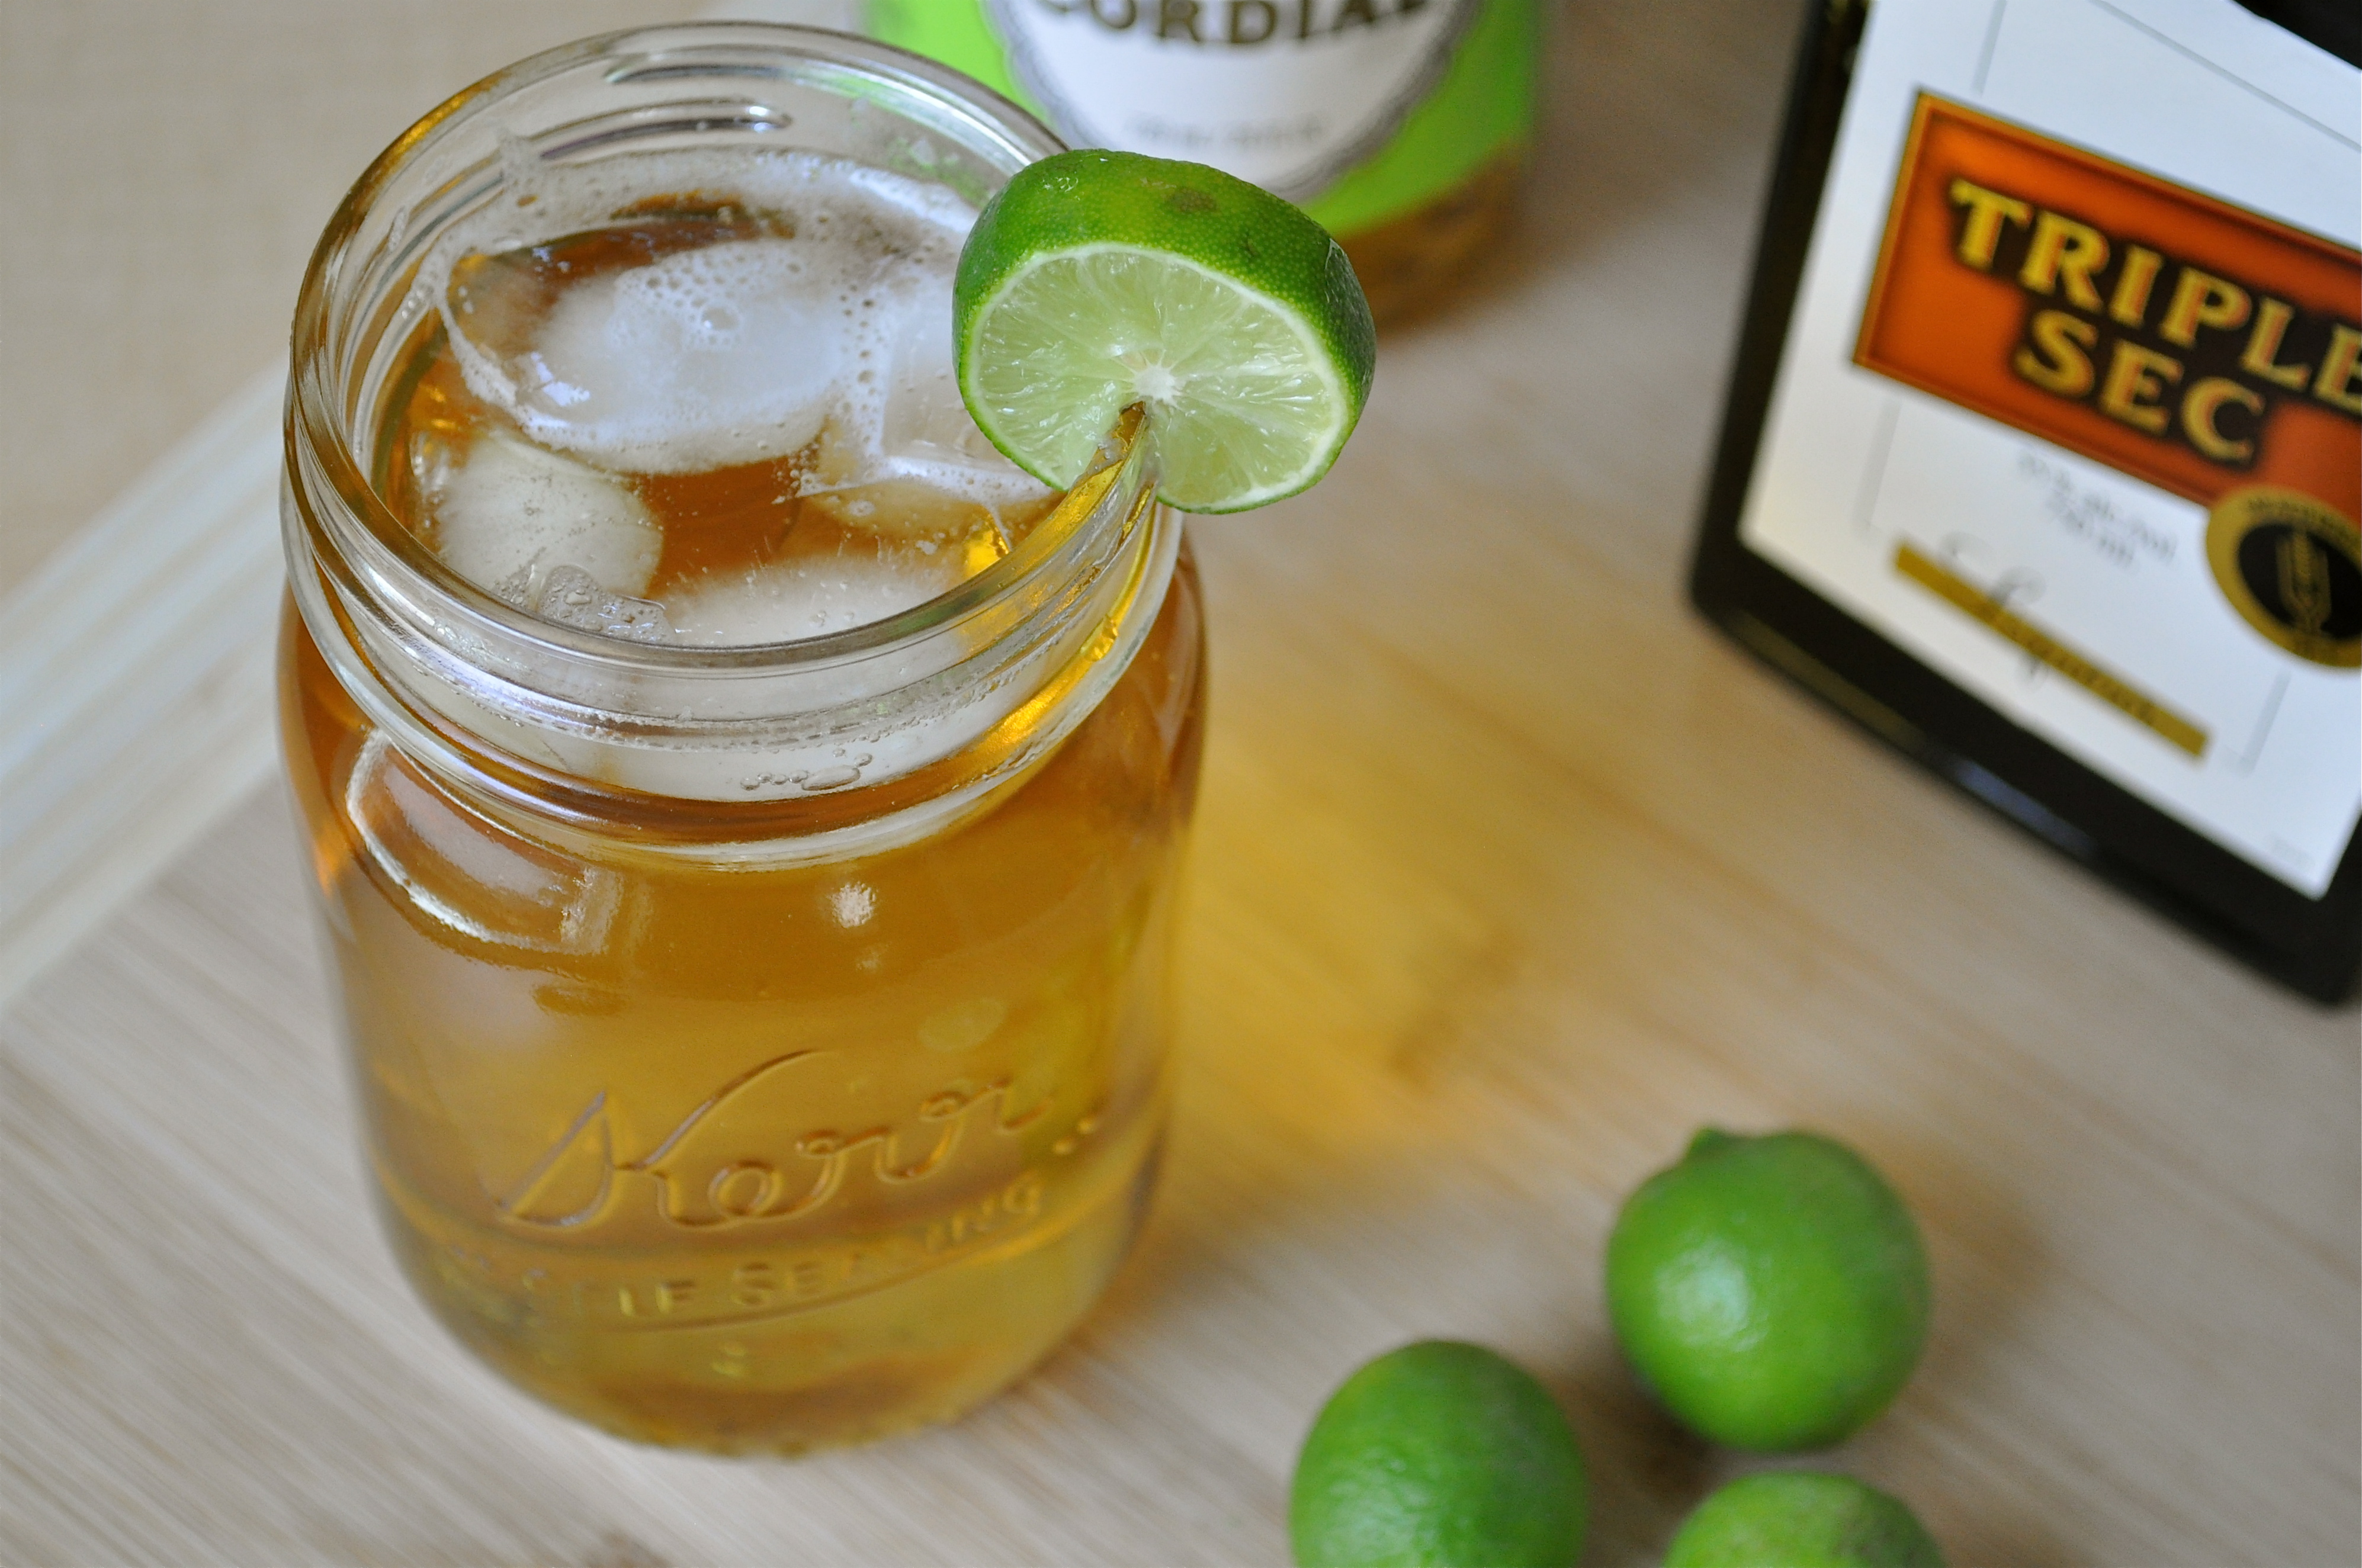
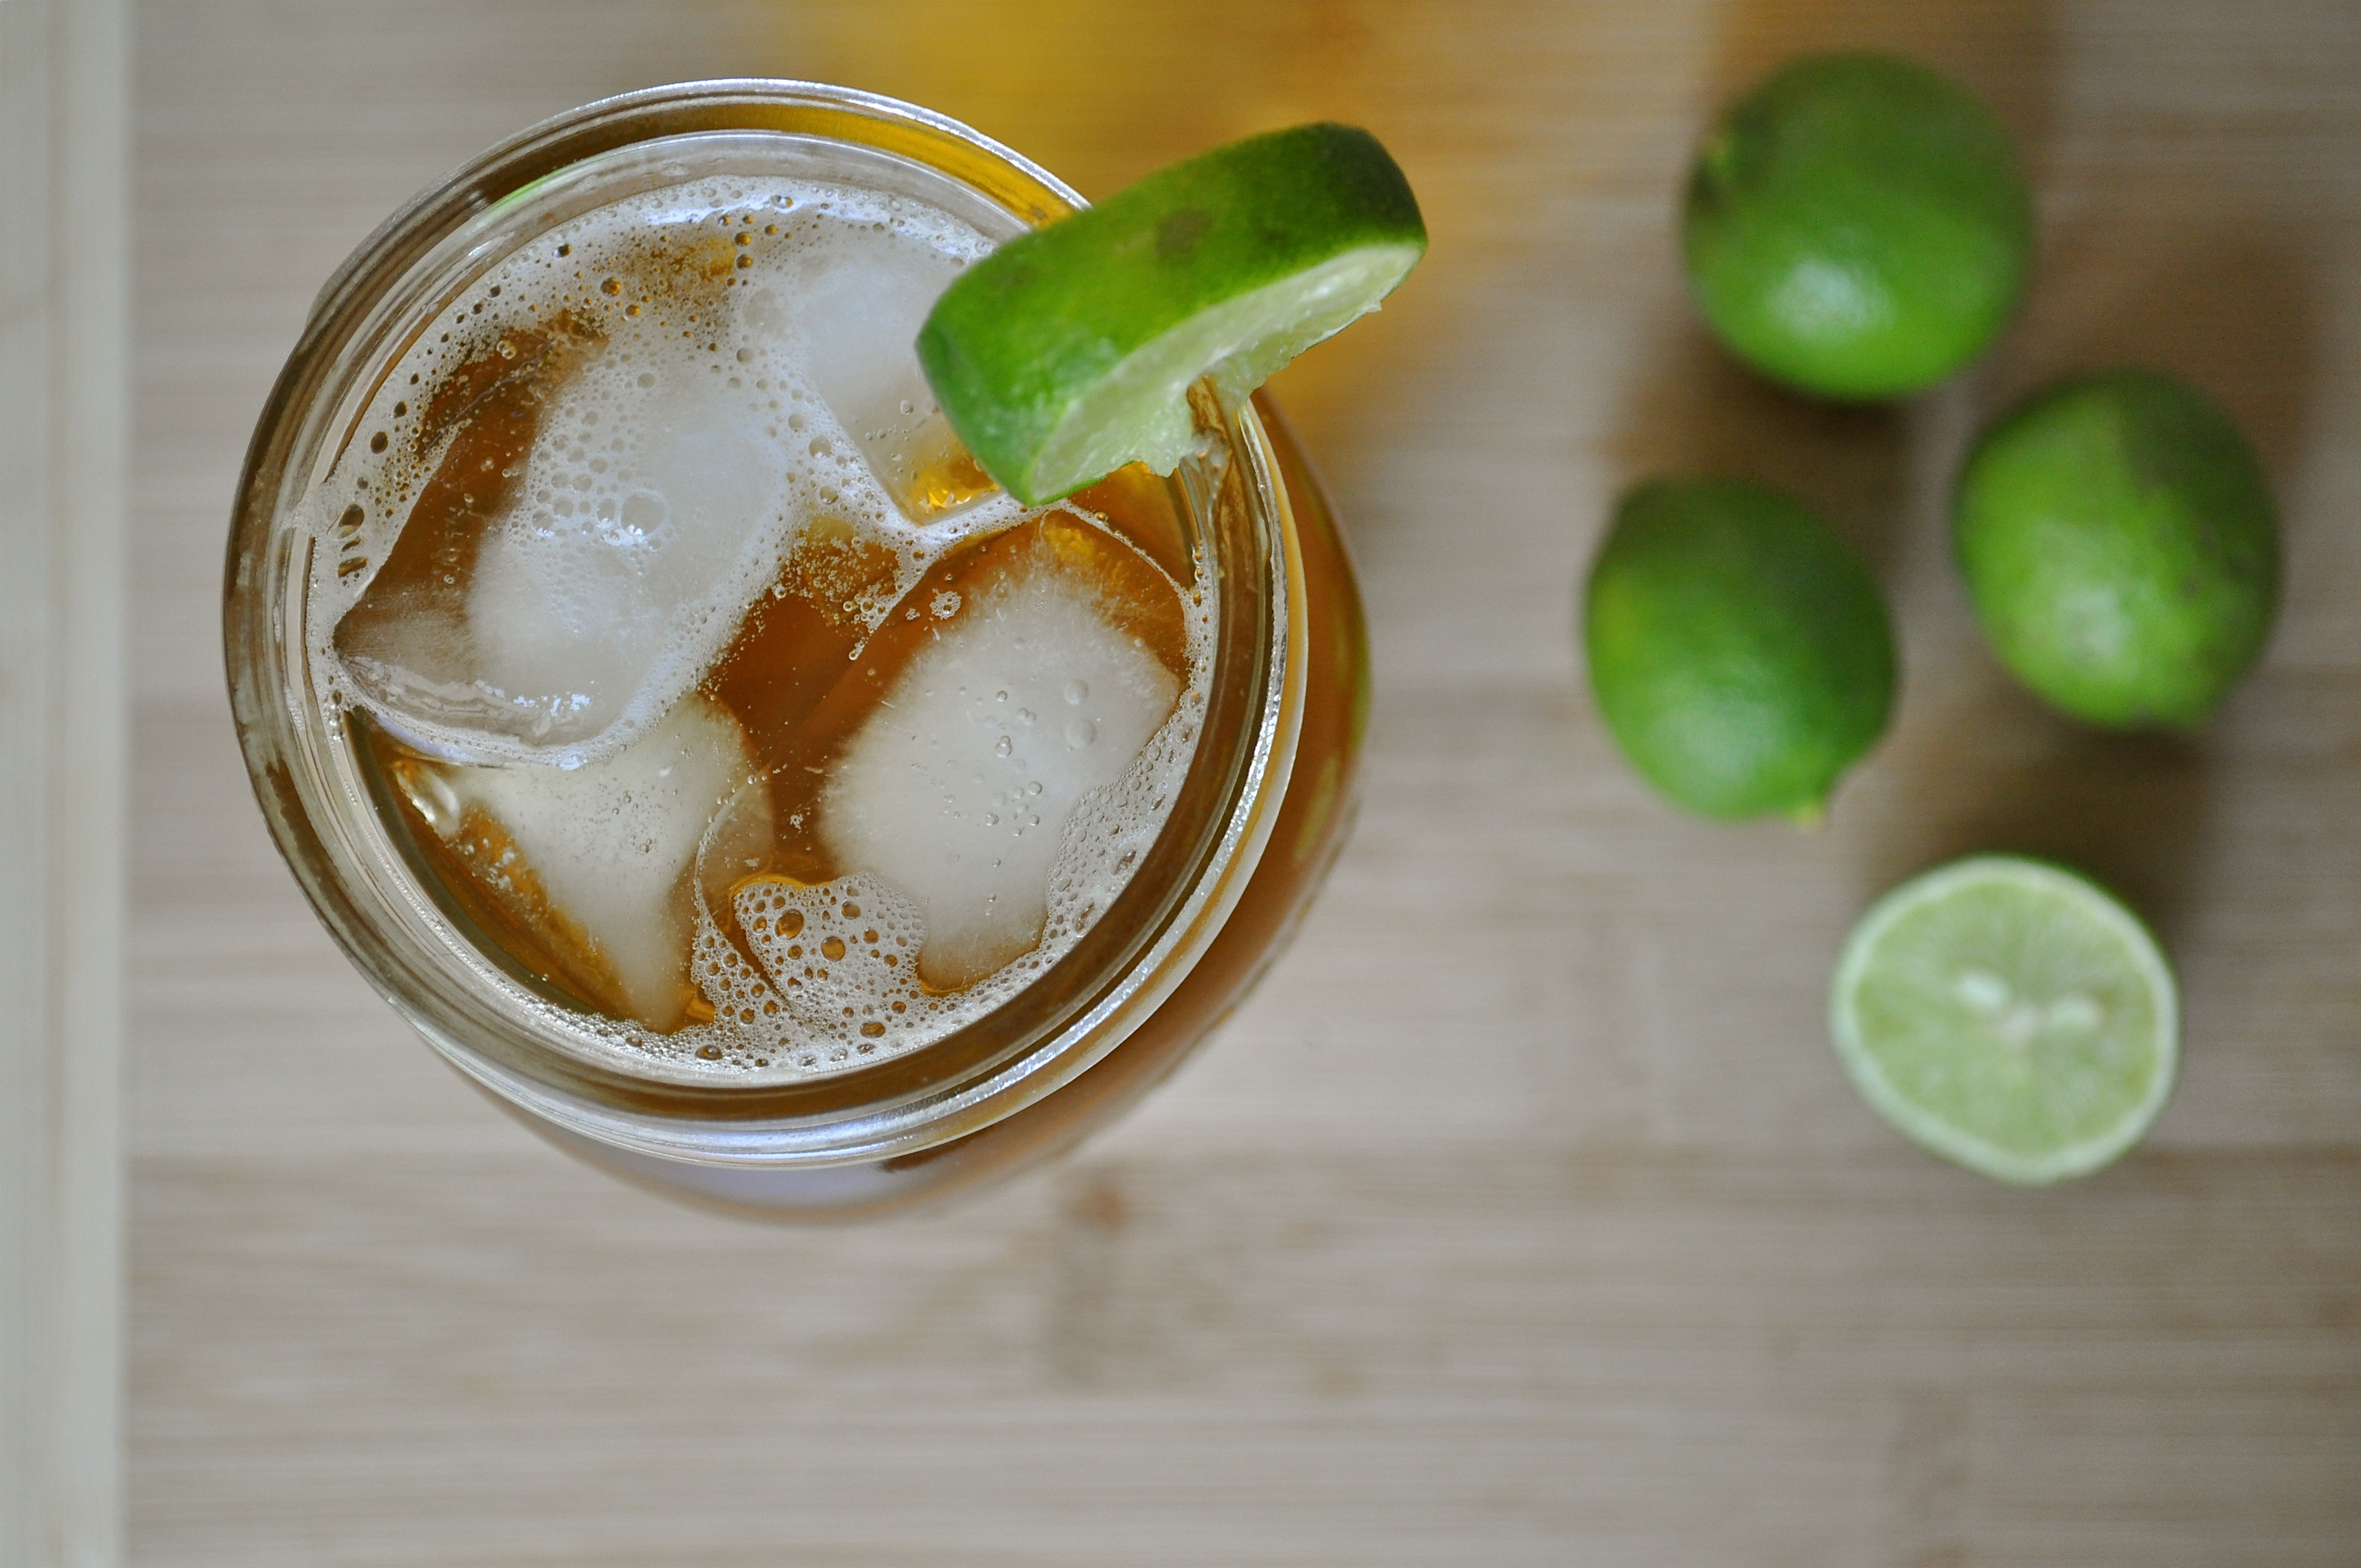
Anyways, a beergarita is more beer-heavy and is mixed with the flavors of a margarita – tequila, triple sec, and lime. A beergarita is totally slurp-worthy and perfect for summer, or a Cinco de Mayo celebration! Just beware, these go down pretty darn easy and pack more of a punch than you might expect.

Happy weekend friends!

Key Lime Beergaritas | Once Upon a Recipe

Key Lime Beergaritas | Once Upon a Recipe

Beergaritas | Once Upon a Recipe

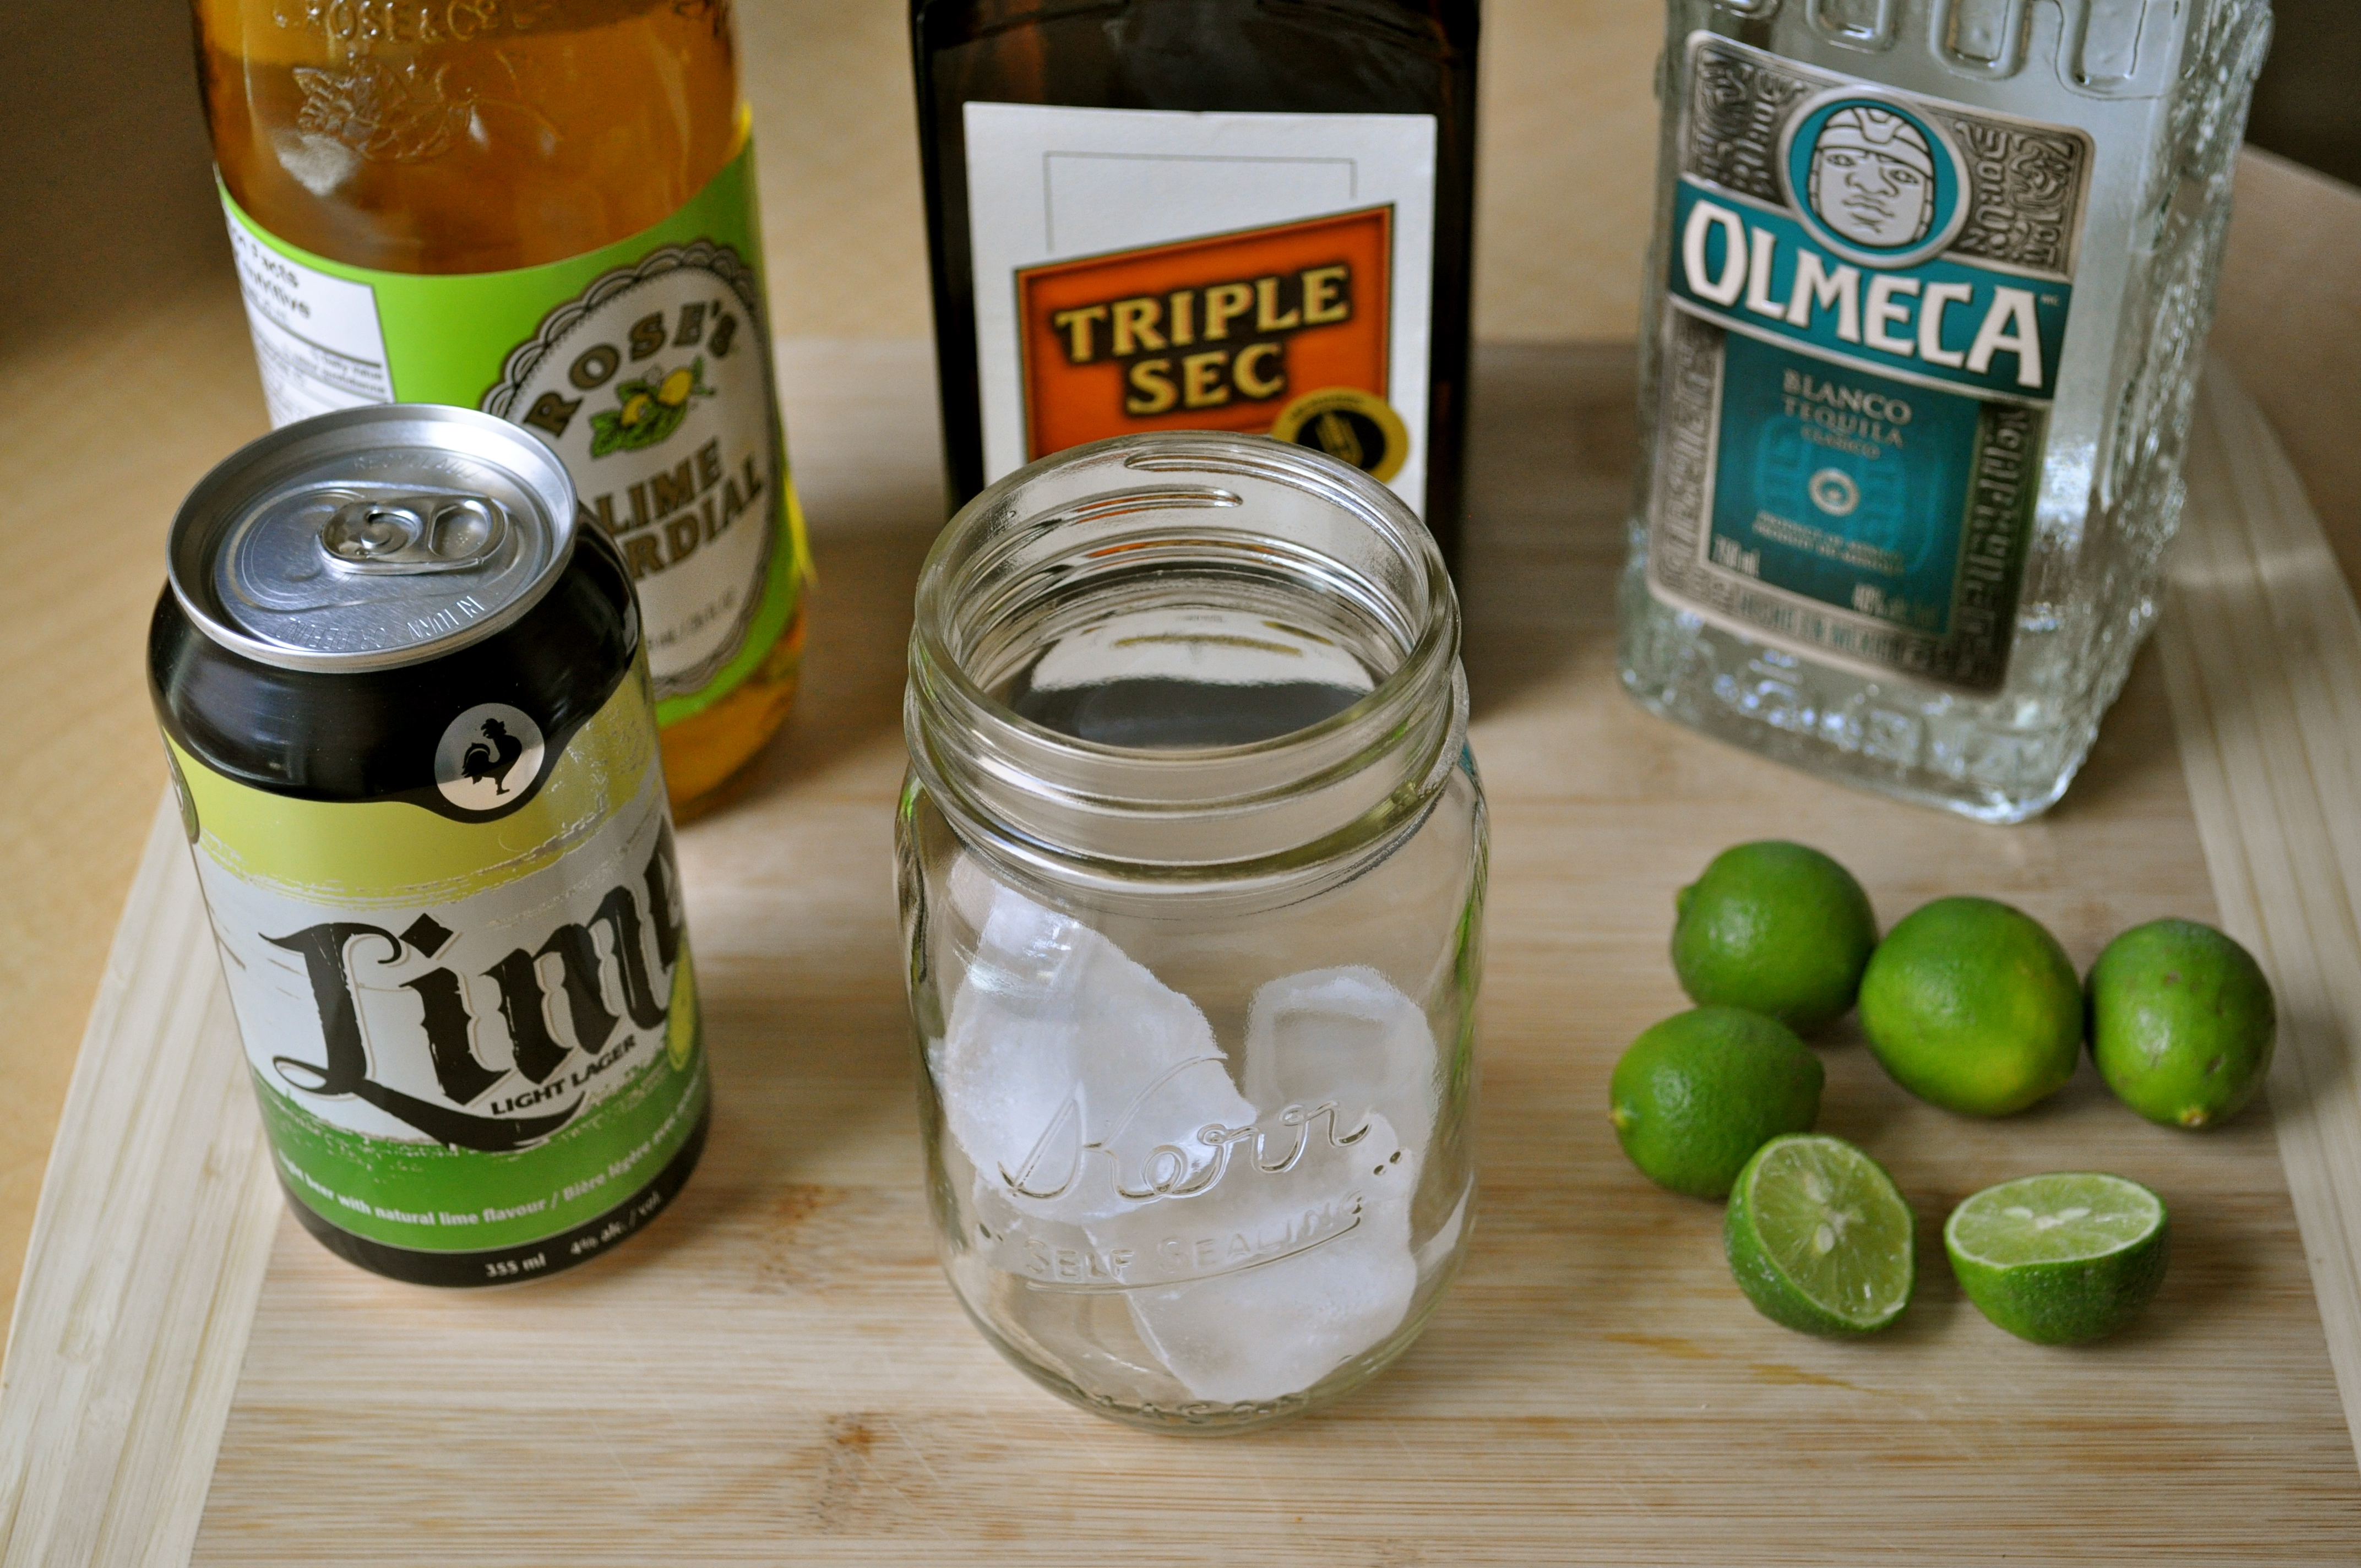
Key Lime Beergaritas (slightly adapted from Iowa Girl Eats)

1 lime beer (ie. Miller Chill or Bud Light)

1 ounce tequila

1/2 ounce triple sec

1/2 ounce lime cordial

Juice from 1-2 key limes

Ice

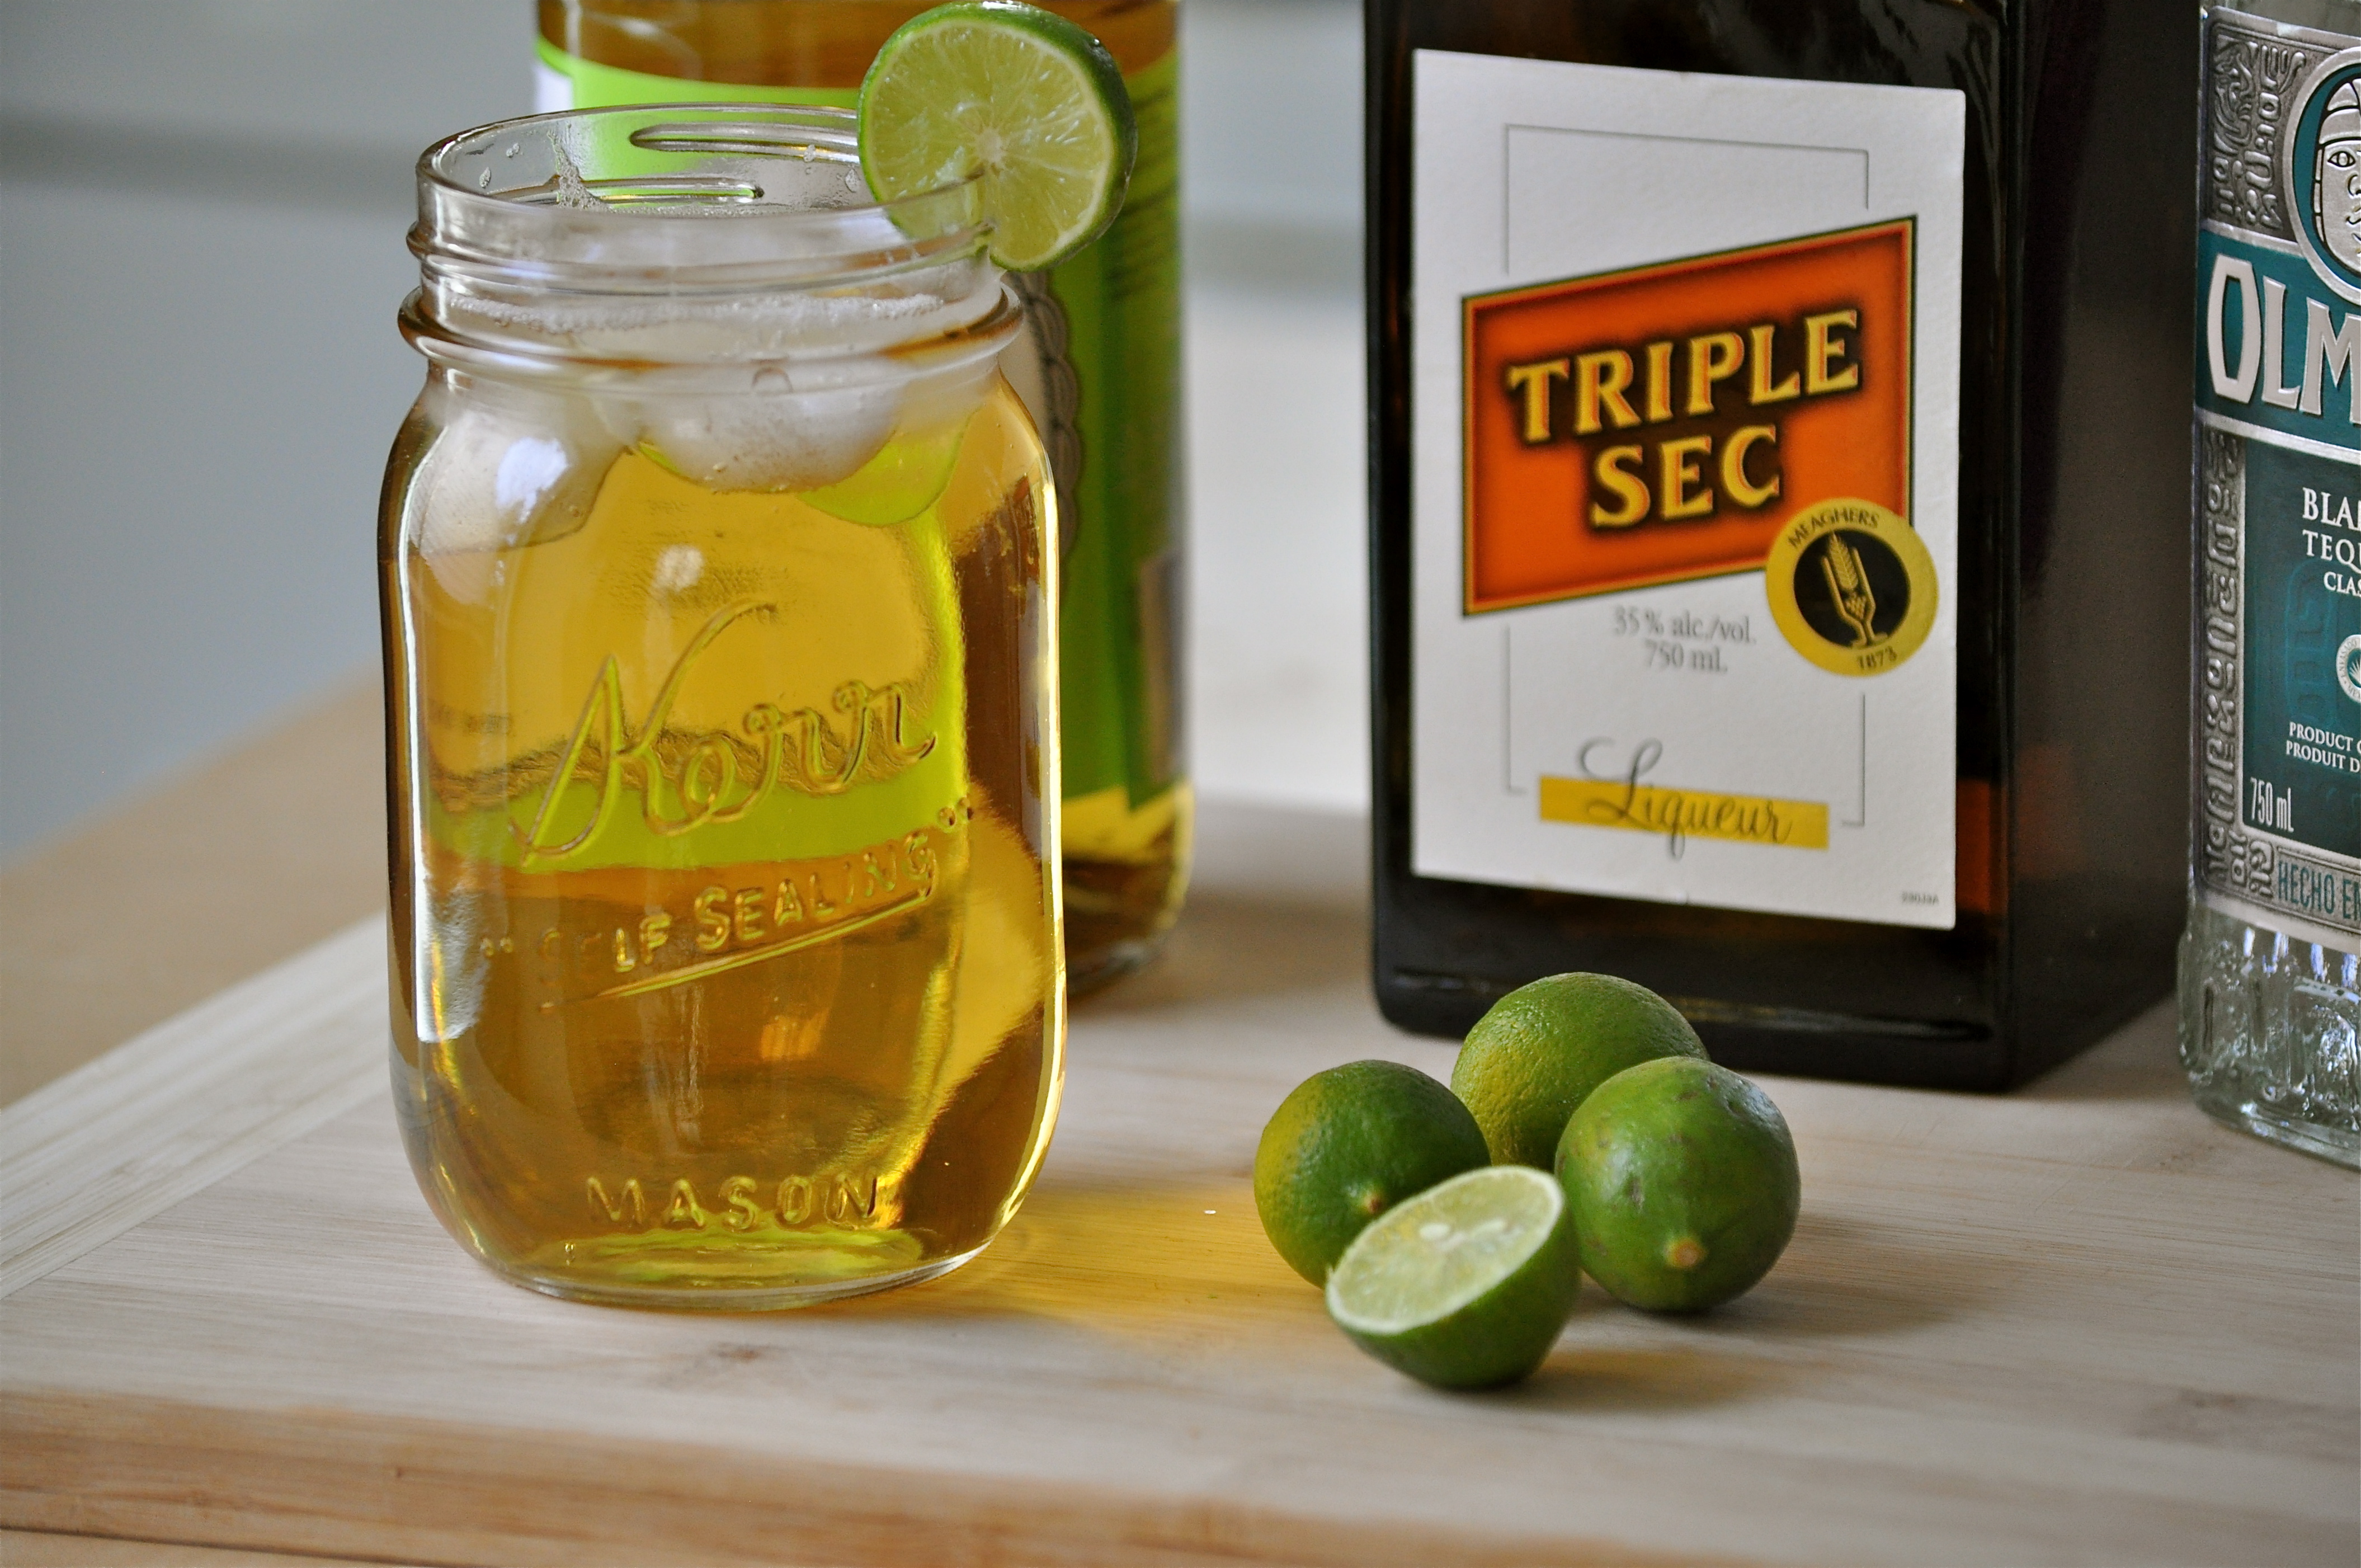
Combine all ingredients together in a large glass and mix together. Garnish with lime, if desired. Enjoy!

Key Lime Beergaritas | Once Upon a Recipe

Be My Schmalentine | Quick Sticky Chocolate Cake for One (or Two)

Sticky Chocolate Cake for One | Once Upon a Recipe

Here we are again. It’s almost February 14. Schmalentine’s Day. Hooray.

I’ve said it before, and I’ll say it again, Valentine’s Day just ain’t my jam. It kind of makes me want to gag. I am a big believer in giving and receiving love every damn day of the year, and therefore I fail to see the point of devoting an entire day to over-the-top demonstrations of love when it’s much nicer to spread it around all year. Flowers? Yes, I’d like to receive them a little more regularly, please and thank you. Chocolate? I already eat it nearly every day. A nice dinner out? Let’s do it. Weekly. Jewelry? I’m not really into it. Jewelry makes my body feel…cluttered.

Sticky Chocolate Cake for One | Once Upon a Recipe

Simple acts of love? Now we’re talking. Slip a sweet note into my coat pocket. Make me a simple dinner at home. Pick up a nice bottle of wine to enjoy with dinner. And don’t wait for February 14 to do it.

Whether or not you have a significant other to celebrate with this Valentine’s Day, you’re probably looking for a sweet treat to enjoy. If nothing else, V-day is a total excuse to eat as much chocolate as your little heart desires. How about this quick and dirty chocolate cake? I came across this recipe for chocolate cake for one in the beautiful cookbook “Home Made Winter” by Yvette van Boven. The recipe is described as a 3-minute chocolate mug cake.

Sticky Chocolate Cake for One | Once Upon a Recipe


Cringe. Friends, I don’t do mug cakes. The microwave, while useful for many things, does not cook cakes very well. Have you ever tried it? The texture is just…ugh. Gummy. Spongy. Yuck. But what intrigued me about this recipe is the fact that Yvette suggested that the cake could be baked in the oven for those who find microwave cakes to be off-putting. For the record, I tried the cake both ways. And I maintain my sentiments about microwave cakes. But you may wish to give it a try, especially if you’re in a pinch for time.

For me, this cake serves a particular purpose. Either you’re having a mad craving for chocolate cake and you don’t want to go to the trouble of making a big cake, and then be left with an entire cake to entice you until it’s gone. Or, you’re in a pinch for a quick dessert for one or two. The cake batter comes together in a flash, and even if you choose to bake it in the oven, it will be ready within 20 minutes. Go the microwave route, and you’ll be taking your first bite in just over 3 minutes. The best part? No leftovers!

Sticky Chocolate Cake for One | Once Upon a Recipe

Quick Sticky Chocolate Cake for One (or Two) ~ adapted from Home Made Winter

3 TBSP. all-purpose flour

1/4 tsp. baking power

Pinch of salt

3 TBSP. sugar

2 TBSP. cocoa powder

1 egg

1/2 tsp. vanilla

3 TBSP. milk

3 TBSP. vegetable oil

3 TBSP. dark chocolate chips

If using the oven, preheat it to 350°F and spray your baking dish with non-stick spray (I used a large ramekin dish). If using the microwave, pick a large microwave safe mug. Use a separate bowl to mix together all of the ingredients and pour into the baking dish. If using a mug, you can simply add everything into the mug and mix it together. No clean-up! However, with the microwave technique, you can omit the baking powder and salt. Bake your cake for about 20 minutes, or until a toothpick inserted into the centre of the cake comes out clean. If using the microwave, pop your mug into the microwave and cook on high for 3 minutes. The cake will rise over the rim of the mug, but don’t sweat it.

Enjoy the cake while still warm, and definitely feel free to add a scoop of ice cream on top. I’m a bit of a chocolate cake purist and prefer to eat it straight up.

Sticky Chocolate Cake for One | Once Upon a Recipe

______________________________________

Need some other Valentine’s Day ideas? I suggest that you start your day with Banana Bread Oatmeal Pancakes or my Nana’s Cinnamon Buns. If you’re in the mood for a love day beverage, I highly recommend a Red Lotus Martini (or two) or a big glass of Red Wine Sangria.

Cooking together is so romantic (in my opinion). Get in the kitchen with your significant other or your friends and make some heart-shaped pizzas with this Whole Wheat Pizza Dough. For a festively colored side dish, try this creamy and dreamy Beet Risotto.

Sweet treats? These Red Velvet Sandwiches are delicious and easy. If you’ve got a little more time on your hands, make some decadent Rice Pudding. Or Homemade Snickers Bars. Or Bourbon Pecan Pie Brownies. For something a little lighter, try Fruit Salsa and Cinnamon Chips. And diving into this Skillet Chocolate Chip Cookie might just be the most delicious thing you can do on February 14.

Happy love day, my friends. And remember to share some love, each and every day of the year. <3

Well Paired | Rosemary-Lemon Sandwich Cookies

Rosemary-Lemon Sandwich Cookies | Once Upon a Recipe


Well, I hate to point out the obvious, but…we survived. The world goes on.

Hopefully, you’re prepared for Christmas because it’s coming in just three more days and now you really have no excuse for not being ready. However, whether you’ve accidentally left everything to the last minute (or not), I’m here to help.

Rosemary-Lemon Sandwich Cookies


First of all, you must go make some lemon butter. It’s quick! It’s easy! It’s delicious! It makes a wonderful gift! Aside from its extremely high deliciousness factor, it’s darn cute!

But if you want to go the extra mile, make some rosemary lemon shortbread-esque cookies, and then sandwich them together with a creamy mixture of lemon butter and mascarpone cheese. Umm, yeah…you’re going to want to do this, if not for others then for yourself. And don’t fret! If you just don’t have the time or energy to make your own lemon butter, you could certainly substitute store bought lemon curd or even lemon pie filling for the lemon butter. Although I highly recommend going the extra mile and making your own lemon butter. Just sayin’. And please, don’t be afraid of the rosemary in this recipe. It adds a very subtle flavor that complements the lemon beautifully. This ain’t no one-dimensional cookie. This is a multidimensional cookie!

Rosemary-Lemon Sandwich Cookies | Once Upon a Recipe


Rosemary-Lemon Sandwich Cookies | Once Upon a Recipe


Thank you to my lovely coworker, Jenn for sharing this recipe with me. It comes from the latest issue of Better Homes and Gardens. And let me tell you, it’s decadent. I encourage you to double the recipe as one batch only makes about 18 sandwiches. But then again, you will most certainly be tempted to eat these little creatures, so if you don’t plan on getting them out of your house immediately, this may be a case where less is more. Consider yourself warned.

Rosemary-Lemon Sandwich Cookies | Once Upon a Recipe


Make these friends. Share them with some special people. And get back to the celebrations of the season. Much love (and cookies) to you all.

Rosemary-Lemon Sandwich Cookies | Once Upon a Recipe


Rosemary-Lemon Sandwich Cookies (barely adapted from Better Homes and Gardens, Dec. 2012)

Makes about 18 sandwich cookies.

1 cup unsalted butter, softened

3/4 cup granulated sugar + extra for dipping

2 tsp. fresh rosemary, chopped

2 tsp. lemon zest (about 2 lemons)

1/2 tsp. baking powder

1/4 tsp. salt

1 tsp. vanilla

2 1/4 cups all-purpose flour

1/2 cup lemon butter

1/2 cup mascarpone cheese

Preheat the oven to 400°F. Prepare your cookie sheets with parchment paper or a silpat. In a large bowl, beat the butter on medium speed until creamy. Add the sugar, rosemary, lemon zest, baking powder, and salt, and beat until combined. Scrape the bowl to ensure everything is well incorporated. Beat in the vanilla, and then add the flour.

Shape the dough into 1-inch balls, and place on the cookie sheets. With the bottom of a glass dipped in sugar, flatten each ball to 1/2-inch thickness. Bake for about 8 minutes or until the bottoms are lightly browned. Cool completely.

In a small bowl, combine the lemon butter and mascarpone cheese. Spread  on the bottom sides of half of the cookies, and top with the remaining cookies to make sandwiches. Layer sandwich cookies between sheets of waxed paper in an airtight container. Store in the refrigerator or freeze.

Rosemary-Lemon Sandwich Cookies | Once Upon a Recipe

Ho Ho Holiday Gifting | Lemon Butter

Though it all seems so far away, my heart aches for the children, families, and teachers affected by the Newtown school tragedy this past week. At a time when the world seems incomprehensible, I do what makes sense to me. I bake and I share. Thinking of you all and holding you close to my heart.

Lemon Butter | Once Upon a RecipeFriends, Christmas is less than one week away! Are you freaking out yet?

I’m tottttttttally freaking. Suffice it to say that I just started my shopping yesterday. Yes, started. However, after a seven hour suicide mission marathon at the mall I am well on my way to the finish line. I credit that miraculous fact to two things. One, the two meals and large caffeinated beverage that helped me to power through those seven hours and my heavy reliance on homemade gifting this year (which thankfully, I got an early start on).

Lemon Butter | Once Upon a Recipe

Homemade gifts are wonderful to give and receive. What could be more special than receiving a gift that is the product of the blood, sweat, and tears hard efforts of someone you love? I certainly can’t think of a single thing.

The good news is – there are many homemade gifts out there that are really simple and take little time or creativity to prepare. Take edible gifts, for example! Quick, easy, and delicious!

Lemon Butter | Once Upon a Recipe

Don’t believe me? Allow me to demonstrate. With lemon butter! Lemon butter is my family’s take on what most people refer to as lemon curd. It’s creamy, it’s tangy, it’s sweet, and it’s incredible. Four ingredients, less than 30 minutes, and you’ve got yourself a delicious and versatile treat!

Eggs are cracked. We need six. Two cups of sugar are added. Three lemons are zested and juiced. It’s all whisked together with a quick flick of the wrist. Ok, maybe a few flicks of the wrist. Then we cook it all gently in a double boiler on the stove until it thickens up. One cup of butter is stirred in at the end. Boom shaka laka. Lemon butter!

Lemon Butter | Once Upon a Recipe

Pour it into little jars. Tie them up all pretty with some raffia. This recipe will produce four cups of lemon butter – enough to fill 8 of these cute little 4-ounce jars. That’s eight gifts people! Get into it!

Lemon Butter | Once Upon a Recipe

In case I haven’t convinced you already, let me tell you about a few ways you can enjoy this lemon butter.

1. Fill mini prepared tart shells for a quick and delicious dessert.

2. Spread it onto toast. Muffins! Scones!

3. Stir a spoonful into plain Greek yogurt. Seriously good.

4. Eat it by the spoonful. (Trust me, you’ll want to.)

Lemon Butter | Once Upon a Recipe

Lemon Butter

Makes about 4 cups. 

6 whole eggs

2 cups granulated sugar

Juice + zest of 3 lemons

1 cup butter, cut into small cubes

In a double boiler, whisk together the eggs, sugar, and lemon juice + zest. Cook over medium heat until thick, stirring often (this takes about 10-15 minutes). Once the mixture is thick enough to coat the back of a spoon, stir in the butter until melted and incorporated. Remove from heat and allow to cool for a few minutes before pouring into jars. Seal tightly and refrigerate. Consume within a few weeks.

Lemon Butter | Once Upon a Recipe

Come back in a few days and I’ll show you another use for lemon butter. Hint: It starts with a C and ends in ookie.

Oh! And one more thing! Once Upon a Recipe has been undergoing a little facelift behind-the-scenes for the past while. I can’t wait to share it all with you in the new year!

Guest Post: Kristy @ Gastronomical Sovereignty | Rough & Rustic Stuffing

Hi friends! Special treat for you today – Kristy from Gastronomical Sovereignty is here to share a festive recipe. Kristy is one of my favorites. Check out more of her blog after this post and you’ll see why. Bonus: She’s a fellow Canadian. Cheers to that!

Good morning Amanda’s darling readers!

Anyone who knows me knows I love me some Christmas. The tree, the music, the presents, company, that glowing feeling that starts deep in your stomach and radiates through your every pore – that could be the wine. But still, I love me some Christmas! And best of all, at this time of year, I love a good, filling, rough & rustic stuffing.

from above christmas stuffing

There are lots of things you can stuff right now. Stockings. Packages. Feather down pillows. Your face. Random body parts that will remain un-named because not everyone appreciates me talking about vaginas on their blogs. Oops. Sorry Amanda! I said vagina. Oh no.
.
But most importantly – at least while we’re in the presence of family – birds! This year it’s just me and the boyfriend so we aren’t roasting a full turkey. Instead we’re thinking about just 2 breasts. Turkey breasts. What’s wrong with me?
.
You could stuff this stuffing inside a bird if you like but this recipe was simply baked in the oven all by itself. Is it still called stuffing if it isn’t stuffing something? Hm.
This was also less goopy than most stuffings I’ve had. You could add another 1 – 2 cups of liquid if you like your stuffing heavier but this is a nice light-feeling alternative to everything else we eat at Christmas dinner but still loaded with flavor to-boot! Boots are another thing you can stuff. With socks. Or presents. Or….
.
Rough & Rustic Stuffing

(printable recipe) – Serves 6.

.
Ingredients:
1 loaf of sourdough bread, roughly chopped into 1” pieces
1 cup onion, diced
1 cup carrot, skin on & diced
1 cup celery, sliced
1 cup mushrooms, sliced
2 cups apple, skin on, cored & diced
2 cups chicken, beef, or veggie stock
1 lb. chorizo sausage (approx. 3 large links), removed from casings
Handful of fresh parsley, roughly chopped
Handful of fresh sage, roughly chopped
2 TBSP. butter
2 pastured eggs, lightly beaten
Coarse sea salt & fresh cracked black pepper
.
What to Do:
Pre-heat your oven to 300°F. Place chopped bread on a couple of baking sheets. Place in oven and toast until golden, approx 30 minutes. Remove from heat and set aside.Turn the heat up to 350°F and grease a casserole dish with Tbsp of butter and/or non-stick spray. Set aside.Place a large pan over medium heat with 1 TBSP. of butter. Once hot, add the sausage and break up into small pieces. Cook until almost all the pink is gone, stirring often.
.
Add the onion, celery, carrot, mushroom and a good helping of salt and pepper. Allow for the veggies to soften, stirring regularly, until just barely fork tender, approx 10 minutes.
.
Pour in the apples, stock and herbs. Bring to just a boil, scraping any bits off the bottom of the pan. Mmm flavor! Remove from heat.
.
Toss the bread into the casserole dish and pour eggs over top. Mix well. Add the sausage/veggie/stock mixture. Make sure everything is combined.
.
Cover and place in oven. Bake for 45 minutes, remove the cover, and cook a further 10 minutes. Remove from the heat and allow to sit for 10 minutes.
.
Eat.
.
Buen provecho!
Kristy

How I Survived a Half Marathon | (And Lived to Eat) Pumpkin Toffee Ice Cream

You are much stronger than you think.

I repeated this phrase approximately 149 times in my head during the 1 hour, 57 minutes, and 19 seconds that it took me to complete my first half marathon. 21.1 km. Boom.

To say I was nervous going into this race is a major understatement. My training didn’t go as well as I had hoped. Motivation was hard to find at certain points. Life easily got in the way of going for a run (Geez life! Why you gotta be like that?). I overtrained in the final month before the race, leading to terrible shin splints a couple of weeks before the big day. I obsessively googled race day tips. I almost bought a new pair of shoes with 7 days to go.

My uncle gave me some great advice about a month ago. He encouraged me to visualize the race and how it would feel to finish. After our conversation, I spent a few minutes before I fell asleep every night thinking about what crossing the finish line would feel like. The sights I would see. What I would smell. Hear. Every time I would add more specific detail. Standing at the starting line, there was no doubt in my mind that I would finish the race. I had envisioned it so many times.

The thing is, we are all capable of so much more than our minds allow us to believe. My yoga instructor often says “Keep breathing. There is nothing that you cannot breathe through”…often in the third minute of thunderbolt pose, when our legs are burning, ready to give out. “Just breathe,” she tells us. “You are much stronger than you think.”

And so I breathed deeply as I repeated “You are much stronger than you think” over and over. And over.

The first 10km clipped right by. In fact, when I passed the 10km marker, I was surprised. Almost half way! My surprise gave me hope that the next 10km would fly by just as quickly. The next marker I hit read “13km”. I felt like it should have read 15km. You’re over half way there, I reminded myself. You can do this!

And then the wheels started to fall off the bus. One of my water bottles popped out of my fuel belt and bounced around on the ground behind me. I skidded to a halt and tried to quickly grab it without disturbing any of the other runners. I grabbed the bottle. It jumped out of my hands again. I ended up half-lunging, half falling to the side of the course to get out of another runner’s way. She gave me a sympathetic look. I got back on my feet and got moving again. But I was frazzled. I had lost my momentum. My rhythm.

By the time I hit the 16km mark, the kilometres really started to crawl by. I began to desperately wish that I had someone running beside me, encouraging me, cheering me on. Someone who might be able to drag me across the finish line, if needed.

The huge hill at kilometre 18 nearly finished me. It was long and winding. I promised myself that I would be at the top in 20 seconds. Just when I thought I was nearing the top, it wound around and kept going. I attempted to trick myself in various ways. I pretended that I was on a leisurely 5km run through my neighborhood. I told myself that my body felt great! That my legs did not feel as though they were moving independently from my body, like two stiff boards that I no longer had any control over. That my lungs were full of air, rather than painfully tightening due to a lack thereof.

As I reached the 20km mark, I came upon my friends in the crowd of people lining the streets. Thank goodness for my friends. Hearing their voices cheer my name, seeing their smiling faces, reading the neon sign they held above their heads (“Hurry up, my legs hurt!”) gave me that one final push that I so desperately needed. I managed to sprint the last 200m to the finish line. And despite the difficulty of preceding two hours, I felt like a million bucks. I think it’s true. Nothing worth doing is ever easy. 

Feeling good a few minutes after the finish!

I used to think that I would never run further than a half marathon. Anything longer just seemed…crazy. And quite frankly, downright unnecessary. But in the fog of my post-race high, I’m having second thoughts. There just might be a full marathon in my future.

After all, we are much stronger than we think.

And while we’re burning all of these calories, we’d better remember to replace them. What better way than ice cream?! I came across this recipe for pumpkin ice cream by the lovely Leah from Freutcake a few weeks ago. I immediately pinned it for future making. I made a few small changes to Leah’s recipe, adding in a few additional spices and replacing the dark chocolate chips with toffee bits. It’s creamy, pumpkin-y, and studded with little bits of Skor chocolate bar. Perfect for Fall!

Pumpkin Toffee Ice Cream (adapted from Freutcake, originally from David Lebovitz)

I am presently fantasizing about eating this ice cream out of a big waffle cone and drizzled with caramel sauce. Makes about 1 quart.

1 1/2 cups whole milk

1 cup heavy cream

1/3 cup plus 2 TBSP. granulated sugar

1/2 tsp. ground ginger

1/2 tsp. ground cinnamon

1 cinnamon stick

1/2 tsp. ground nutmeg

1/4 tsp. ground cloves

1/4 tsp. ground allspice

1/4 tsp. salt

5 large egg yolks

1/4 cup brown sugar, packed

1 tsp. vanilla

2 tsp. brandy

3/4 cup pumpkin puree

1 cup chopped Skor bar (or other toffee chocolate bar)

Prepare an ice bath by putting some ice and a little water in a large bowl and nest a smaller metal bowl (one that will hold at least 2 quarts) inside it. Place a mesh strainer over the top.

In a medium saucepan mix together the milk, cream, granulated sugar, ginger, cinnamon, cinnamon stick, nutmeg, cloves, allspice, and salt. Warm the mixture until hot and the edges begin to bubble and foam. Whisk the egg yolks in a separate bowl and gradually whisk in about half of the milk mixture (to temper the eggs), stirring constantly. Scrape the egg mixture back in to the saucepan and cook over low heat, stirring constantly and scraping the bottom with a heatproof spatula, until the mixture thickens and coats the spatula (an instant-read thermometer should read between 160º-170ºF). Immediately pour the mixture through the strainer into the bowl nested in the ice bath. Add in the brown sugar, stir until cool, then refrigerate overnight.

Whisk in the vanilla, brandy, and pumpkin puree. Freeze in your ice cream maker according to the manufacturer’s instructions. Stir in the chopped toffee bar, transfer to a container (or my favorite, a loaf pan) and freeze until firm.

How To: Easter Fun | Chocolate Nests

How to have fun this Easter…

Grab some easy ingredients and throw ’em all together. We’re talking four ingredients, friends. Easy as pie. Actually, way easier than pie. Do it!

Whatever way you’re spending this Easter weekend, I hope it involves much food, love, and happiness. And most importantly, chocolate!


Chocolate Nests (from The Pastry Affair)

Makes 8 nests. 

1/2 cup peanut butter

1 cup chocolate chips

3 cups chow-mein noodles

Mini-eggs (or jelly beans)

In a saucepan over low heat, melt the chocolate and peanut butter and stir until smooth. Pour over top of the chow mein noodles and stir until evenly coated. Drop by spoonfuls onto a cookie sheet lined with waxed or parchment paper. Try to create “nest” shapes as you work, leaving an indentation on the top of each nest. Allow the nests to set in the refrigerator for at least 30 minutes before decorating with chocolate eggs or jelly beans.

PS. The fun level of this activity is exponentially higher when you have help from little hands. 🙂

One Last Taste for 2011 | Egg Nog Cupcakes


2011. A year filled with a few ups, many downs, and lots of in-betweens. I feel a buzz of excitement for the fresh start that the new year will bring. But first, one final recipe for 2011. I made these cupcakes for dessert on Christmas Day, and they were a much bigger hit than I expected. I wanted to use up the last of the egg nog in my fridge, so I thought I’d make these once more for a New Year’s Eve party that I’m heading to tonight. They really are delicious.


My brain is filled with many words, but I’m going to keep it short and sweet. Thank you my dear readers – friends, family, and strangers who come here for a little peek into my kitchen – without you, this blog would be nothing. From my heart to yours, I wish you all the best in the coming year. Cheers to happiness, love, adventure, and much more in 2012!

Much love,

Amanda


Egg Nog Cupcakes (adapted from the always lovely Annie’s Eats)

For the cupcakes:

1 1/3 cups all-purpose flour

1/2 tsp. baking soda

1 tsp. baking powder

Pinch of salt

1/4 tsp. nutmeg

1/4 cup dark rum or bourbon

1 cup egg nog

1/4 cup vegetable oil

1 TBSP. apple cider vinegar (or plain vinegar)

1 tsp. vanilla

1 cup sugar

For the icing:

1 cup of butter, room temperature

2 1/2 cups icing sugar

Pinch of nutmeg

2 1/2 TBSP. egg nog

1 TBSP. dark rum

For the cupcakes: Preheat the oven to 350°F. Line a 12-count muffin tin with liners of your choice. In a medium bowl, combine the flour, baking soda, baking powder, salt, and nutmeg and whisk together. In the bowl of an electric mixer, combine the remaining ingredients, and beat until well-mixed. Slowly add in the flour mixture and beat until just combined. Fill the muffin tins 2/3 full and bake for about 24 minutes, or until a toothpick inserted into the centre comes out clean. Cool completely.

For the icing: Place the butter in the bowl of an electric mixer fitted with a whisk attachment. Beat the butter on medium-high speed until smooth, about 30 seconds. Add in the icing sugar and nutmeg, and mix on medium-high speed until smooth, about 1 minute. Add in the eggnog and whip on medium-high speed until light and fluffy, about two minutes. Finally, add in the rum, and mix on low speed until blended.

Use a pastry bag to decorate the cooled cupcakes, or spread the icing on with a knife. For an extra special garnish, poke half a cinnamon stick into each iced cupcake, and/or sprinkle with nutmeg. Store uneaten cupcakes (not that you’ll have any) in the refrigerator for up to 3 days.


PS. Just stating the obvious here, but…maybe I’ll be a cupcake decorator in my next life.

The In-Between | Cranberry Egg Nog Scones

Holla!

How goes it boys and girls? Did you have a magical Christmas? Did you eat way too much and drink to your heart’s content? Did you get way too little shut-eye over the past few days? Are you totally bummed about going back to work tomorrow? I sure did, and I sure am. Alas, the party must go on.

And there will be another party in, oh…about 4 days. So let’s take a moment to relax and recuperate, shall we?

Yesterday, I took a day for myself. I allowed myself to be a sloth-like couch potato. I didn’t shower. I wore my comfy clothes. I ate dessert for dinner, and dinner for dessert. I watched a Diners, Drive-Ins, and Dives marathon. Which just made me crave poutine and cinnamon-bun french toast, by the way. I probably lost a few brain cells, but they’ll grow back…right?

But the craziest part? I felt bad about it. I felt guilty for being a couch potato when I should have been cleaning, working out, organizing that dang room, and the list goes on. Sometimes we can be so hard on ourselves. But the reality is, there will always be something that needs doing, and unless we press the pause button every so often, we will miss out on opportunities for rest, relaxation, and being kind to ourselves.

This morning, I woke up after a refreshing 8-hour sleep, I went to a hot yoga class, and then I let the rest of my day carry me where it wanted. I put the to-do list away. And clearly the day wanted me to exercise my baking muscle because these scones were born. I had a bag of fresh cranberries in my fridge that I threw into my basket on a whim last week, mostly because they were ridiculously cheap. I also had a carton of egg nog hangin’ out in there. I have to admit, I’m not the biggest fan of egg nog. I like to have a token Egg Nog and Rum (or two) each Christmas, but that’s about all I can handle. Which leaves me with a little too much egg nog on my hands. However, after making a batch of these scones, it might not be enough.

Cranberry and Egg Nog Scones

I love how these scones turned out. They were incredibly light, and honestly, if you weren’t told that there was egg nog in them, you might not be able to guess that it was in there at all. The next time I make these (and there will be a next time), I will add in the zest of an orange – I think it would compliment the flavors so well.

2 cups all-purpose flour

1/2 cup oats

1/3 cup + 2 TBSP. organic cane sugar

1 TBSP. baking powder

1/4 tsp. baking soda

Pinch of salt

1 1/4 cups fresh cranberries, roughly chopped

1/3 cup butter, cold and cut into small cubes

3/4-1 cup egg nog

1 egg white + 1 tsp. water, whisked

Extra sugar for sprinkling on top of scones

Preheat the oven to 400°F. Mix the flour, oats, sugar (reserving the 2 TBSP.), baking powder, baking soda, and salt together. Cut the cold butter into the flour mixture using a pastry blender (or two knives) until the mixture resembles coarse meal. In a separate bowl, combine the cranberries and the 2 TBSP. sugar and toss to coat. Add in to the flour mixture. Slowly add the egg nog to the flour mixture, using only enough to bring it all together. On a lightly floured surface, pat the dough into a rectangle, about 3/4 inches thick. Cut into 8 pieces, and place them on a parchment or Silpat-lined baking sheet. Brush them with the egg white/water mixture, and sprinkle with sugar. Bake for about 15-18 minutes, or until lightly browned. Enjoy immediately!

Holiday Wishes | Last-Minute Gifts For The Procrastinators


It’s Christmas Eve. Merry Christmas Eve!

Are you ready? Have you picked out or made something special for everyone on your list? Are your sweet treats ready to be devoured? Are you ready to share and celebrate with those you love?

I’m ready. It’s been a long, sleepless week, but I’m ready.

For the less-organized, I have some last-minute gift ideas that can be ready in no time. And better yet, they will have been made by you. Home made = thoughtful, sweet, lovely.


Vanilla Extract

Who wouldn’t love it? I followed these instructions from the always reliable Joy the Baker. I’ve made vanilla extract before and it was truly fabulous.


Vanilla Bean Sugar

Head on over to Skinnytaste to find out how to make your own Vanilla Bean Sugar. It’s unbelievably easy and totally awesome!


Lemon Pepper Rosemary Salt

Wickedly easy, delicious, and can be used on meats, fish, veggies, and in soups, stews, you name it! Here are some lickety-split instructions. The recipe is from O Magazine, Dec. 2008.

Ingredients: Grated zest of 2 lemons (about 2T) Fresh rosemary leaves from 2 branches (about 3T) 1 T freshly ground black pepper 3/4 cup coarse sea salt In a food processor, process the lemon zest, rosemary, and pepper until finely chopped, about 1 minute. Add salt and pulse until salt forms smaller crystals and mixture is blended, about 30 seconds. Pack into glass jars with tight-fitting lids and store in a cool dark place for up to 2 months.

PS. I found the small jars for the salt at the local dollar store, and the larger jars at Ikea. Mason jars for the vanilla are from Michael’s.


Cookies!

I’m not sure that I’ve ever met a soul who doesn’t like cookies and who wouldn’t be tickled to receive a freshly baked batch of such delicious treats. Last week I got together with a group of lovely ladies and we had a blast making these gingerbread heads. Serious fun people.

Looking for other cookie ideas? Why not try…

Cherry Almond Butter Cookies

Neapolitan Cookies

Christmas Biscotti

Kindness Cookies

And I highly recommend giving someone you love some crack for Christmas – Christmas Crack.

Time to start the celebrations. I’m getting fueled for my day with strong french press coffee and cookies for breakfast. I’m kidding…maybe. No matter how ready you are for Christmas, I sincerely hope that the coming days are filled with love, happiness, and lots of good food and drink. Merry Christmas my dear readers, I’m thankful for you all. Best wishes for the holiday season. <3

%d bloggers like this: