The Great Food Blogger Cookie Swap: Nutella & Rolo Stuffed Double Chocolate Chip Cookies

Nutella & Rolo Stuffed Double Chocolate Chip Cookies | Once Upon a Recipe

Hello my friends! Happy December!

This year, I participated in the Great Food Blogger Cookie Swap, hosted by two darlings, The Little Kitchen and Love & Olive Oil. The cookie swap brings food bloggers from around the world together to exchange cookies. Basically, you sign up, receive the addresses of three other bloggers, and then you send each blogger a dozen homemade cookies. And then you wait to receive three dozen delicious cookies from those that received your name. Oh, the anticipation!

I must also add that over $13, 700 was raised for Cookies for Kids’ Cancer! Sweet treats and supporting a good cause – what’s not to like?

Nutella & Rolo Stuffed Double Chocolate Chip Cookies | Once Upon a Recipe

Participating in this swap was so much fun! I was introduced to six great new bloggers (even another blogger in my own city!) AND I received three batches of delicious cookies. Total win!

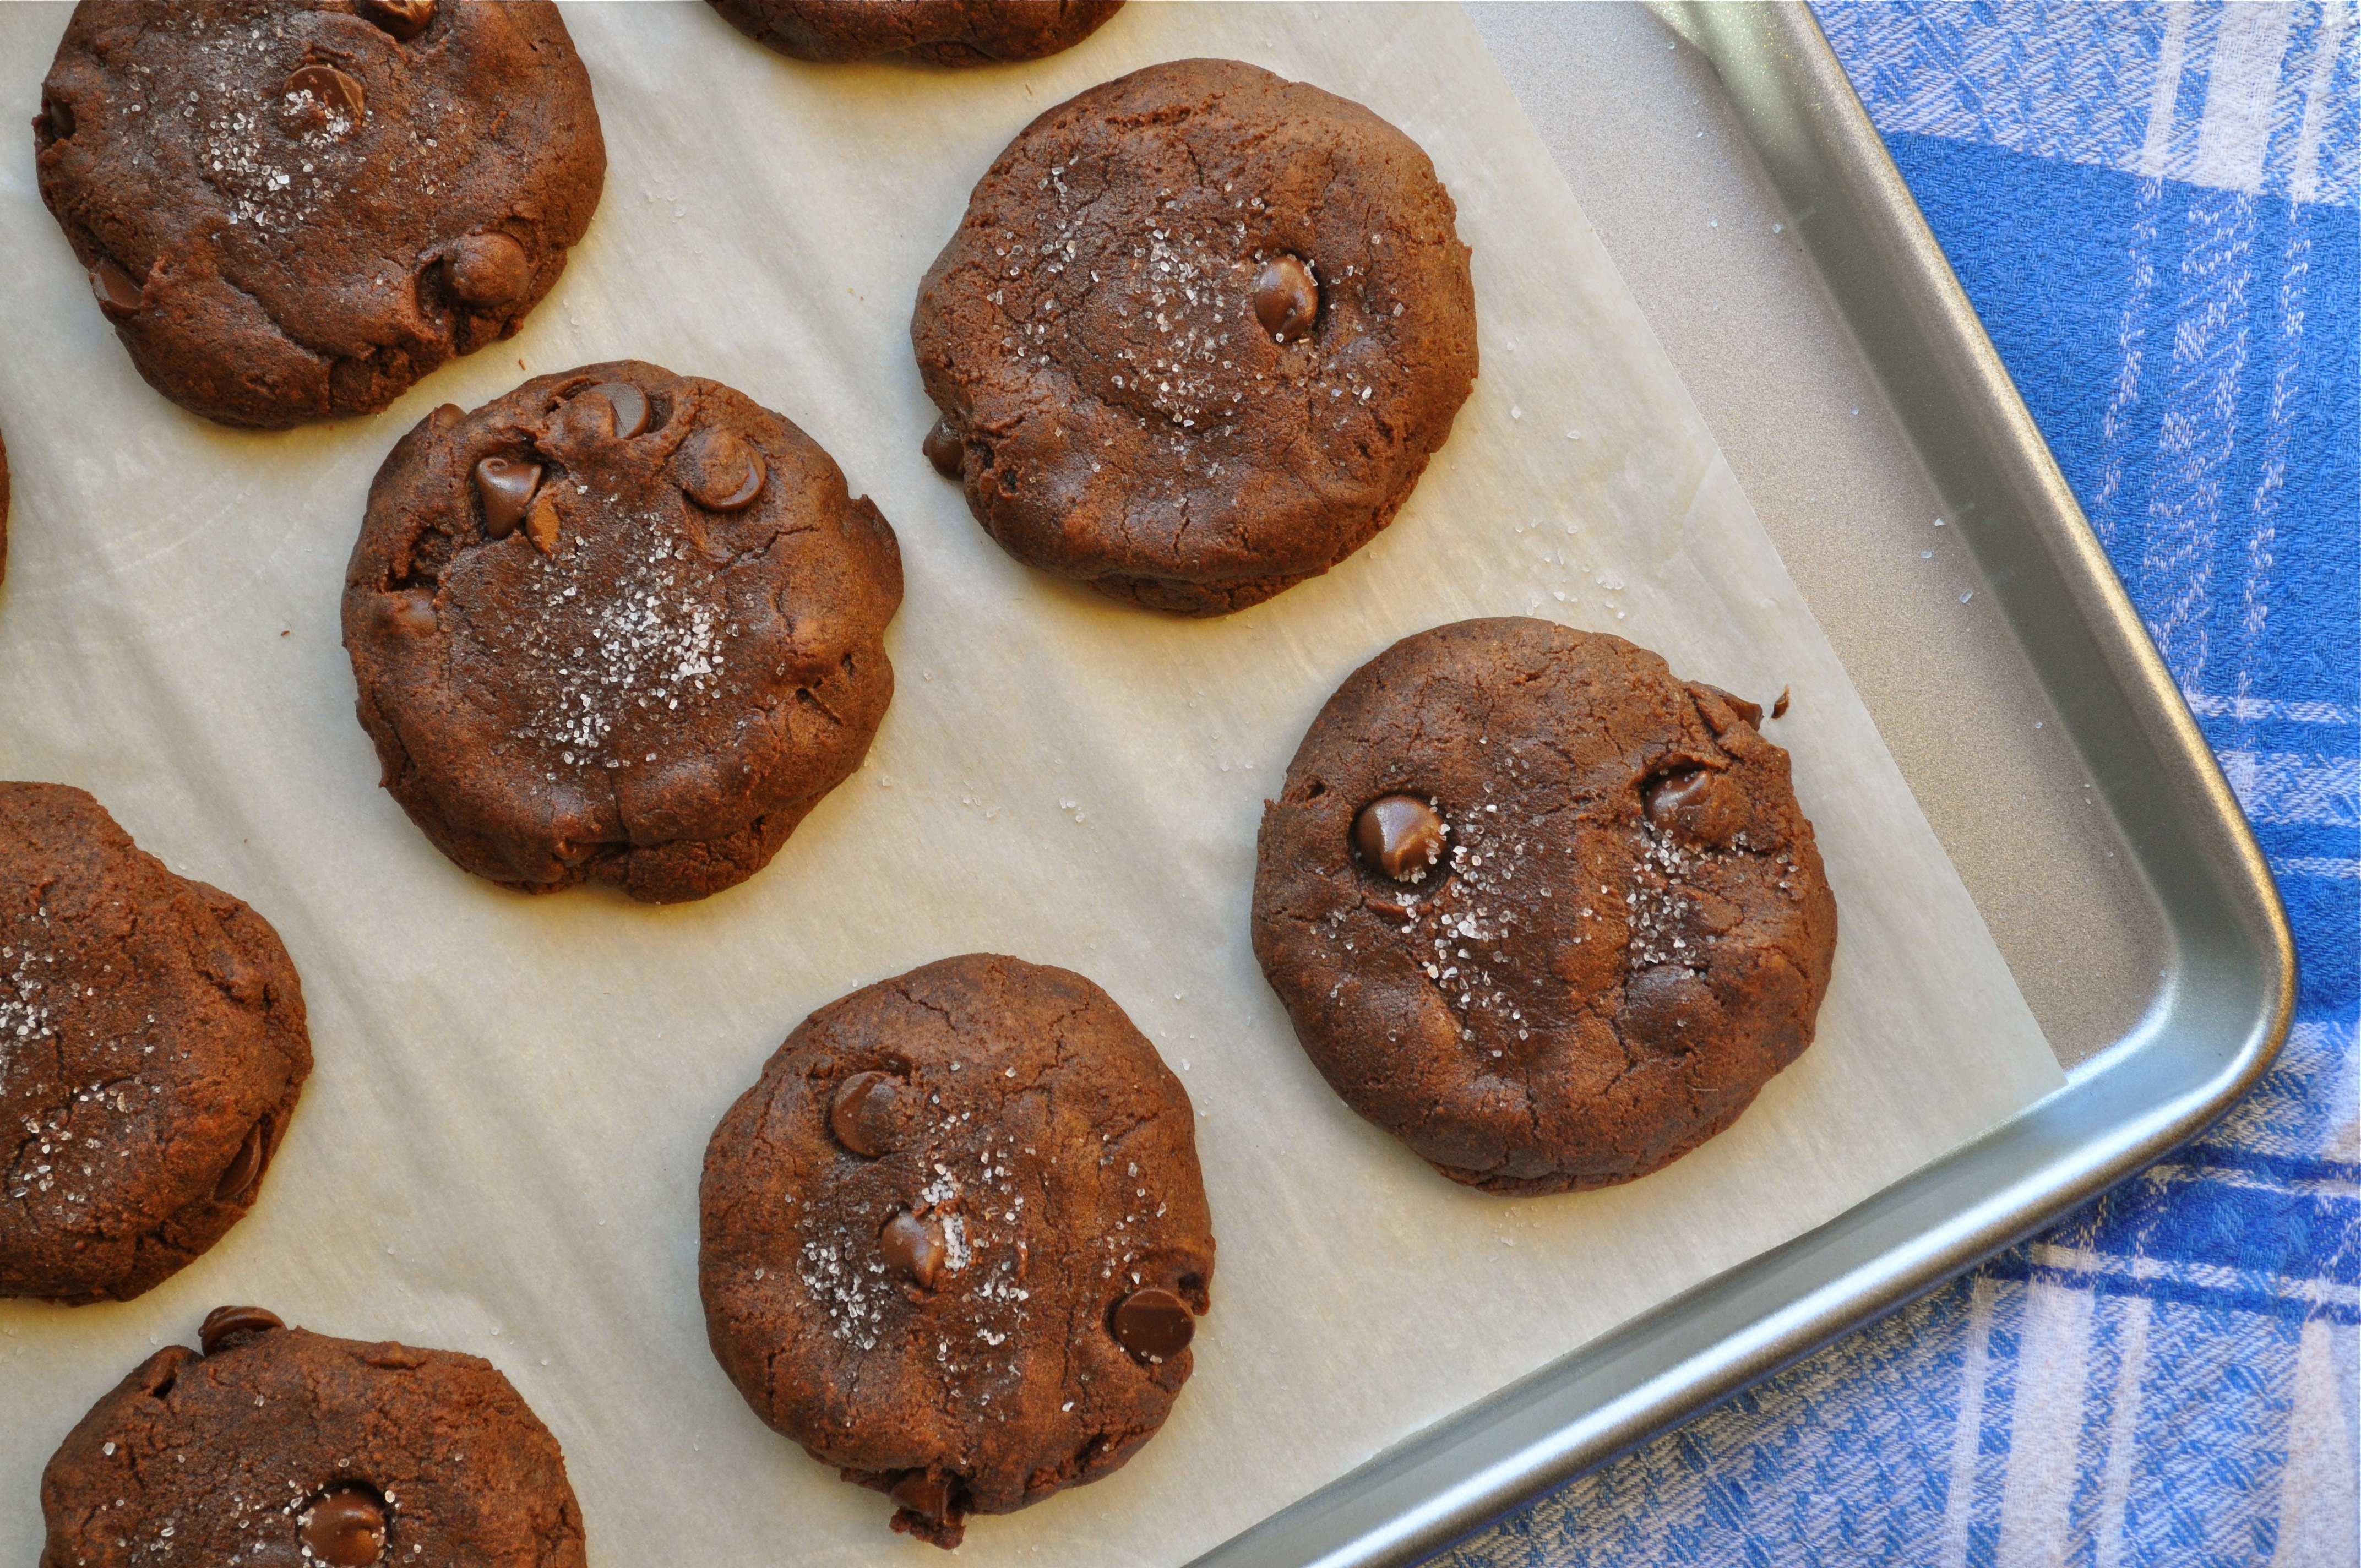
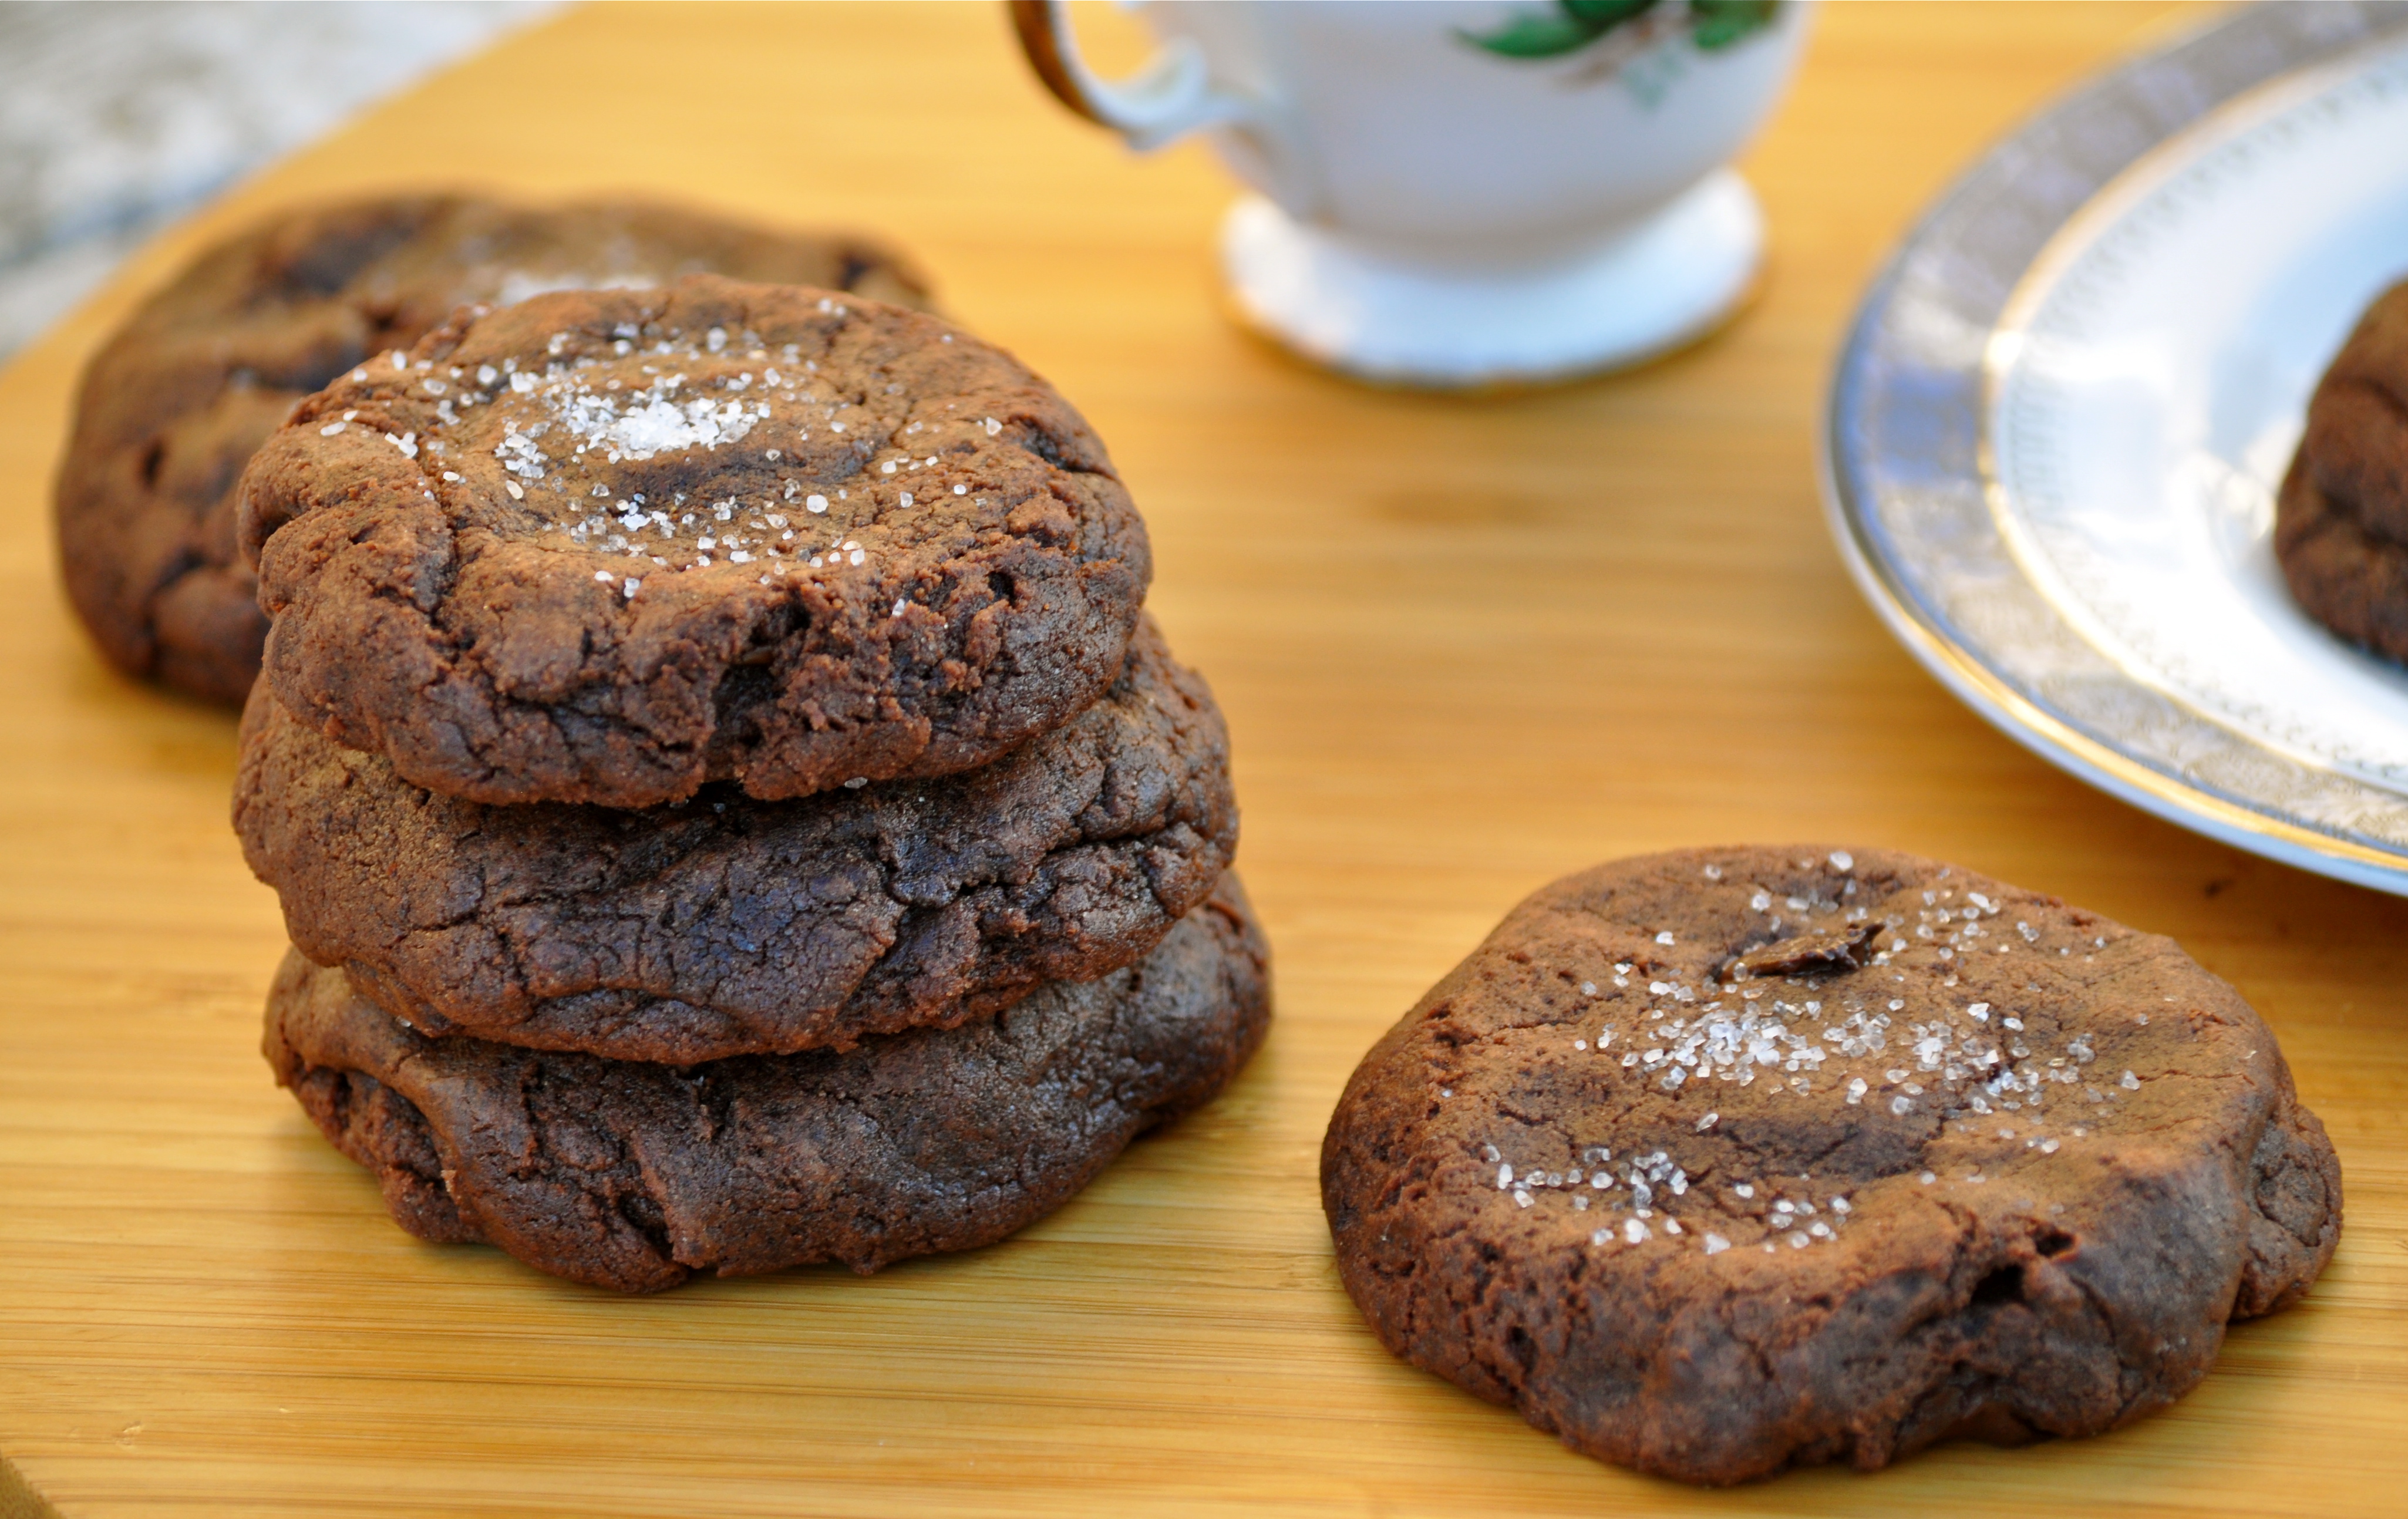
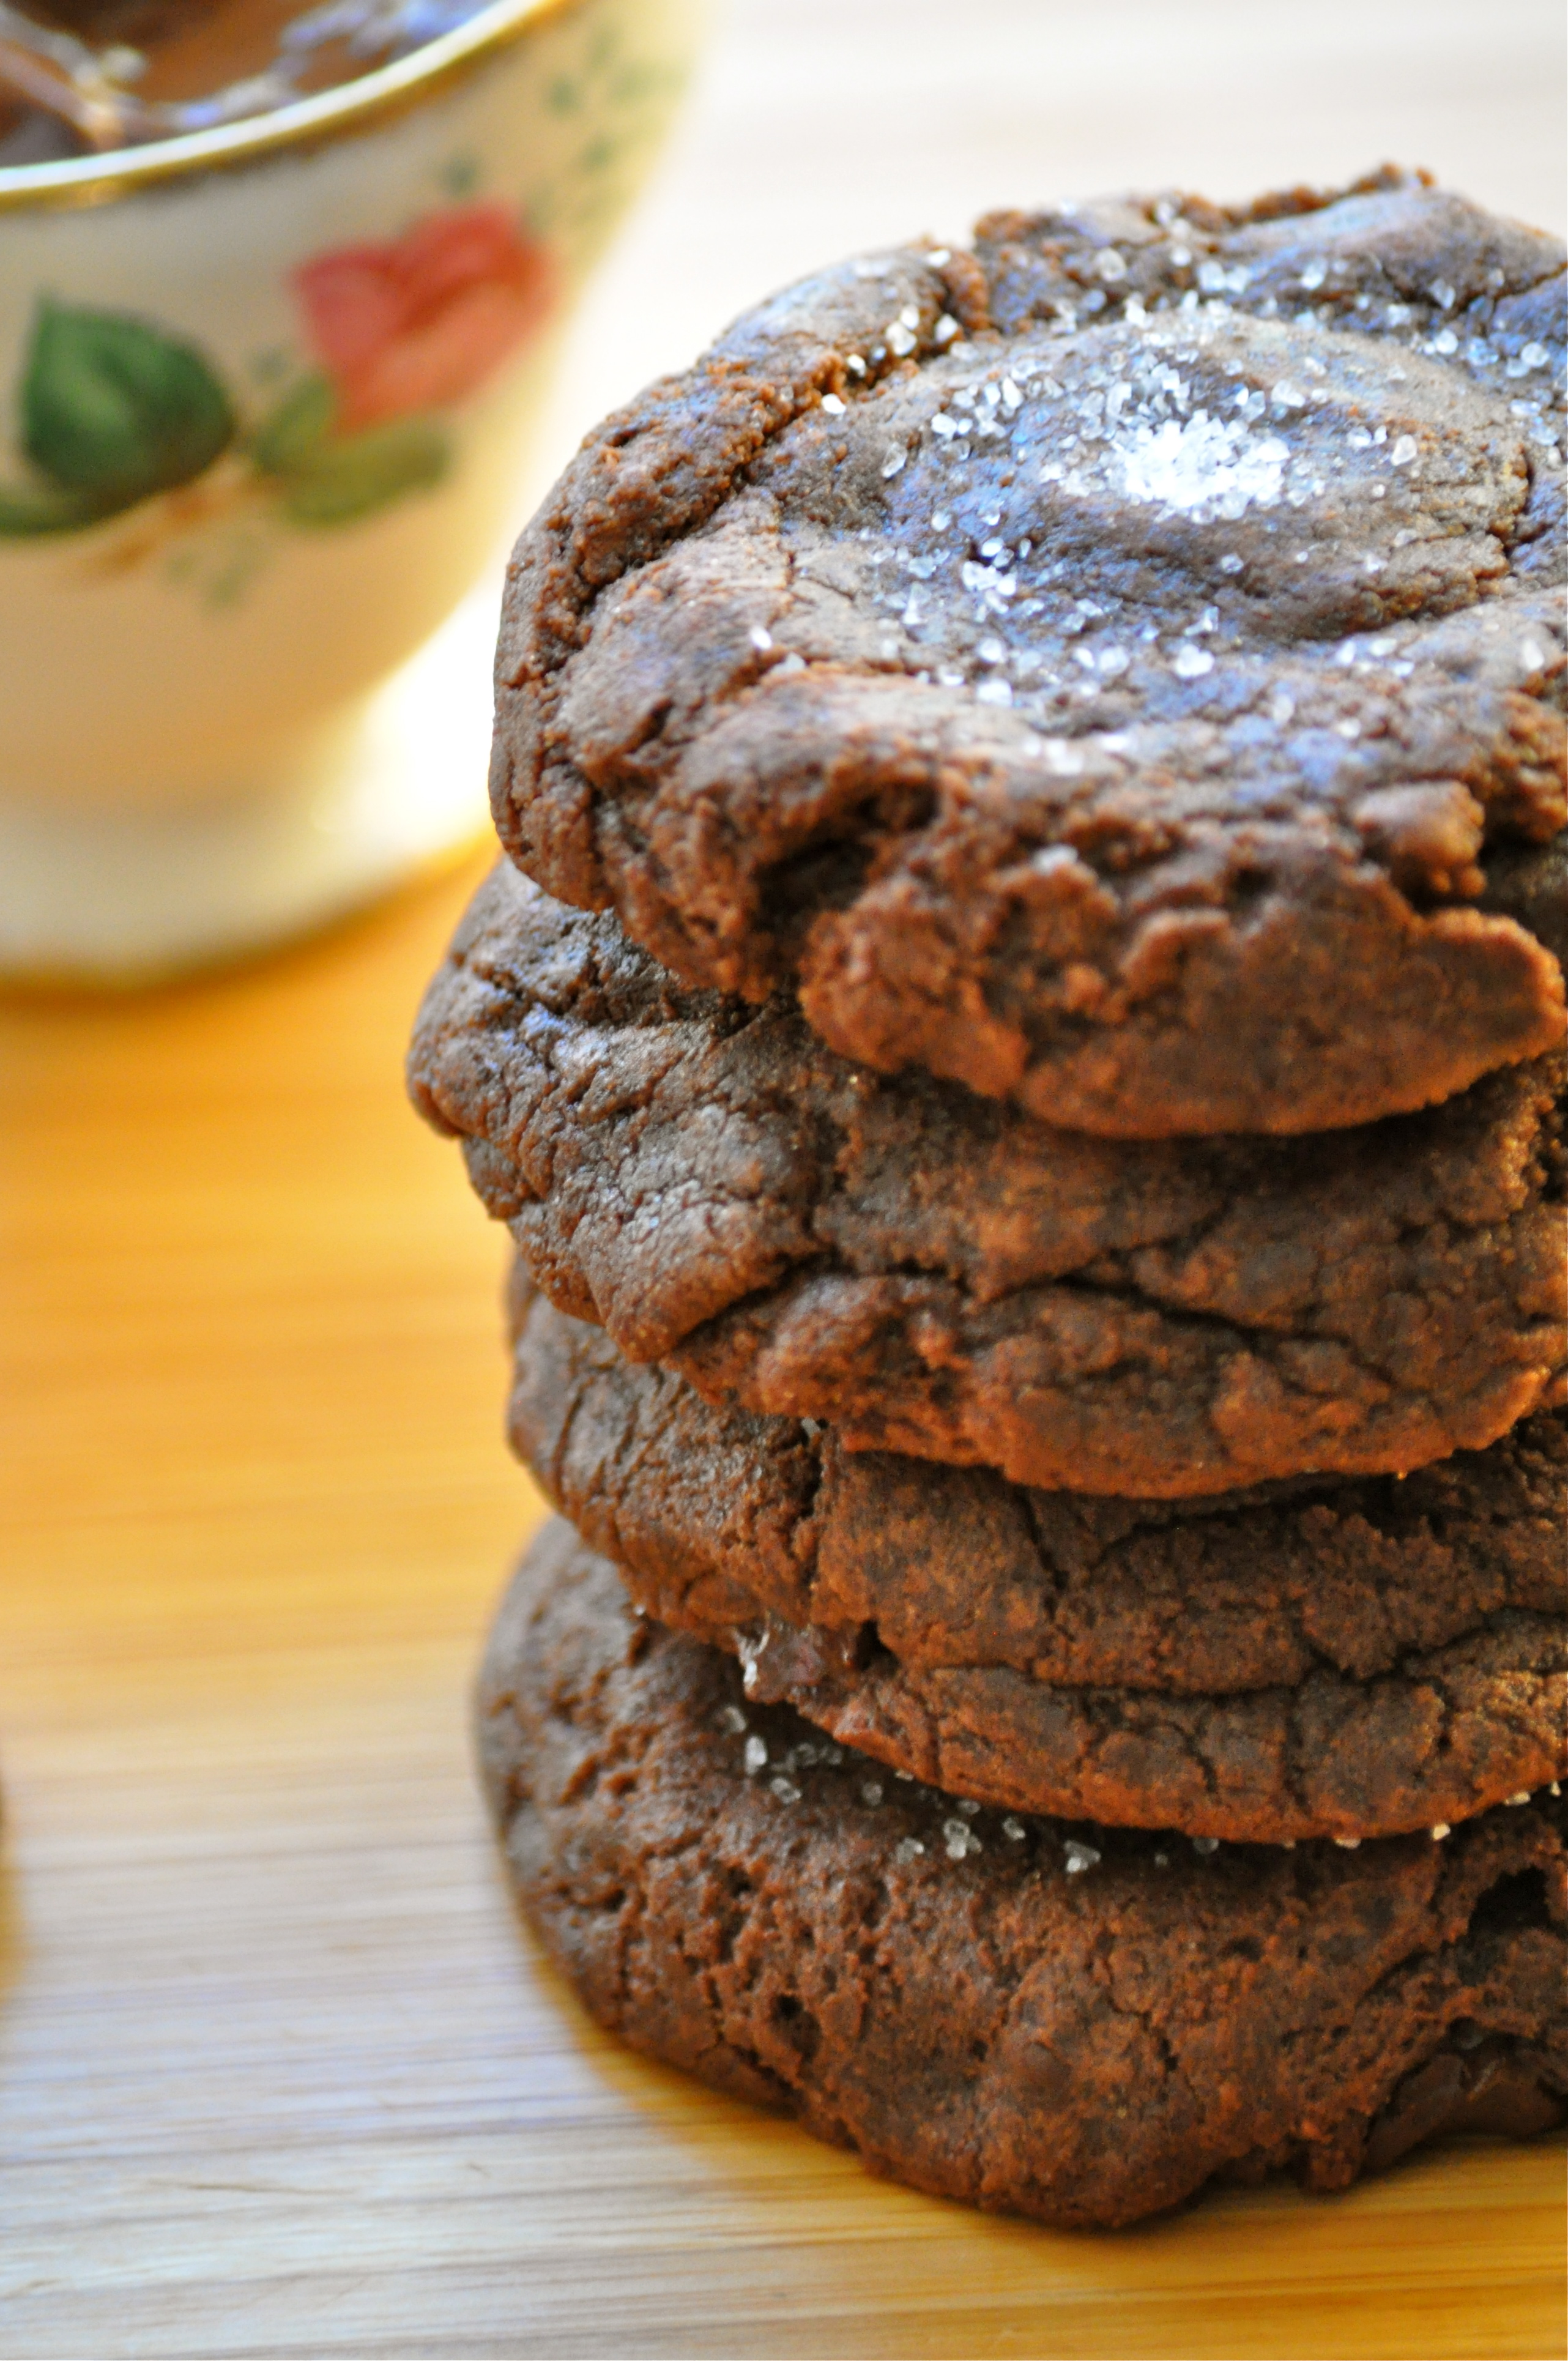
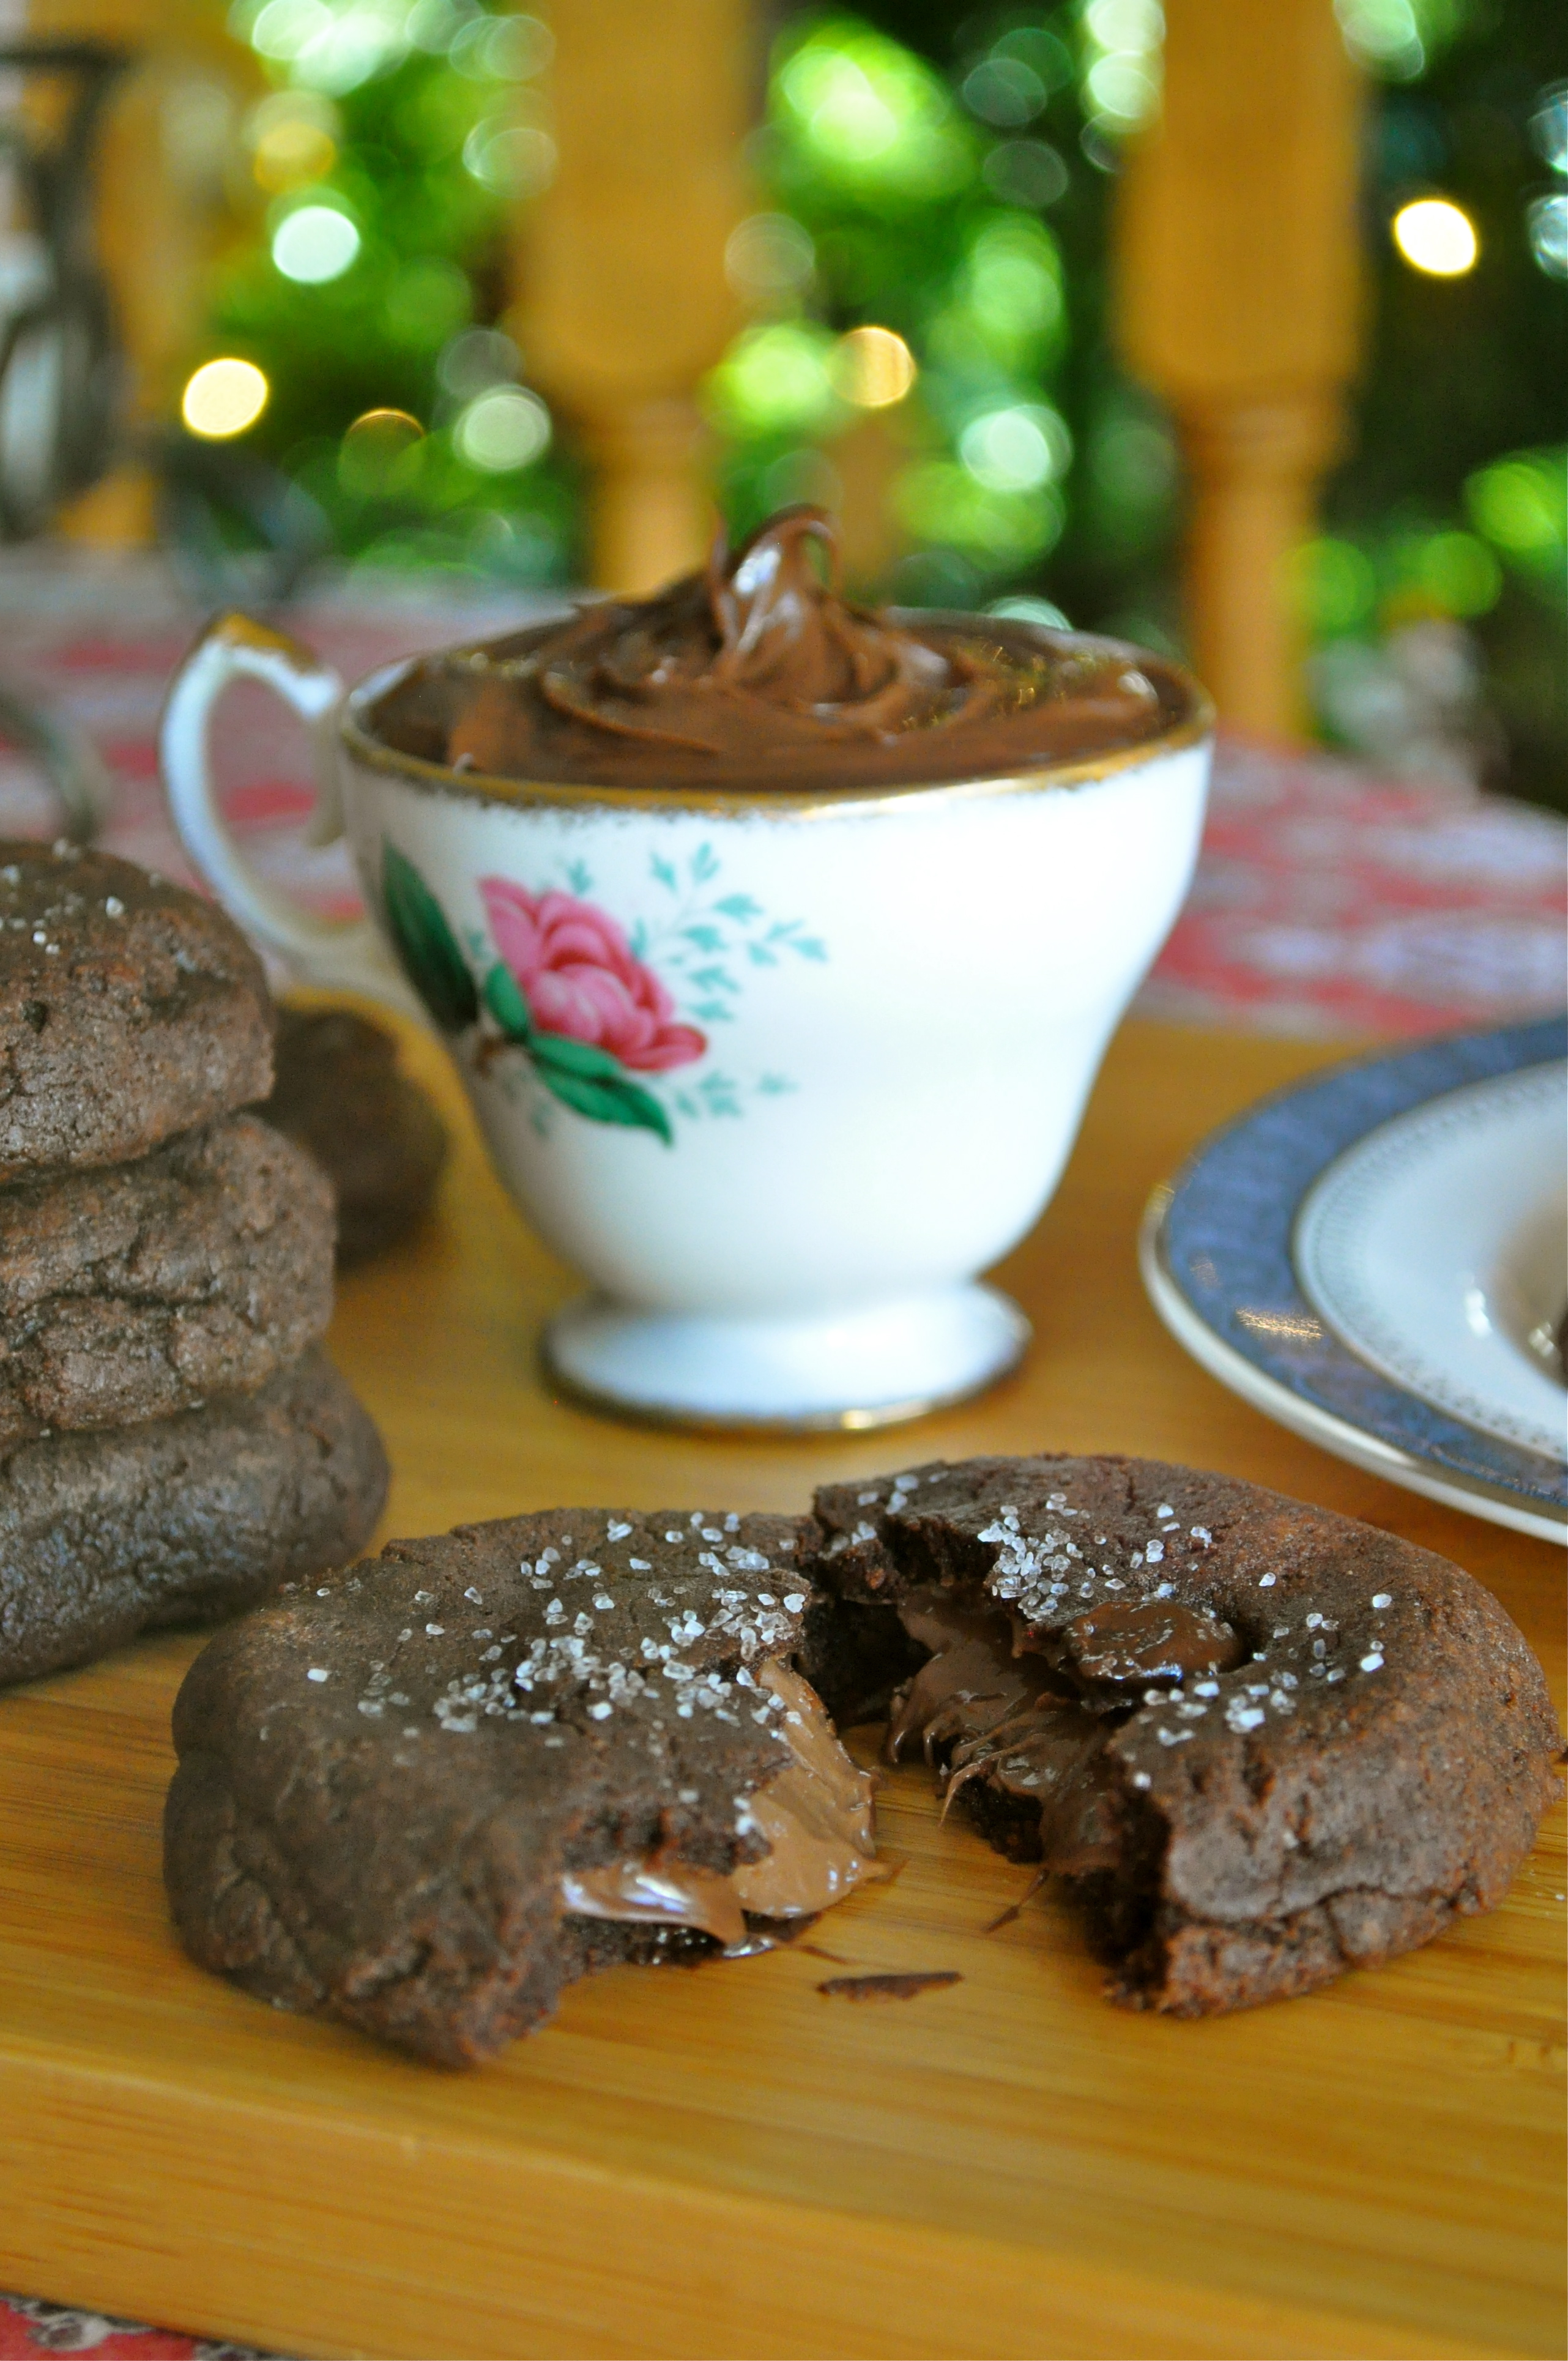
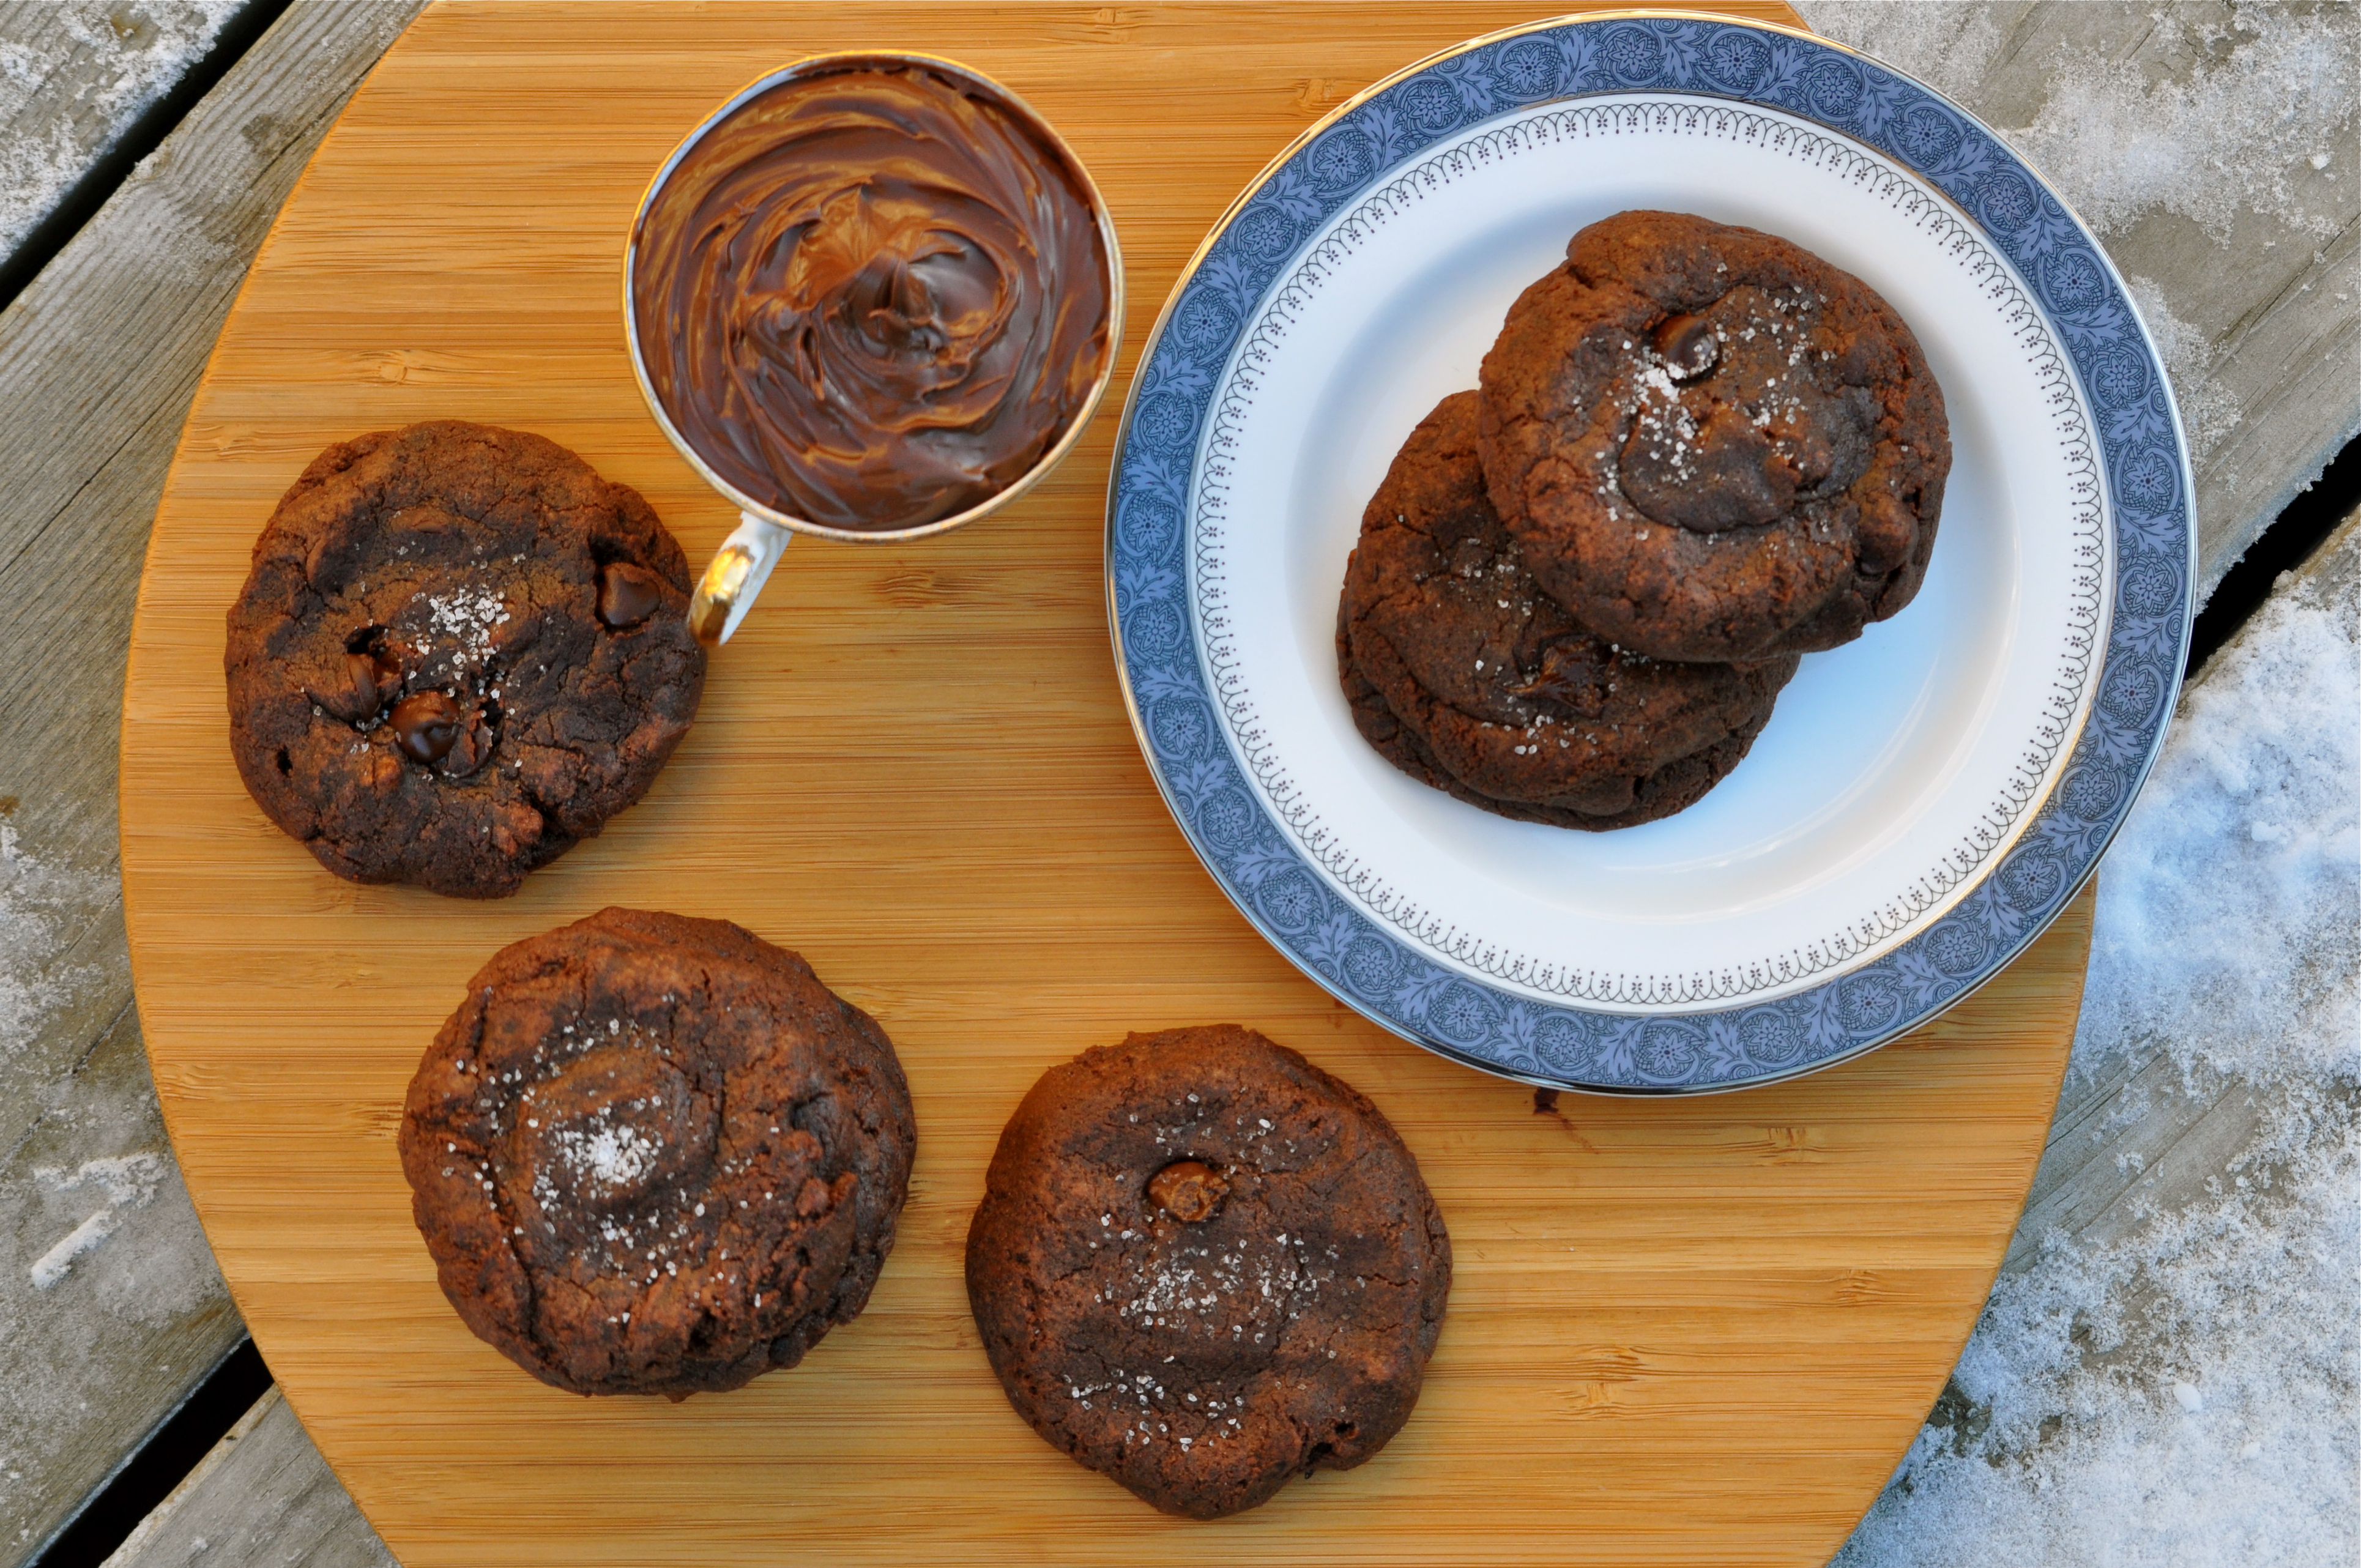
Aaaaaannnnnddddd, I finally had a good excuse to try a recipe that I’ve been waiting to make ever since I first saw it on Izy’s blog, Top With Cinnamon. Dudes, these cookies are one of the best things to ever come out of my oven. Think about a rich chocolate cookie, stuffed with creamy Nutella and a melty Rolo (aka. caramel goodness), and then sprinkled with fleur de sel. Oh, and they’re made in a saucepan. One single dang saucepan. Fewer dirty dishes! My cookie standards have officially been raised to a whole new level.

Nutella & Rolo Stuffed Double Chocolate Chip Cookies | Once Upon a Recipe

A few things: I made these cookies a total of four times. I found the dough a bit difficult to work with the first couple of times. It seemed a little dry and was hard to shape. Don’t worry though, the cookies were still delicious! The third and fourth times, I used my kitchen scale to get more exact measurements (Izy had included weight measurements in her original recipe). BIG difference. The dough was much easier to work with and the final cookie was much more tender. I highly recommend using a kitchen scale if you’ve got one. However, don’t be discouraged if you don’t have a scale, as they will still be incredible.

And next year, all of you should participate in the swap too! Check the Great Food Blogger Cookie Swap website for more details. Happy holiday baking! More recipes comin’ atcha soon!

Nutella & Rolo Stuffed Double Chocolate Chip Cookies | Once Upon a Recipe   Nutella & Rolo Stuffed Double Chocolate Chip Cookies | Once Upon a Recipe

Nutella and Rolo Stuffed Double Chocolate Chip Cookies (slighty adapted from Top With Cinnamon)

These cookies are best when made with good quality dark cocoa powder. Also, the cookies firm up a bit when they cool, so don’t be worried if they appear under-baked after the 8-10 minute mark. These cookies, still warm + a cold glass of milk = perfection. Makes about 18 cookies. 

1/2 cup (110g) butter

1 1/2 cups (350g) light brown sugar

1/2 cup (55g) cocoa powder

2 eggs

1 tsp. vanilla

1/4 tsp salt

3/4 tsp baking powder

2 cups (260g) all-purpose flour

1/2 cup (100g) dark chocolate chips

Fleur de sel, for sprinkling

~1/3 cup Nutella

~18 Rolo chocolates

Preheat your oven to 350°F. Prepare two baking sheets with parchment paper or a Silpat.

In a medium saucepan, melt the butter. Remove the pan from heat and stir in the brown sugar and eggs. Add the cocoa, salt and baking powder and stir until well combined. Add the flour and stir until just mixed. Then stir in the chocolate chips.

Drop dough by the tablespoon onto the baking sheets (no more than 12 per sheet). Use your finger make a large indentation the centre of the dough; fill the indentation with about 1/2 teaspoon of Nutella and top with a Rolo. Take another tablespoon of dough and flatten it with your fingers, then place over top of the dough balls. Seal the edges and very gently flatten just a little bit.

Sprinkle with fleur de sel and bake for 8-10 minutes. Do not overbake. Allow to cool on the cookie sheet for about 10 minutes, then transfer to a wire rack to cool completely.

Nutella & Rolo Stuffed Double Chocolate Chip Cookies | Once Upon a Recipe

PS. If you’re looking for more great cookie recipes, check out the recipes for the cookies I received over at My Life Made Sweet & Saucy (Raspberry  Marshmallow S’mores!), Korena In the Kitchen (Cranberry-Orange Christmas Jammers), and The Snack Dept. (Minty Trader Joe’s Cookie Butter Cookies!).

Brown Butter Cinnamon Roll Skillet Cake

Brown Butter Cinnamon Roll Skillet Cake | Once Upon a Recipe

Dear Time,

Why is there not more of you? Why must you move so quickly when I’m having fun and so slowly when I’m not? I’d like to please have the body of Halle Berry, but I don’t have the time to exercise like a maniac and count all of my calories (nor do I want to). I mean, I have time, but not that much time. I’d like to take up knitting and soap making and I’d like to really learn to play the guitar (and not just stumble my way through a few simple songs). I’d like to volunteer more. I’d like to take my pup to the dog park every morning so she can burn off more of her boundless energy. I’d like to organize my closet because it’s a jungle in there (and maybe a mouse. Help, I’m scared!). I’d like to read the 78 books on my “List of Books to Read” before I’m 78.

I’d like to keep my house in a more constant state of clean, rather than its constant state of chaos. I’d like to learn more about wine and beer and maybe even make my own. I’d like to host dinner parties and cook for my friends and family because that’s a whole lot more fun than eating cereal for dinner cooking for just me. I’d like to drink a green juice every morning, and not just the mornings that I “have time.” I’d like to take 15 minutes every day to try to meditate and clear my crazy brain. I’d like to handwrite letters to my friends from afar, rather than send them an occasional text message or email. I’d like to become a better photographer. I’d like to get out of the city once a month, even if it’s only for a few hours, to a town half an hour away. I’d really like to sleep more. I’d like to do all of these things and about a thousand more, but I. Need. More. Time.

Please consider stretching yourself out a bit?

Sincerely,

Amanda

Brown Butter Cinnamon Roll Skillet Cake | Once Upon a Recipe

Brown Butter Cinnamon Roll Skillet Cake | Once Upon a Recipe

Seriously friends, how do you all do it? You all make it look so easy – even those of you with children and a load of responsibilities twice the size of mine. Please tell me that it really isn’t as simple as you make it look, or at least share some of your secrets. How do you balance it all?

While I certainly don’t have the answer, I do have a new trick up my sleeve. One thing I definitely don’t have time for is making homemade cinnamon rolls on the regular. But imagine having a warm slice of cake that tastes exactly like a freshly baked cinnamon roll to stuff into your pie hole in only a fraction of the time?! Yes friends, that is what we call a win.

Brown Butter Cinnamon Roll Skillet Cake | Once Upon a Recipe

This skillet cake comes together lickety-split, quicker than you can say “but I don’t have time!” The first time I made this, I whipped it up when I woke up in the morning and baked it while I got ready for work. By the time I had to leave, it was cool enough to handle and transport. Dudes, it was still warm when we ate with our morning coffee. Now if that doesn’t make a work day better, I’m out of ideas.

Now, I recommend that you throw this cake together one morning when you need a little pick-me-up. Even during the crazy holiday season that is descending upon us, you can make the time. Browning the butter isn’t even necessary, but it does add a little something extra. However, I promise you it’s still completely delicious if you forego that step. Enjoy, sweet friends!

Brown Butter Cinnamon Roll Skillet Cake | Once Upon a Recipe

Brown Butter Cinnamon Roll Skillet Cake (recipe adapted from Crunchy Creamy Sweet)

A warm, fluffy cake, filled with little craters of brown sugar and cinnamon, reminiscent of a freshly baked cinnamon roll. If you don’t have a skillet, you can bake it in a 8 x 8 pan, or you can double the recipe and bake it in a 9 x 13 pan. Be sure to grease the pan well. And if you want to skip the step of browning the butter, just make sure it’s melted before you incorporate it into the rest of the batter. Serves 6.

Cake:

1 1/2 cups all-purpose flour

1/2 cup granulated sugar

2 tsp. baking powder

Pinch of salt

3/4 cup milk

1 egg

1 tsp. vanilla

1/4 cup brown butter*

Topping:

1/2 cup butter, softened

1/2 cup brown sugar, packed

1 TBSP. all-purpose flour

1 1/2 tsp. cinnamon

Glaze:

1 cup powdered sugar

1 tsp. vanilla

2 TBSP. milk

Preheat the oven to 350°F. Mix all of the cake ingredients together, except for the butter. Slowly stir in the butter and mix just until incorporated (don’t overmix). Pour into a greased 10-inch skillet and spread out evenly. Mix the topping ingredients together until well combined. Drop by spoonfuls evenly over the batter and swirl with a knife. Bake for 25-28 minutes, or until golden brown around the edges.

Combine the glaze ingredients and drizzle over top of the cake while still warm. Serve immediately. Leftover cake can be stored for a couple of days if well-wrapped.

*If you’ve never browned butter before, here is a really great tutorial.

Brown Butter Cinnamon Roll Skillet Cake | Once Upon a Recipe

Whole Wheat Pumpkin and Cinnamon Chip Scones

Whole Wheat Pumpkin Cinnamon Chip Scones | Once Upon a Recipe

Please be warned: I am about to shove at least a couple of pumpkin recipes in your face in the coming weeks.

‘Tis the season! Fall is in full bloom, yo! The colors, the crisp days, the pumpkin beer, the boots, the scarves, the pumpkin everything, even that dank, disgusting, wet leaves smell – I. Love. It. If only it could last forever. All in favor of replacing Winter with an extra-lengthy Fall, say I.

Iiiiiiiiiiiiiiiiiiiiiiiiiiiiiiiiiiiiiiiiiiiiiiiiiiiiiiiiiiiiii.

Whole Wheat Pumpkin Cinnamon Chip Scones | Once Upon a Recipe

Whole Wheat Pumpkin Cinnamon Chip Scones | Once Upon a Recipe   Whole Wheat Pumpkin Cinnamon Chip Scones | Once Upon a Recipe

So, if you’re not too sick of pumpkin yet (and I really hope you aren’t), let’s bake some pumpkin scones! Truth be told, I have never partaken in the delight that is a Starbucks pumpkin scone. Every year, many peoples be freaking out about the arrival of pumpkin spice lattes and pumpkin scones. But I can guarantee that you can make a far more delicious version of both at home.

Whole Wheat Pumpkin Cinnamon Chip Scones | Once Upon a Recipe

Let’s start with the scones! We’re going to add a little health with some whole wheat flour, and we’re going to punch up the flavor with a hefty dose of spice and cinnamon chips. A generous sprinkling of raw cane sugar adds a lovely crunch to the tops of these scones. One of these little diddies alongside a cup of coffee or tea and you’re living the good Fall life!

Whole Wheat Pumpkin Cinnamon Chip Scones | Once Upon a Recipe

Whole Wheat Pumpkin and Cinnamon Chip Scones (adapted from King Arthur Flour)

Cinnamon chips can be found in most US grocery stores. Sadly, I have never found them in Canada (at least in Alberta), but pick up a couple of bags every time I visit the States. If you can’t find cinnamon chips where you are, feel free to amp up the ground cinnamon in this recipe for a little extra cinnamon kick. The original recipe also suggests adding crystallized ginger pieces, either in place of, or alongside the cinnamon chips. However, I think the cinnamon chips really make ’em. 

1 1/2 cups all-purpose flour

1 1/4 cups whole wheat flour

1 TBSP. baking powder

3/4 tsp. salt

3/4 tsp. ground cinnamon

1/4 tsp. ground ginger

1/2 tsp. ground nutmeg

1/4 tsp. ground cloves

1/4 tsp. ground allspice

1/2 cup butter, cold

1 cup cinnamon chips

2/3 cup pure pumpkin

2 eggs

1 TBSP. milk

Raw cane sugar, for sprinkling

In a large bowl, combine the flours through to the spices. Whisk together until thoroughly mixed. Cut the butter into the dry ingredients until the mixture resembles a coarse meal. Stir in the cinnamon chips. In a smaller bowl, whisk together the pumpkin and the eggs. Add the pumpkin mixture to the dry ingredients and stir until it starts to come together. Turn the mixture out onto a floured surface and use your hands to bring everything together. Try not to overwork the dough.

Split the dough in half and form each half into a round disc, about 1 inch thick. Brush each disc with the milk and sprinkle generously with raw cane sugar. Cut each round into six equal pieces. Arrange all 12 pieces on a prepared cookie sheet, about an inch apart. Place the cookie sheet in the freezer, uncovered, for 30 minutes to thoroughly chill (this will help with rise and texture).

Preheat the oven to 425°F. Bake the scones for 22-24 minutes or until golden. Cool on a baking rack. Enjoy the scones warm, or store cooled scones in an airtight container for up to a few days. Typically scones taste best on the same day they are baked, but I liked these scones even better the second day. They’re lovely with a cup of tea or coffee. Makes 12 scones.

Whole Wheat Pumpkin Cinnamon Chip Scones | Once Upon a Recipe

Ginger Cookie and Salted Caramel Ice Cream Sandwiches

Ginger Cookie and Salted Caramel Ice Cream Sandwiches | Once Upon a Recipe

Oh heyyyyyyyyyy. I’m…sorry.

Yes, consider this your advance apology for the recipe I am about to share with you.

Ginger Cookie and Salted Caramel Ice Cream Sandwiches | Once Upon a Recipe

I’m sorry for ruining your diet. I’m sorry for kiboshing your plans to start eating healthier after a summer full of patio beer-drinking and ice cream-eating. I’m sorry for giving you a cold recipe just when the weather is starting to turn cooler (much cooler, if you live in my part of the world) and you’re craving all things warm and toasty. But mostly, I’m sorry for not appreciating the amazingness that is salted caramel a hell of a lot sooner.

Ginger Cookie and Salted Caramel Ice Cream Sandwiches | Once Upon a Recipe

I realize that salted caramel everything has been rather trendy for the past while, but in all honesty it didn’t really appeal to me. Sure, I like caramel. And yes, I am a big fan of the salty/sweet combination. But as my wise mama said, “if all of your friends jumped off a bridge, would you do it too?” And so while everyone else was choosing salted caramel ice cream, I was sticking to ye old faithful – chocolate chip cookie dough. Or mint chip. I would not be sucked in by this new salted caramel kid on the block.

Ginger Cookie and Salted Caramel Ice Cream Sandwiches | Once Upon a Recipe

But then I came across a recipe for Salted Butter Caramel Ice Cream by David Lebovitz. (The word “butter” may or may not have been mostly responsible for capturing my attention). One look at photos of the creamy, deep caramel-colored ice cream dotted with little rivers of gooey caramel was enough to change my tune. It was time to see what all the fuss was about.

And dangggggggg. You trendy foodies know your stuff. (Not that I ever questioned your expertise). I’m tempted to say that this is some of the best ice cream I have ever tasted. Like, ever. My words will not do this ice cream justice. You simply must try it for yourself.

But I couldn’t stop there. Chewy ginger cookies are one of my favorites in the Fall and Winter months due to their spicy flavor profile. I had the sense that ginger cookies with a scoop of salted caramel ice cream smashed between them would be rather epic and I was right. But again, don’t take my word for it.

Ginger Cookie and Salted Caramel Ice Cream Sandwiches | Once Upon a Recipe

A couple of notes about these two recipes: First of all, be warned – the ice cream recipe is a bit involved and will take you some time. However, I can promise you that it is worth the effort. Please be careful though, as the salted caramel is as hot as Hades and will hurt (a lot) if you splatter yourself with it. I have a rather sizable war wound from a stray droplet that found its way onto my hand while I was scraping the caramel praline mixture onto the cookie sheet. Ouch! Secondly, both the ice cream and the cookies are lovely on their own. The ice cream tastes magnificent scooped into a sugar cone or a plain ol’ bowl, and the cookies are wonderful with a cup of coffee or tea. In fact, this is my new favorite ginger cookie recipe – the raw cane sugar adds an incredible texture and crunch to the outside of the chewy cookie. So if making the ice cream sandwiches seems like too much all at once, pick one part and have fun with it!

Ginger Cookie and Salted Caramel Ice Cream Sandwiches 

For the Salted Caramel Ice Cream (from David Lebovitz)

Makes 1 generous quart.

For the caramel praline (mix-in):

½ cup sugar

¾ tsp. good quality sea salt, such as fleur de sel

For the ice cream:

2 cups whole milk, divided

1½ cups sugar

4 TBSP. salted butter

½ tsp. sea salt

1 cup heavy cream

5 large egg yolks

¾ tsp. vanilla

To make the caramel praline, spread the ½ cup of sugar in an even layer in a medium-sized heavy duty saucepan. Line a baking sheet with a silicone baking mat or brush it sparingly with unflavored oil. Heat the sugar over medium heat until the edges begin to melt. Use a heatproof utensil to gently stir the liquefied sugar from the bottom and edges towards the center, until all the sugar is dissolved. Continue to cook, stirring infrequently until the caramel starts smoking and begins to smell like it’s just about to burn (this doesn’t take long). Working quickly, sprinkle in the ¾ teaspoon of salt without stirring, then pour the caramel onto the prepared baking sheet and lift up the baking sheet immediately, tilting and swirling it almost vertically to encourage the caramel to form as thin a layer as possible. Set aside to harden and cool.

To make the ice cream, prepare an ice bath (fill a large bowl about a third full with ice cubes and add a cup or so of water to cause the ice cubes to float). Nest a smaller metal bowl (at least 2 quarts) over the ice, pour 1 cup of the milk into the inner bowl, and rest a mesh strainer on top of it. Spread 1½ cups sugar in the saucepan in an even layer. Cook over moderate heat, until caramelized, using the same method described for the caramel praline. Once caramelized, remove from heat and stir in the butter and salt, until butter is melted, then gradually whisk in the cream, stirring as you go. The caramel may harden and seize, but return it to the heat and continue to stir over low heat until any hard caramel is melted. This happened to me, but be patient! It will become smooth with time. Stir in the second cup of milk.

Whisk the yolks in a small bowl and gradually pour some of the warm caramel mixture over the yolks, stirring constantly. Scrape the warmed yolks back into the saucepan and stir constantly to cook the custard (scraping the bottom as you stir) until the mixture thickens. If using an instant-read thermometer, it should read 160-170°F.

Pour the custard through the strainer into the milk set over the ice bath, add the vanilla, then stir frequently until the mixture is cooled down. Cover and refrigerate the mixture overnight. Freeze the mixture in your ice cream maker according to the manufacturer’s instructions. While the ice cream is churning, crumble the hardened caramel praline into small pieces. Once your caramel ice cream is churned, quickly stir in the crushed caramel, then spread into a container to chill in the freezer until firm. Cover with plastic wrap and allow the plastic wrap to touch the surface of the ice cream to prevent ice crystals from forming.

For the Ginger Cookies (adapted from A Couple Cooks)

Makes about 24 cookies.

2 1/4 cups all-purpose flour

2 tsp. baking soda

1 tsp. cinnamon

1 tsp. ginger

1 tsp. allspice

1/2 tsp. ground cloves

1/2 tsp. salt

3/4 cup unsalted butter

3/4 cup raw cane sugar (plus extra, for rolling)

1 egg

1/2 cup molasses

In a large bowl, combine the dry ingredients (flour through to salt) and mix well. In the bowl of an electric mixer, beat together the butter and 3/4 cup raw cane sugar until light and fluffy, about 3 minutes. Add the egg and molasses and mix well. Stir in the dry ingredients. Refrigerate the cookie dough for 1 hour.
Preheat the oven to 375°F. Roll the dough into small balls (about  1 1/2-inch), then roll the balls in the raw cane sugar to coat. Arrange on a prepared baking sheet (with a Silpat or parchment paper). Bake until set and crinkled on top, about 10-12 minutes. Do not overbake. Remove from oven and allow to cool for a few minutes before transferring to a wire rack to cool completely.
To assemble the ice cream sandwiches: Place a small scoop of ice cream between two cookies and press together gently. Carefully wrap each sandwich in plastic wrap and place in freezer for a couple of hours.

Ginger Cookie and Salted Caramel Ice Cream Sandwiches | Once Upon a Recipe

Enjoy the rest of your week, friends!

Cosmic Cookies! [Vegan]

Cosmic Cookies | Once Upon a Recipe

Oh boy, friends, do I have a cookie recipe for you!

First of all, a little backstory. So there’s this organic market here in my ‘hood called Planet Organic. In the bakery section, you can find a lil’ treat called the Cosmic Cookie. It’s freakishly delicious, and also bordering on healthy, considering the oats, spelt flour, flax, etc. going on. I once bought a package of said cookies and jotted down the ingredient list with a plan to try to recreate them at home. However, the ingredient list was long, and trying to figure out the quantities of each ingredient just made my brain hurt. I hate math.

Cosmic Cookies | Once Upon a Recipe

My plans of creating these cookies at home fell by the wayside. I stopped purchasing them from the store because they ain’t cheap. My dreams died a little. Sad story, eh?

Cosmic Cookies | Once Upon a Recipe   Cosmic Cookies | Once Upon a Recipe

But then, something straight-up magical happened. A couple of weeks ago, I was reading the blog of my fellow prairie girl Christal (who writes a fantastic healthy-eating blog, BTW), and she dropped the best bomb ever: PO had released the recipe of their famous cookies! The angels started singing, I started crying tears of joy, and called all of my friends to share the good news. Well, not really, but you can bet your next paycheque that I hightailed it over to the PO website to check out the recipe. And proceeded directly to the grocery store to pick up everything I needed to make these cookies.

Cosmic Cookies | Once Upon a Recipe

I altered the recipe in a few areas, most notably, subbing in coconut oil for canola oil and almond milk for soy milk. The cookies turned out exactly as I’d hoped. I stored the cookies in an airtight container in the freezer and took them out as needed for snacks and lunches. They were especially perfect as pre-CrossFit fuel. PS. More on CrossFit later, as a few people have asked for details. As long as I survive the duration of the class, which is questionable, I will tell you a few tales. But in the meantime, bake up a batch of these cookies to sustain you through your work day/school day/workout/and so on. They truly are “cosmic” – out of this world!

Cosmic Cookies | Once Upon a Recipe

Cosmic Cookies  (adapted from Planet Organic’s Cosmic Cookie recipe)

A delicious and healthy cookie, packed with good-for-you and energizing ingredients. These cookies make a great regular or pre-workout snack. This recipe makes about 24 cookies. Feel free to make the cookies smaller, but remember to adjust the baking time accordingly. 

2 1/4 cups quick cooking oats

2 cups spelt flour

1 cup sunflower seeds

3/4 cup pumpkin seeds (plus extra, for sprinkling on top)

1/2 cup shredded unsweetened coconut

1/4 cup flax seeds

1 cup organic cane sugar

1 TBSP. cinnamon

2 tsp. sea salt

1 cup dark chocolate chips

1 1/2 cups raisins

1/4 cup water

1/4 cup blackstrap molasses

3/4 cup coconut oil, melted

1 cup unsweetened almond milk

1 tsp. vanilla

Preheat the oven to 350°F. Prepare two large baking sheets with parchment paper or a Silpat. In a large bowl, combine the dry ingredients (oats through to raisins). In a separate bowl, mix together the wet ingredients (water through to vanilla). Add the wet mixture to the dry mixture and mix until just combined. Portion the cookie dough using a 1/3 cup measure, and then slightly flatten the cookies prior to baking. Bake for about 24 minutes, or until lightly browned.

Cosmic Cookies | Once Upon a Recipe

Have a wonderful week, friends!

A Family Favorite | Puffed Wheat Squares

Puffed Wheat Squares | Once Upon a Recipe

Hi friends! I hope you all had a marvelous weekend. I spent mine with some of my favorite friends, drank too much sangria, danced until I was a sweaty mess, stayed up way too late, and this, coupled with the fact that I’ve been burning the candle at both ends for the past month or so has left me in the throes of an awful cold. I don’t know what it is about getting sick in the summer, but it always feels WAY worse to me. Like, oh hi, I’m running a fever AND my house is 98 degrees and rising – perfect! It’s a beautiful day and rays of sunshine are beaming through the window, BUT I’m sweating my arse off inside whilst being doped up on cold meds – AWE.SOME. No thank you. I’ll take a cold in the deep dark of winter over one in the depths of summer any day. At least curling up on the couch with a blanket and bad daytime TV seems slightly more appealing when it’s minus one million outside.

Puffed Wheat Squares | Once Upon a Recipe   Puffed Wheat Squares | Once Upon a Recipe

In any case, I’ve learned that I’m terrible at resting. Like, I know that when you’re sick, it’s usually a result of your body being run down and therefore rest is necessary to get healthy again. But I can only sleep so much. And I can only lay in a vertical position for so long. And I can guarantee that in the time that I am “resting”, my brain is already making 101 plans for what I need to do next. My brain isn’t very good at being quiet.

Puffed Wheat Squares | Once Upon a Recipe

So today, after lying on the couch for what seemed like days watching What Not To Wear and Diners, Drive-Ins, and Dives (seriously, those are the only half decent shows on during daytime hours, and I am using the term half decent very loosely), I decided that my compromise would be to continue to lay on the couch, write a blog post, and finally share this recipe with you. These puffed wheat squares have been on my list to share with you since I first started this blog, nearly three years ago (eep, three years!). I make them quite regularly, but have never taken the time to photograph them. One of the reasons being that they tend to get consumed rather quickly. However, I churned two batches of these squares out of my kitchen a couple of weeks ago for my Dad’s epic 60th birthday celebration, and took a few minutes to snap a few shots. And every last square was gone less than an hour after the platter was set out to be ravaged by the party-goers.

Puffed Wheat Squares | Once Upon a Recipe

These squares are chocolatey, sticky, and wonderfully chewy. The recipe comes from one of my aunties, and it is the best puffed wheat square recipe in the history of the land. Make no mistake – not all puffed wheat squares are created equal. Of paramount importance is the chocolately goodness to puffed wheat ratio. AKA. The chocolately goodness must generously coat each morsel of puffed wheat. Let’s be real, these squares aren’t a healthy treat. But they are damn good and ridiculously addictive. Which means you should probably make some immediately.

Puffed Wheat Squares | Once Upon a Recipe   Puffed Wheat Squares | Once Upon a Recipe

Puffed Wheat Squares

A family favorite! Makes about 24 squares, depending on the size. Perfect for parties and BBQ’s!

½ cup butter

1 cup corn syrup

1 cup white sugar

1/3 cup brown sugar

6 heaping TBSP. cocoa powder

1 tsp. vanilla

10 cups puffed wheat

Measure the puffed wheat into a large mixing bowl and set aside. Melt the butter with the corn syrup, sugars, and cocoa powder in a large saucepan over medium heat. Bring to a boil and simmer for 1 minute. Remove from heat, add the vanilla, and stir well. Pour the mixture over the puffed wheat and mix until the puffed wheat is evenly coated. Press into a 9×13-inch pan that has been lightly sprayed with non-stick spray. Allow to cool and then cut into squares. Store in an airtight container to maintain ooey-gooey freshness!

Puffed Wheat Squares | Once Upon a Recipe

For Todd (and Rufus) | Peach Cinnamon Swirl Ice Cream

Cinnamon Peach Swirl Ice Cream | Once Upon a Recipe

This post is for Todd. Todd who, you ask? Well, I wish I could tell you.

You see friends, I was in a car accident a couple of weeks ago. I will spare you the details, but as any of you who have also experienced the frightening event that is a car accident can attest, a car accident has the ability to shake you up a bit. This wasn’t a simple fender bender, this was a crash that killed my car. (My car’s name was Rufus, and may he rest in peace). Thankfully, no one was seriously injured and both myself and the other driver walked away relatively unharmed. And at the end of the day, that is all that matters. A car is a car, and cars can be replaced.

Peach Cinnamon Swirl Ice Cream | Once Upon a Recipe

Todd was the gentleman who stopped and helped me at the scene of the accident. He arrived on the scene about a minute after it happened – after numerous drivers who would have witnessed the accident zoomed on by. Todd called 9-1-1 as I had become a bit useless due to shock. Todd held my pup, Bella for me while I spoke to the police officers and medical personnel. (Bella had been in the car with me, as we were on our way to the dog park. Fortunately, she was not hurt either.). Todd called his wife and told her he was going to be late for dinner. When I protested and begged him to carry on with his evening, he refused. Todd told me that he would not leave until he knew someone was there with me and that everyone was ok. Todd sat with me on the side of the busy freeway for two hours. Todd told me that everything would be ok.

Peach Cinnamon Swirl Ice Cream | Once Upon a Recipe

When my mom arrived, and Todd finally succumbed to my pleas for him to go home to his wife and eat (a now cold) dinner, I was so focused on thanking him profusely for his time, his kindness, his compassion – I failed to get his last name. And wouldn’t you know it, there are a lot of Todds out there. I have been unable to locate this particular gem of a Todd, but if I could, I would tell him – in a more coherent and calm manner than I did that evening – just how thankful I am that he was driving down the road that day and took the time to stop to help me.

Friends, it’s true when they say that the little things in life are what count. And for me, this complete stranger who stopped to help a very panicked girl and her dog – he counts. And I can promise that the next time I find myself in a situation where helping someone out might inconvenience me, even for a couple of minutes (nevermind hours), I will remember Todd. And I will pay his kindness forward.

Peach Cinnamon Swirl Ice Cream | Once Upon a Recipe

And to my dear Rufus (my wonderful little blue Mazda 3) – thank you for saving me. You done good.

Peach Cinnamon Swirl Ice Cream | Once Upon a Recipe

This ice cream is nothing short of amazing. I have read many wonderful things about Jeni’s Splendid Ice Cream, but unfortunately Jeni’s ice creams are not available here in Canada. So when I came across a recipe for Jeni’s ice cream base, I knew I had to try it. The recipe yields a rich and creamy ice cream, and I can’t wait to experiment with different flavor combinations. But for my first attempt, I decided to pair it with one of my favorite summer fruits – peaches! The final result tastes just like peach pie a la mode, minus the pastry part. I’m tempted to try this recipe again with pie crust cookie chunks! In any case, the long and short of it is that this is a perfect summer ice cream recipe.

To Todd! And all of the other “Todds” out there – thank you.

Peach Cinnamon Swirl Ice Cream | Once Upon a Recipe

Peach Cinnamon Swirl Ice Cream (ice cream base from saveur.com by Jeni Britton, and peach cinnamon swirl adapted from A Cozy Kitchen)

For the ice cream:

2 cups whole milk
4 tsp. cornstarch
1 1/4 cups heavy cream
2/3 cup sugar
2 tbsp. light corn syrup
1/4 tsp. salt
3 tbsp. cream cheese, softened

Combine 1/4 cup of the milk and the cornstarch in a small bowl and mix well; set slurry aside. In a large saucepan, whisk together the remaining milk along with the cream, sugar, corn syrup, and salt. Bring the mixture to a boil over medium-high heat. Cook for 4 minutes, then add in the slurry. Return to a boil and cook, stirring, until thickened, for about 2 minutes. In a large bowl, combine the cream cheese with about 1/4 cup of the hot milk mixture and whisk until smooth, then whisk in the remaining milk mixture. Cover the bowl and refrigerate until the mixture is chilled, or overnight. Churn the ice cream in your ice cream maker according to manufacturer’s instructions (mine took about 25 minutes).

For the peach cinnamon swirl:

4 peaches (about 2 pounds)
1/4 cup white granulated sugar
1 tsp. cinnamon + a pinch of salt

Bring a large pot of water to boil. Add in the peaches and blanch for 1-2 minutes. Remove the peaches from the water and allow to cool enough to handle. Remove the skins and pits and cut the peaches into bite-size pieces. Add the peaches, the sugar, and the cinnamon and salt to a saucepan and cook over medium heat for about 10-15 minutes, or until the peaches have broken down and the mixture is thick. Allow the mixture to cool to room temperature.

Layer the ice cream and peach mixture in a container. Cover with plastic wrap and allow the plastic to touch the ice cream – this will help prevent ice crystals from forming. Freeze for at least 2-4 hours. Scoop and enjoy!

Peach Cinnamon Swirl Ice Cream | Once Upon a Recipe

Have a lovely weekend! xo

Vegan and Deceivin’ | Vanilla Macadamia Nut Coffee Coconut Ice Cream

Vanilla Macadmia Nut Coffee Coconut Ice Cream | Once Upon a Recipe

Well ahoy there, friends! Pardon my absence – I have been without Internet access for the past while. Looonnnggg story. But tonight finds me stationed at a coffee shop, a ginormous green tea lemonade by my side, and free access to the Interwebs. Huzzah!

I have decided that I need to do this more often – not for the free Internet – but for the sake of quiet and the absence of distractions. It is nice to come to a place and just sit and write, without leaping up every five minutes to fetch Bella’s ball for her, change the load of laundry, or feel the urge to turn the TV for background noise. Perhaps it will become a regular event.

Vanilla Macadamia Nut Coffee Coconut Ice Cream | Once Upon a Recipe

However, let’s get back to the food. I have to be honest. I’ve had a few busts in the kitchen lately. I’m a believer in only sharing food and recipes that I really love, and that I think you’ll love too, and I have not been churning many winners out of my kitchen lately. A big part of that has been a result of a busy schedule, and the fact that I typically have time to make one big pot of something that I feast on throughout the week. Day 5 leftovers = not my favorite thing.

Despite my lackluster kitchen efforts, I did manage to get around to dusting off my ice cream maker this past weekend and made the first batch of ice cream of the season. And I had to share.

Vanilla Macadmia Nut Coffee Coconut Ice Cream | Once Upon a Recipe

Almost a month has passed since Dana first shared her Coffee Coconut Ice Cream recipe. I immediately bookmarked it. However, I bookmark a lot of recipes, and sometimes things get lost in the shuffle, despite my good intentions. Thankfully, I follow a few great food blogs (read: several hundred…) and occasionally the same recipe will have caught another blogger’s eye, prompting them to post the recipe (or their version of it), which then gives me a nice little reminder about that bookmark I made. Ahh, the circle of life blogging. It’s totally a thing.

So…when the lovely Clara re-posted Dana’s recipe last week, I knew I had to take it as a sign from the food gods that I was intended to make this ice cream. One should never ignore a sign from the food gods!

Vanilla Macadmia Nut Coffee Coconut Ice Cream | Once Upon a Recipe

Oh goodness, am I ever glad that I listened. First of all, I changed up the recipe just a little. In place of the regular brewed coffee, I used the vanilla macadamia nut coffee that I brought back from Hawaii last month. I added a bit more vanilla, and then tossed in some toasted macadamia nuts and mini dark chocolate chips. This ice cream is vegan, peeps. That may be a selling feature for some (ie. Vegans, the dairy-intolerant, etc.). However, I can assure you that no one will ever know that it is. Oh, and surprisingly, the coconut flavor is not overwhelming. The creaminess is so deceiving, you’ll think you’re eating regular ice cream. It’s vegan and deceivin’! (Yep, came up with that one all by myself…)

One more thing – if you don’t already own an ice cream maker, you may want to change that. I was given mine as a gift, and to be honest, I never thought I would enjoy it as much as I do. The fact is, there’s something rather lovely about homemade ice cream, and it’s darn easy to make too. I declare Summer 2013 as the season of ice cream adventure!

Vanilla Macadamia Nut Coffee Coconut Ice Cream | Once Upon a Recipe

Vanilla Macadamia Nut Coffee Coconut Ice Cream (adapted from Minimalist Baker)

Makes about 1.5 quarts. Feel free to experiment with different flavors of coffee, if you’re so inclined. Change up the add-ins too! And use premium quality coconut milk, if possible. It will make a big difference. 

2 cans full-fat coconut milk

¾ cup brewed coffee (I used vanilla macadamia nut coffee)

¾ cup sugar

2 tsp. vanilla

¾ cup toasted and chopped macadamia nuts

½ cup mini dark chocolate chips

Combine the coconut milk, coffee, and sugar in a saucepan over medium heat. Stir until the sugar dissolves, about 5 minutes. Remove from heat and add in the vanilla. Transfer the mixture to a bowl, cover and refrigerate until well chilled (at least 6 hours or overnight). Churn in your ice cream maker (according to manufacturer’s instructions). Mine took about 25 minutes. Fold in the macadamia nuts and chocolate chips. Transfer to a Tupperware container (or loaf pan!) and cover with plastic wrap. Allow the plastic wrap to touch the surface of the ice cream, as this will help prevent ice crystals from forming. Freeze for at least 4 hours. Scoop and serve!

Vanilla Macadamia Nut Coffee Coconut Ice Cream | Once Upon a Recipe

Gettin’ Tarty | Brûléed Lemon Tart

Brûléed Lemon Tart | Once Upon a Recipe

Ladies and gentlemen, behold one of the most fabulous things I have ever baked and eaten. The brûléed lemon tart.

I think I may have just made that word up: brûléed. I’m rather certain that brûlée is a noun and that I just used it as a verb. Wait, is that right? Suddenly, I am having difficulty recalling the basics of English grammar. But I don’t care. It sounds kinda catchy.

Bruleed Lemon Tart | Once Upon a Recipe

And this tart is pretty damn catchy. As in, you’ll want to catch it in your mouth because it’s damn delicious.

My apologies, the words aren’t exactly flowing well at the moment. My mind is a bit preoccupied with the fact that in less than 24 hours, I will be on a plane en route to Hawaii, where I will enjoy two weeks of uninterrupted bliss with some very fun people. My body is here, but my brain is already in the sun, sand, and Mai Tais.

Bruleed Lemon Tart | Once Upon a Recipe

But before I go, I must share this tart with you. It may look simple, but it is rather magnificent. A buttery shortbread crust filled with a sweet/tart creamy lemon filling, topped with a sugar crust akin to the one you’d find atop another delectable dessert, crème brûlée. I first made this tart last summer for my mom’s birthday. I topped it with blackberries. It received rave reviews. I made it again as part of the rather gluttonous Easter Feaster a couple of weeks ago, and it did not survive the Easter Feaster table.

Bruleed Lemon Tart | Once Upon a Recipe

If you’ve never made a tart before, fear not. It’s ridiculously simple. The crust comes together in a flash in a food processor. After chilling out in the fridge for a couple of hours, it gets rolled out and pressed into a tart pan. Bake ‘er up. Mix the filling ingredients together. Pour over crust. Bake again. Sprinkle with sugar. Torch it up. Badabing, badaboom.

Brûléed Lemon Tart | Once Upon a Recipe

Despite the large quantities of cream, butter, sugar, and eggs in this recipe, the end result is surprisingly light. And this tart comes with a guarantee: It will not survive more than 24 hours. You have been warned. Either invite some friends over or be prepared to eat this thing until it’s gone. No judgment here if you choose the latter.

Brûléed Lemon Tart | Once Upon a Recipe

A quick note: I will be spending the next two weeks in paradise, and while I would love to promise that I will update the blog a time or two, if the Mai Tais and Pina Coladas are calling to me, I’m not going to ignore them. However, I can guarantee that I will be sharing tidbits from my adventures on Instagram and Twitter, so follow me there if you’re so inclined. The adventures will include a visit here. Have a fabulous couple of weeks, friends! xo.

Brûléed Lemon Tart | Once Upon a Recipe

Brûléed Lemon Tart (from Epicurious, originally printed in Bon Appétit, April 2004)

Makes one 10-inch tart. Feel free to jazz up the finished product with fresh fruit, such as blackberries or blueberries. With that said, it’s just as delicious without any additions. 

For the crust:

1 cup all-purpose flour

1/4 cup icing sugar

Pinch of salt

6 TBSP. unsalted butter, cold and cut into cubes

6 tsp. whipping cream

For the filling:

3/4 cup + 2 TBSP. sugar, divided

3/4 cup whipping cream

4 egg yolks (reserve one egg white)

2 whole eggs

Juice + zest from 2 large lemons (about 1/2 cup juice + 1 TBSP. zest)

For the crust: Combine the flour, icing sugar, and salt in a food processor and pulse for a few seconds until blended. Add the butter and pulse until the mixture looks like coarse meal. Add the whipping cream and blend until moist clumps form. If the dough is too dry, add more whipping cream one teaspoon at a time. Gather the dough into a ball, flatten into a disc, and then wrap in plastic wrap and refrigerate for two hours.

Preheat the oven to 350°F. Remove the dough from the fridge and roll out onto a floured surface. I used a 10-inch tart pan with a removable bottom, but a 9-inch tart pan would work fine too. Roll the dough thin enough to cover the bottom of the pan and create double-thick sides. Press into the tart pan. Poke the bottom of the tart shell all over with a fork. Bake for 18 minutes. Brush the inside of the tart shell with the reserved beaten egg white. Maintain the oven temperature.

For the filling: Combine the 3/4 cup sugar, whipping cream, egg yolks, eggs, and lemon juice and zest in a large bowl and whisk together until combined. Pour the filling into the warm tart shell and return to the oven. Bake for 30-35 minutes, or until the filling is slightly puffed at the edges and set in the center. Cool for about an hour.

Sprinkle the remaining 2 TBSP. of sugar over the filling. Use a kitchen torch to caramelize the sugar, as if you were making crème brûlée. If you do not have a kitchen torch, you can use your broiler to achieve a similar effect. Be very careful, checking the tart after a minute or two, and turning the pan for even browning. It may also be wise to cover the edges of the crust with tin foil to prevent the crust from getting too brown. Allow the tart to cool for another hour, until the topping is crisp. Slice and serve!

Brûléed Lemon Tart | Once Upon a Recipe

Check This Out | Pretzel Rolo Nut Bites

Pretzel Rolo Nut Bites | Once Upon a Recipe

Happpppppppy Friday!

The balmy temperatures of late had me caught up in some serious daydreaming of patios with friends this weekend (a bit prematurely, I am aware), but the larger than necessary dump of snow we received yesterday really pounded the final nail into that coffin of dreams. *sigh* Why must you mock me, Mother Nature? Ah well, my Hawaii countdown will keep my spirits high. Only 26 days left to go!

Not to worry, I won’t rub it in any more for now at least. While Erin was popping by to share those incredible Super-Rocky Rocky Road Brownies, I was sharing a little somethin’ somethin’ over in her neck of the woods. I’ll let the pictures do the talking.

Pretzel Rolo Nut Bites | Once Upon a Recipe

Pretzel Rolo Nut Bites | Once Upon a Recipe

Pretzel Rolo Nut Bites | Once Upon a Recipe

Pretzel Rolo Nut Bites | Once Upon a Recipe

Pretzel Rolo Nut Bites | Once Upon a Recipe

Pretzel Rolo Nut Bites | Once Upon a Recipe

Now why don’t you let your fingers do some walking on over to Read, Eat, Create to check out the full post? These wickedly easy, scrumptious, and addictive Pretzel Rolo Nut Bites await you!

Have a great weekend friends!

%d bloggers like this: