Falling | Pumpkin Cookies with Cinnamon Frosting


I’m going to cut right to the chase.

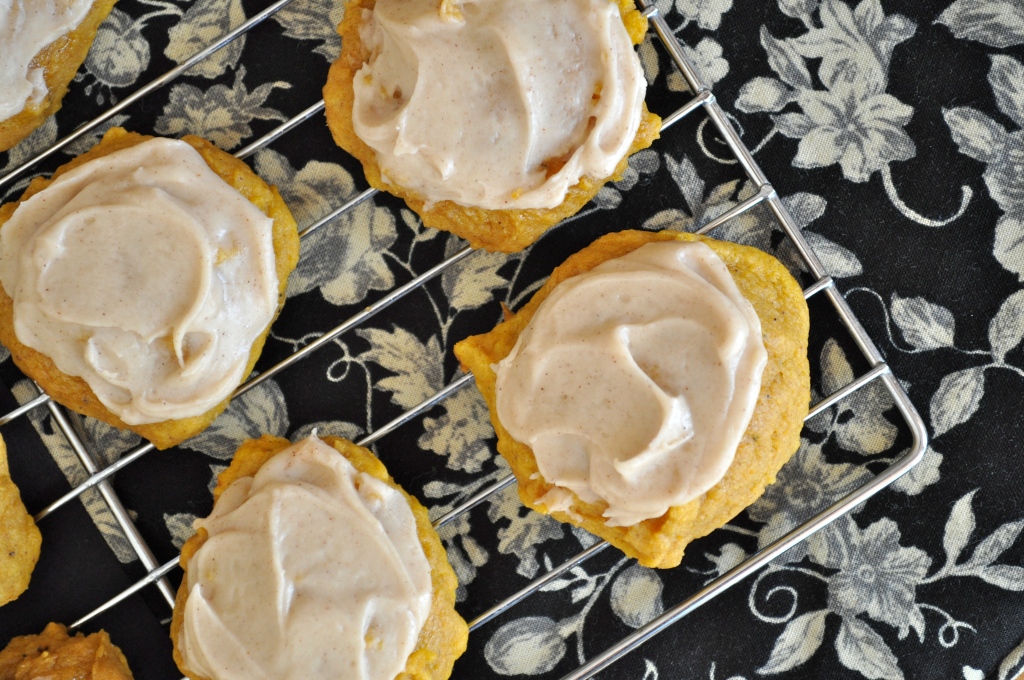
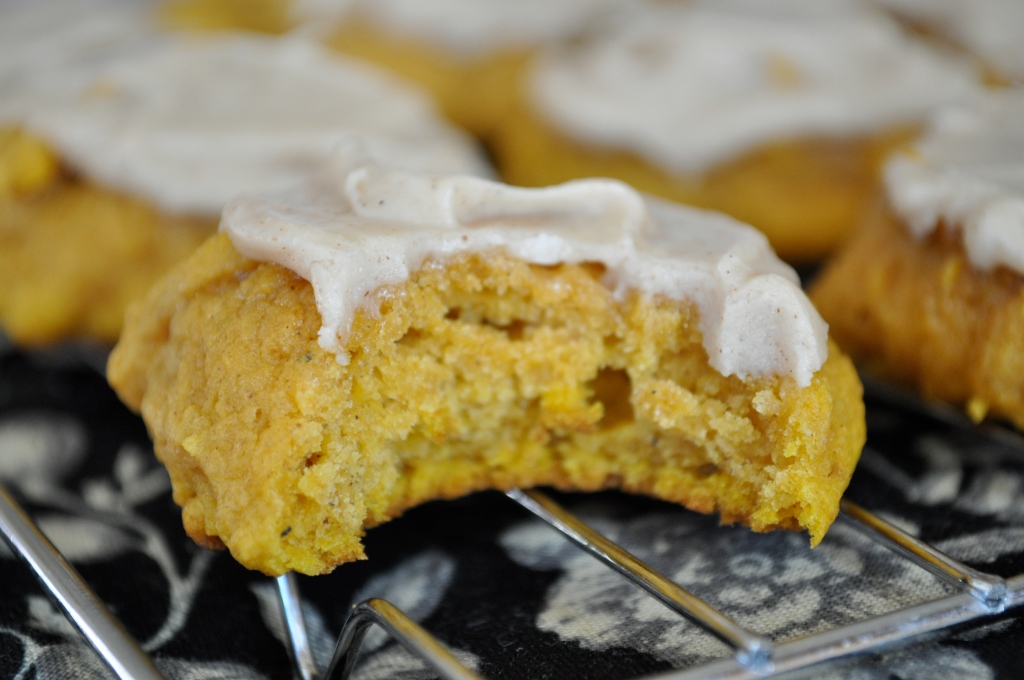
I made you some cookies. They’re soft and cakey. Spicy and pumpkiny. Yep, pumpkiny is a word. You heard it here first.

But back to those cookies…


Posting two cookie recipes back to back was not the plan. I had another recipe to share with you. However, these little melt-in-your-mouth pillows of pumpkiny goodness came into my life unexpectedly this week and I just had to share them immediately. Words really don’t do these cookies justice. They taste like pumpkin pie, but way better ’cause I don’t really even like pumpkin pie. I mean, I eat a token slice of it every Thanksgiving, but only because Thanksgiving wouldn’t feel the same if I didn’t. But these cookies, they deliver.


So how about you run off to the grocery store and pick yourself up some pumpkin, and then get your tush into the kitchen to make these? And then you can proceed to eat a dozen cookies over the course of the day. But they’re tiny, and they have pumpkin in them. So you’re practically eating a serving of vegetables…

Go make these cookies!


Pumpkin Cookies with Cinnamon Frosting (adapted from Better Homes and Gardens)

1 cup of butter, softened

1 cup of granulated sugar

1 tsp. baking powder

1 tsp. baking soda

1/2 tsp. salt

1 tsp. cinnamon

1/2 tsp. ground nutmeg

1 egg

1 tsp. vanilla

1 1/2 cups of pumpkin puree

2 cups of all-purpose flour

For the frosting:

1/4 cup butter

1/4 cup brown sugar

1/8 cup milk

1/2 tsp. vanilla

1 tsp. cinnamon

2 to 2 1/2 cups icing sugar

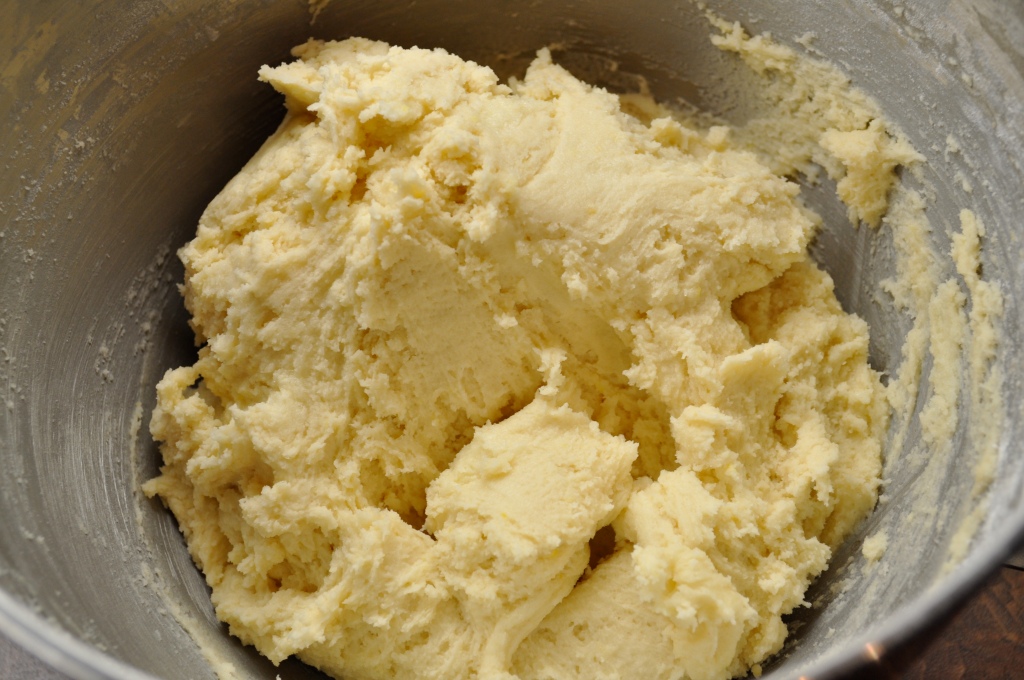
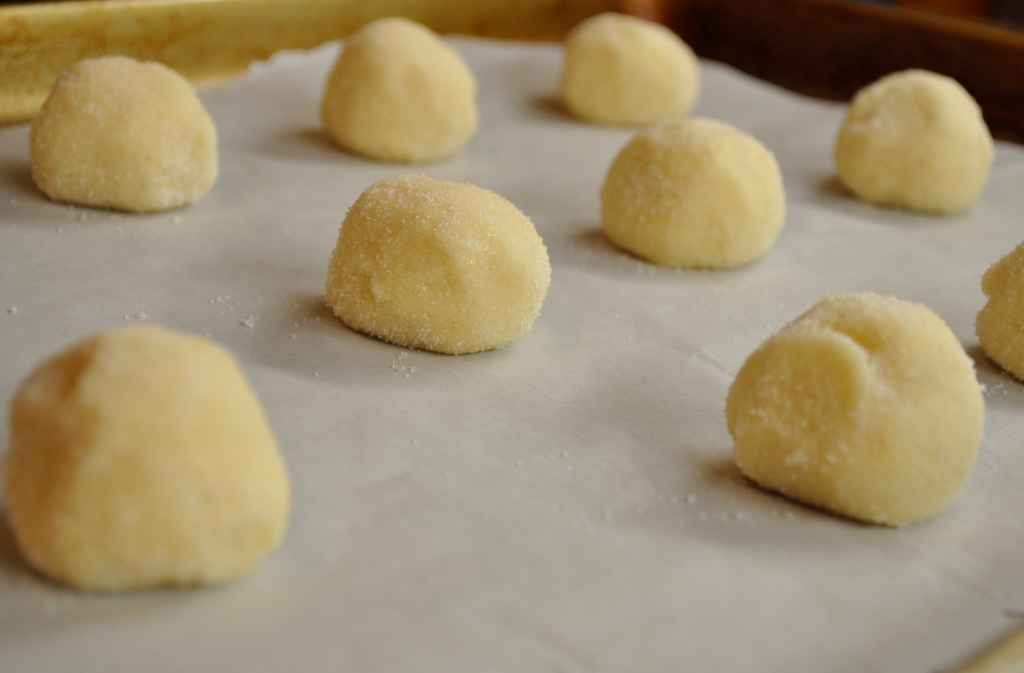
Preheat your oven to 350°F. In a mixing bowl, beat the butter with an electric mixer on medium speed for about 30 seconds. Add the sugar, baking powder, baking soda, salt, cinnamon, and nutmeg. Beat until thoroughly combined, taking care to scrape the bowl down at least once. Add the egg and vanilla, and beat until combined. Beat in the pumpkin. Add in the flour and mix together well. Drop the dough by heaping teaspoons onto a cookie sheet lined with parchment paper or a Silpat (or one sprayed with cooking spray). Bake for 10 to 12 minutes or until tops are just set. Transfer the cookies to a wire rack and allow to cool.

For the frosting: In a small saucepan, heat the butter and brown sugar together over low heat until melted and smooth. Transfer to a bowl. Stir in the milk, vanilla, and cinnamon. Add in 2 cups of icing sugar and beat until smooth. Add more icing sugar if necessary to create a spreadable frosting.

Frost the cookies when cool and enjoy! Store in an airtight container, placing waxed paper between layers to avoid them sticking together.

A Successful Quest | The Perfect Chocolate Chip Cookie

Hello friends. Do you like cookies?

Do you like thick, chewy cookies?

Thick, chewy, chocolate chip cookies?

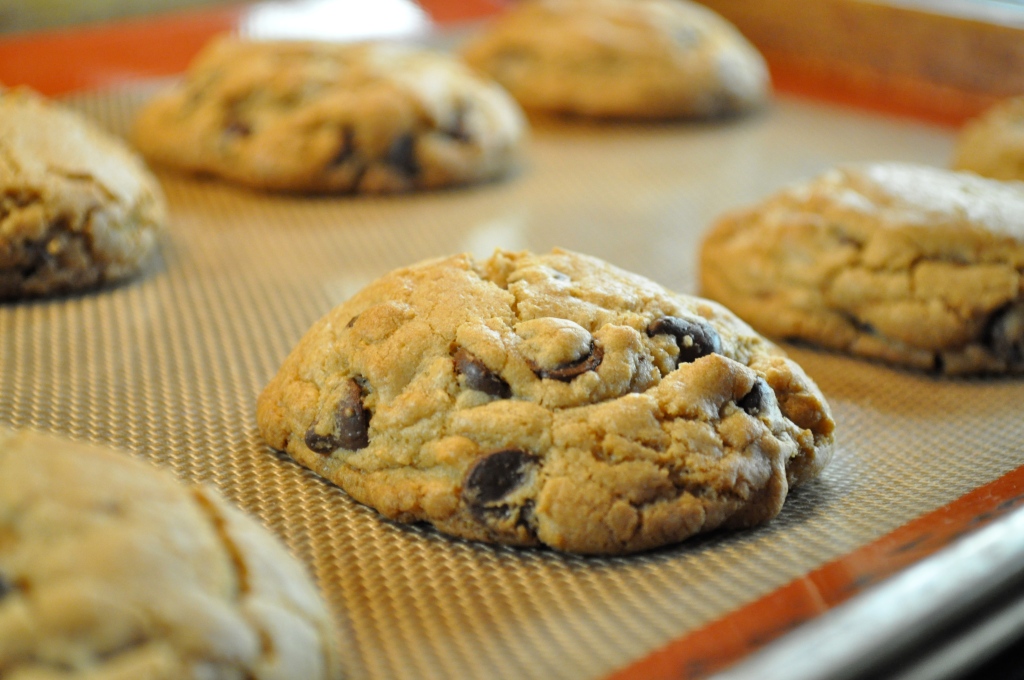
 If you answered yes to the above questions, then hold onto your hats. Because I have the perfect cookie for you.

My quest for the perfect chocolate chip cookie started when I was just a tyke, learning my way around the kitchen. Don’t get me wrong, the cookies always tasted delicious, but much of the time the end result was a big cookie pancake, created by the cookies all flattening out and running into each other. Unfortunately, I wanted individual thick, chewy cookies, not one big, thin cookie. *sigh*

And then, a miracle happened. A few days ago, I was perusing a few of my favorite food blogs. And I came upon this post by Joy from Joy the Baker. My heart started racing as I read about cookies that did not flatten into a cookie pancake, cookies that would stay thick and chewy! Cookies that were made with melted butter (what?) and bread flour (huh?) – a recipe very unlike all the others that have failed (for me at least). Well, I just had to try them for myself. Immediately. I braced myself – it was probably too good to be true.

Imagine my delight when the cookies popped out of the oven, thick and perfectly round! And my surprise, when they didn’t sink as soon as they were out of their warm oven cave! And my happiness when I sunk my teeth into one of these cookies, in awe of its moist chewiness! Seriously people, these cookies are top notch. Very worthy of the “perfect” in their name. The secret must be the bread flour. Or the melted butter. Or the combination of the two. Who knows? They taste amazing and that’s really all that matters. Try them today. Happy eating!

The Perfect Chocolate Chip Cookie (via Joy the Baker, originally from Alton Brown)

1 cup (two sticks) unsalted butter

2 1/4 cups bread flour

1 tsp. kosher salt

1 tsp. baking soda

1/4 cup sugar

1 1/4 cups brown sugar

1 egg

1 egg yolk

2 TBSP. milk

1 1/2 tsp. vanilla

2 cups semisweet chocolate chips

Preheat the oven to 375°F.Melt the butter in a heavy-bottom saucepan over low heat. Sift together the flour, salt, and baking soda and set aside.Pour the melted butter into a bowl. Add the sugar and brown sugar. Cream the butter and sugars on medium speed (it takes a few minutes to get the butter and sugars to come together, so be patient). Add the egg, yolk, milk and vanilla and mix until well combined. Slowly incorporate the flour mixture until thoroughly combined. Stir in the chocolate chips.

Chill the dough (for at least 30 minutes), then scoop onto parchment-lined baking sheets. Bake for 10-12 minutes or until golden brown, but don’t overbake. Rotate the baking sheet for even browning. Cool completely and store in an airtight container. Eat!

PS. I know I have been posting a lot about sweets lately, but contrary to the impression I may be making, I do eat healthier things than cookies and cakes and delicious frozen desserts. Stay tuned for some savory and healthy recipes on the way!

Update: I made these cookies again this weekend and used 1 cup chocolate chips, 1 cup butterscotch chips, and OMG, it was an explosion of amazing deliciousness! I bet this cookie recipe would make a good base for any mix-ins you wanted to use (instead of chocolate chips) – nuts, white chocolate, peanut butter chips, M & Ms, etc.

When Life Gives You Lemons | Lemon Crinkles

I’m having one of those weeks. The kind of week where exhaustion hits you like a train, you don’t get enough sleep, and you literally count the hours until the weekend – those two wonderful days that give you the opportunity to catch up on rest, relax, and do all the things that you wanted to do during the week, if you didn’t have work and other commitments to worry about. Not that I expect to get much sleep this weekend…

See this sweet little face? Those mismatched puppy-dog eyes? That little deformed nose? Do not, I repeat, DO NOT let those impressively cute features fool you. Honey and I adopted our little Bella from the Humane Society at the beginning of January. Don’t get me wrong, we absolutely adore her, we love her to bits. But…she hasn’t let us sleep through the night since. Not since the very first night we brought her home, and she tried to deceive us with her too-good-to-be-true behavior. As a result, we are both completely and utterly exhausted. She wakes up several times each night, and then it takes her nearly an hour to fall back to sleep (if she even does), barking all the while. Standing between me and REM sleep. *sigh* What are we doing wrong?

Perhaps I sound a bit melodramatic here, it must be the sleep deprivation talking. Sorry, I’ll get back on track. I made these cookies during the holiday season, and found them to be quite delightful. They remind me of a light shortbread cookie, but with a hint of lemon flavor (next time I whip these up I think I will double the lemon zest for a stronger lemon taste). These little lemon crinkles go very well with a hot cup of tea or coffee. Remember, when life gives you lemons, make lemon cookies! That’s my current philosophy.

Lemon Crinkles

2 3/4 cups all-purpose flour

1 tsp. baking soda

1/2 tsp. baking powder

1/2 tsp. salt

1 cup butter, softened

1 1/2 cups white sugar

1 egg

1/2 tsp. vanilla

Zest of one lemon

4 TBSP. fresh lemon juice

1/2 cups sugar for rolling cookies

Preheat your oven to 350°F. Line two cookie sheets with parchment paper. In a small bowl, whisk together the flour, baking soda, baking powder and salt. In a larger bowl, beat together the butter and sugar until light and fluffy. Beat in the egg, vanilla, lemon zest and juice.

Add in the dry ingredients, beating until just combined. Roll rounded spoonfuls of dough into balls and then roll in sugar. Place on lined cookie sheets, about 1 or 2 inches apart. Bake for 8 to 10 minutes. Remove from the oven and let stand on cookie sheet for 2 minutes before removing to cool on wire racks. Makes 24 – 36 cookies. Happy eating!

The Exchange | Neapolitan Cookies

Ready for more cookie recipes yet? ‘Cause there are a few coming down the pipe! Today I hosted a cookie exchange with some of my favorite family and friends. There were so many delicious cookies to share – I fear that I may end up eating my body weight in baked goods in the coming weeks! Clearly the afternoon was a success – check out my haul!

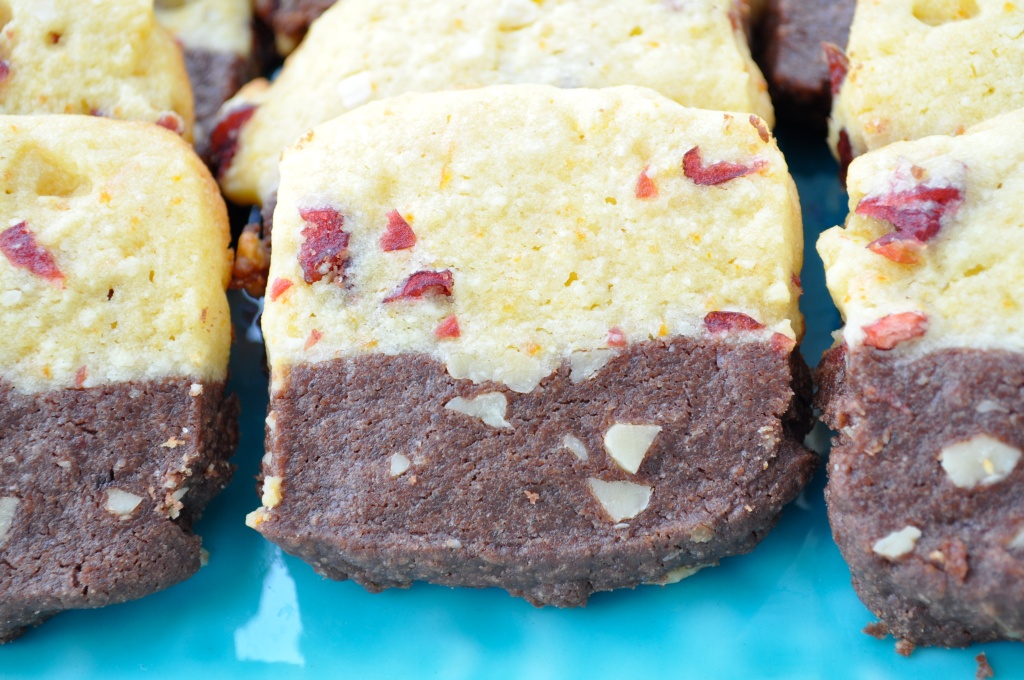
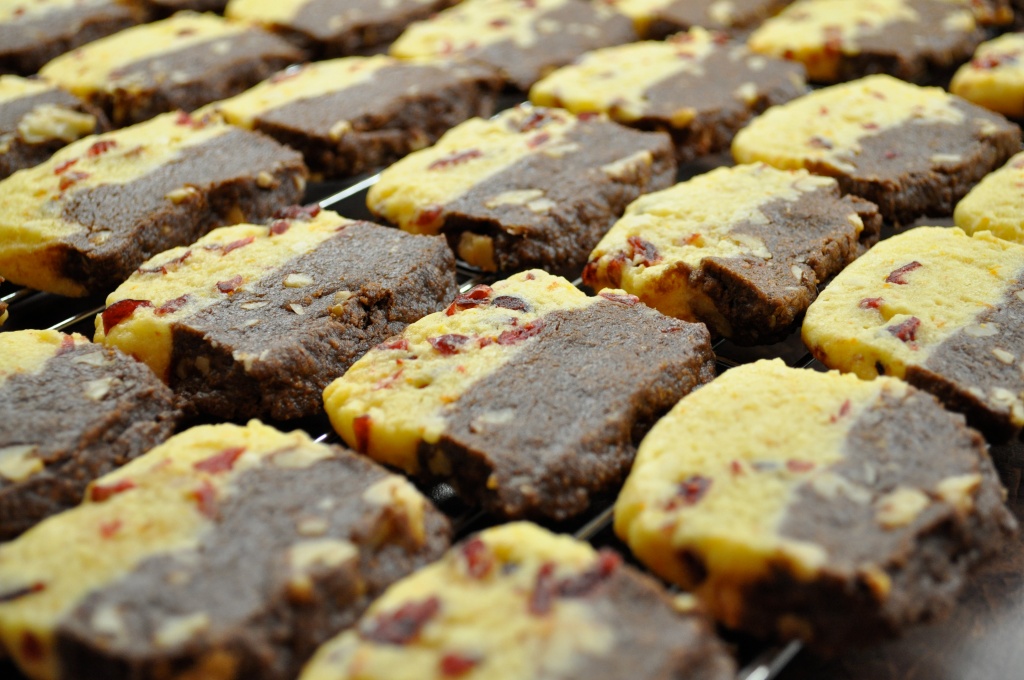
So many amazing treats – I can’t wait to try them all! I decided to share a recipe that I came across last holiday season – Martha Stewart’s Neapolitan cookies. I adapted the original recipe slightly (it also called for espresso powder in the chocolate half of the cookie, but I wanted to keep it a little more simple). The cookies were very well received last year, so I definitely wanted to share them with everyone this year. They take a little bit of time to make, but overall are quite easy, and they taste wonderful. The flavor of the orange, almonds, and cranberries blend perfectly with the chocolate and walnuts. These would make such a lovely homemade gift!


Christmas can be such a stressful time of year, with many demands (cooking, preparing for guests, shopping for gifts), but baking cookies is such a relaxing experience for me. I better be careful – at this rate I may end up with an insane amount of cookies to eat. But that would just mean more for sharing, one of my favorite holiday activities. Wouldn’t you love to receive a tin of homemade cookies from a friend? Try sharing these cookies (or making them for yourself). You won’t be disappointed. Happy eating!

Neapolitan Cookies (adapted from Martha Stewart)

For the orange-sable dough:                                         For the chocolate-walnut dough:

1 ¼ cups whole blanched almonds                              1 ½ cups all-purpose flour

1 cup sugar                                                                           ½ cup Dutch-process cocoa powder

¾ cup unsalted butter, room temp.                               1 cup unsalted butter, room temp.

3 TBSP. finely grated orange zest (2-3 oranges)       1 cup sugar

1 large egg                                                                            1 tsp. vanilla extract

1 TBSP. freshly squeezed lemon juice                           1 cup walnuts, coarsely chopped

1 ½ cups all-purpose flour

1 cup dried cranberries, roughly chopped

To make the orange-sable dough: Place almonds and sugar in the bowl of a food processor. Process until the mixture resembles coarse cornmeal. Add the flour and set aside. Place the butter and zest in a bowl and mix using an electric mixer. Beat on medium speed until white and fluffy, 2-3 minutes. On low speed, add the almond mixture; beat until combined. Add egg and lemon juice; combine. Wrap in plastic and store in the refrigerator until ready to use.

To make the chocolate dough: Sift flour and cocoa powder into a large bowl and set aside. Using an electric mixer, beat the butter, sugar, and vanilla until creamy, 3-4 minutes. Working in additions, gradually beat in flour mixture, scraping down sides of bowl twice. Wrap in plastic and store in refrigerator until ready to use.

Line an 8-inch square baking pan with plastic wrap. In a large bowl, stir the cranberries into the orange-sable dough. In another large bowl, stir the walnuts into the chocolate dough. Press the orange mixture into the bottom of the pan. Using an offset spatula, (or wet fingers) smooth top evenly. Spread chocolate mixture over the orange mixture and smooth evenly. Cover with plastic wrap and chill for at least 2 hours.

Heat oven to 350oF. Line two baking sheets with parchment paper. Shake the dough out of the pan and remove plastic. Cut into 2-by-8-inch bricks; cut bricks into ¼-inch-thick slices. Place slices on sheets, spaced 1 ½ inches apart. Bake for 12-15 minutes, or until firm to the touch. Transfer cookies to a wire rack to cool. Store in an airtight container.  Makes about 6 dozen.

PS. Later this week…Christmas Biscotti!

PPS. What is your favorite Christmas cookie recipe?

The Baking Begins | Cherry Almond Butter Cookies

There is something about holiday baking that just gets me feelin’ the Christmas spirit. Maybe it’s the warmth that comes from the oven and fills the kitchen in contrast with the cold outside, maybe it’s the sweet scent of baking butter and sugar that teases your tummy, or maybe it’s the thoughts of sharing delicious cookies and treats with friends and family as you get together to celebrate the season. Whatever it is, I adore it and can’t seem to get enough.

Baking is a big Christmas tradition in my family, and there is never a shortage of sweet treats to choose from. In fact, one might be inclined to skimp on turkey and mashed potatoes in an effort to leave extra room for cookies and squares and tarts!

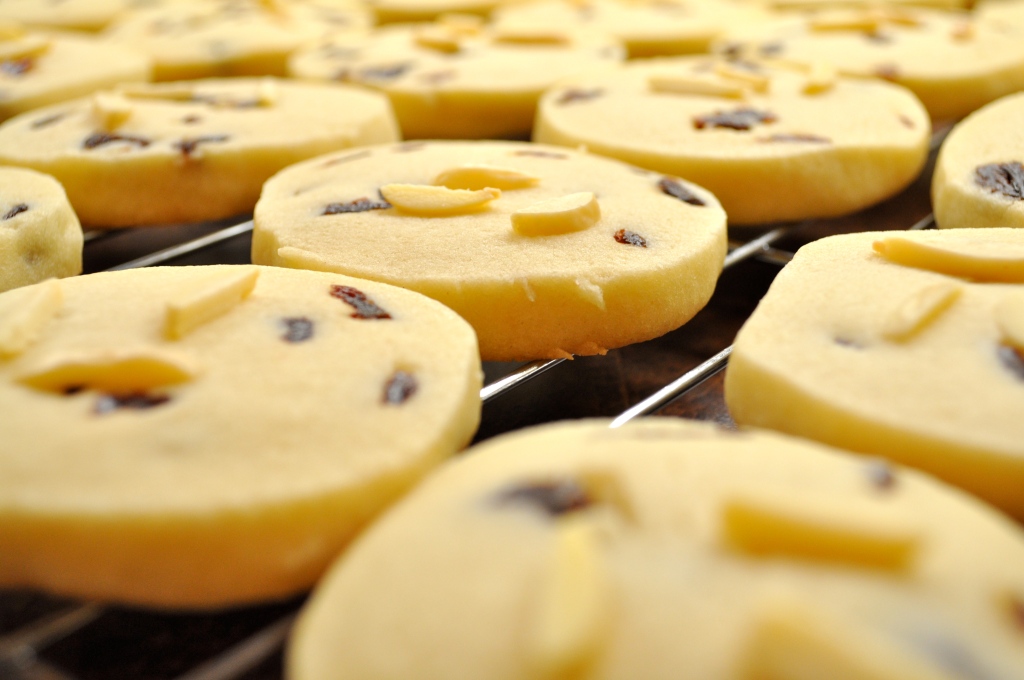
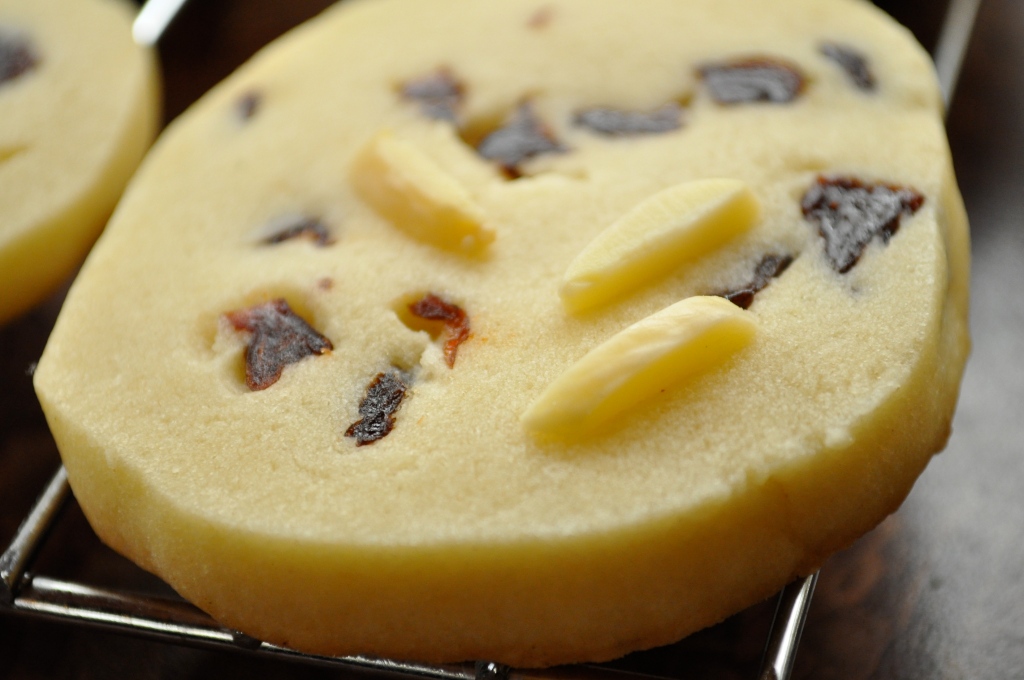
There are a few Christmas cookie recipes that I turn to year after year, but I also try to pick a couple of new recipes to try every holiday season. These cookies, Cherry Almond Butter Cookies, joined my recipe stash a few years ago when I impulsively bought the Company’s Coming Most Loved Cookies cookbook right before Christmas. Their butter content might make you think of shortbread, and they have a similar buttery sweetness, but the addition of tart dried cherries and crunchy toasted almonds give them a delicate uniqueness. They have become one of my favorites, and if you give them a try, they might become one of your favorites too!

Cherry Almond Butter Cookies (from Company’s Coming Most Loved Cookies)

2 cups of butter, softened (room temperature)

1 1/2 cups of sugar

1 egg

2 tsp. vanilla

5 cups of all-purpose flour

2 tsp. baking powder

1/2 tsp. salt

1 1/3 cups of dried cherries (roughly chopped)

1 cup of toasted slivered almonds

Cream the butter and sugar together in a large bowl. Add the egg and beat well. Add the vanilla and beat until smooth. Combine the flour, baking powder, and salt together in a medium bowl. Add to the butter mixture in 3 additions, mixing well after each addition until no dry flour remains.

Add the cherries and mix well. Divide the dough into 3 portions. Shape each portion into an 8-inch (20 cm) long log. Wrap each log with waxed paper. Chill for at least 6 hours or overnight.  (This is an important step as it makes the cookie dough firm and easy to slice before baking). When ready to bake, discard the wax paper from each log. Cut into 1/3-inch (1 cm) slices. (I was able to get about 20 slices out of each log, for a total of 60 cookies). Arrange about 2 inches (5cm) apart on cookie sheets lined with parchment paper.

Gently press 2 or 3 almond slivers* in a decorative pattern on top of each slice. Bake at 350 degrees F for about 10 minutes or until just golden. Let stand on cookie sheets for 5 minutes before removing to wire racks to cool.

*To toast the almond slivers, spread them evenly in an ungreased shallow pan. Bake in a 350 degree F oven for 5-10 minutes, stirring or shaking often, until lightly golden.

PS. Honey just informed me that when he found these in the freezer this afternoon, he polished off 8 cookies in one sitting. Hide these if you want them to make it until Christmas!

PPS. I apologize for the terrible light in my photos. I have zero natural light in my condo, and since I do much of my cooking/baking in the evening after work, the light is even worse! The odd Saturday or Sunday cooking venture might yield more favorable results, but I’m not going to limit myself to just those two days per week.


%d bloggers like this: