A Family Favorite | Puffed Wheat Squares

Puffed Wheat Squares | Once Upon a Recipe

Hi friends! I hope you all had a marvelous weekend. I spent mine with some of my favorite friends, drank too much sangria, danced until I was a sweaty mess, stayed up way too late, and this, coupled with the fact that I’ve been burning the candle at both ends for the past month or so has left me in the throes of an awful cold. I don’t know what it is about getting sick in the summer, but it always feels WAY worse to me. Like, oh hi, I’m running a fever AND my house is 98 degrees and rising – perfect! It’s a beautiful day and rays of sunshine are beaming through the window, BUT I’m sweating my arse off inside whilst being doped up on cold meds – AWE.SOME. No thank you. I’ll take a cold in the deep dark of winter over one in the depths of summer any day. At least curling up on the couch with a blanket and bad daytime TV seems slightly more appealing when it’s minus one million outside.

Puffed Wheat Squares | Once Upon a Recipe   Puffed Wheat Squares | Once Upon a Recipe

In any case, I’ve learned that I’m terrible at resting. Like, I know that when you’re sick, it’s usually a result of your body being run down and therefore rest is necessary to get healthy again. But I can only sleep so much. And I can only lay in a vertical position for so long. And I can guarantee that in the time that I am “resting”, my brain is already making 101 plans for what I need to do next. My brain isn’t very good at being quiet.

Puffed Wheat Squares | Once Upon a Recipe

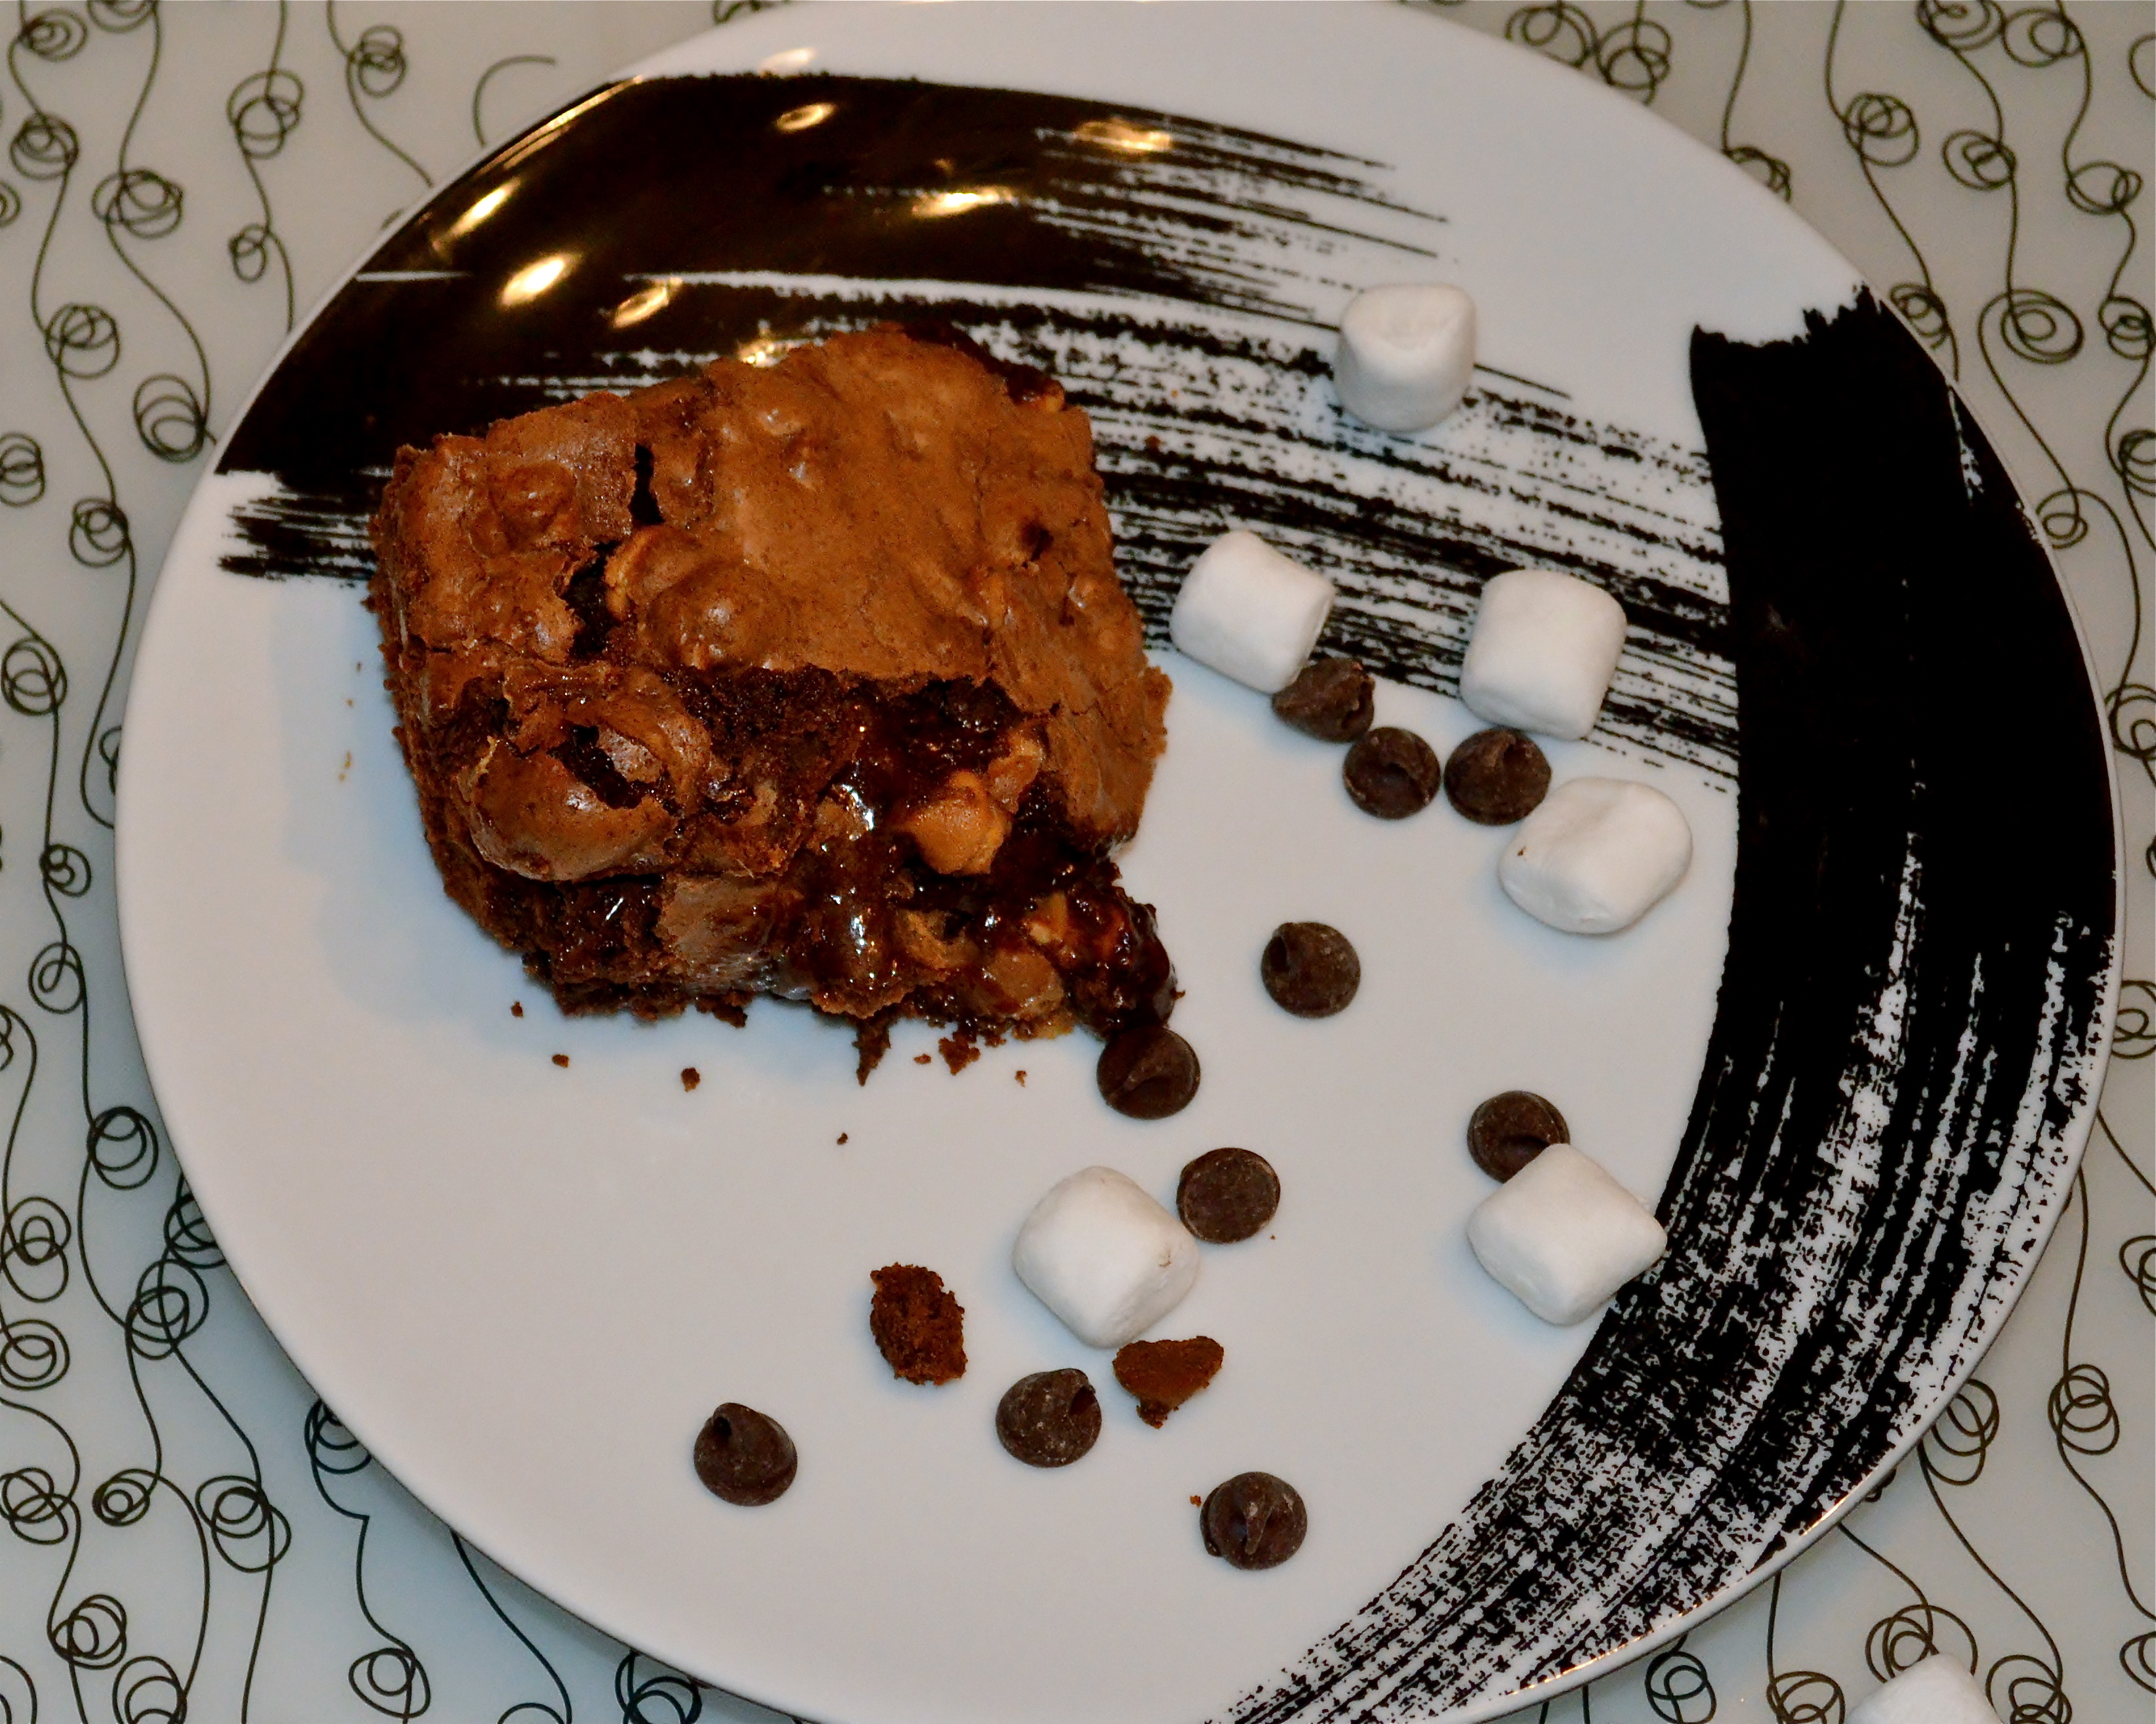
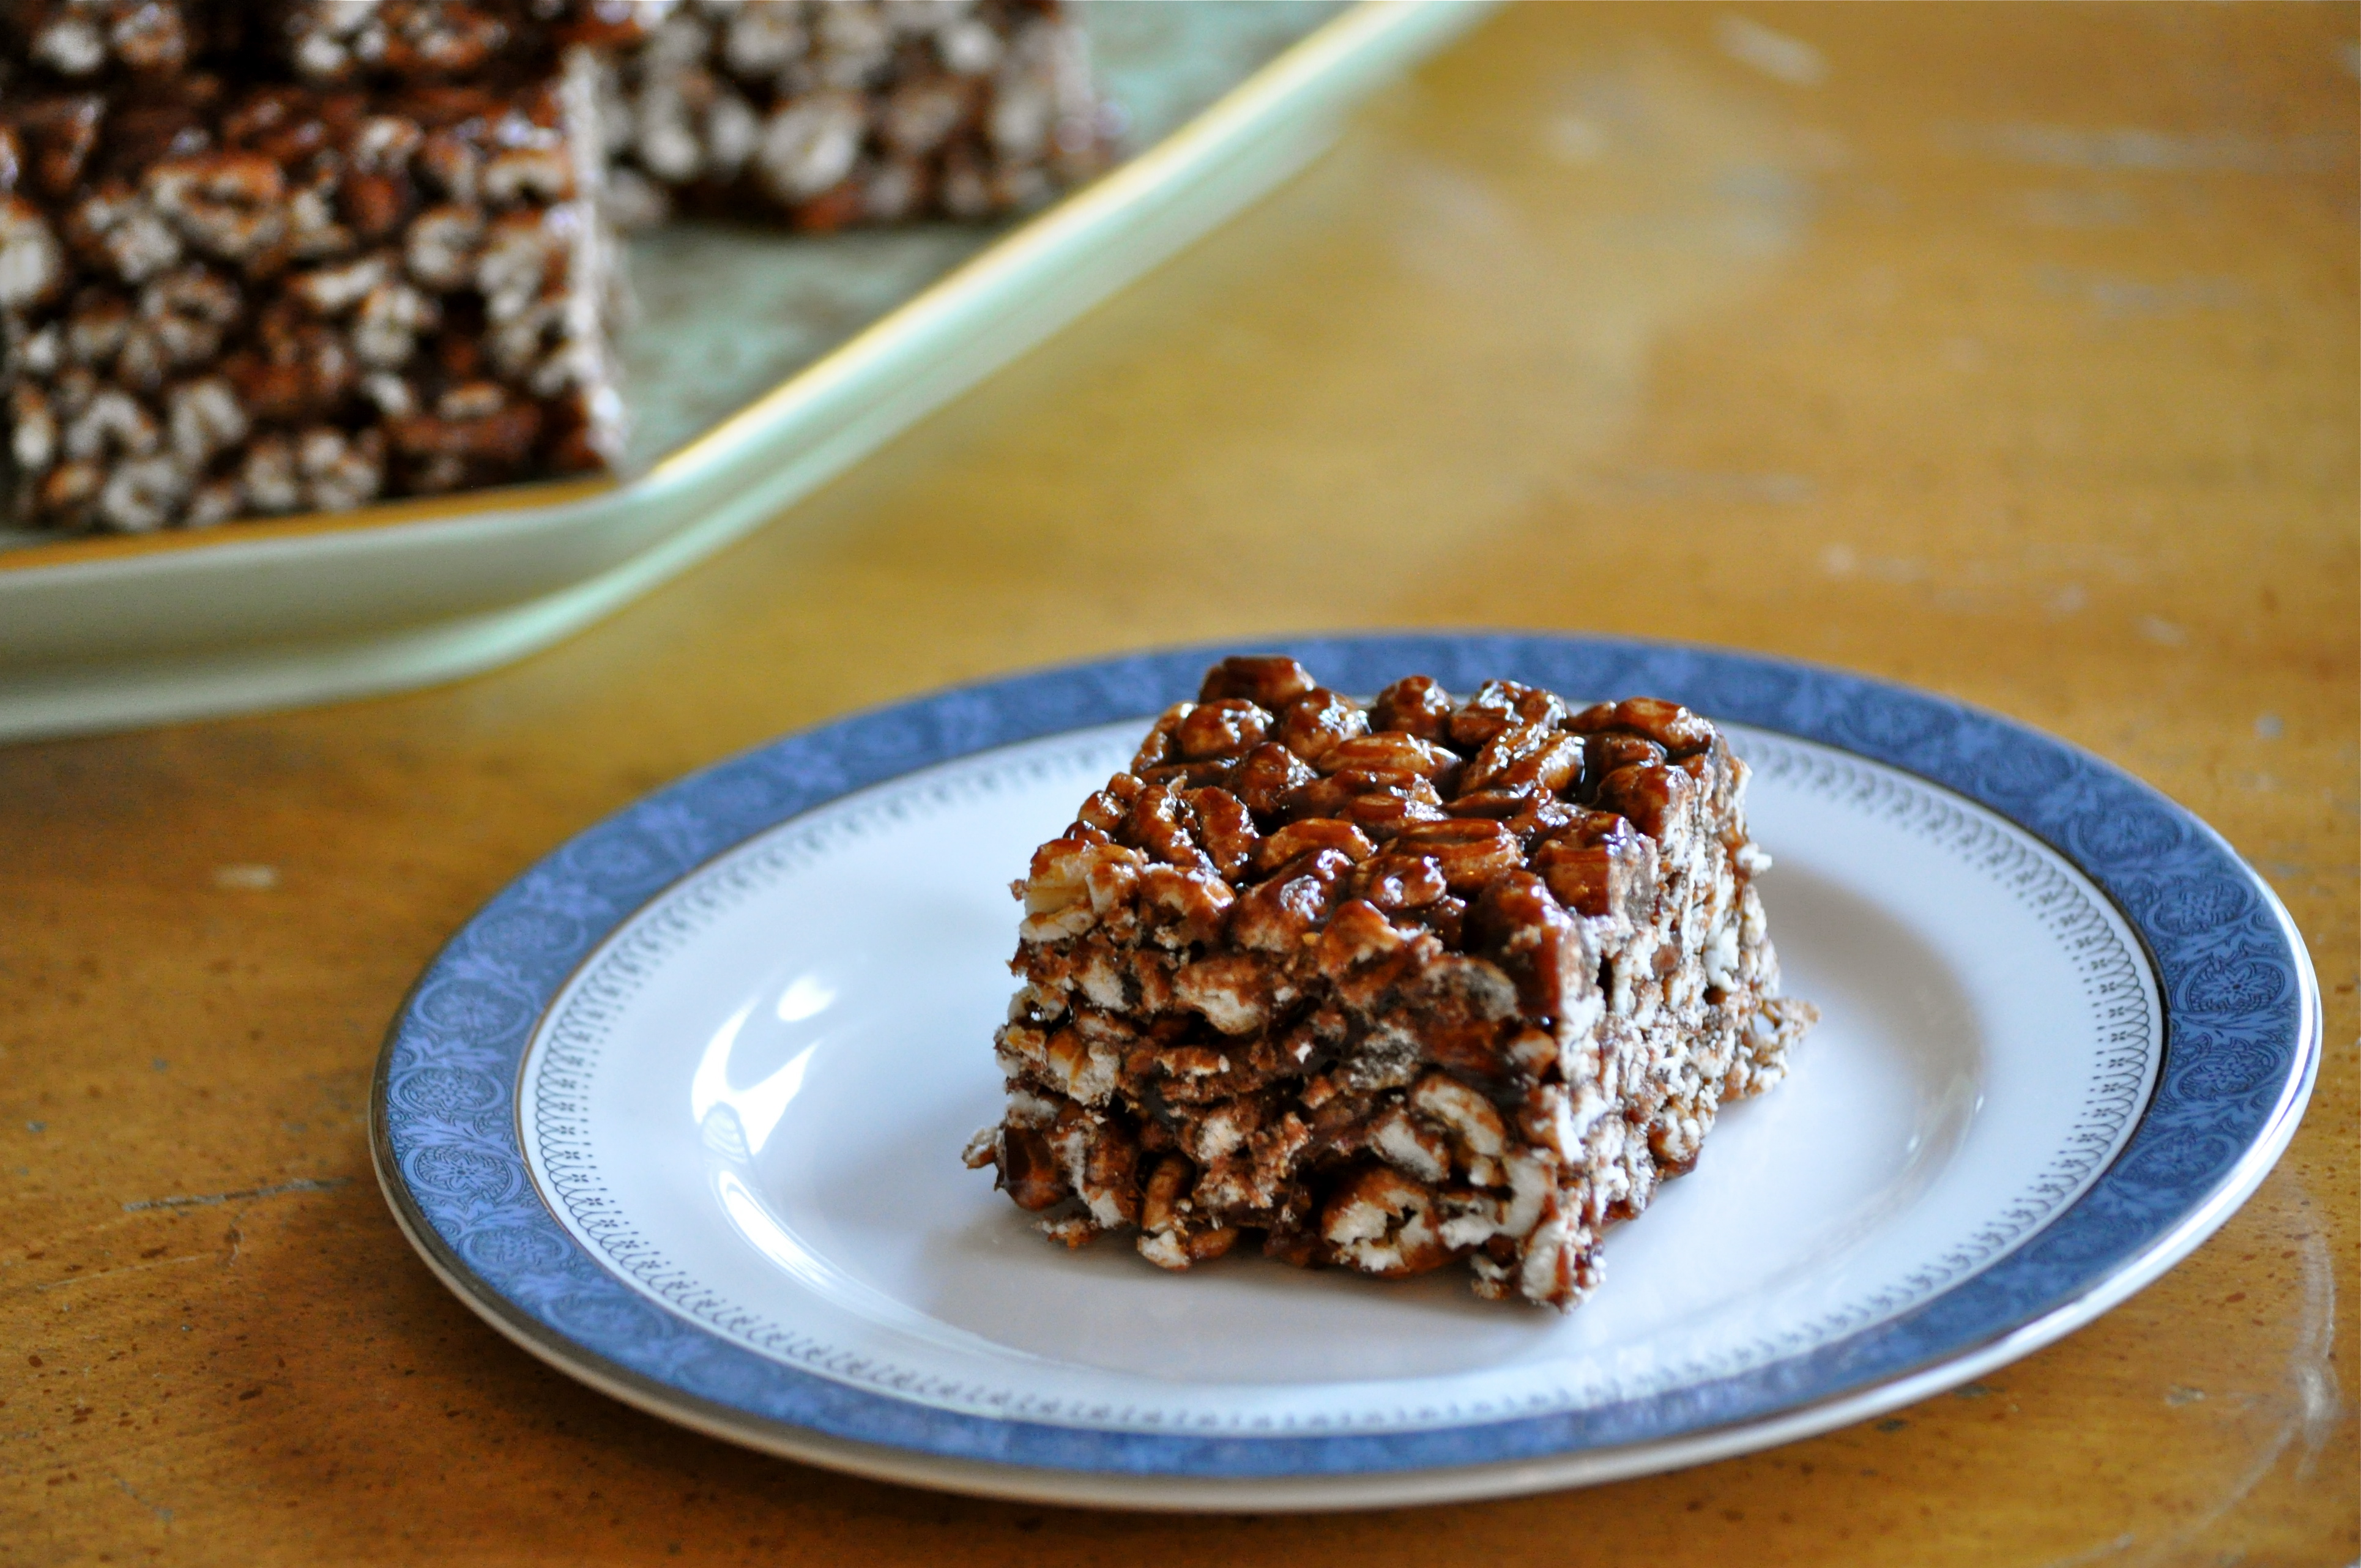
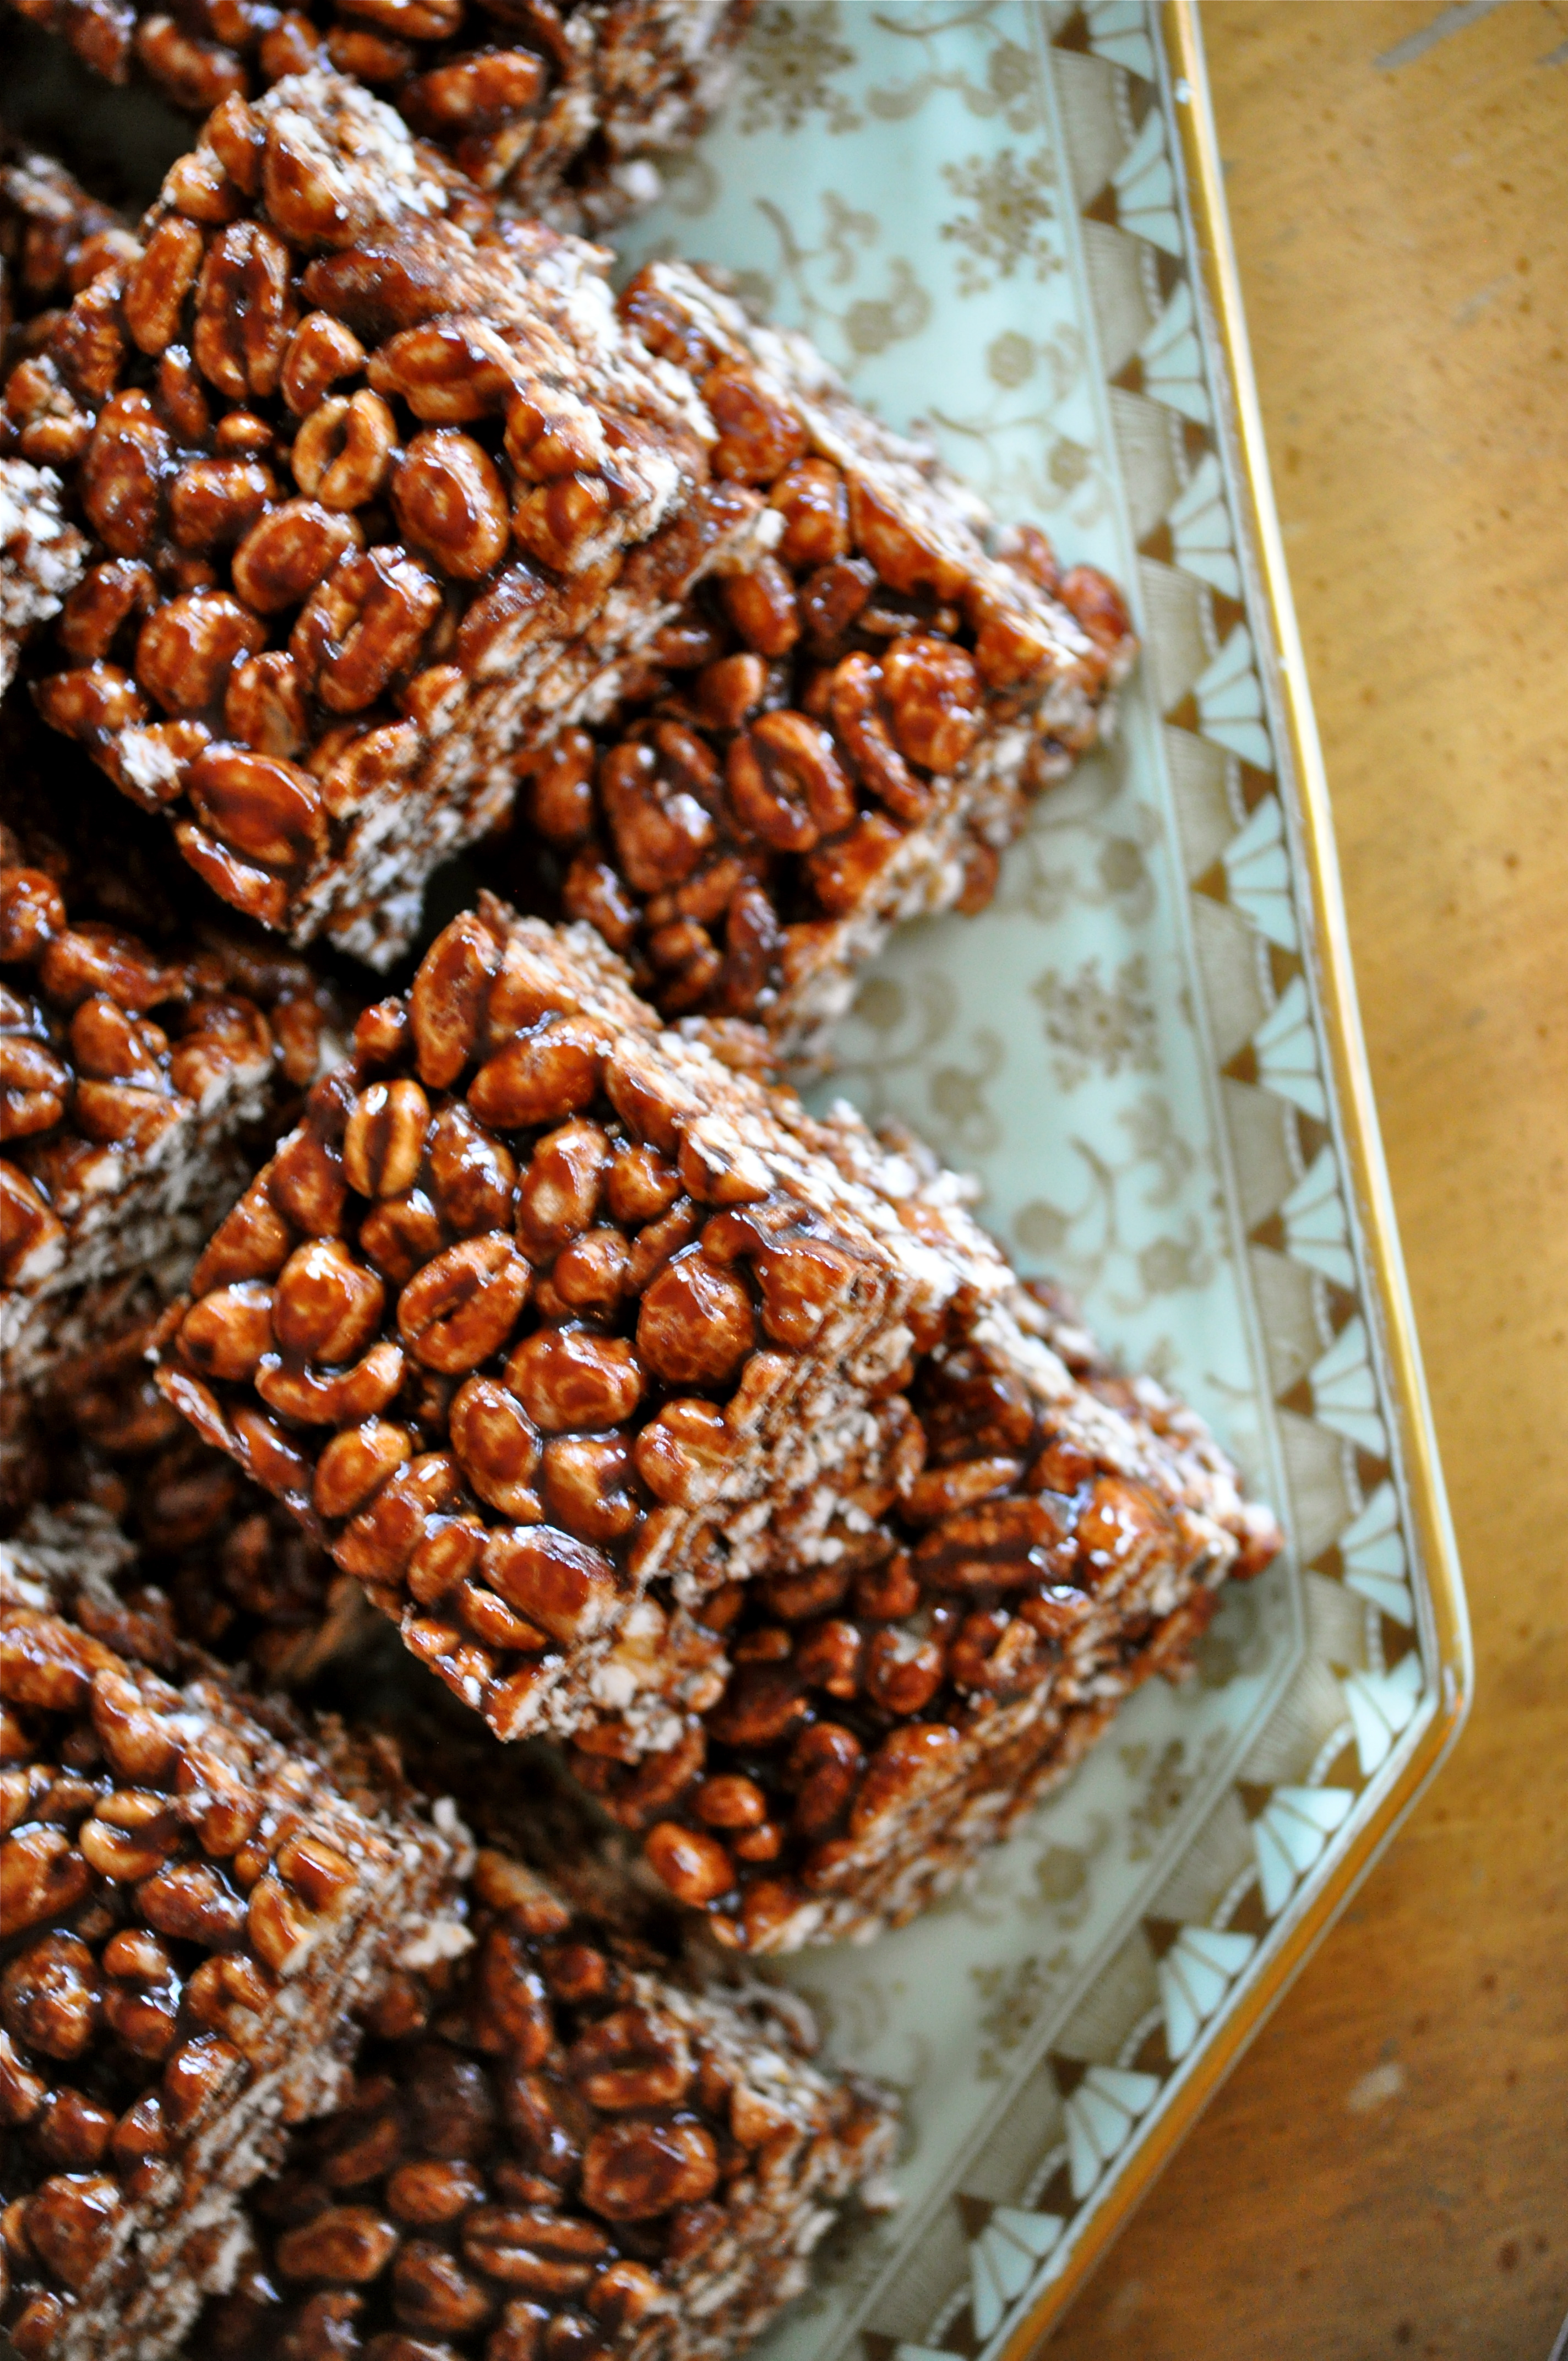
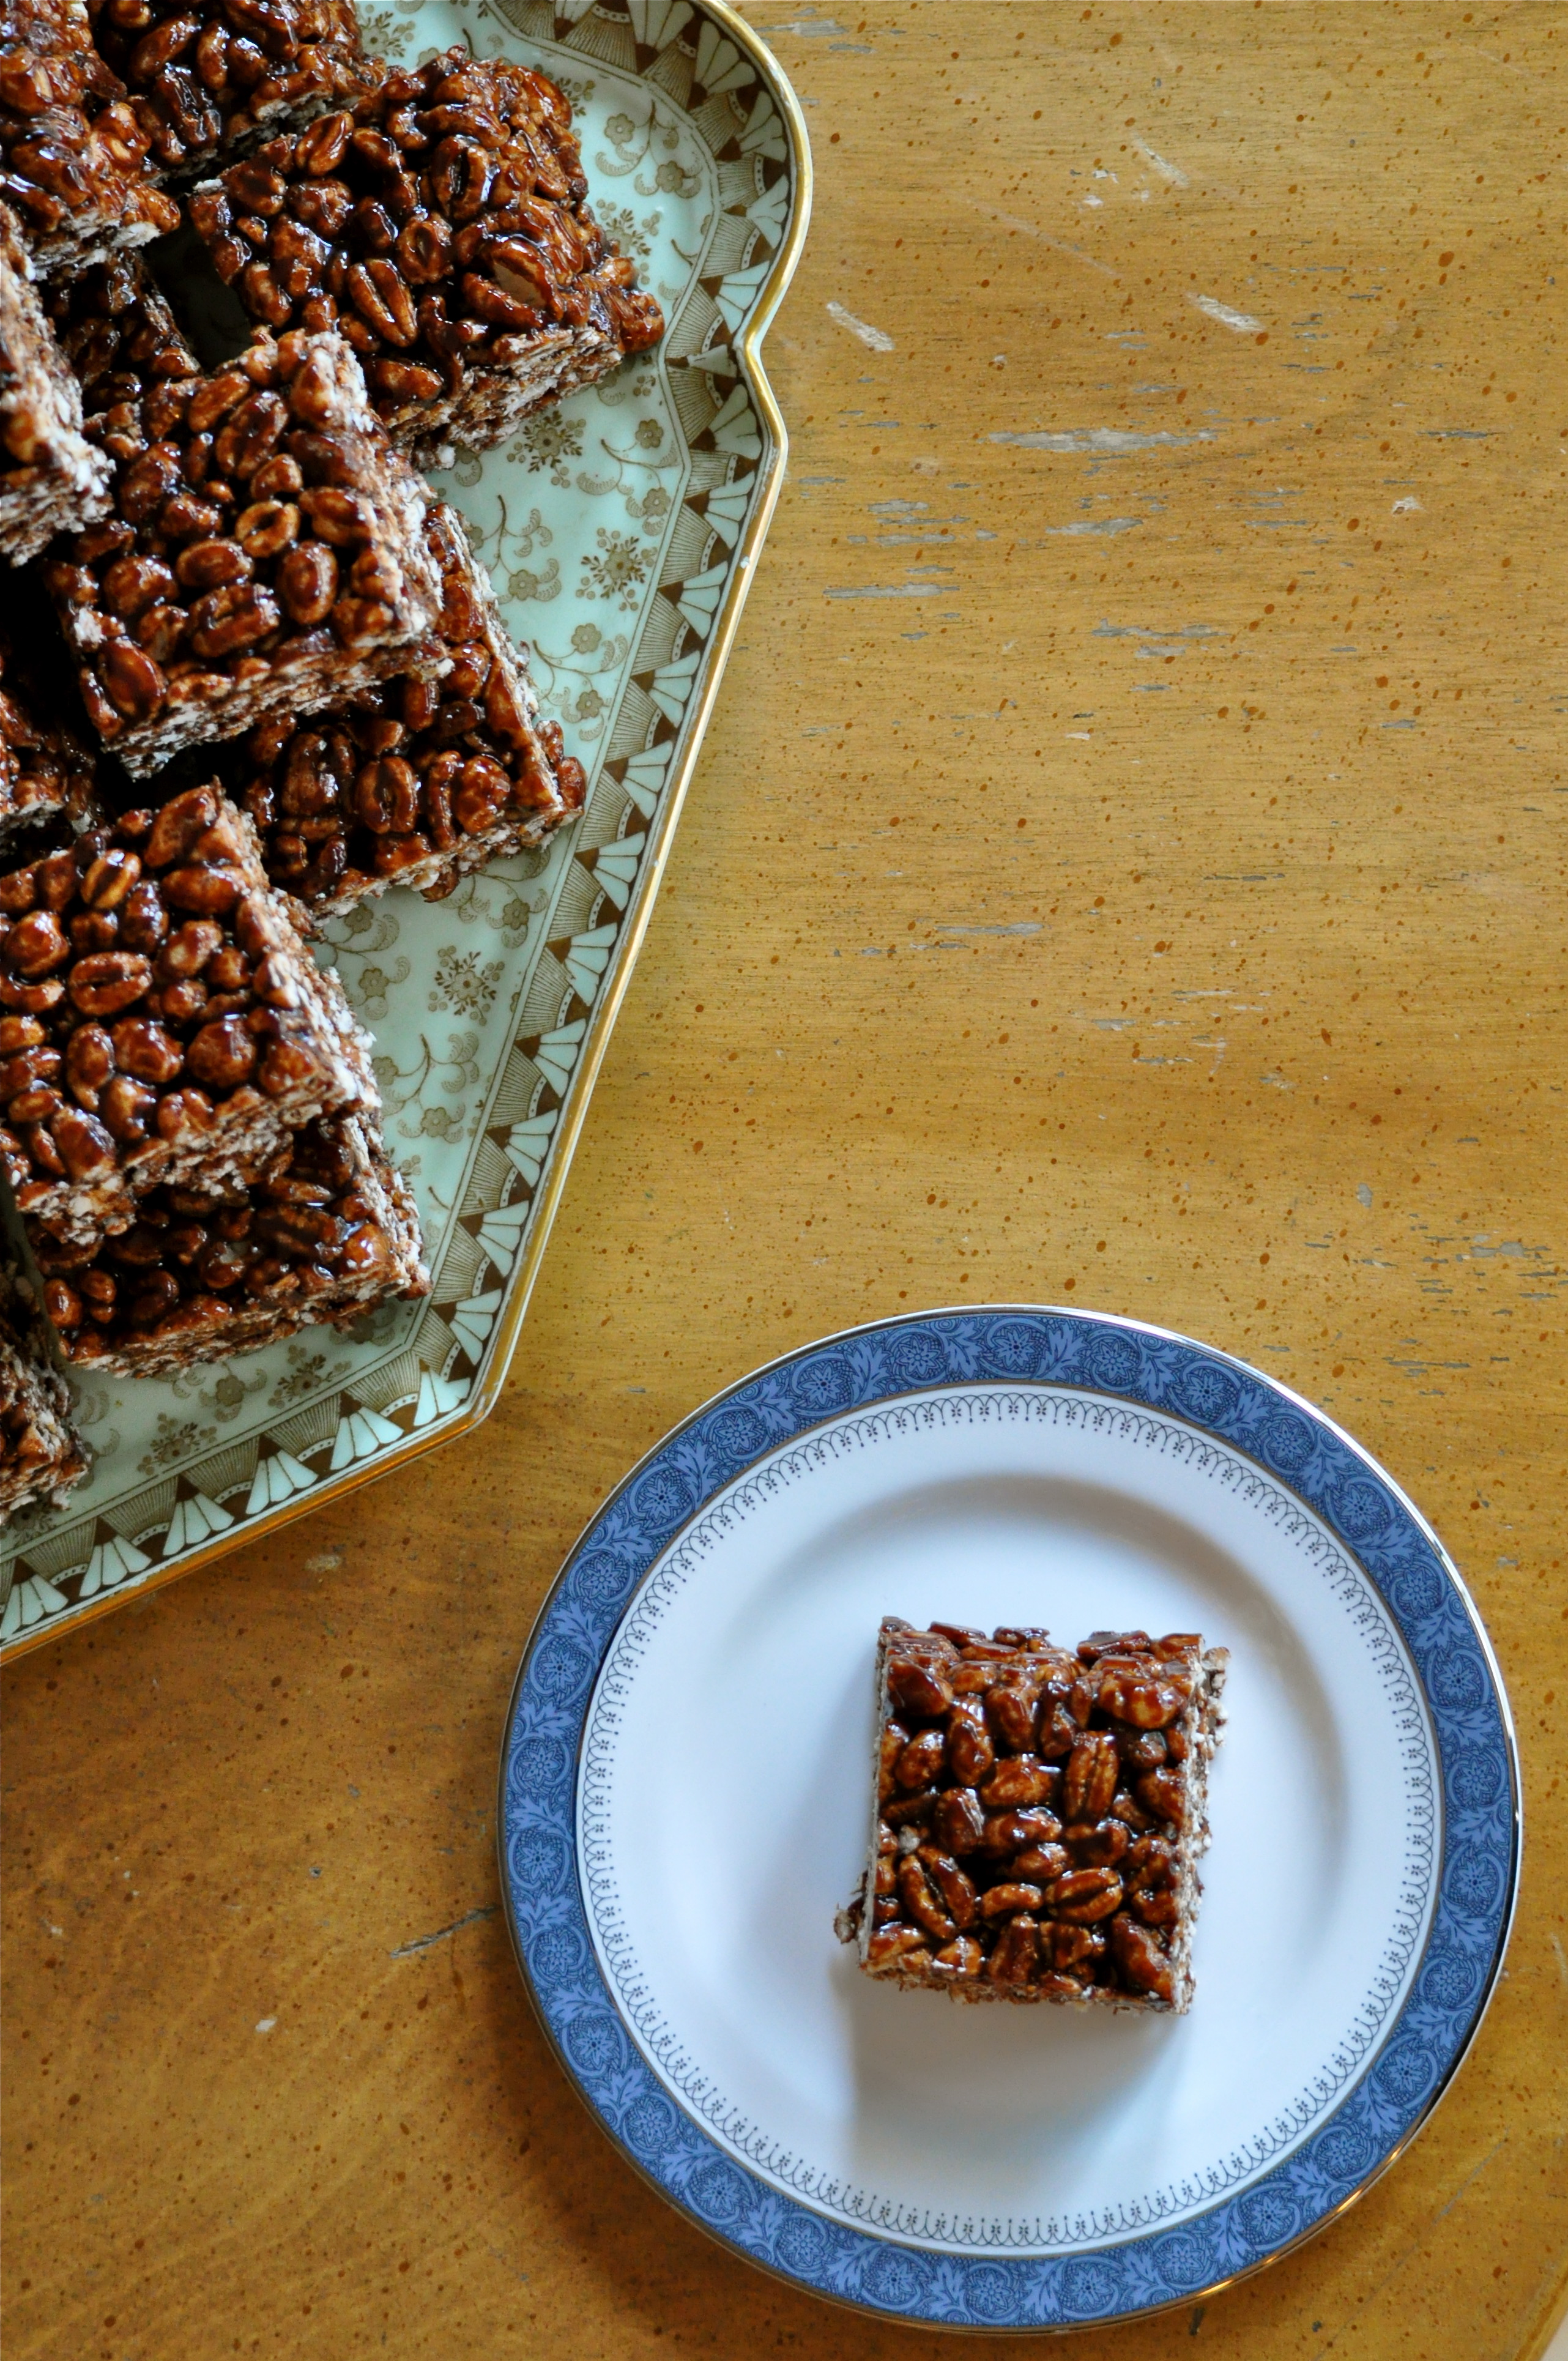
So today, after lying on the couch for what seemed like days watching What Not To Wear and Diners, Drive-Ins, and Dives (seriously, those are the only half decent shows on during daytime hours, and I am using the term half decent very loosely), I decided that my compromise would be to continue to lay on the couch, write a blog post, and finally share this recipe with you. These puffed wheat squares have been on my list to share with you since I first started this blog, nearly three years ago (eep, three years!). I make them quite regularly, but have never taken the time to photograph them. One of the reasons being that they tend to get consumed rather quickly. However, I churned two batches of these squares out of my kitchen a couple of weeks ago for my Dad’s epic 60th birthday celebration, and took a few minutes to snap a few shots. And every last square was gone less than an hour after the platter was set out to be ravaged by the party-goers.

Puffed Wheat Squares | Once Upon a Recipe

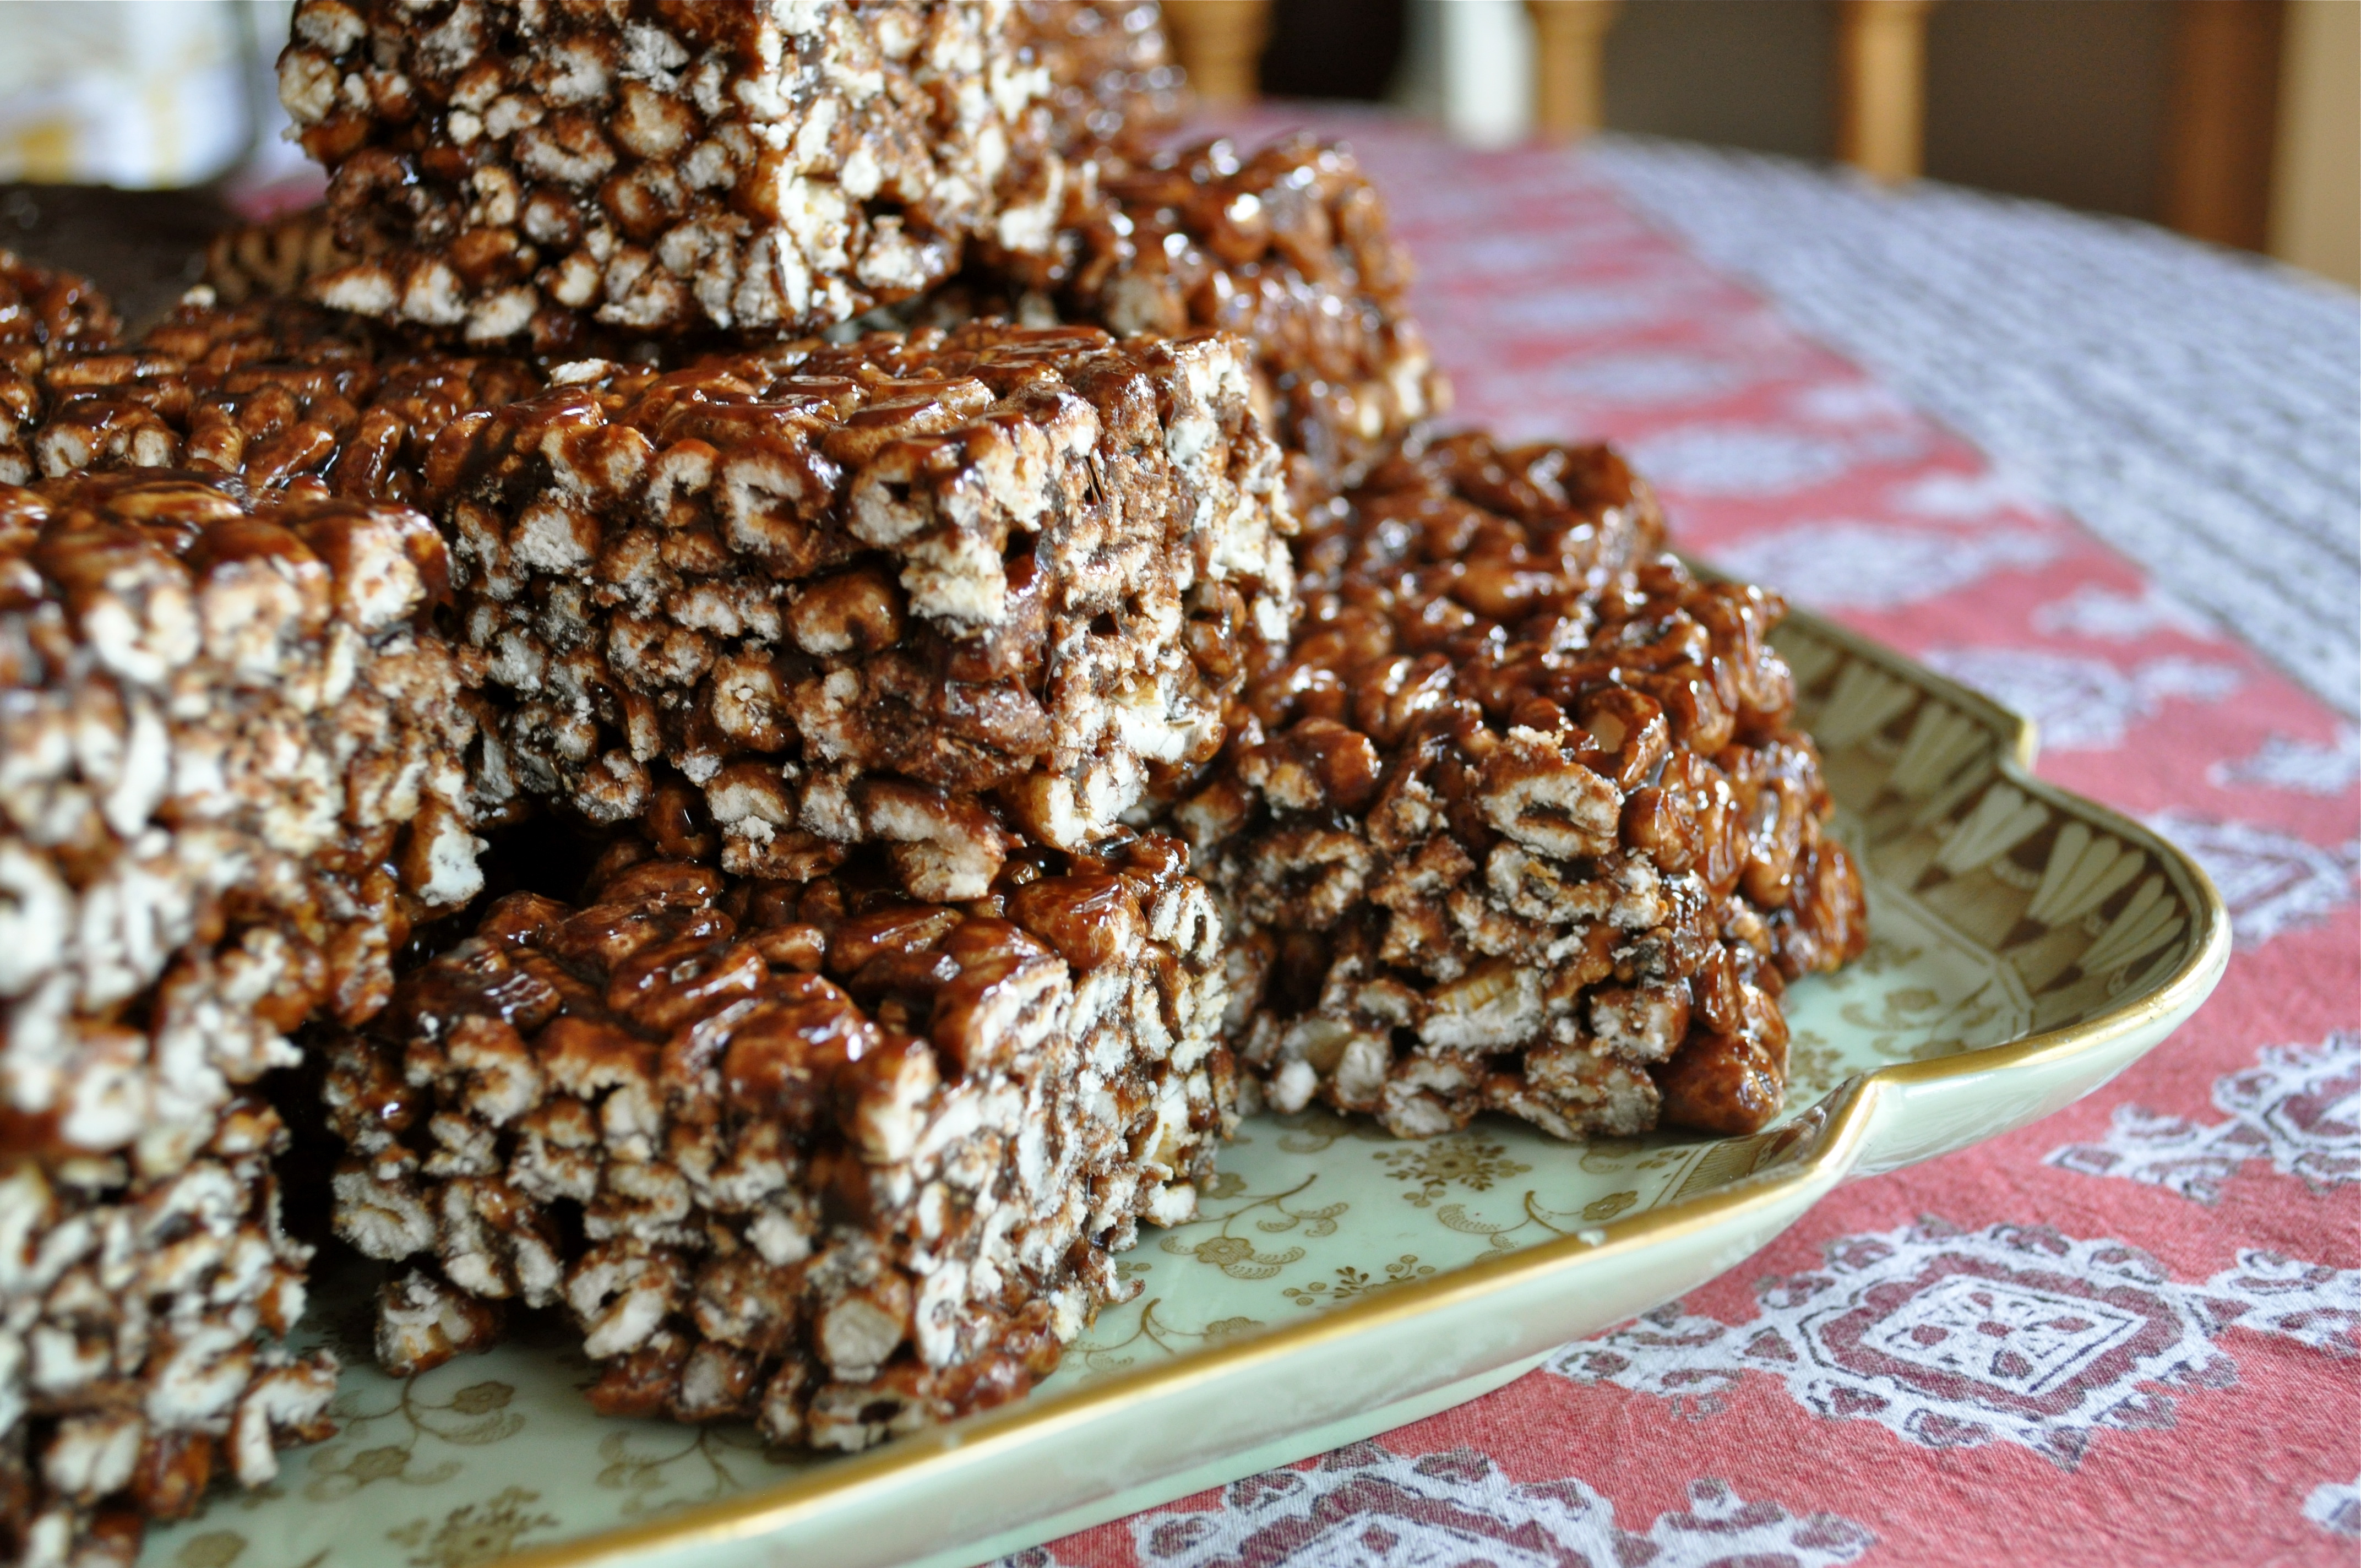
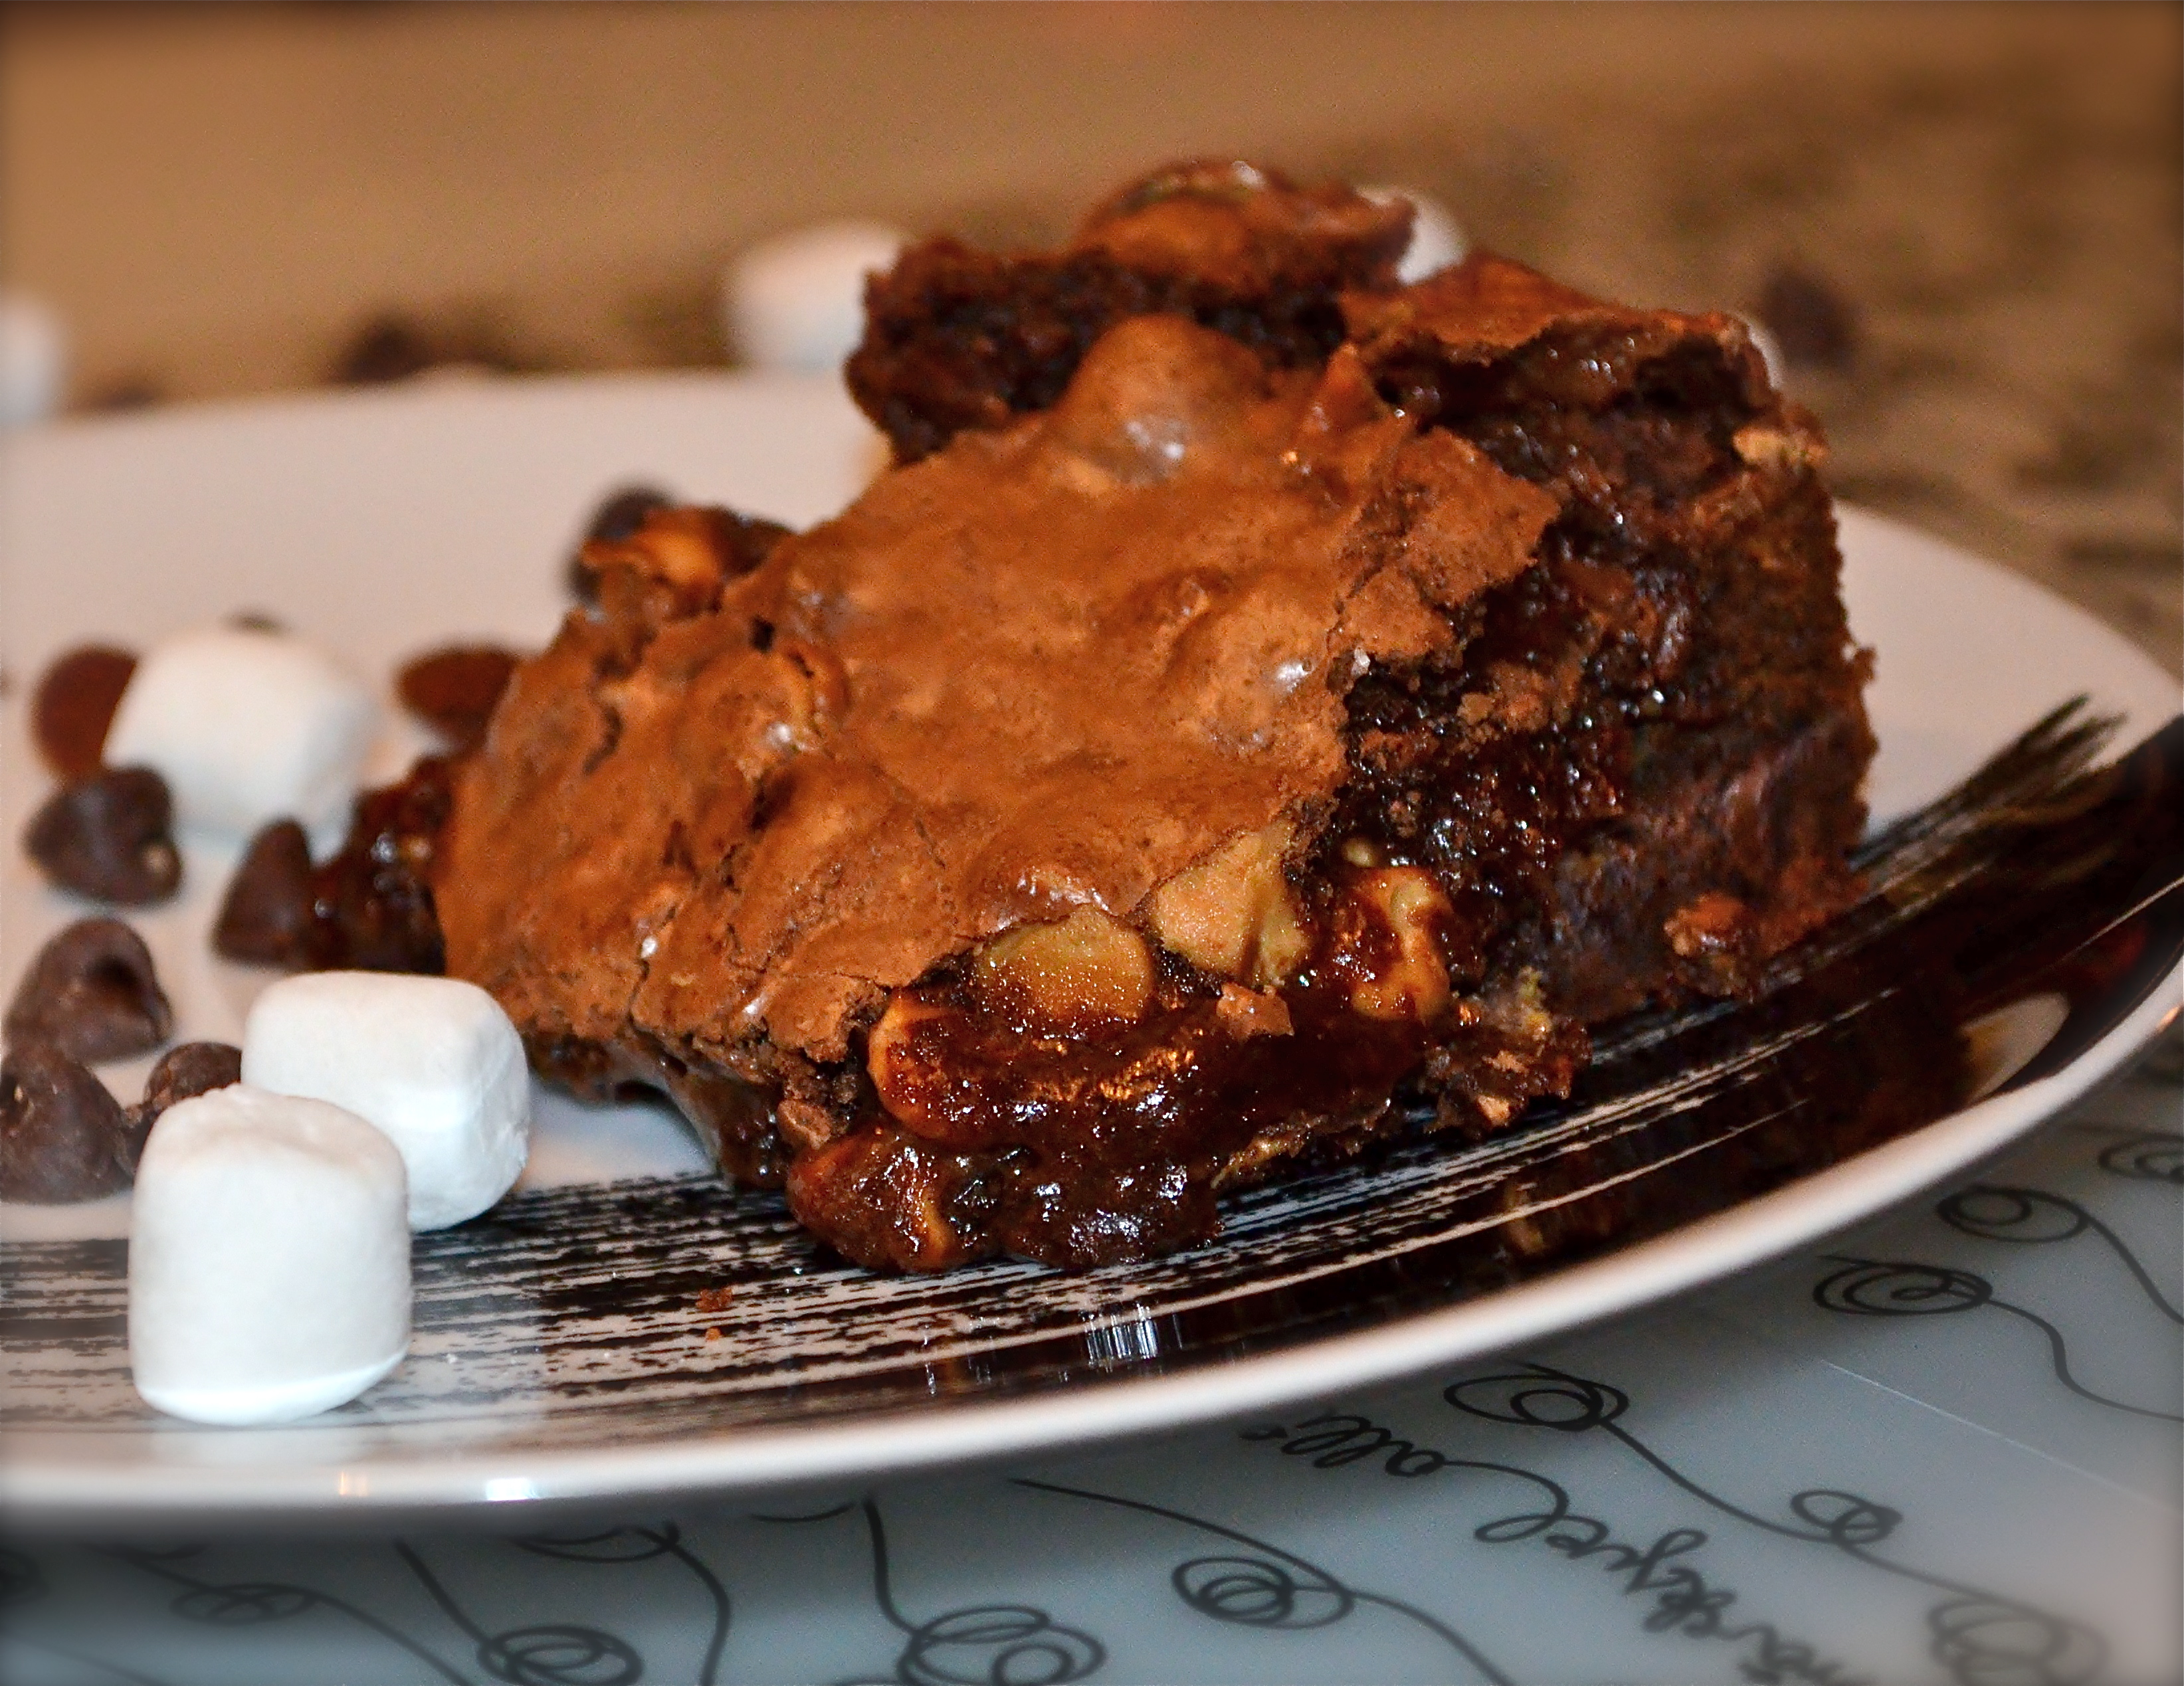
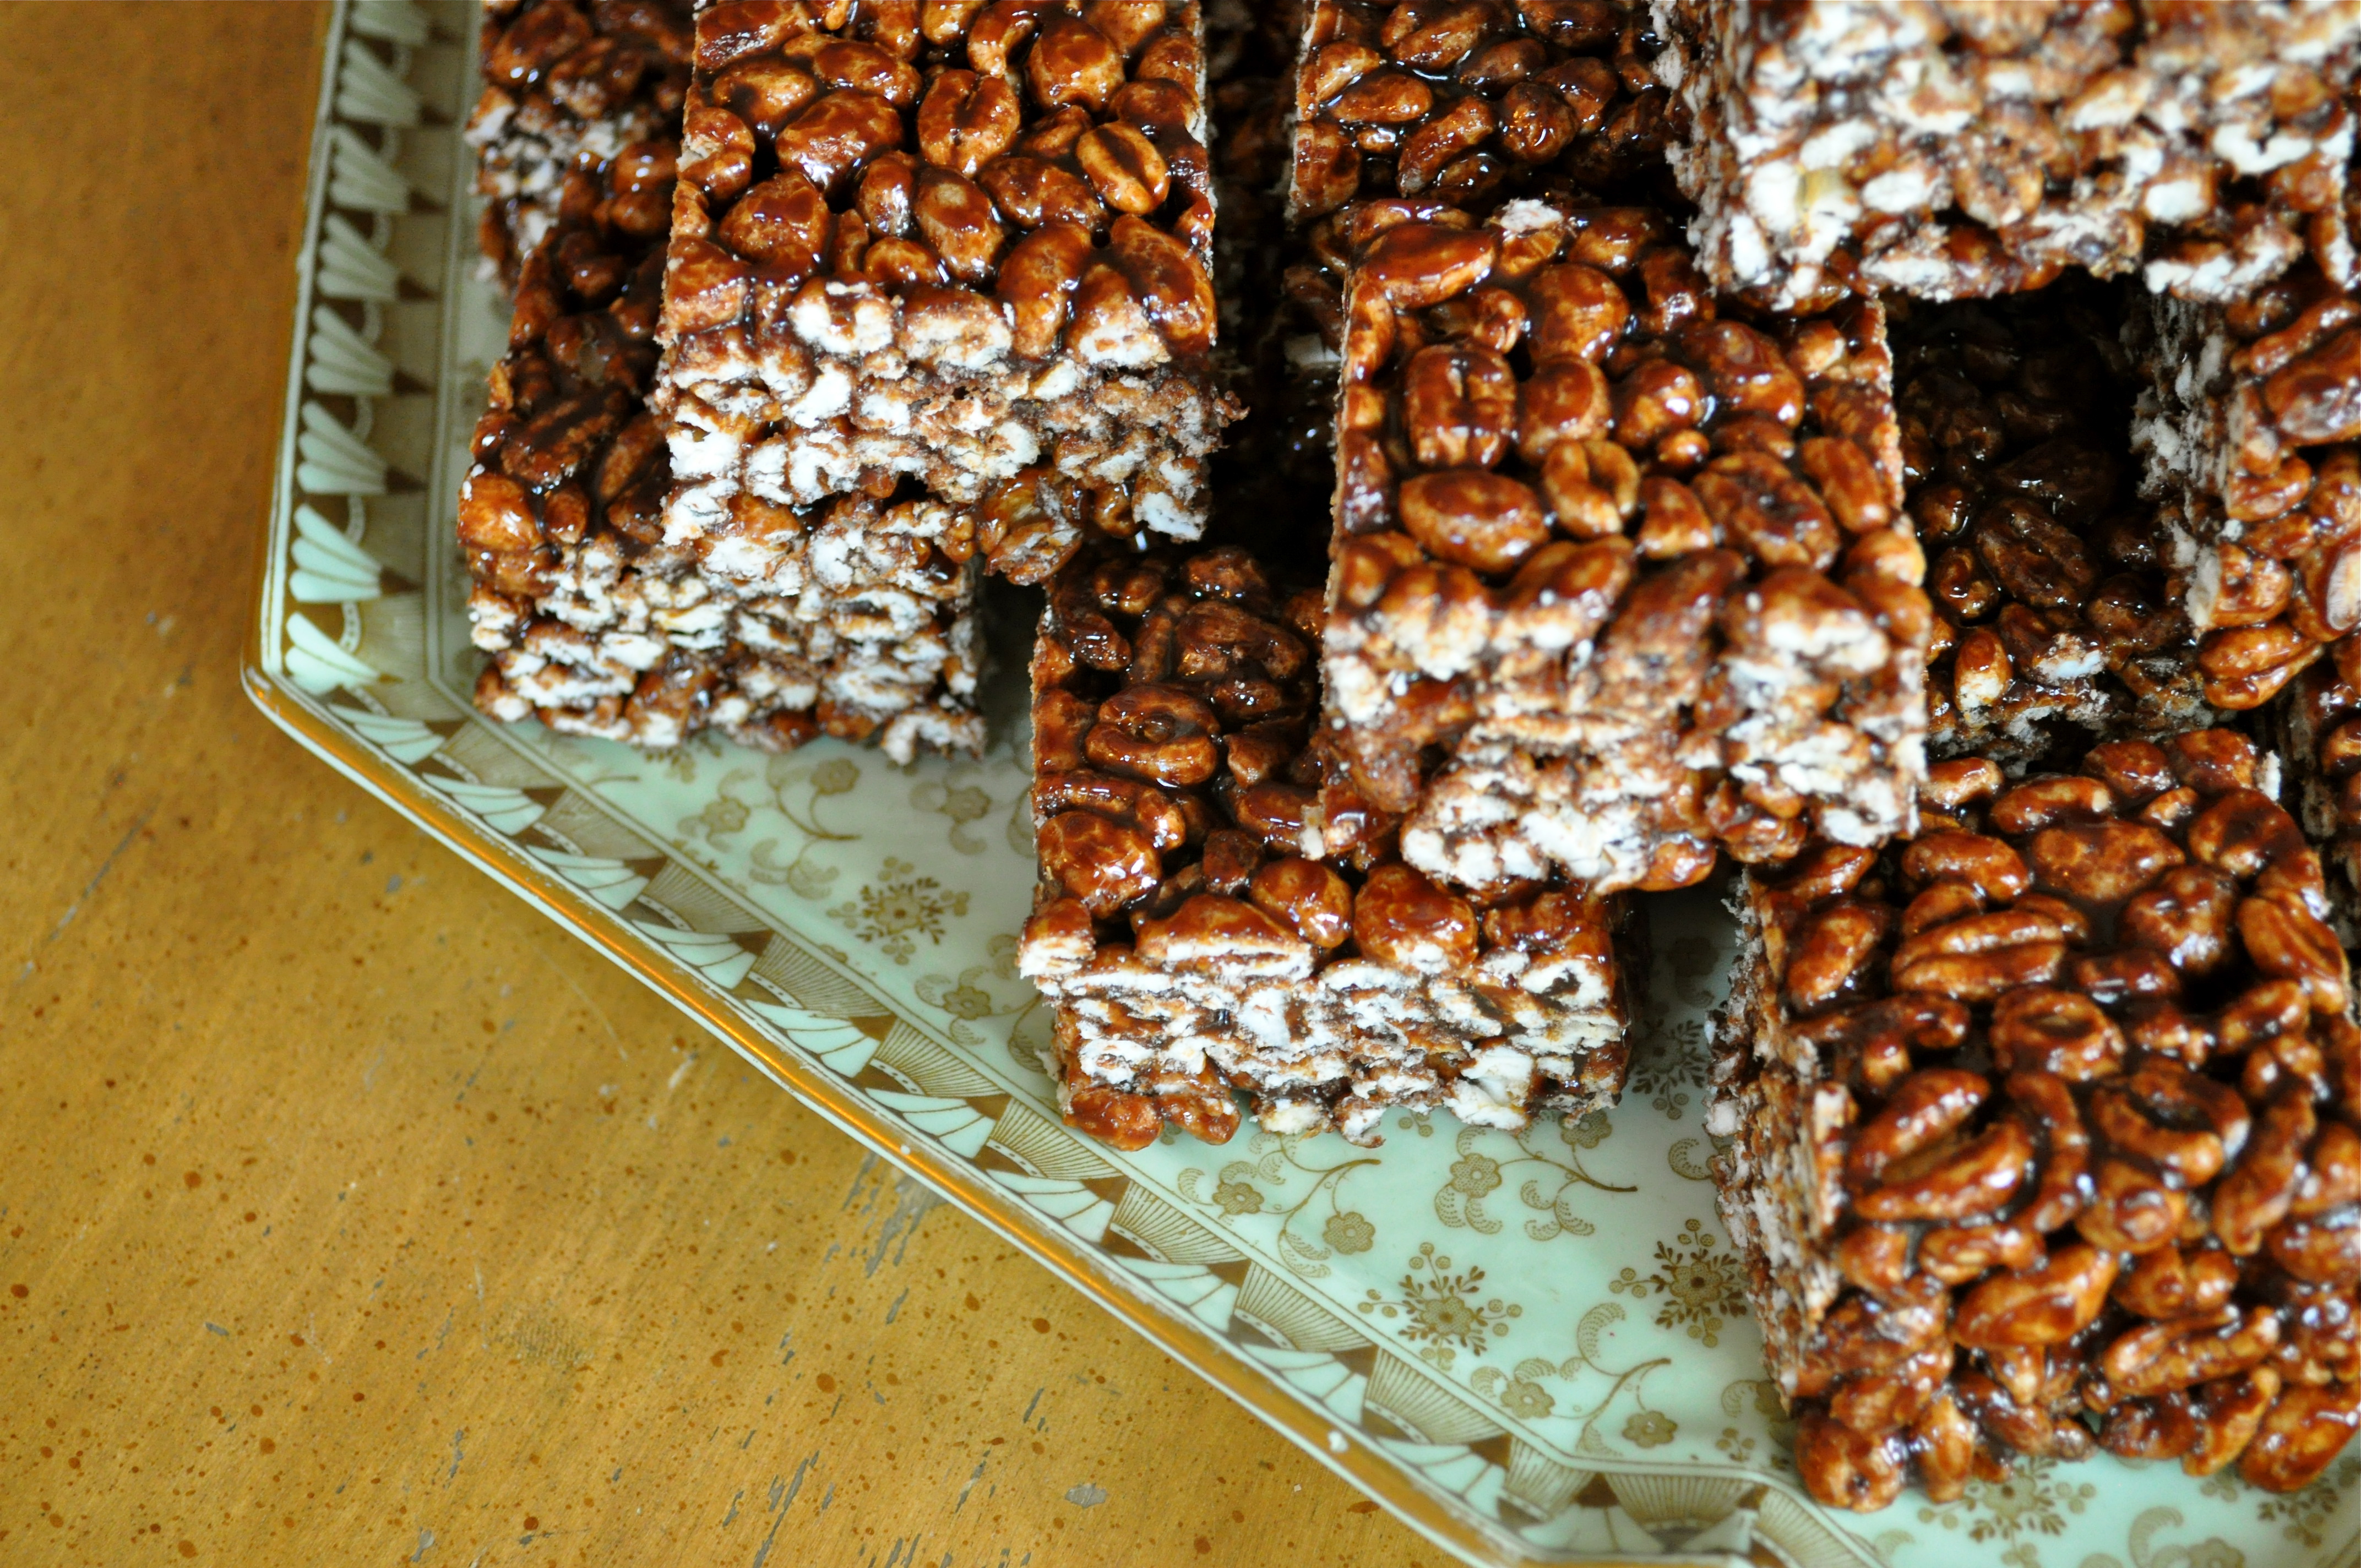
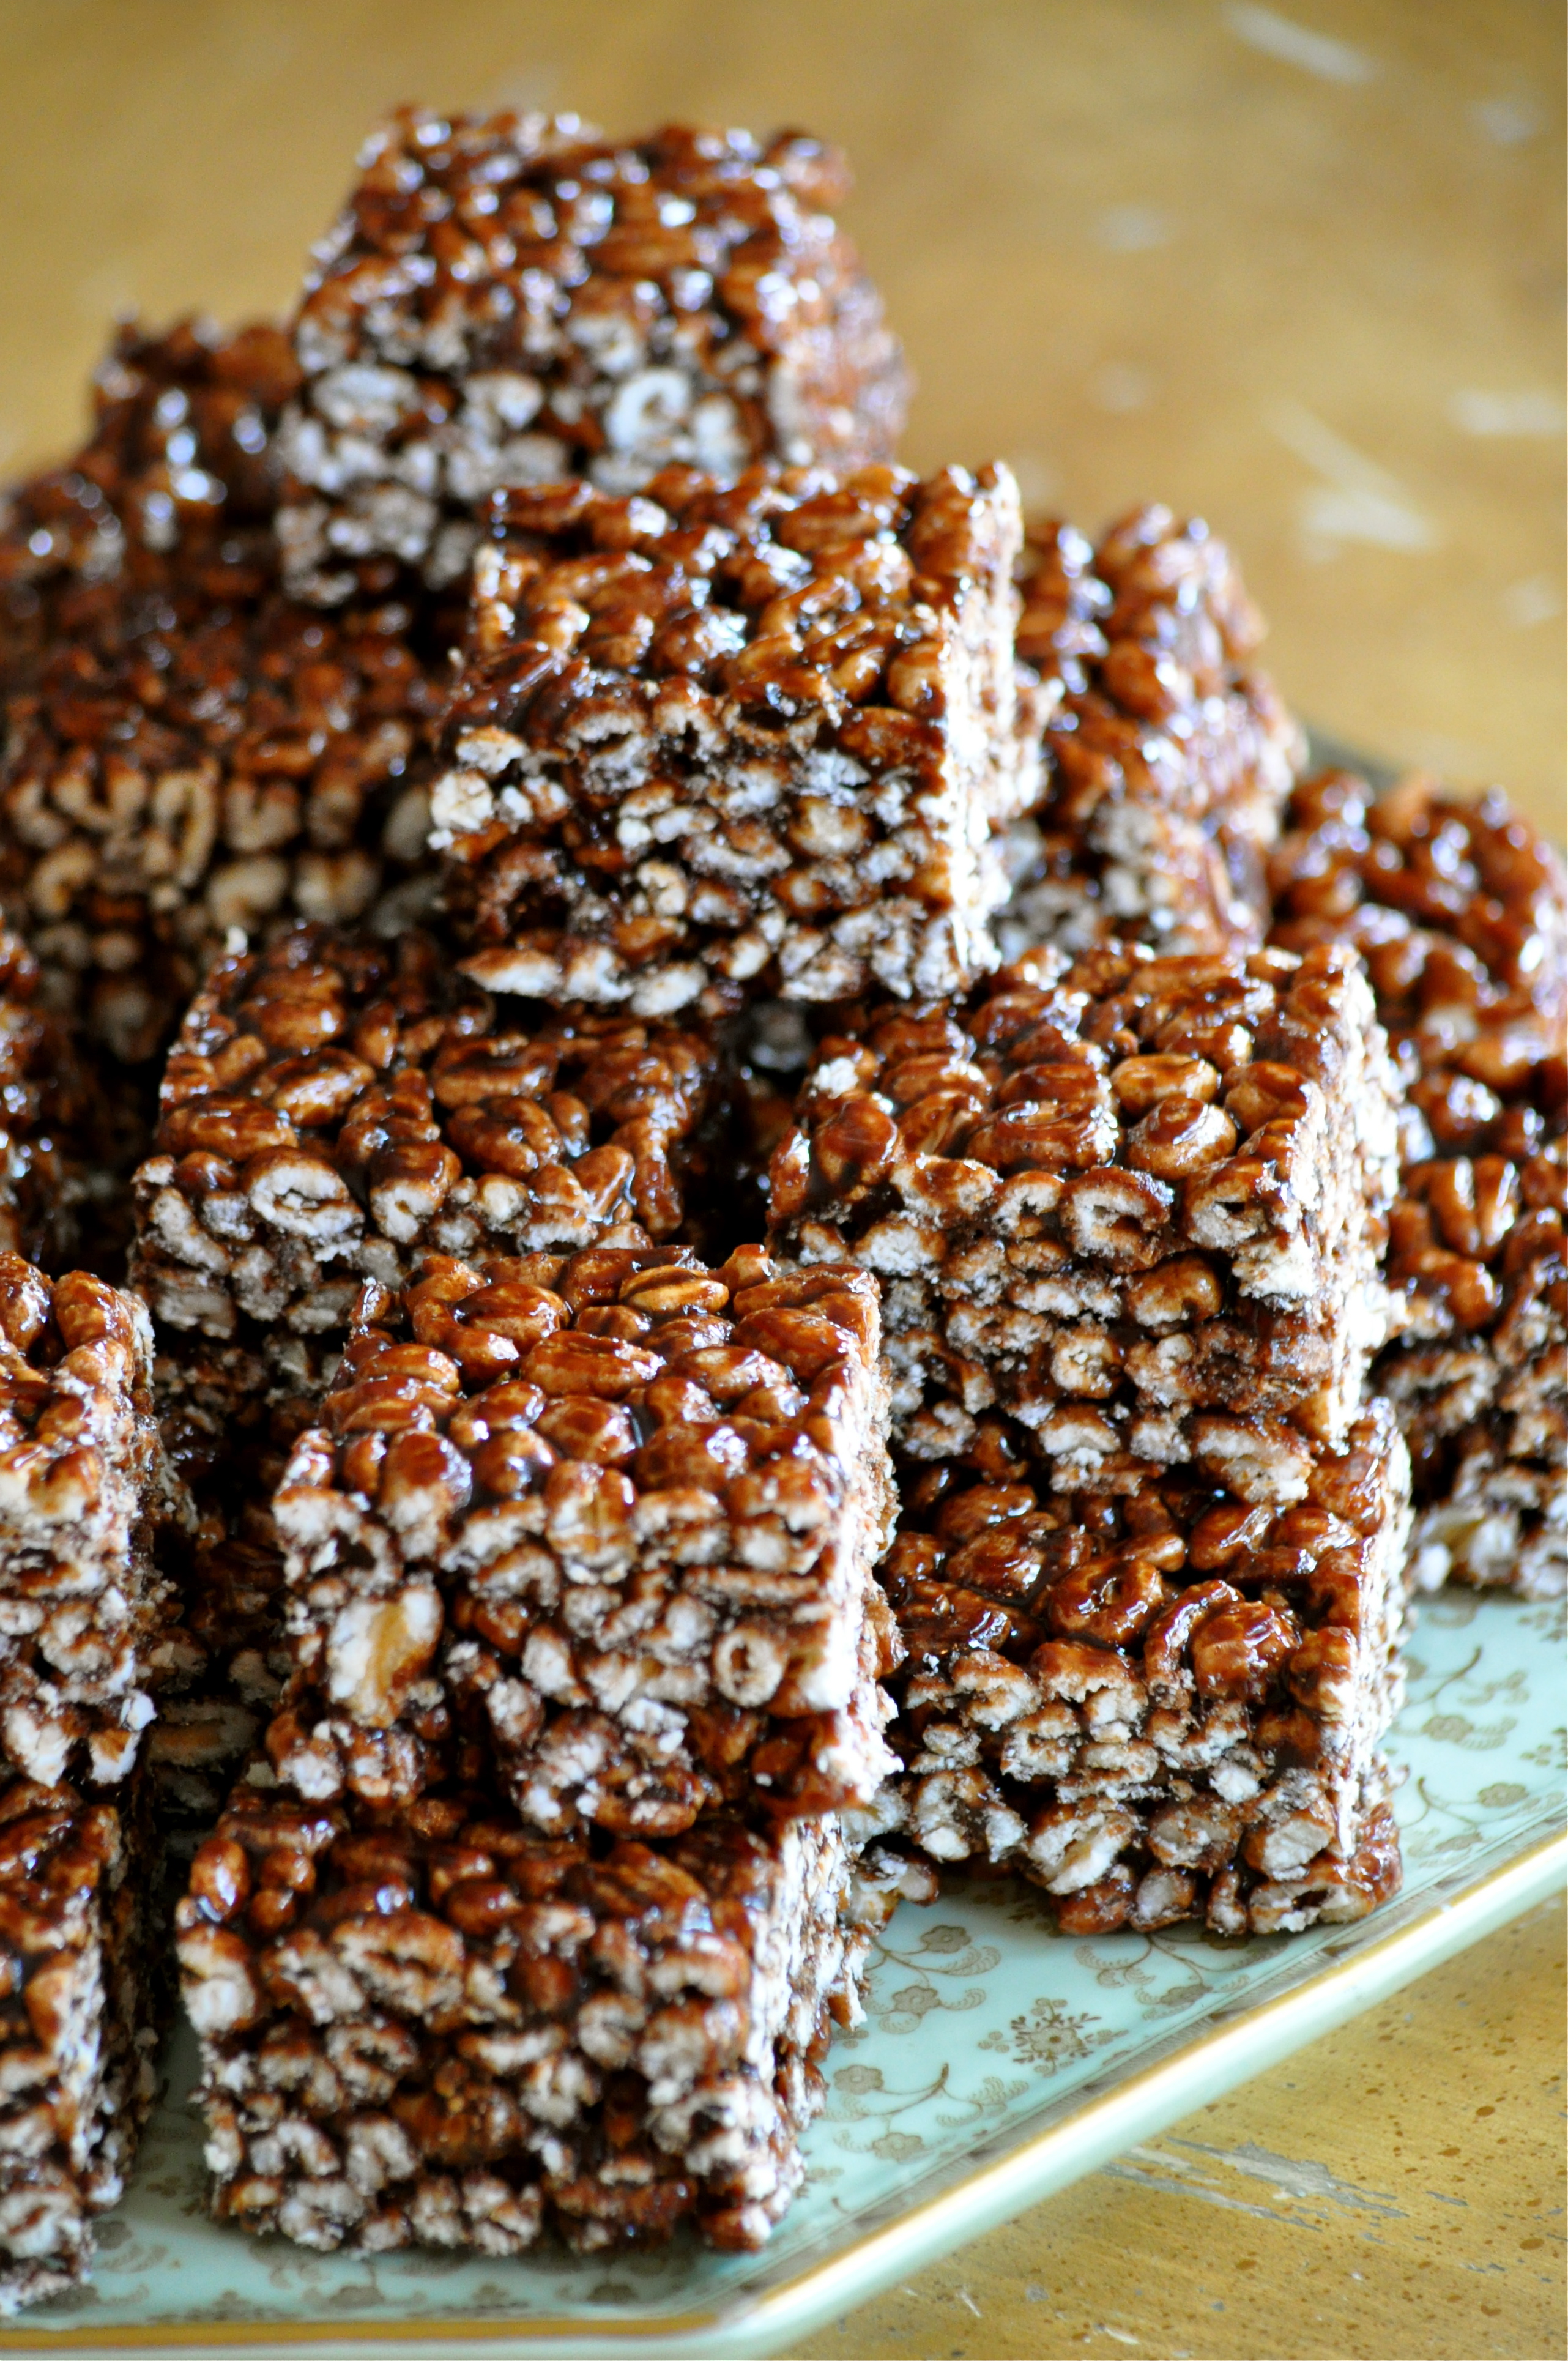
These squares are chocolatey, sticky, and wonderfully chewy. The recipe comes from one of my aunties, and it is the best puffed wheat square recipe in the history of the land. Make no mistake – not all puffed wheat squares are created equal. Of paramount importance is the chocolately goodness to puffed wheat ratio. AKA. The chocolately goodness must generously coat each morsel of puffed wheat. Let’s be real, these squares aren’t a healthy treat. But they are damn good and ridiculously addictive. Which means you should probably make some immediately.

Puffed Wheat Squares | Once Upon a Recipe   Puffed Wheat Squares | Once Upon a Recipe

Puffed Wheat Squares

A family favorite! Makes about 24 squares, depending on the size. Perfect for parties and BBQ’s!

½ cup butter

1 cup corn syrup

1 cup white sugar

1/3 cup brown sugar

6 heaping TBSP. cocoa powder

1 tsp. vanilla

10 cups puffed wheat

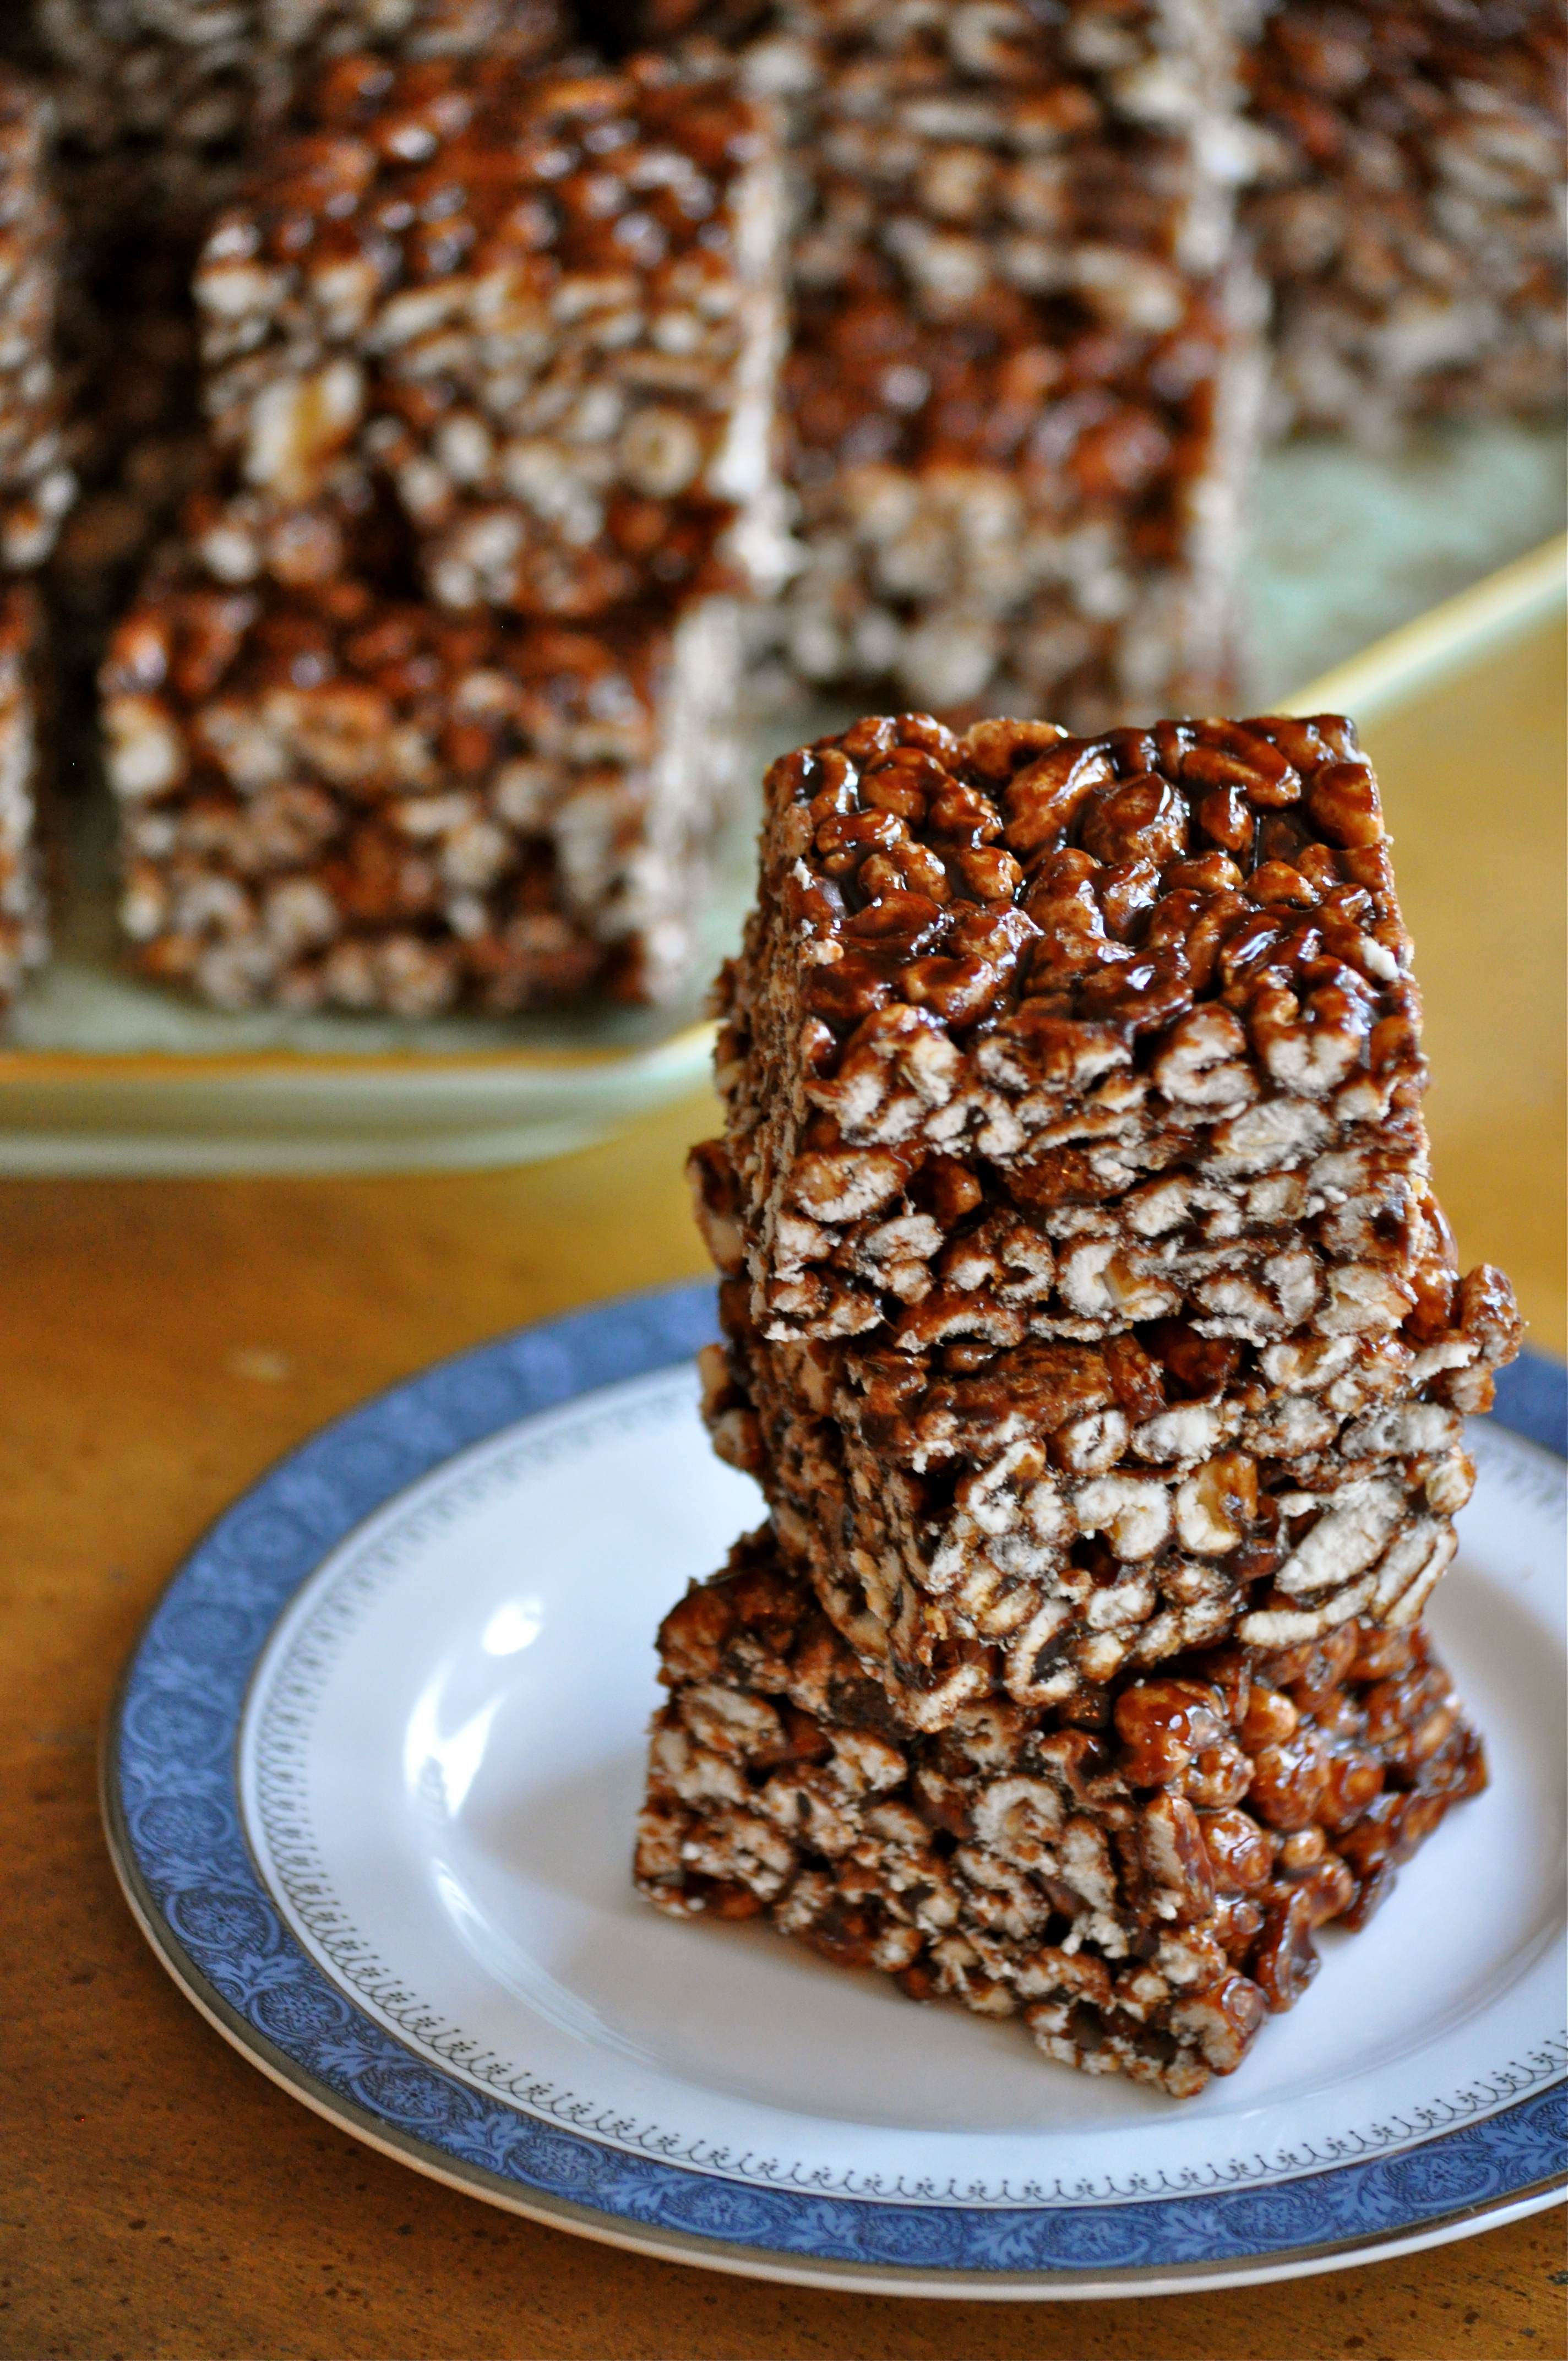
Measure the puffed wheat into a large mixing bowl and set aside. Melt the butter with the corn syrup, sugars, and cocoa powder in a large saucepan over medium heat. Bring to a boil and simmer for 1 minute. Remove from heat, add the vanilla, and stir well. Pour the mixture over the puffed wheat and mix until the puffed wheat is evenly coated. Press into a 9×13-inch pan that has been lightly sprayed with non-stick spray. Allow to cool and then cut into squares. Store in an airtight container to maintain ooey-gooey freshness!

Puffed Wheat Squares | Once Upon a Recipe

For Todd (and Rufus) | Peach Cinnamon Swirl Ice Cream

Cinnamon Peach Swirl Ice Cream | Once Upon a Recipe

This post is for Todd. Todd who, you ask? Well, I wish I could tell you.

You see friends, I was in a car accident a couple of weeks ago. I will spare you the details, but as any of you who have also experienced the frightening event that is a car accident can attest, a car accident has the ability to shake you up a bit. This wasn’t a simple fender bender, this was a crash that killed my car. (My car’s name was Rufus, and may he rest in peace). Thankfully, no one was seriously injured and both myself and the other driver walked away relatively unharmed. And at the end of the day, that is all that matters. A car is a car, and cars can be replaced.

Peach Cinnamon Swirl Ice Cream | Once Upon a Recipe

Todd was the gentleman who stopped and helped me at the scene of the accident. He arrived on the scene about a minute after it happened – after numerous drivers who would have witnessed the accident zoomed on by. Todd called 9-1-1 as I had become a bit useless due to shock. Todd held my pup, Bella for me while I spoke to the police officers and medical personnel. (Bella had been in the car with me, as we were on our way to the dog park. Fortunately, she was not hurt either.). Todd called his wife and told her he was going to be late for dinner. When I protested and begged him to carry on with his evening, he refused. Todd told me that he would not leave until he knew someone was there with me and that everyone was ok. Todd sat with me on the side of the busy freeway for two hours. Todd told me that everything would be ok.

Peach Cinnamon Swirl Ice Cream | Once Upon a Recipe

When my mom arrived, and Todd finally succumbed to my pleas for him to go home to his wife and eat (a now cold) dinner, I was so focused on thanking him profusely for his time, his kindness, his compassion – I failed to get his last name. And wouldn’t you know it, there are a lot of Todds out there. I have been unable to locate this particular gem of a Todd, but if I could, I would tell him – in a more coherent and calm manner than I did that evening – just how thankful I am that he was driving down the road that day and took the time to stop to help me.

Friends, it’s true when they say that the little things in life are what count. And for me, this complete stranger who stopped to help a very panicked girl and her dog – he counts. And I can promise that the next time I find myself in a situation where helping someone out might inconvenience me, even for a couple of minutes (nevermind hours), I will remember Todd. And I will pay his kindness forward.

Peach Cinnamon Swirl Ice Cream | Once Upon a Recipe

And to my dear Rufus (my wonderful little blue Mazda 3) – thank you for saving me. You done good.

Peach Cinnamon Swirl Ice Cream | Once Upon a Recipe

This ice cream is nothing short of amazing. I have read many wonderful things about Jeni’s Splendid Ice Cream, but unfortunately Jeni’s ice creams are not available here in Canada. So when I came across a recipe for Jeni’s ice cream base, I knew I had to try it. The recipe yields a rich and creamy ice cream, and I can’t wait to experiment with different flavor combinations. But for my first attempt, I decided to pair it with one of my favorite summer fruits – peaches! The final result tastes just like peach pie a la mode, minus the pastry part. I’m tempted to try this recipe again with pie crust cookie chunks! In any case, the long and short of it is that this is a perfect summer ice cream recipe.

To Todd! And all of the other “Todds” out there – thank you.

Peach Cinnamon Swirl Ice Cream | Once Upon a Recipe

Peach Cinnamon Swirl Ice Cream (ice cream base from saveur.com by Jeni Britton, and peach cinnamon swirl adapted from A Cozy Kitchen)

For the ice cream:

2 cups whole milk
4 tsp. cornstarch
1 1/4 cups heavy cream
2/3 cup sugar
2 tbsp. light corn syrup
1/4 tsp. salt
3 tbsp. cream cheese, softened

Combine 1/4 cup of the milk and the cornstarch in a small bowl and mix well; set slurry aside. In a large saucepan, whisk together the remaining milk along with the cream, sugar, corn syrup, and salt. Bring the mixture to a boil over medium-high heat. Cook for 4 minutes, then add in the slurry. Return to a boil and cook, stirring, until thickened, for about 2 minutes. In a large bowl, combine the cream cheese with about 1/4 cup of the hot milk mixture and whisk until smooth, then whisk in the remaining milk mixture. Cover the bowl and refrigerate until the mixture is chilled, or overnight. Churn the ice cream in your ice cream maker according to manufacturer’s instructions (mine took about 25 minutes).

For the peach cinnamon swirl:

4 peaches (about 2 pounds)
1/4 cup white granulated sugar
1 tsp. cinnamon + a pinch of salt

Bring a large pot of water to boil. Add in the peaches and blanch for 1-2 minutes. Remove the peaches from the water and allow to cool enough to handle. Remove the skins and pits and cut the peaches into bite-size pieces. Add the peaches, the sugar, and the cinnamon and salt to a saucepan and cook over medium heat for about 10-15 minutes, or until the peaches have broken down and the mixture is thick. Allow the mixture to cool to room temperature.

Layer the ice cream and peach mixture in a container. Cover with plastic wrap and allow the plastic to touch the ice cream – this will help prevent ice crystals from forming. Freeze for at least 2-4 hours. Scoop and enjoy!

Peach Cinnamon Swirl Ice Cream | Once Upon a Recipe

Have a lovely weekend! xo

Vegan and Deceivin’ | Vanilla Macadamia Nut Coffee Coconut Ice Cream

Vanilla Macadmia Nut Coffee Coconut Ice Cream | Once Upon a Recipe

Well ahoy there, friends! Pardon my absence – I have been without Internet access for the past while. Looonnnggg story. But tonight finds me stationed at a coffee shop, a ginormous green tea lemonade by my side, and free access to the Interwebs. Huzzah!

I have decided that I need to do this more often – not for the free Internet – but for the sake of quiet and the absence of distractions. It is nice to come to a place and just sit and write, without leaping up every five minutes to fetch Bella’s ball for her, change the load of laundry, or feel the urge to turn the TV for background noise. Perhaps it will become a regular event.

Vanilla Macadamia Nut Coffee Coconut Ice Cream | Once Upon a Recipe

However, let’s get back to the food. I have to be honest. I’ve had a few busts in the kitchen lately. I’m a believer in only sharing food and recipes that I really love, and that I think you’ll love too, and I have not been churning many winners out of my kitchen lately. A big part of that has been a result of a busy schedule, and the fact that I typically have time to make one big pot of something that I feast on throughout the week. Day 5 leftovers = not my favorite thing.

Despite my lackluster kitchen efforts, I did manage to get around to dusting off my ice cream maker this past weekend and made the first batch of ice cream of the season. And I had to share.

Vanilla Macadmia Nut Coffee Coconut Ice Cream | Once Upon a Recipe

Almost a month has passed since Dana first shared her Coffee Coconut Ice Cream recipe. I immediately bookmarked it. However, I bookmark a lot of recipes, and sometimes things get lost in the shuffle, despite my good intentions. Thankfully, I follow a few great food blogs (read: several hundred…) and occasionally the same recipe will have caught another blogger’s eye, prompting them to post the recipe (or their version of it), which then gives me a nice little reminder about that bookmark I made. Ahh, the circle of life blogging. It’s totally a thing.

So…when the lovely Clara re-posted Dana’s recipe last week, I knew I had to take it as a sign from the food gods that I was intended to make this ice cream. One should never ignore a sign from the food gods!

Vanilla Macadmia Nut Coffee Coconut Ice Cream | Once Upon a Recipe

Oh goodness, am I ever glad that I listened. First of all, I changed up the recipe just a little. In place of the regular brewed coffee, I used the vanilla macadamia nut coffee that I brought back from Hawaii last month. I added a bit more vanilla, and then tossed in some toasted macadamia nuts and mini dark chocolate chips. This ice cream is vegan, peeps. That may be a selling feature for some (ie. Vegans, the dairy-intolerant, etc.). However, I can assure you that no one will ever know that it is. Oh, and surprisingly, the coconut flavor is not overwhelming. The creaminess is so deceiving, you’ll think you’re eating regular ice cream. It’s vegan and deceivin’! (Yep, came up with that one all by myself…)

One more thing – if you don’t already own an ice cream maker, you may want to change that. I was given mine as a gift, and to be honest, I never thought I would enjoy it as much as I do. The fact is, there’s something rather lovely about homemade ice cream, and it’s darn easy to make too. I declare Summer 2013 as the season of ice cream adventure!

Vanilla Macadamia Nut Coffee Coconut Ice Cream | Once Upon a Recipe

Vanilla Macadamia Nut Coffee Coconut Ice Cream (adapted from Minimalist Baker)

Makes about 1.5 quarts. Feel free to experiment with different flavors of coffee, if you’re so inclined. Change up the add-ins too! And use premium quality coconut milk, if possible. It will make a big difference. 

2 cans full-fat coconut milk

¾ cup brewed coffee (I used vanilla macadamia nut coffee)

¾ cup sugar

2 tsp. vanilla

¾ cup toasted and chopped macadamia nuts

½ cup mini dark chocolate chips

Combine the coconut milk, coffee, and sugar in a saucepan over medium heat. Stir until the sugar dissolves, about 5 minutes. Remove from heat and add in the vanilla. Transfer the mixture to a bowl, cover and refrigerate until well chilled (at least 6 hours or overnight). Churn in your ice cream maker (according to manufacturer’s instructions). Mine took about 25 minutes. Fold in the macadamia nuts and chocolate chips. Transfer to a Tupperware container (or loaf pan!) and cover with plastic wrap. Allow the plastic wrap to touch the surface of the ice cream, as this will help prevent ice crystals from forming. Freeze for at least 4 hours. Scoop and serve!

Vanilla Macadamia Nut Coffee Coconut Ice Cream | Once Upon a Recipe

Gettin’ Tarty | Brûléed Lemon Tart

Brûléed Lemon Tart | Once Upon a Recipe

Ladies and gentlemen, behold one of the most fabulous things I have ever baked and eaten. The brûléed lemon tart.

I think I may have just made that word up: brûléed. I’m rather certain that brûlée is a noun and that I just used it as a verb. Wait, is that right? Suddenly, I am having difficulty recalling the basics of English grammar. But I don’t care. It sounds kinda catchy.

Bruleed Lemon Tart | Once Upon a Recipe

And this tart is pretty damn catchy. As in, you’ll want to catch it in your mouth because it’s damn delicious.

My apologies, the words aren’t exactly flowing well at the moment. My mind is a bit preoccupied with the fact that in less than 24 hours, I will be on a plane en route to Hawaii, where I will enjoy two weeks of uninterrupted bliss with some very fun people. My body is here, but my brain is already in the sun, sand, and Mai Tais.

Bruleed Lemon Tart | Once Upon a Recipe

But before I go, I must share this tart with you. It may look simple, but it is rather magnificent. A buttery shortbread crust filled with a sweet/tart creamy lemon filling, topped with a sugar crust akin to the one you’d find atop another delectable dessert, crème brûlée. I first made this tart last summer for my mom’s birthday. I topped it with blackberries. It received rave reviews. I made it again as part of the rather gluttonous Easter Feaster a couple of weeks ago, and it did not survive the Easter Feaster table.

Bruleed Lemon Tart | Once Upon a Recipe

If you’ve never made a tart before, fear not. It’s ridiculously simple. The crust comes together in a flash in a food processor. After chilling out in the fridge for a couple of hours, it gets rolled out and pressed into a tart pan. Bake ‘er up. Mix the filling ingredients together. Pour over crust. Bake again. Sprinkle with sugar. Torch it up. Badabing, badaboom.

Brûléed Lemon Tart | Once Upon a Recipe

Despite the large quantities of cream, butter, sugar, and eggs in this recipe, the end result is surprisingly light. And this tart comes with a guarantee: It will not survive more than 24 hours. You have been warned. Either invite some friends over or be prepared to eat this thing until it’s gone. No judgment here if you choose the latter.

Brûléed Lemon Tart | Once Upon a Recipe

A quick note: I will be spending the next two weeks in paradise, and while I would love to promise that I will update the blog a time or two, if the Mai Tais and Pina Coladas are calling to me, I’m not going to ignore them. However, I can guarantee that I will be sharing tidbits from my adventures on Instagram and Twitter, so follow me there if you’re so inclined. The adventures will include a visit here. Have a fabulous couple of weeks, friends! xo.

Brûléed Lemon Tart | Once Upon a Recipe

Brûléed Lemon Tart (from Epicurious, originally printed in Bon Appétit, April 2004)

Makes one 10-inch tart. Feel free to jazz up the finished product with fresh fruit, such as blackberries or blueberries. With that said, it’s just as delicious without any additions. 

For the crust:

1 cup all-purpose flour

1/4 cup icing sugar

Pinch of salt

6 TBSP. unsalted butter, cold and cut into cubes

6 tsp. whipping cream

For the filling:

3/4 cup + 2 TBSP. sugar, divided

3/4 cup whipping cream

4 egg yolks (reserve one egg white)

2 whole eggs

Juice + zest from 2 large lemons (about 1/2 cup juice + 1 TBSP. zest)

For the crust: Combine the flour, icing sugar, and salt in a food processor and pulse for a few seconds until blended. Add the butter and pulse until the mixture looks like coarse meal. Add the whipping cream and blend until moist clumps form. If the dough is too dry, add more whipping cream one teaspoon at a time. Gather the dough into a ball, flatten into a disc, and then wrap in plastic wrap and refrigerate for two hours.

Preheat the oven to 350°F. Remove the dough from the fridge and roll out onto a floured surface. I used a 10-inch tart pan with a removable bottom, but a 9-inch tart pan would work fine too. Roll the dough thin enough to cover the bottom of the pan and create double-thick sides. Press into the tart pan. Poke the bottom of the tart shell all over with a fork. Bake for 18 minutes. Brush the inside of the tart shell with the reserved beaten egg white. Maintain the oven temperature.

For the filling: Combine the 3/4 cup sugar, whipping cream, egg yolks, eggs, and lemon juice and zest in a large bowl and whisk together until combined. Pour the filling into the warm tart shell and return to the oven. Bake for 30-35 minutes, or until the filling is slightly puffed at the edges and set in the center. Cool for about an hour.

Sprinkle the remaining 2 TBSP. of sugar over the filling. Use a kitchen torch to caramelize the sugar, as if you were making crème brûlée. If you do not have a kitchen torch, you can use your broiler to achieve a similar effect. Be very careful, checking the tart after a minute or two, and turning the pan for even browning. It may also be wise to cover the edges of the crust with tin foil to prevent the crust from getting too brown. Allow the tart to cool for another hour, until the topping is crisp. Slice and serve!

Brûléed Lemon Tart | Once Upon a Recipe

Guest Post: Erin from Read, Eat, Create: Super-Rocky Rocky Road Brownies

Happy hump day friends!

Today I have a special guest here to share a sweet recipe. Take it away, Erin!

Guest Post - Read, Eat, Create - Rocky Road Brownies

Hi all you Once Upon a Recipe readers! I’m so excited that Amanda let me invade her cute space for the day! I absolutely love her blog and the recipes on here are just to die for! I suppose I should introduce myself. My name is Erin and I blog over at Read, Eat, Create. I’m still working on the “create” part though. Pinterest is just a little too intimidating if you know what I mean.

I’m here to share my love for sweet treats. Now I’m not really a big cupcake or cake lover and I have to be in the mood for cookies (say whaaaa?) but I have a serious soft spot in my heart for brownies. Another soft spot when it comes to sweets for me is ice cream, specifically Rocky Road ice cream. Anyone else with me on this?

So I figured I would combine the two to make one seriously delicious bite.The best part is these are really easy to make!

Guest Post - Read, Eat, Create - Rocky Road Brownies Guest Post - Read, Eat, Create - Rocky Road Brownies

Super-Rocky Rocky Road Brownies

2  1-ounce squares unsweetened chocolate

2/3 cup all-purpose flour

½ tsp. baking powder

¼ tsp. salt

¼ cup (1/2 stick) butter, softened

1 cup granulated sugar

2 eggs

1 tsp. vanilla extract

1  6-ounce package semi-sweet chocolate morsels

1 cup peanut butter chips

1 cup mini marshmallows

Non-stick cooking spray

1. Preheat oven to 350 degrees.

2. Melt chocolate squares in a double boiler. If you don’t have one you can put a metal bowl over the top of a small kettle of boiling water and melt the chocolate in the bowl that way. Set aside to cool slightly.

3. In a large mixing bowl, beat together the butter and the sugar until they’re well blended. Add eggs, one at a time, mixing well after each egg.

4. Gradually add the melted chocolate and mix well. Beat in the vanilla.

5. Slowly add the flour mixture to the bowl and mix thoroughly.

6. Fold in the chocolate chips, peanut butter chips, and marshmallows.

7. Pour the batter into an 8×8 inch pan that has a good coat of non-stick spray.

8. Bake for 40 minutes.  You can tell that they are done if you put a wooden toothpick near the center and it comes out clean.

Thanks so much for letting me stop by Amanda! Want more kitchen fun (and a peek into my life of never ending randomness)?  Come on over for a visit at Read, Eat, Create. Hope to see you all there!

Sometimes You Just Need a Cookie | Skillet Chocolate Chip Cookie

Sometimes life just calls for a cookie. And not just any cookie. A humungous cookie that can be made in one bowl (a skillet, to be exact), is ready in less than 30 minutes, and that can be topped with a scoop or two of ice cream, and eaten straight out of said skillet as soon as it comes out of the oven.

Possible life events that may necessitate the making and the consumption of a skillet cookie:

-You had a bad day at work. Make yourself a skillet cookie. Invite friends over. You do not want to be faced with the task of eating the whole cookie yourself. I mean, you do, but you really don’t. You know?

-A good friend is going through a rough time. Make your friend a skillet cookie, give her some wine to help her wash it down (milk, what?), and most importantly, help her eat it.

-It’s that time of the month. Aunt Flo is visiting, the monthly curse, etc. What woman doesn’t use PMS as an excuse to eat a little extra chocolate? See point #1.

-Boy troubles.

-You have chocolate chips in your cupboard that are about to go bad and you must use them immediately, for fear of chocolate going to waste. That just wouldn’t be acceptable.

-You feel like eating a cookie.

-It’s Monday.

But really, if you need an excuse to enjoy a delicious, extra-large, hot, ooey-gooey cookie, you probably wouldn’t have come here in the first place. (However, if you do, I’ll gladly feed you as many excuses as you need. I’ve got your back.).

This recipe comes straight from here. No additions or substitutions needed, it’s quite perfect the way it is. I have made this skillet cookie more times than I care to admit since I first came across the recipe. It’s so darn easy, so good, and I always have the necessary ingredients on hand. Feel free to use your favorite kind of chocolate. My favorite is dark chocolate chips. Rumor has it that dark chocolate is full of many good-for-you things (antioxidants, iron, magnesium). See? This cookie is practically doing your body a favor. Get on it!

Chocolate Chip Skillet Cookie (from the lovely Sophistimom)

1/2 cup (1 stick) unsalted butter

1/2 cup granulated sugar

1/2 cup brown sugar

1 tsp. vanilla

1 egg

1 1/2 cups all-purpose flour

1/2 tsp. baking soda

1/4 tsp. salt

1 cup chocolate chips

Preheat the oven to 350°F. Melt the butter in an 8-inch cast iron skillet set over medium-low heat. Stir in the sugars and vanilla and remove from heat. Let rest until pan is warm, but no longer very hot, about 5 minutes.

Add in the egg and mix well. Mix in the flour, baking soda, and salt until smooth. Stir in the chocolate chunks. Place in the oven for 15-20 minutes, or until starting to turn golden around the edges, and the centre is just set. Don’t overbake! Enjoy immediately (with ice cream, if you wish).

You’re totally going to burn your tongue on the first bite. Just sayin. 😉

Giving Thanks | Caramel Cream Cheese Apple Dip


Happy Thanksgiving to my Canadian friends!

Today I will be making a concentrated effort to stuff myself to the gills with turkey, mashed potatoes, and pumpkin pie. Actually, pumpkin this, which is what I will be contributing to tonight’s dinner. I can’t wait to try it! Oh, and I don’t doubt that there will be plenty of wine consumption as well. What is a day holiday without wine?


Every Thanksgiving, we are encouraged to think about what we are thankful for. I remember as a young child in grade school, art classes around this time of year were always focused on colorful leaves, turkeys, and giving thanks. Even now, twenty years later, I still take a moment to think about some of the wonderful things in my life at Thanksgiving.

Driving to my parents’ house for Thanksgiving dinner yesterday (the first of two), I passed many houses with cars in the driveways and lining the streets. I thought of all of the families and friends gathering together to share a meal and give thanks for this beautiful life that we live. And I felt so thankful knowing that I had a house full of family waiting for me. I know that not everyone is so lucky.


It’s kind of a shame that we don’t recognize all of these wonderful things more often. It’s so darn easy to get caught up in day-to-day life and to focus on negative things. How tired we are, how much work we have to do, how we don’t have the money to do this or buy that, and the list goes on. We live in a bit of a pessimistic society, no?

So today, I encourage you to think of five things in your own life that you are most thankful for. You don’t have to share them with anyone but yourself. But you might be surprised at just how much you’ve got goin’ on. You’re pretty awesome, in case you need to be reminded.


Whether you’re celebrating Thanksgiving today or not, I do encourage you to try this little number. This dip comes from one of my coworkers (thanks K!) – she brought it to a potluck at work and everyone raved about it. Apparently she always gets requests for “the apple dip” when attending potlucks, and I can see taste why. It is SO delicious! And incredibly simple. And a great way to enjoy Fall’s apple bounty! I brought it to dinner yesterday, and when we ran out of apples, we just used our fingers to finish it off. We’re classy like that.


Caramel Cream Cheese Apple Dip

8 oz. light cream cheese, softened

1/4 cup brown sugar, loosely packed

~1/3 to 1/2 cup caramel sauce

2 Skor bars, finely chopped

Mix the cream cheese and brown sugar together well. Spread evenly into the bottom of a shallow dish (~8 x 10″) or pie plate. Pour the caramel sauce over top and gently spread it out evenly. Feel free to add more or less caramel, depending on your tastes. Top with the chopped Skor bar. You could also top with shaved or chopped chocolate, if you prefer. Cover and refrigerate until consumption. Serve with sliced apples. Pears would be delicious too!


Take good care, friends! xoxo

A Farewell to Summer | Strawberry Rhubarb Crumb Cake

Fall is here. Can you feel it? The hours of daylight are becoming shorter, a chill descends upon us in the late evening and lingers until late morning, and I have turned on the seat heaters in my car once or twice (for reals). The leaves are beginning to turn those beautiful shades of gold. Pumpkin spice lattés are back! I find myself craving hearty soups and comfort food for dinner instead of lighter summertime fare. I want to bake with apples and pumpkin and delicious fall spices.

Over the past week or so, things have felt different to me. It’s interesting how the universe ebbs and flows, and how each season brings with it new ideas, feelings, and goals. I was reflecting on this post the other day, and I was reminded of the idea that Fall, in a sense, marks the beginning of a new year.

Fall presents an opportunity for a fresh start. Last Summer, the psychic told me that the number nine repeatedly made an appearance in my tea leaves, palm, and tarot cards. Based on that, he predicted that September was going to be an important month. Six weeks later, at my friend’s wedding reception, her mother hugged me and randomly said “Always remember that number nine is lucky” before walking away. Nothing noteworthy happened last September. But I’m convinced. This September is mine.

In less than two weeks, I am going to run my first half marathon. I’m freaking a little bit. Maybe a lot actually. I don’t feel as prepared as I would like. The running partners that I signed up for the race with have decided to withdraw their registrations due to running injuries. I’ve been having painful shin splints over the past couple of weeks – probably a result of overtraining as I frantically prepare for a 22km trek through the mountains. Friends, I am scared. But I am also excited. I know that I can do it – now it’s just a matter of doing it. Mind over matter. Positive thinking. Believing in myself.

For me, Fall also means turning another year older. In exactly one month, I will celebrate another year of living. Of experiences and lessons learned. It seems that once one passes the age of 25, birthdays aren’t quite as fun or exciting as they used to be (ie. the girlie sleepovers). But this year, I’m milkin’ it. I will only turn 28 once, so I damn well better celebrate it. My favorite people + lots of wine + a kick-ass birthday cake + a little dancing = the only way to do it.

But before half marathons and birthdays (and all of the other incredible things that are on the horizon), we must bid farewell to Summer. This cake is one way to do just that. A delicious sour cream cake is topped with a strawberry and rhubarb quick jam and then blanketed with crumble topping. We’re talking ample cake-to-crumble ratio here friends.

So quick! Bake this pretty little cake up before all of the strawberries have disappeared from the shelves and a garden full of rhubarb is just a memory! And enjoy a slice with a steaming up of coffee or tea, or for breakfast, and preferably with someone fabulous. I most certainly did.

Strawberry Rhubarb Crumb Cake (adapted from About.com, Southern Food Guide)

For the filling:

2 cups rhubarb, thinly sliced

1 pint strawberries, sliced and slightly mashed

1 TBSP. fresh lemon (or lime) juice

2/3 cup sugar

3 TBSP. cornstarch

For the cake:

1 1/2 cups all-purpose flour

1/4 tsp. baking soda

1 tsp. baking powder

Pinch of salt

1/2 cup (1 stick) butter, softened

3/4 cup sugar

2 eggs

1/2 cup sour cream

2 tsp. vanilla extract

For the crumble topping:

3/4 cup all-purpose flour

1/2 cup sugar

1/2 tsp. ground cinnamon

Pinch of ground nutmeg

5 TBSP. melted butter

1/2 cup chopped pecans

For the filling: In a medium saucepan, combine the rhubarb, mashed strawberries, and lemon juice. Mix the sugar and cornstarch together and add to the fruit mixture. Bring to a simmer, then reduce the heat to low and stir until thickened (about 5 minutes). Remove from heat and let cool.

For the cake: Preheat the oven to 350°F. Combine the 1 1/2 cups flour, baking soda, baking powder, and salt in a bowl.

In a large mixing bowl, beat the butter with the 3/4 cup sugar until light and fluffy. Add in the eggs and sour cream, and then the vanilla. Slowly add in the flour mixture until smooth and blended. Spread in a greased 9-inch springform pan. Spoon the cooled filling mixture over the cake batter.

For the crumble topping: Combine the ingredients, mix well, and sprinkle evenly over the filling layer. Bake for about 45-50 minutes, or until the cake is firm and topping is lightly browned. Allow to fully cool before slicing. The cake will keep, well-wrapped in the refrigerator, for a couple of days.

PS. You guys rock. In case I don’t tell you often enough. xoxo


I Scream, You Scream, We All Scream For… | Mint Chocolate Chip Ice Cream

Friends, I have a very sad confession to make. I have had an ice cream maker sitting, unused, in its original box, for one and a half long years. I received it as a gift for Christmas in 2010. I had good intentions of using it immediately. I picked out recipes. I formulated ice cream-making plans. And it never happened.

You see, whenever I followed through on those good intentions, and got all geared up to make ice cream, I’d open the box and realize (for the bazillionth time) that the canister needed to be frozen for at least 8 hours prior to using it. And I’m embarrassed to report that instead of taking it out of the box and sticking in the freezer to avoid the same disappointment the next time around, I just closed it right back up again. It is important to note that there was one other very labor intensive step required…washing the canister. Sometimes I confuse even myself.

Thankfully, I righted all of these wrongs last weekend when I did the smart thing and stuck that dang canister into the freezer, and the next day went out and picked up my ice cream making supplies. And then I got straight to makin’ ice cream!

The combination of mint and chocolate has been one of my favorites for a long time, so I immediately began searching for a mint chocolate chip ice cream recipe. Cool, minty ice cream chock full of dark chocolate chunks. And let me tell you…there is nothing quite like a humongous bowl of cold, minty ice cream on a hot summer evening to help cool a person down. Heat wave is an understatement. Let’s just say there’s been much spread eagle, underwear only, fan blasting directly at the bed insomnia sleeping going on lately. Thank goodness for ice cream.

PS. July is National Ice Cream month! Don’t be surprised if you see another ice cream recipe (or two) posted here in the next few weeks. I’ve spotted a recipe for peanut butter ice cream…trouble!

Mint Chocolate Chip Ice Cream (adapted from The Kitchn)

Makes about two quarts.

3 cups fresh mint leaves

4 cups half and half

3/4 cup sugar

A pinch of salt

1 tsp. vanilla

4 egg yolks

6 ounces good quality dark chocolate, chopped

Tear the mint leaves off of their stems and put in a bowl. Pound with a pestle or large spoon just until they are bruised and start to give off their delicious minty fragrance.

In a heavy saucepan over medium heat, whisk together the half and half, sugar, and salt. Heat until the mixture just begins to steam, the remove from heat, add the mint leaves, and cover. Steep for about two hours. Once the mixture has steeped, strain out the mint leaves and bring the mixture to just under a simmer. Whisk the egg yolks together in a small bowl and add a cup of the cream to temper the eggs. Whisk it all back into the saucepan and cook, stirring, until the custard reaches 170º to 174ºF (this only took a couple of minutes for me). Remove from heat and stir in the vanilla. Pour into a bowl, cover, and refrigerate overnight.

We’re ready to make ice cream! First, chop the chocolate into chunks and set aside. Freeze the custard in your ice cream maker according to directions, adding the chocolate about halfway through. Transfer ice cream to a container and cover with plastic wrap so that the wrap is touching the surface of the ice cream (this will prevent ice crystals from forming). Freeze for at least four hours before serving. Enjoy!

Conquering Fear | Chocolate Glazed Doughnuts

Well hello there friends! I bet you were starting to think that I’d fallen off the face of the earth. Fortunately, I’m still kicking. In truth, I’ve been working my arse off. The intense training schedule continues. After a day of work and a hard run, I’m lucky if I get some decent food past my lips, let alone photograph it and come up with an accompanying witty post.

But I must admit, I’m kind of using this whole running thing as a license to eat whatever the hell I want. Thankfully I’m a reasonable person (most of the time), and I’m trying to find a good balance between eating healthy and indulging from time to time. A few weeks ago, I had this sudden urge to try making doughnuts from scratch. And it wouldn’t. go. away. So I enlisted the help of a trusty friend of mine and we went to work on a few different recipes.

First, there were sour cream glazed doughnuts. They turned out alright, but not fantastic. Too dense, not cakey enough, and not the right flavor. So we moved onto pumpkin spice cake doughnuts. They were almost fantastic, especially when eaten still warm with a hefty coating of cinnamon sugar. And so we decided to try out a simple yeast doughnut with a rich chocolate glaze. Money.

These were delicious. The doughnut itself is not overly sweet, but the chocolate glaze adds a nice kick of sweet and chocolate.

Ladies and gents, it’s time to conquer our fears.

Yes, fear. I know what you’re thinking. Yeast? Hot oil?! Frying things??!

Don’t be afraid! It’s a lot easier, and more fun, than it looks. Especially in the company of a lovely friend, with some good tunes and a couple glasses of the red stuff. If only all fears were this easy to conquer! And hello?! There are doughnuts at the end of this lil’ journey. If that’s not motivation, I don’t know what is.

Let’s do this!

We start by making a simple yeast dough. Then we let it rise for a little bit until it doubles in size. Look at this beautiful ball of dough! Ain’t she perrty?

Then we roll out the dough and make doughnuts! Supposedly there are fancy doughnut cutters out there, but why not save that cash for another bottle of vino and use a wine glass and a shot glass instead! Doughnut + hole = done! Lay out your cut doughnuts on a lined cookie sheet, cover with a clean tea towel, and allow to rise for another half hour. Get your oil heating while the doughnuts rise.

The one special gadget you will require for this adventure is an oil/candy thermometer. I bought one for $10. When your thermometer reaches 325°F, it’s go time!

Fry, cool, glaze. Easy as pie. And then, EAT!

You can do it, I have faith in you!

Special shout-out to the lovelies that helped me eat my way through these doughnut trials. My heart (and thighs) thank you.

Chocolate Glazed Doughnuts (adapted from La Mia Vita Dolce)

These doughnuts are best enjoyed immediately after they are made, but leftovers can be stored in an airtight container for a couple of days. I recommend warming leftovers briefly in the microwave before enjoying. 

4 tsp. active dry yeast

1/4 cup water

1 cup whole milk

4 TBSP. sugar

1/4 cup butter, melted

4 1/4 cups all-purpose flour

3 eggs

Vegetable oil for deep-frying

Measure the water and milk into a small saucepan and heat over low heat until warm (do not let it boil!). Pour the warm water/milk mixture into a large bowl, and add 1 TBSP. of the sugar, as well as the yeast. Set aside for 10 minutes. The mixture will start to foam, meaning the yeast is working! Add the butter, flour, eggs and remaining sugar to the yeast mixture and mix until a sticky dough forms. Knead the dough on a lightly floured surface to bring it together. Place the dough in an oiled bowl, cover with a tea towel and set aside in a warm place for 45 minutes or until doubled in size.

Knead the dough on a lightly floured surface for 5 minutes or until it feels smooth and elastic when pressed. I punched my dough a few times, and it felt good! I may or may not have pretended that the dough was someone’s face. Unfortunately, karma bit me in the booty and I hit the counter instead. You win some and you lose some. Anyways…

Roll out the dough on a lightly floured surface until 1 cm (1 1/2 inches) thick. Cut 8 cm (3 1/4 inch) rounds with a cutter.  Cut a 3.5 cm (1 1/4 inch) hole in the middle of the rounds. Place on a tray lined with non-stick baking paper, cover with a tea towel and set aside in a warm place for 30 minutes or until risen.

In the meantime, heat the oil (2 inches deep) in a large pot over medium-low heat.  Gently drop the doughnuts one by one into the hot oil. Cook the doughnuts a few at a time for 1 minute each side or until just golden. Drain on a cooling rack set over paper towels.

Chocolate Glaze

2 1/2 cups icing sugar, sifted

1/2 cup unsalted butter

1/4 cup whole milk

1 TBSP. honey

2 tsp. vanilla

4 ounces bittersweet or semisweet chocolate, chopped

Sift icing sugar into a small bowl and set aside. Combine the butter, milk, honey, and vanilla in a medium saucepan and heat over medium heat until butter is melted. Decrease the heat to low, add the chocolate, and whisk until melted. Turn off the heat, add the icing sugar, and whisk until smooth. Dip slightly cooled doughnuts into the glaze and allow to set. Eat immediately!

%d bloggers like this: