Candy Bar Popcorn (Happy Halloween!)

Candy Bar Popcorn | Once Upon a Recipe

Happy Halloween!

It’s the scariest day of the year. Also known as the day when it’s acceptable to eat as much candy as you want and definitely more than you should. I look forward to this day and dread it simultaneously. Not because of the candy part, but because of the costume part. Creating amazing costumes is not my forte. Every year I make a promise to create an incredible and creative costume for Halloween. I make a plan to start early and not leave everything to the very last minute, but my procrastination always gets the best of me and I find myself scrambling to pull things together. And repeat. I know what I’m good at, and making costumes is not one of those things.

Candy Bar Popcorn | Once Upon a Recipe

But not this year! No siree, this year I made it real easy on myself and decided to just nix the costume idea altogether. Don’t get me wrong, I think costumes are fantastic, and if I was any good at actually putting something amazing together, I would. But sometimes you just have to create realistic expectations for yourself, you know? Fortunately, not having to worry about a costume left me more time and energy for what I’m somewhat better at – the food!

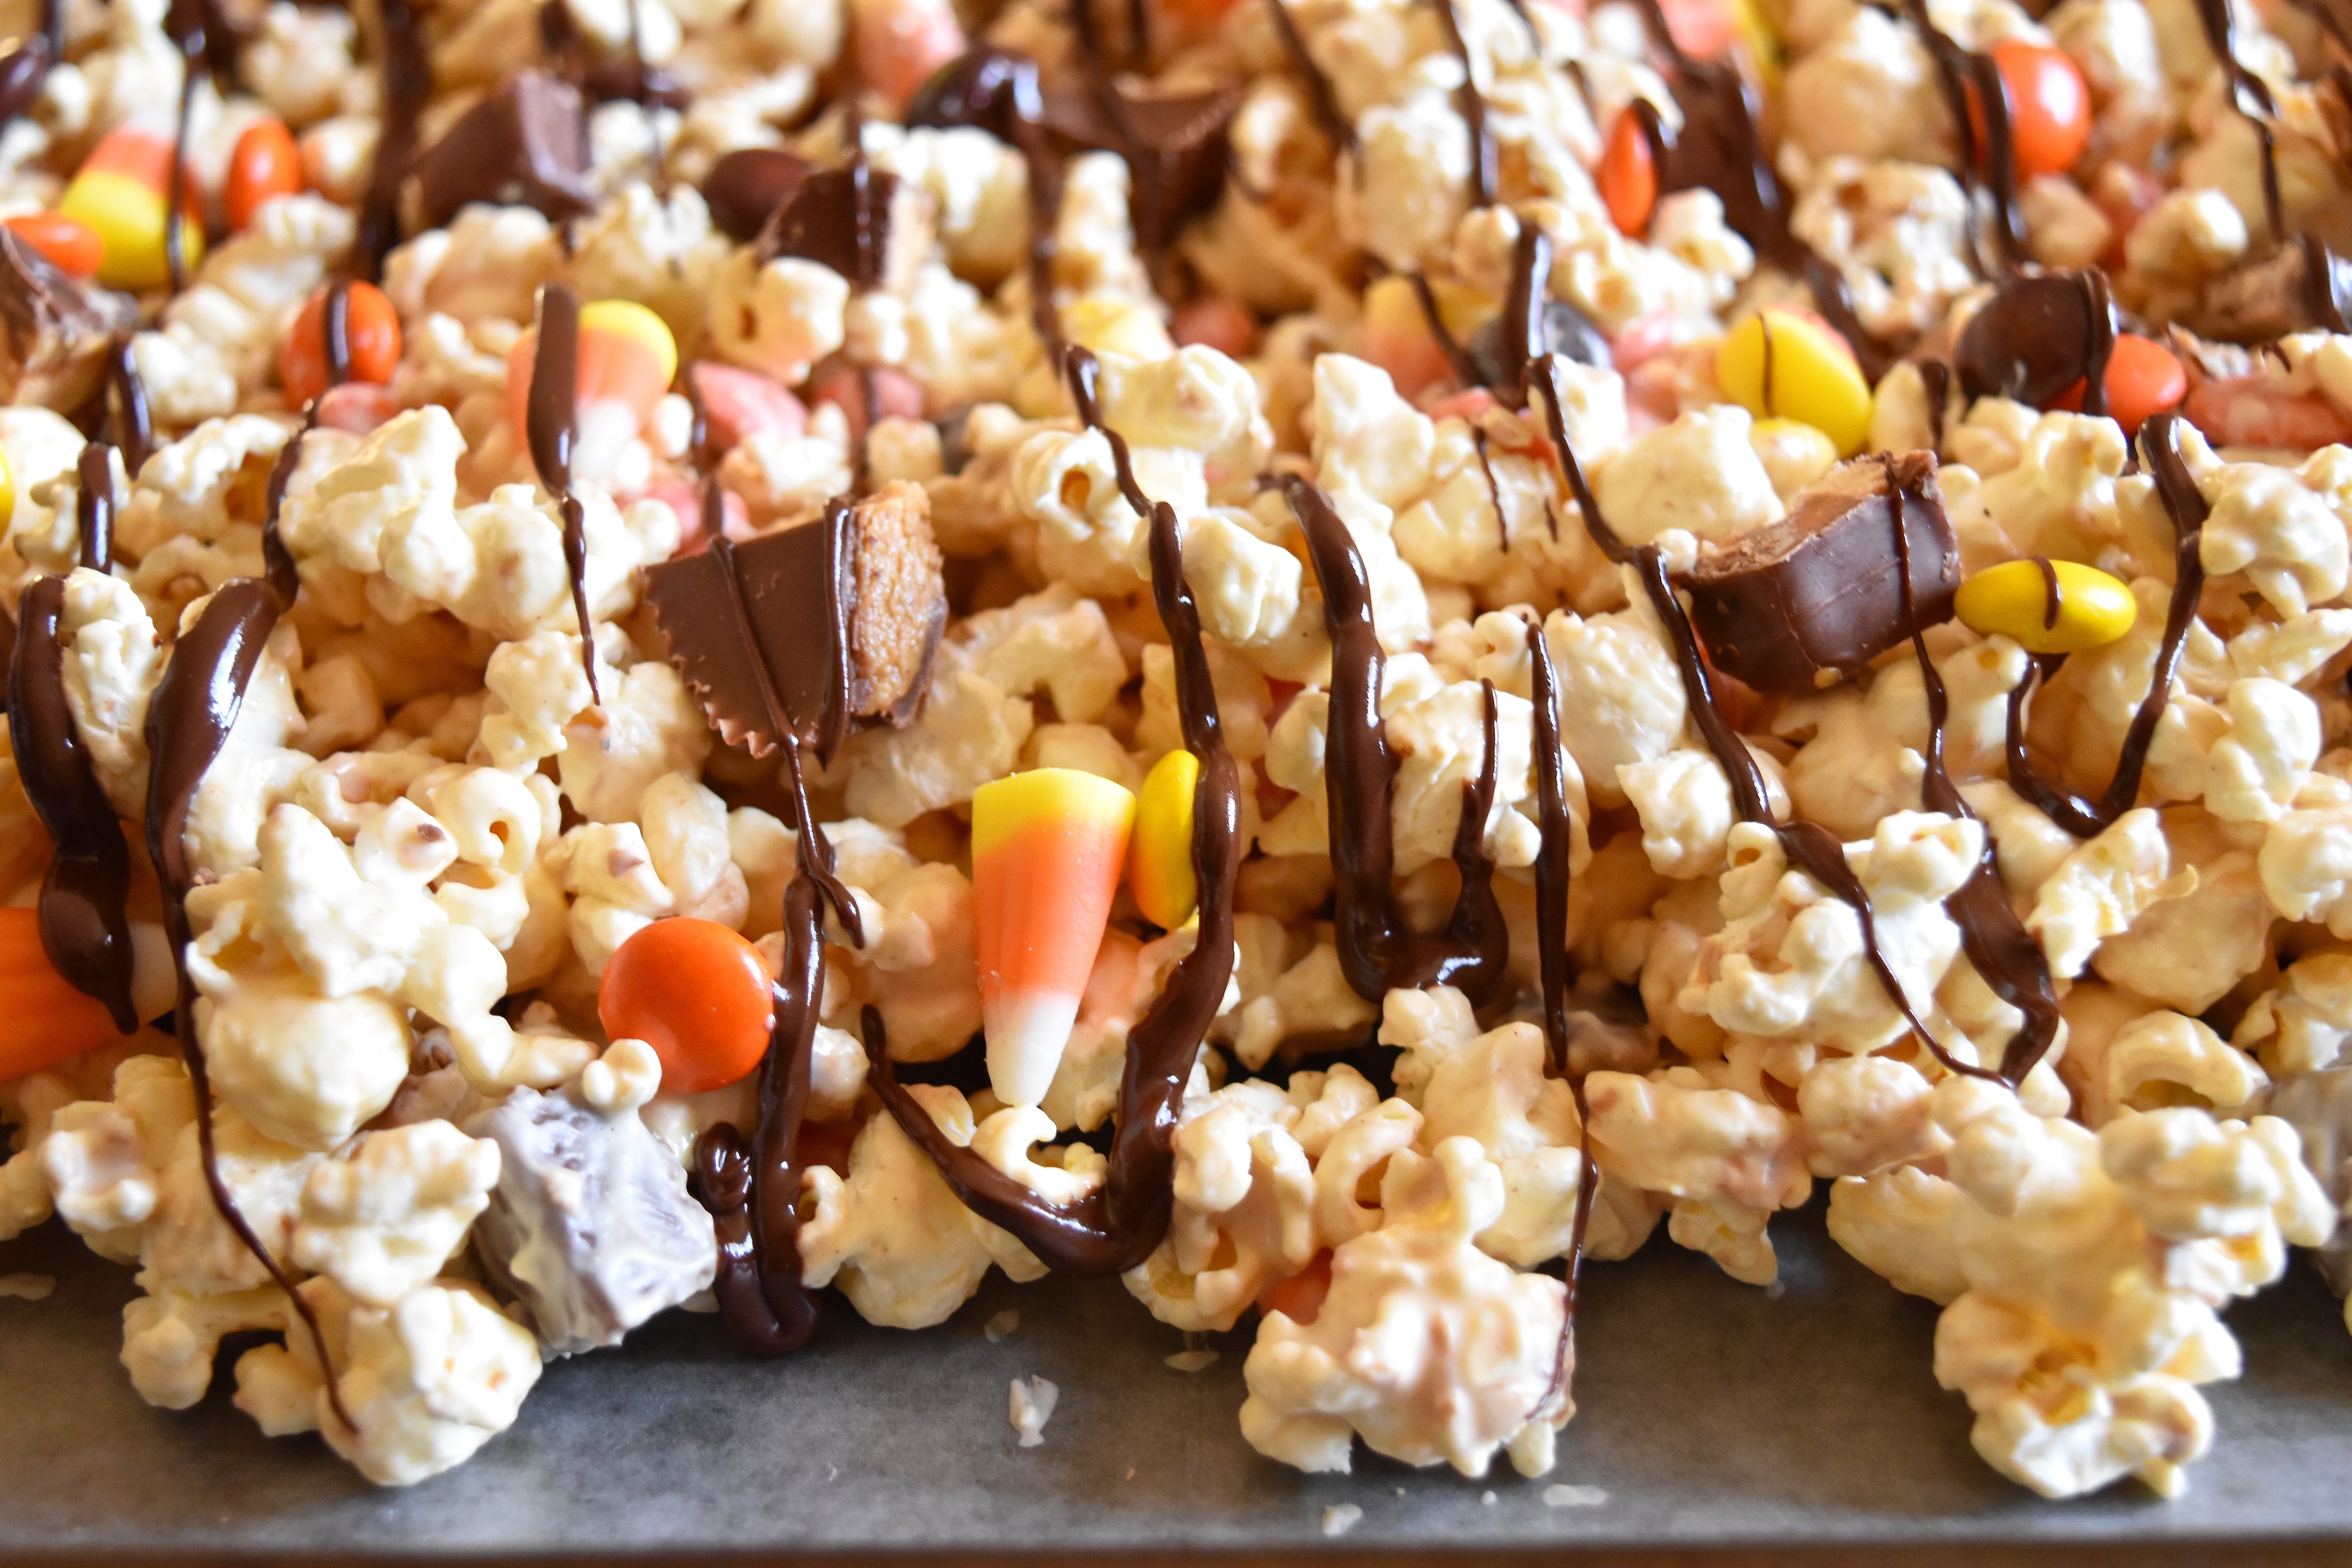
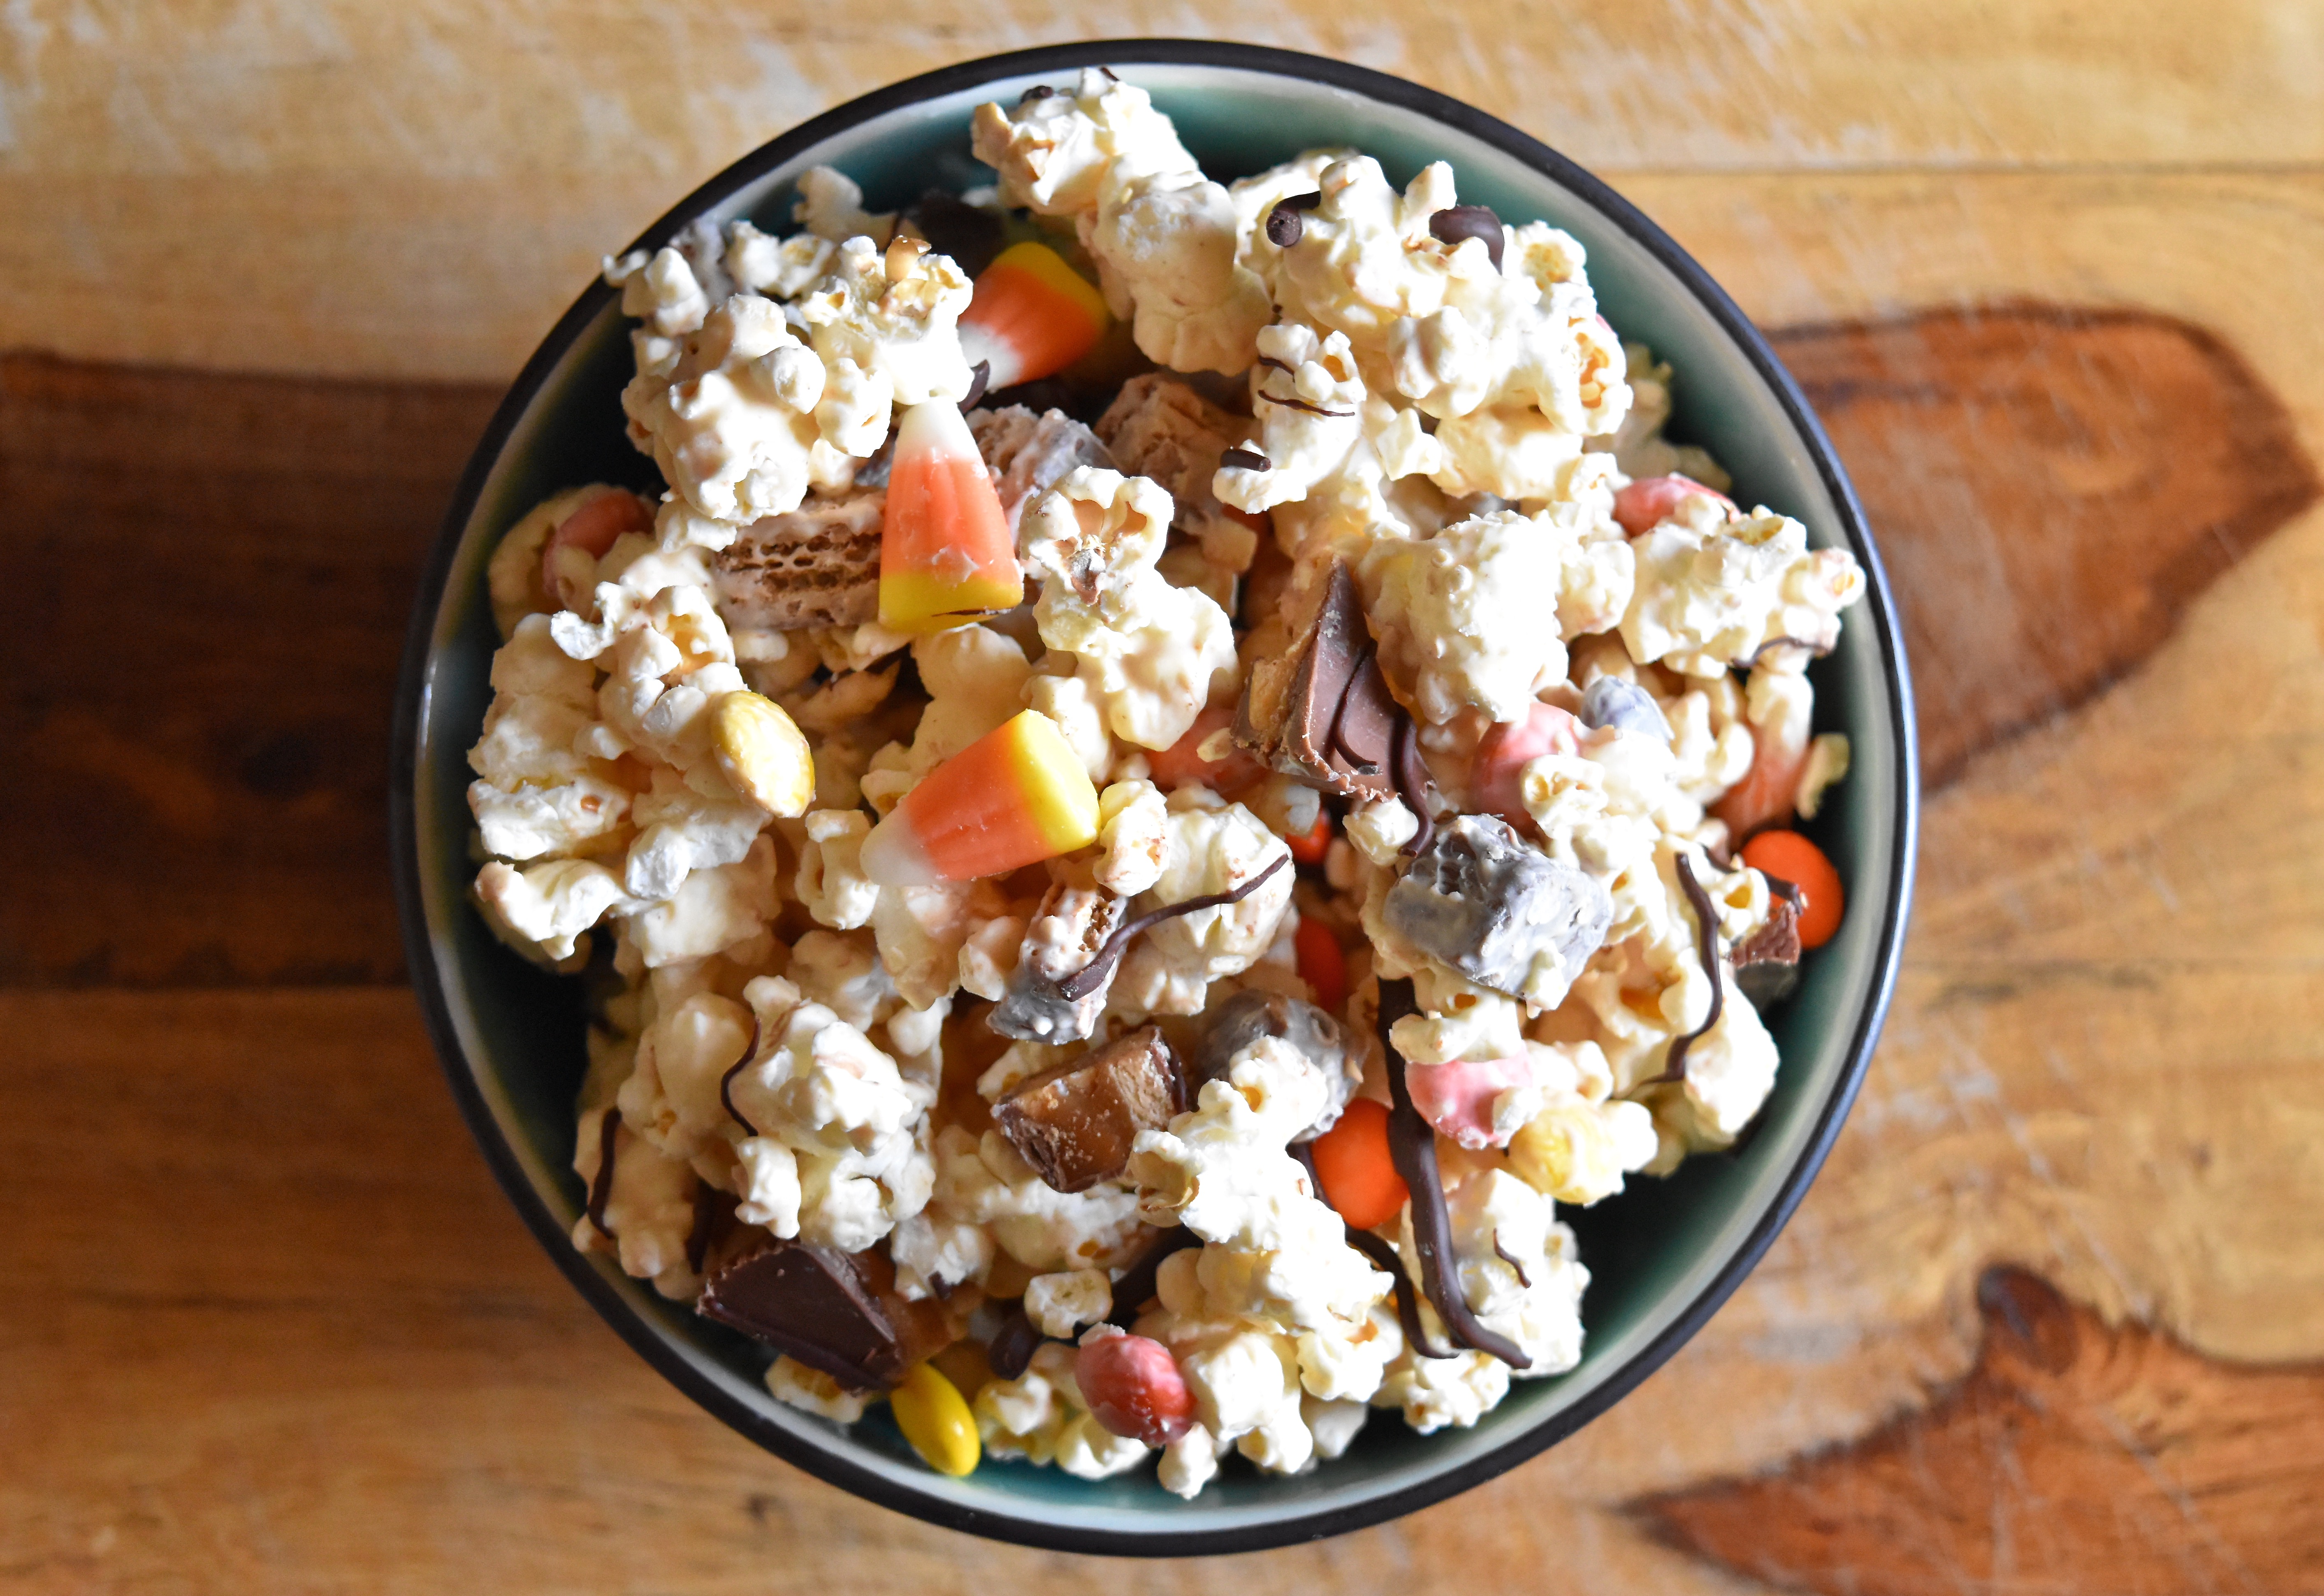
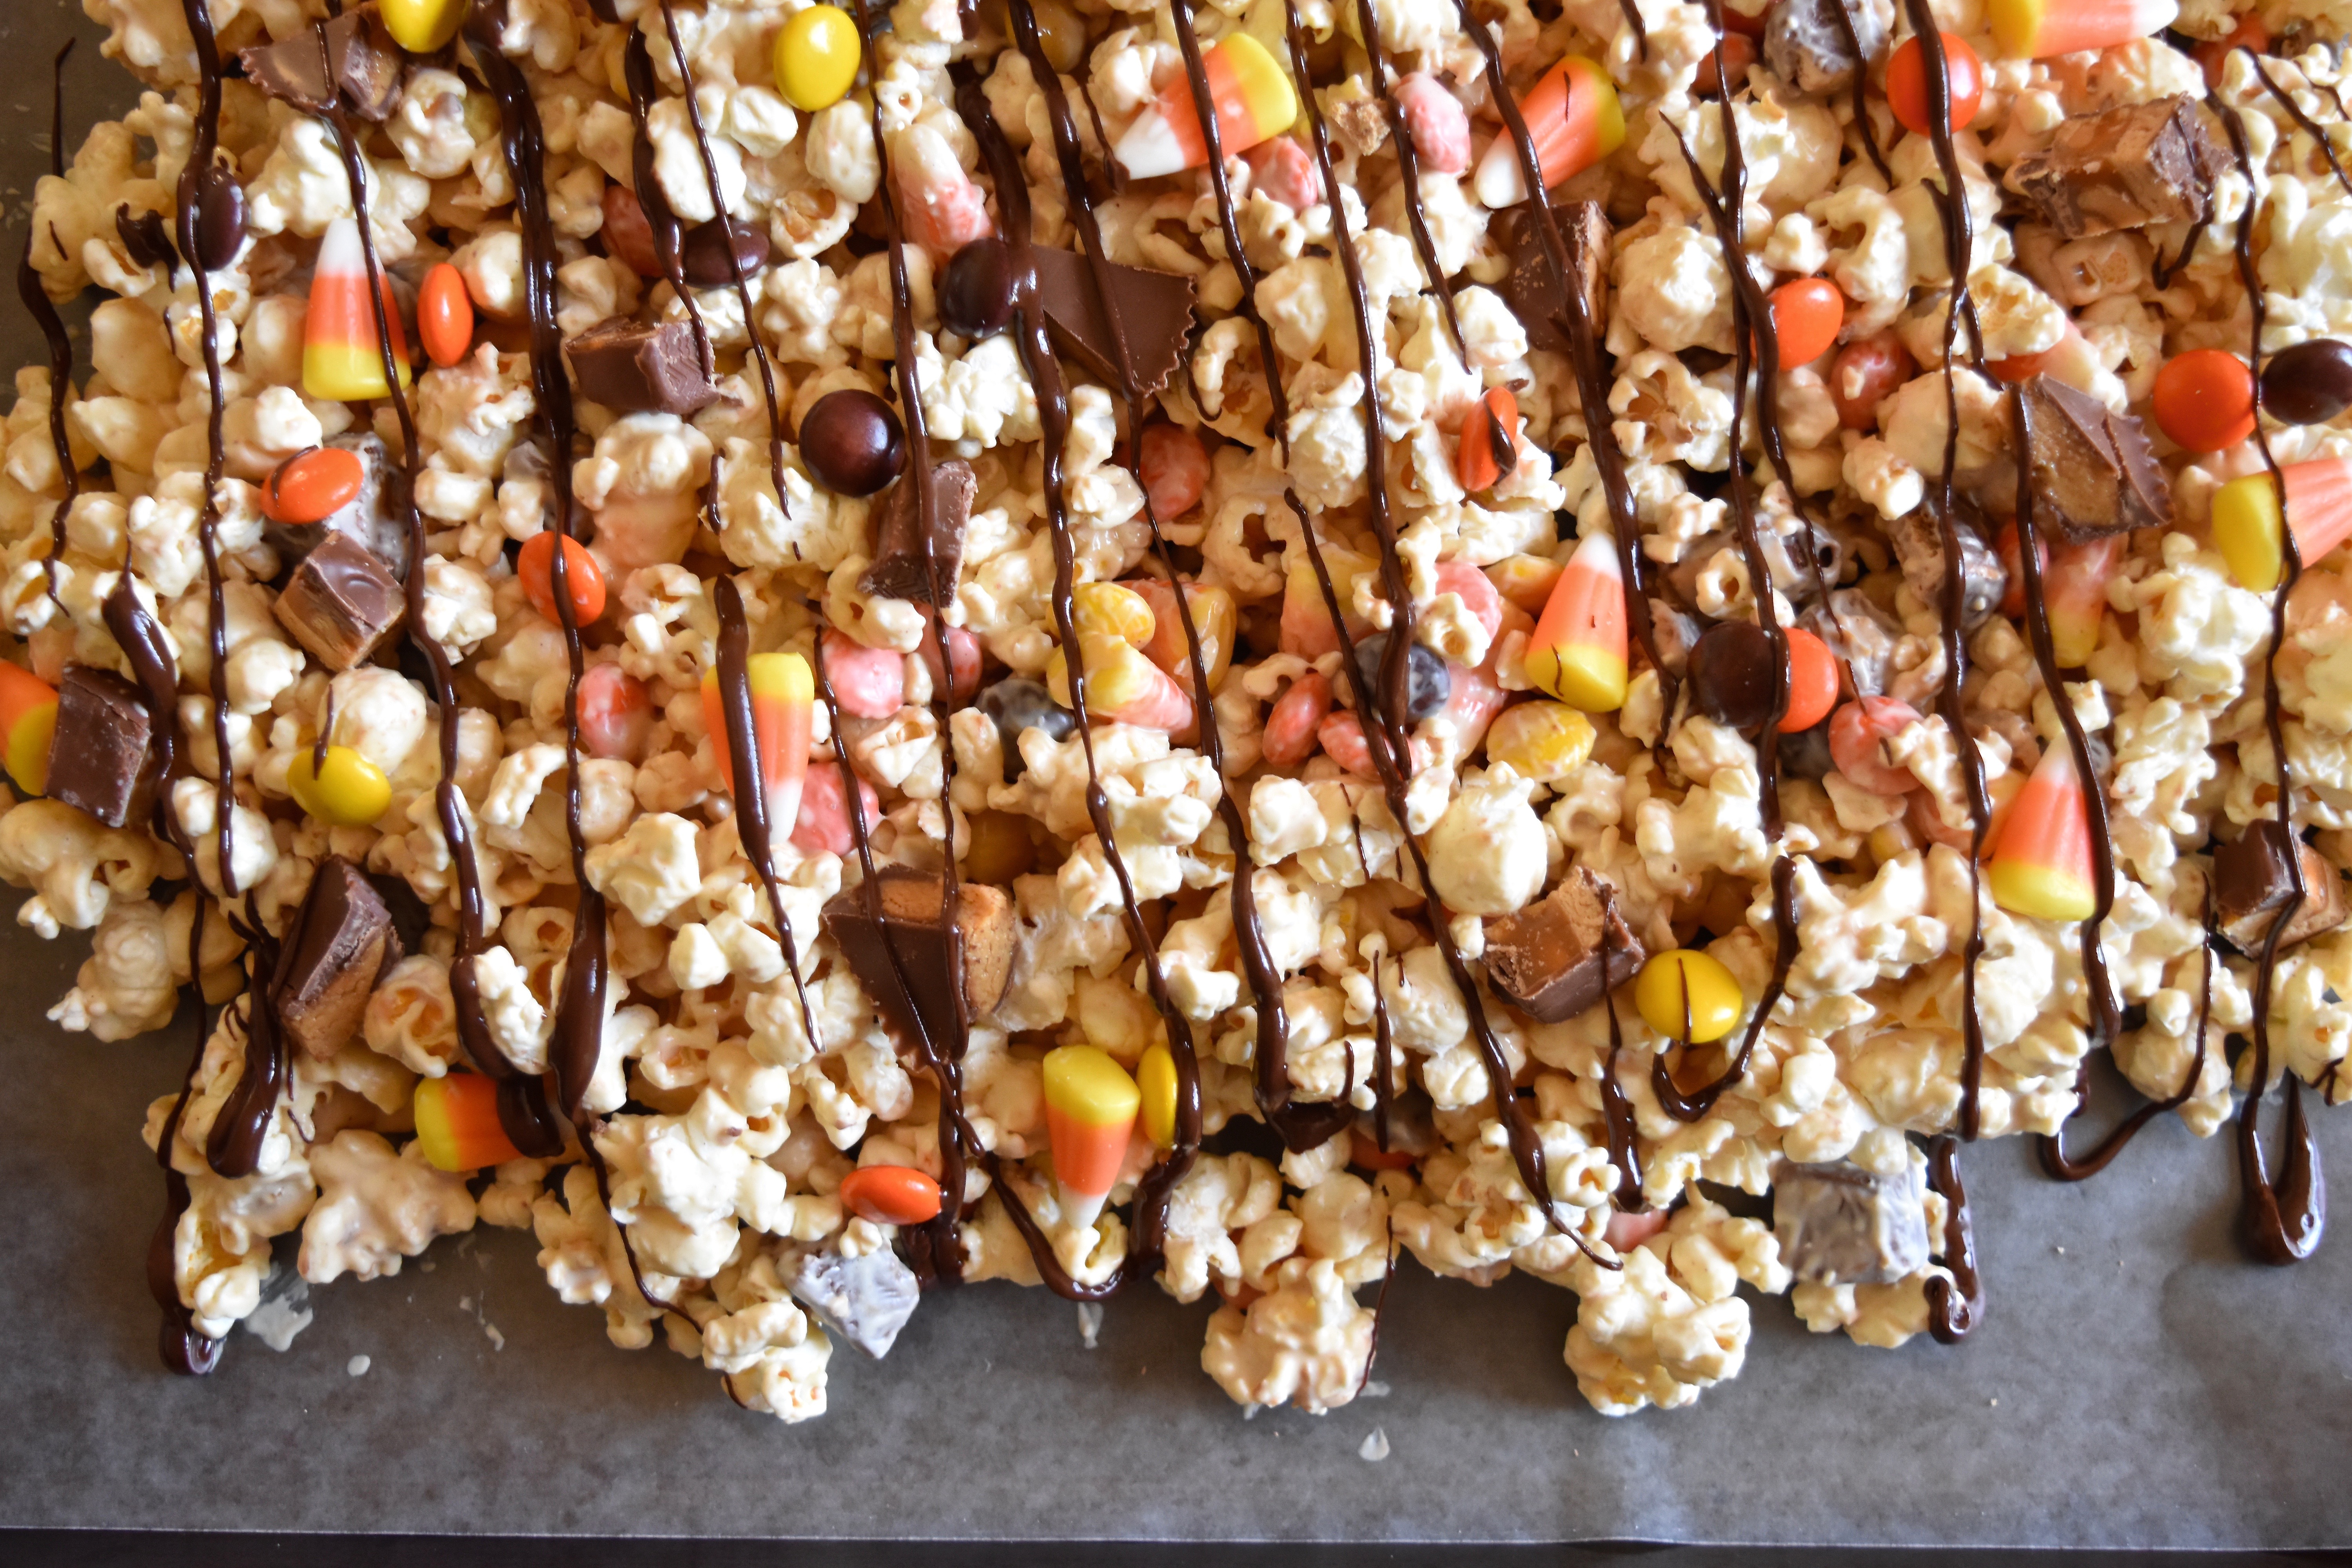
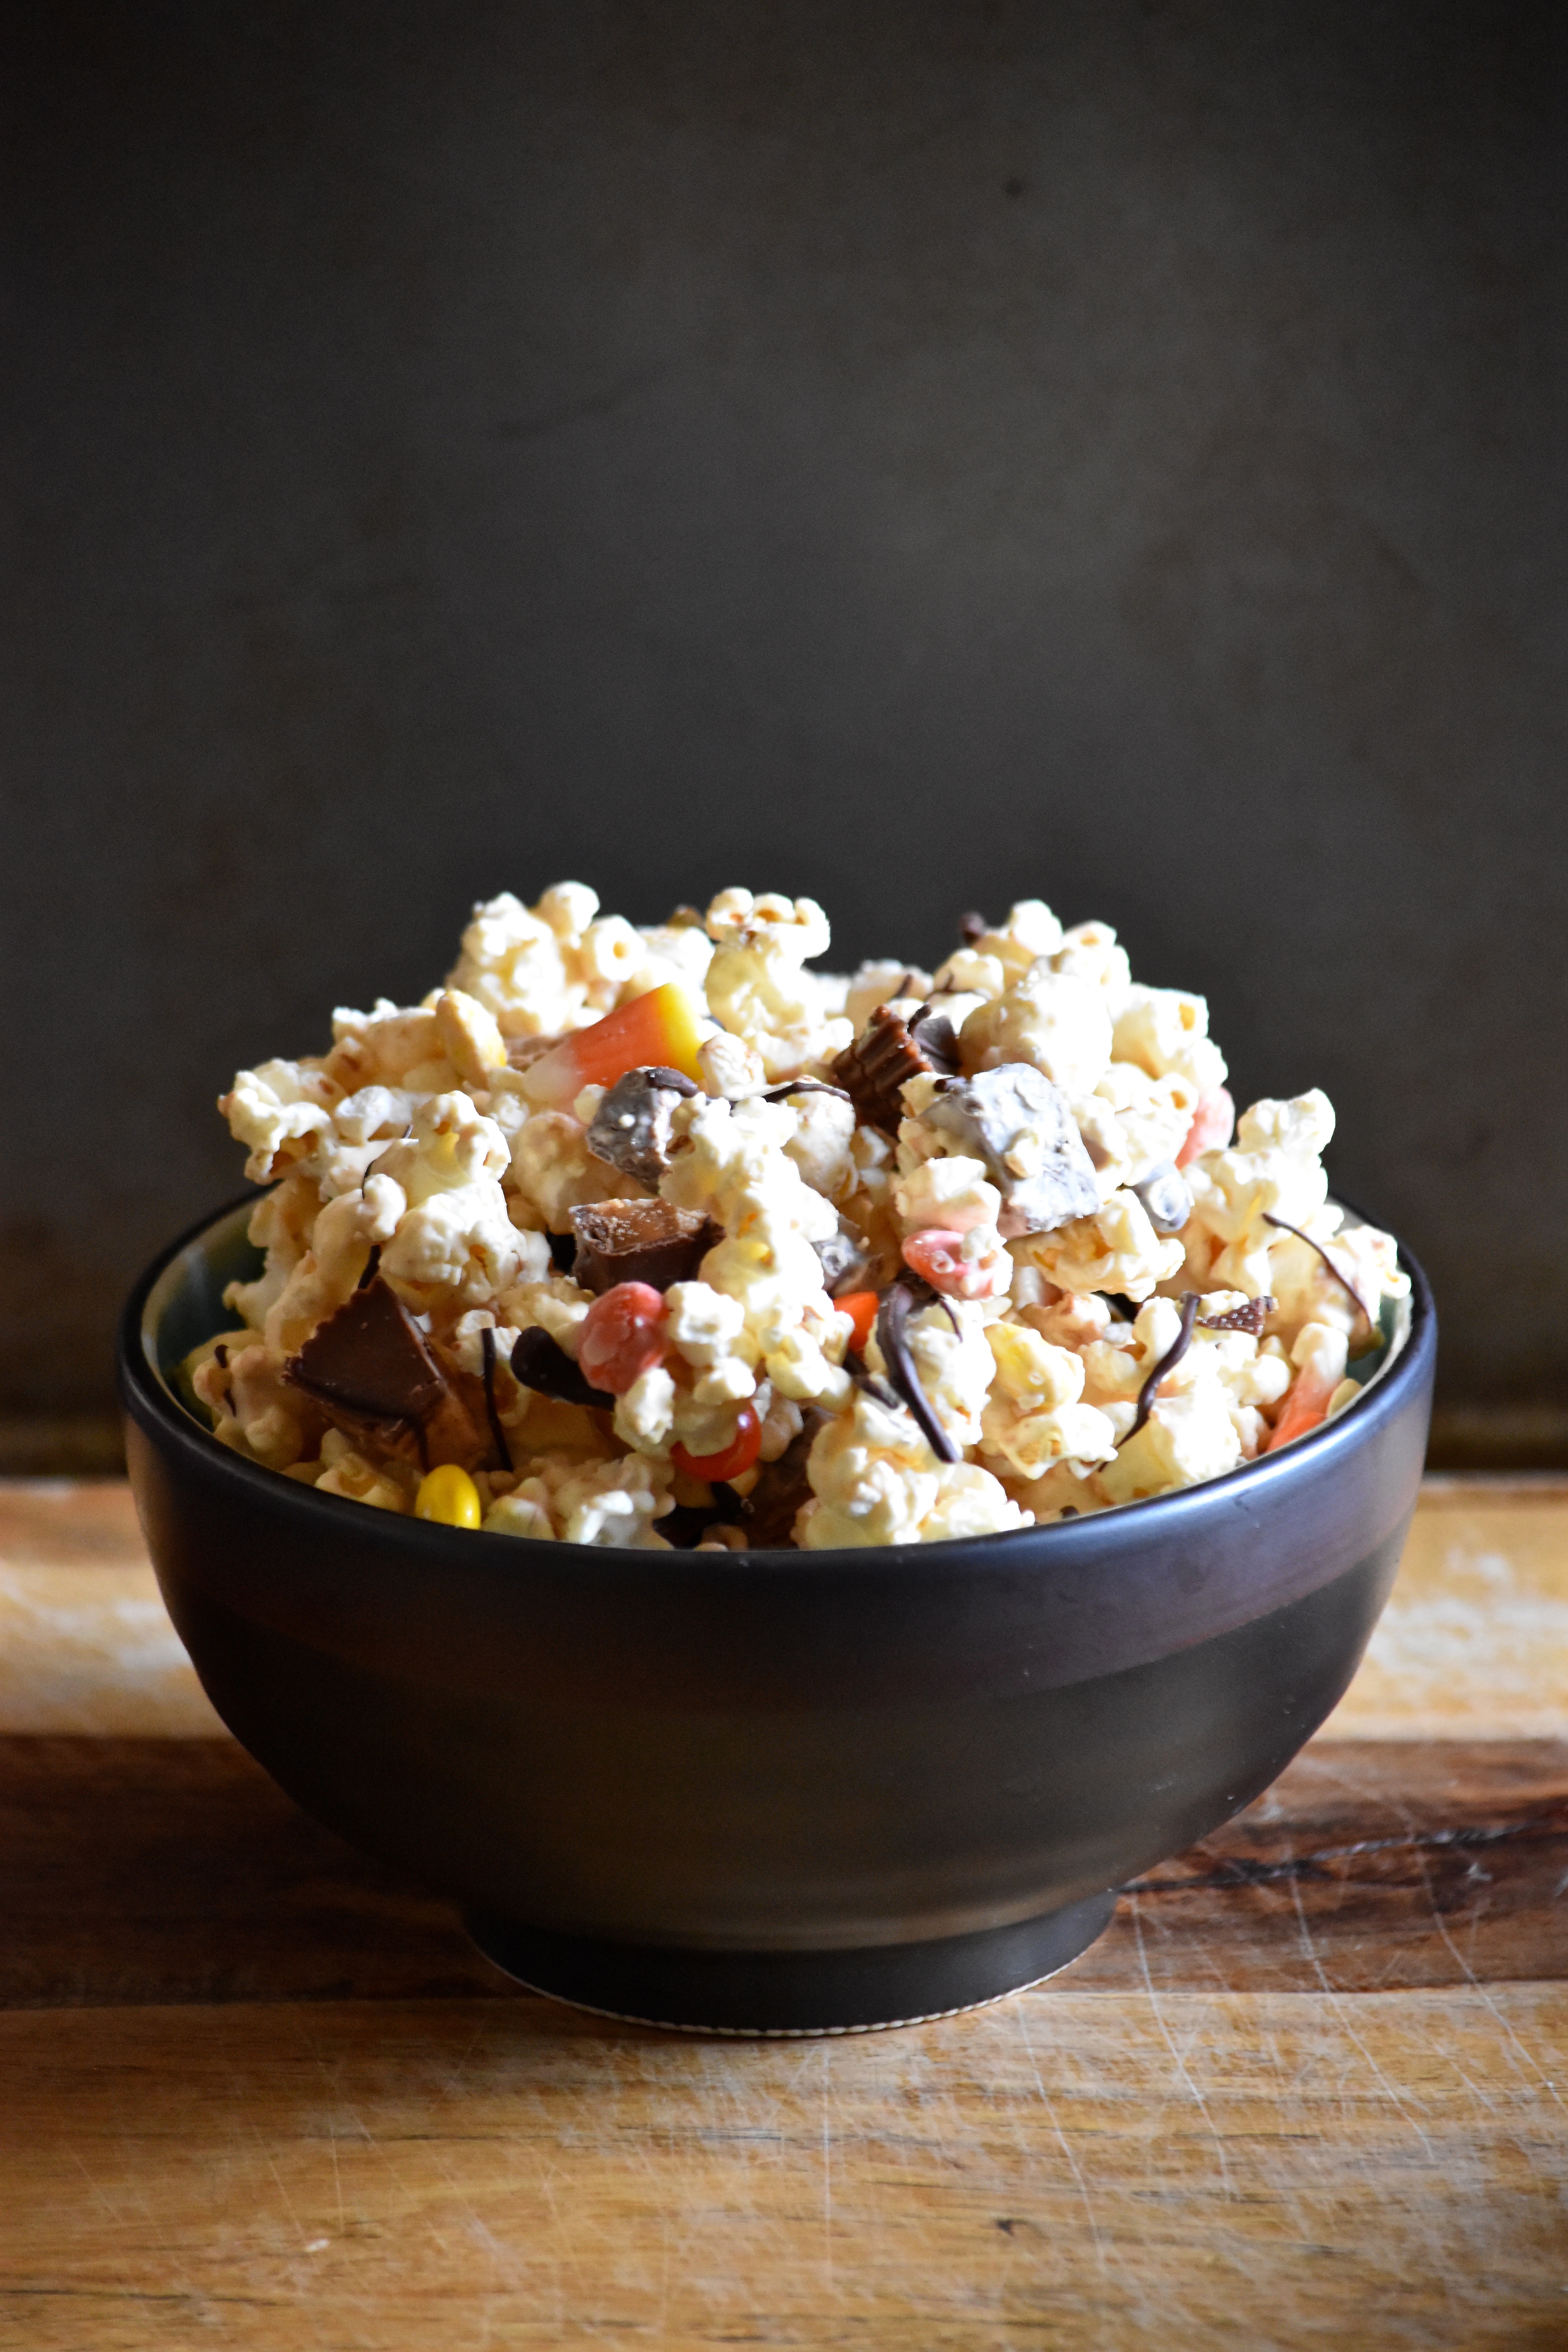
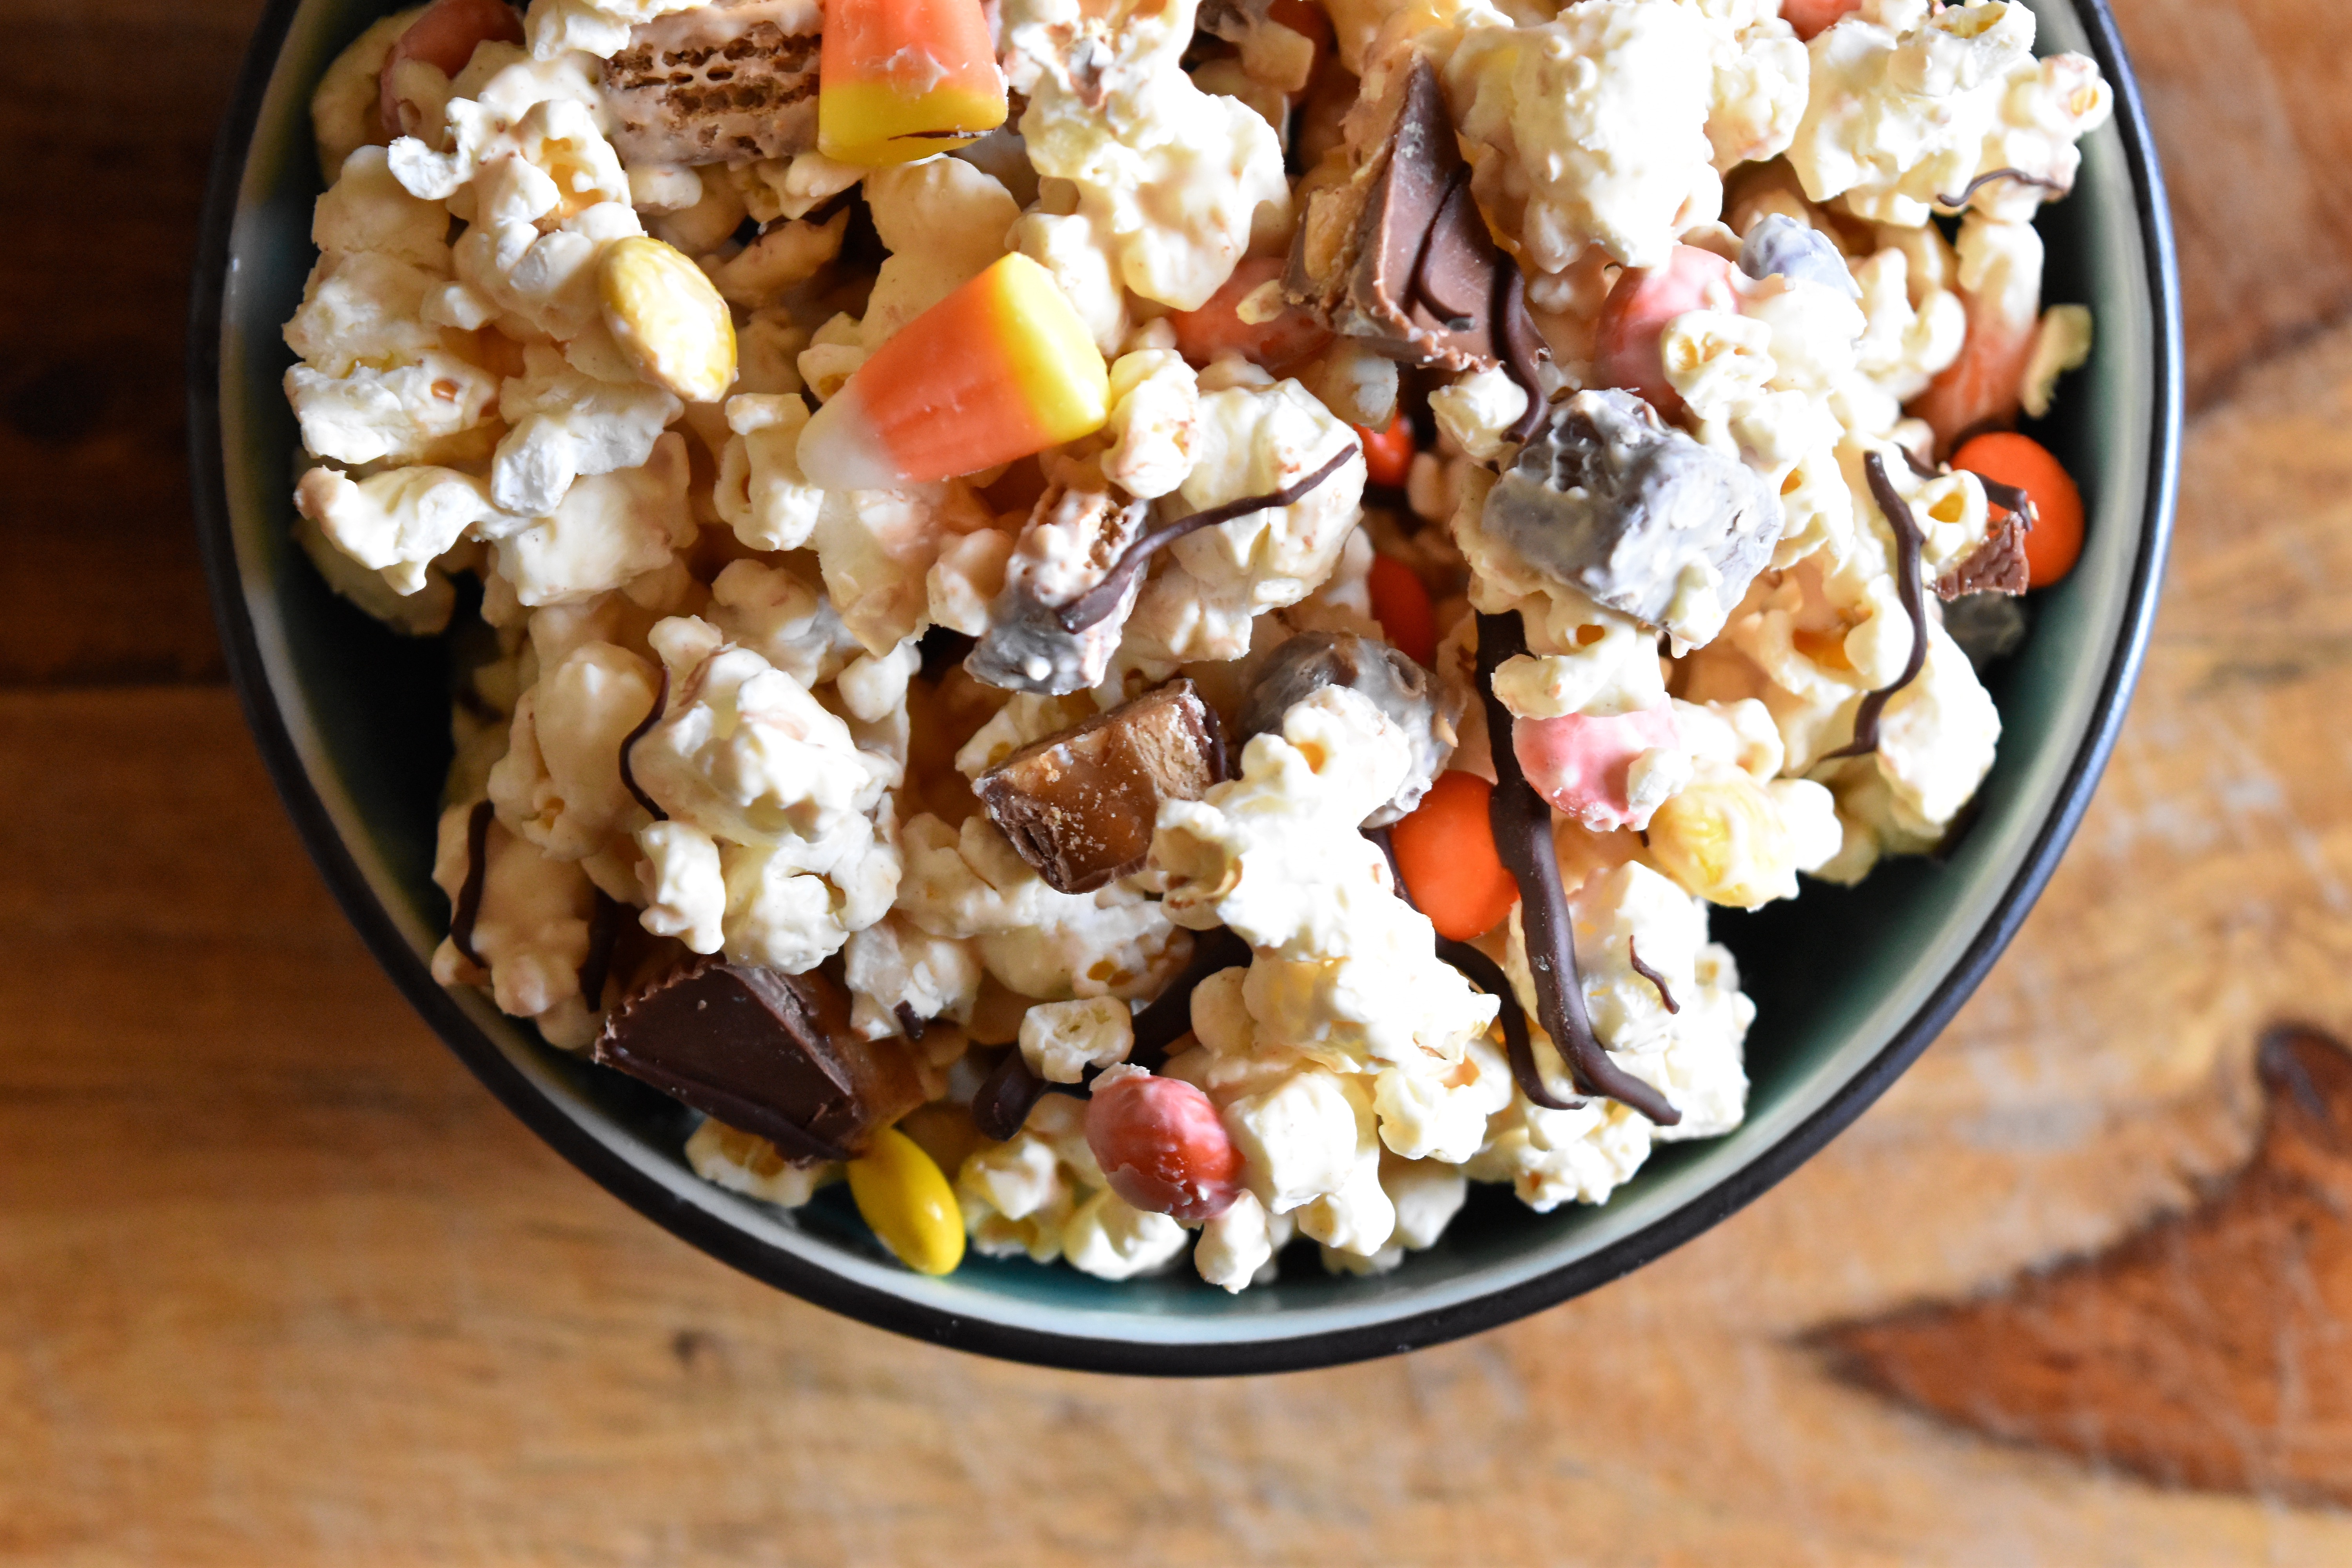
This popcorn was created as a way to put leftover Halloween candy to good use. I don’t personally know much about having leftover candy as it seems to find its way into my pie hole before I have the chance to stop it, but if I did have leftover candy, hypothetically speaking, this is how I would use it. This candy bar popcorn comes together in minutes! Popcorn is mixed with melted white chocolate and peanut butter and loaded with chopped candy bars and candy corn. Halloween crack, if you will.

Candy Bar Popcorn | Once Upon a Recipe

In the midst of your last-minute preparations for tonight’s festivities – the costume-making, the pumpkin carving, the decorating, the party planning – I have one very important task for you. You must ensure that you save some of that Halloween candy so that you can make this candy bar popcorn. In fact, buy some extra candy so that you can make this twice. And truth be told, if you get a hankering for this stuff at another time of year, just chop up some regular size candy bars. Using the mini sizes is great because you can use an assortment of chocolate bars and then you get a nice variety of little bites. You’re going to love this stuff. You’re welcome and I’m sorry.

Candy Bar Popcorn | Once Upon a Recipe

Candy Bar Popcorn 

Any kind of candy works in this popcorn, so use whatever you have on hand. My favourite combination was Mars, Snickers, Reese’s pieces, and candy corn. The popcorn can be stored in an airtight container for several days, if it lasts that long!

8 cups of popped corn

1 cup white chocolate pieces

3 TBSP. peanut butter

2 cups candy (chopped chocolate bars, candy corn, Smarties, etc.)

1/4 cup milk chocolate pieces

Prepare a large baking sheet with wax paper. Put the popped corn into a large bowl, being sure to remove any unpopped kernels. In a double boiler over medium heat, gently melt the white chocolate and peanut butter, stirring until smooth.

Pour the white chocolate mixture over the popcorn, add the candy pieces, and stir to combine. Turn the mixture out onto the baking sheet and spread into a single layer.

Melt the milk chocolate pieces in a small bowl in the microwave (start with 30 seconds, then 10 second increments until melted). Drizzle over the popcorn. Place the baking sheet in the fridge for 15 minutes until cool and set. Break into pieces. Store in an airtight container. Enjoy!

Candy Bar Popcorn | Once Upon a Recipe

Lemon White Chocolate Crème Brûlée

Lemon White Chocolate Crème Brûlée | Once Upon a Recipe

My love affair with crème brûlée started a few years ago. I was visiting my friend Sam, and her husband – Josh, being the dear (and very talented chef) that he is, had whipped us up a couple of pots of crème brûlée to enjoy with our wine. At the time, I wasn’t so sure that I liked crème brûlée, having only eaten it a few times before, and feeling less than impressed with what I had tried. But being one who rarely (if ever) turns down a sweet treat, I dug right into that pot of creamy goodness. It was insanely delicious, what with the perfectly torched sugar crust on top that gave way to the luscious perfection below. I distinctly remember saying to Josh that very night – “You must teach me how to make this.”

Lemon White Chocolate Crème Brûlée | Once Upon a Recipe

For I had tried to make crème brûlée once or twice before, but had encountered difficulty with getting everything to set up properly (crème brûlée soup, anyone?) and had never mastered that perfectly torched sugar topping. I didn’t have the tools or the know-how, and had ended up with an unevenly burnt top, courtesy of my oven’s broiler. It was never a pretty scenario.

Fast forward to several years later, and Josh and I finally made that lesson happen. I have made this recipe a few times since then, and it has turned out perfect every time. The recipe provides a great base for a variety of flavor combinations. Josh also made a dark chocolate raspberry version that was incredible. However, the lemon lover in me had to share this lemon white chocolate version.

Lemon White Chocolate Crème Brûlée | Once Upon a Recipe

Thank you Josh for sharing your crème brûlée know-how! Now, onto the recipe…

I’ve written the recipe in detail, just to ensure that it’s clear. Forgive me if this information or technique is not new to you. I’ve seen a variety of crème brûlée recipes out there, but this is my go-to. It’s foolproof!

Lemon White Chocolate Crème Brûlée | Once Upon a Recipe

Lemon White Chocolate Crème Brûlée

This recipe makes enough to fill 4 small ramekins. It can easily be doubled or tripled, according to the number you require. Just remember to stick to the ratio of 5 egg yolks for every cup of whipping cream. As I mentioned before, this recipe is a great base for other flavor combinations. For example, for a dark chocolate raspberry version, sub in dark chocolate for the white chocolate and omit the lemon. Drop spoonfuls of smashed raspberries into the ramekins pre-bake. Also, the most important step is the chilling process. Be sure to prepare this recipe the night before you wish to serve it, so that the crème brûlée has about 24 hours to chill thoroughly and properly set. 

1 cup whipping cream

5 egg yolks

1/4 cup granulated sugar + more for topping

1 TBSP. vanilla

1/2 cup white chocolate pieces

4 lemons, divided

Preheat the oven to 325°F. Place the four ramekins (or shallow jars) into a baking dish.

In a small saucepan, add the whipping cream, white chocolate pieces, 1 tsp. fresh lemon juice, and the rind* of two lemons. Place the saucepan over medium heat. Stir regularly, and remove from the heat just when the mixture begins to bubble around the edges. In the meantime, in a medium-sized bowl, whisk together the egg yolks, sugar, and vanilla until pale. Very gradually, add the cream mixture to the eggs, stirring constantly. Do not add the cream too quickly, as you are trying to temper the eggs (not scramble them!). Strain the mixture into a bowl (or a large measuring cup with a spout, for ease of pouring) and discard the pieces of lemon rind. Zest the remaining two lemons and add the zest to the cream, stirring to combine. Divide the mixture evenly between the four ramekins.

Place into the oven and then very carefully pour boiling water into the baking dish, until it reaches halfway up the sides of the ramekins. Be careful not to splash any water into the ramekins. Place a cookie sheet over top of the baking dish (to cover). This is optional, but will prevent the tops of the crème brûlée from browning. Bake for about 20-25 minutes, or until the ramekins are almost set, and only a wee bit jiggly in the center. Cool on the counter, and then cover and refrigerate overnight (about 24 hours).

Just before serving, sprinkle the top of each ramekin with about 1 tsp. of granulated sugar. Use a blow torch to carefully melt and brown the sugar on top. Enjoy!

*Using a sharp knife, remove the skin of the lemon in large pieces, avoiding the pith (the white part, which is bitter) as much as possible.

Lemon White Chocolate Crème Brûlée | Once Upon a Recipe

Hope you’re having a great week, friends!

Things I’ve Learned Vol. 1 | Christmas Crack (aka. Clodhoppers)

1.When you’re eating a single lady dinner (read: frozen dinner), always enjoy your dinner on a fancy plate. This will help you to feel less bad about yourself/pathetic for a) eating by yourself, and b) eating microwaved crap when you should have been less lazy and made yourself something respectable to eat. Your fridge is full of groceries, after all.

2. When you decide that it’s a good idea to wait until the week before Christmas to start your Christmas shopping, be prepared to get feisty. People get crazy. I went to Costco recently and people were taking the line-ups for the samples a wee bit too seriously. I actually witnessed two people almost get into a fight about who got there first. Dudes, if you’re going to get that worked up about a sample of cheese, then you’ve got bigger problems on your hands. Seek help. Immediately.

3. It’s not a very smart idea to wait until the week before the big day to start your Christmas shopping.

4.Christmas baking is a lot of fun. Delicious fun at that. And you can dance around to annoying Christmas songs spilling flour and sugar and sprinkles everywhere while you do it. Unfortunately the fun suddenly comes to a halt when you have 14 dozen cookies in your freezer, beckoning you to eat them at all hours of the day and night. Thankfully, most people enjoy Christmas cookies and will gladly take a couple dozen off of your hands. Baking also makes a great gift. Right?

5. We should all poach chickens more often. Whole chickens. As in, stick ’em in a pot, cover ’em with water, add veggies and herbs and simmer away until you’ve got the most tender chicken that’s ever passed your lips. You’ll be left with a whack of chicken (for use in soups, salads, pasta, whatevs) and a serious helping of homemade chicken broth. Win! Seriously. Do it. I followed these guidelines.


Single Lady Dinner/Poached Chicken

6. Nearly every Christmas song recorded after 1995 is terribly annoying. Have you noticed that every song is about love, or asking Santa to shoot you with Cupid’s arrow, bring your love back to you, or some variation of the two? Newsflash peeps! There is no Santa Claus. And if there actually was a jolly old fat guy who could fly around the entire world on a sleigh pulled by magical reindeer in one night, eat billions of cookies, and slide down chimneys and leave us all everything we wished for, I’m pretty sure there wouldn’t be so many weird single people in this world. Me included.

7. Is anyone looking for a weird girlfriend? I’ll bring cookies.

8. If you make the following recipe, you won’t regret it.

Warning: I have discovered edible crack. Just 4 ingredients come together to create a highly addictive sweet snack. This recipe was shared by a lovely coworker of mine (hi E!) who brought said edible crack to a cookie exchange I attended last weekend. Clodhoppers is the real name, but after one taste of this stuff, you’ll agree that it’s as addictive as crack. Not that I have any personal experience with the stuff (seriously). Make it. Eat it. Enjoy it.

Christmas Crack (aka. Clodhoppers)

1 cup white chocolate pieces

1/2 cup dried cranberries

1/4 cup slivered almonds

2 heaping cups of Graham Crackers cereal

In a medium bowl, combine the cereal, cranberries, and almonds. In a double boiler over medium heat, melt the chocolate. Pour the melted chocolate over the cereal mixture, and toss until evenly coated. Roughly spread the mixture (but leave lots of clumps!) on a baking sheet lined with wax paper and throw the whole shebang into the freezer for about 10-15 minutes (to set). Remove from the freezer and break into chunks. Package in festive Christmas bags to give away, or toss into a bowl to enjoy yourself. Start researching rehab programs near you. 😉

A Festive Treat | Christmas Biscotti

My mom brought these delectable treats to the cookie exchange last weekend. I spent the afternoon in the kitchen with her the day before, and we worked through the recipe together (neither of us had ever made biscotti before). This biscotti is quite delightful, if I do say so myself. The original recipe called for dried raspberries or strawberries, but my mom could not find either, no matter how hard she looked, so we improvised and used cranberries. The biscotti are loaded with pistachios, cranberries, and little bits of white chocolate, making them look rather festive and fitting for the holiday season! Not to mention the fact that they are delicious, especially with a nice cup of coffee or tea.

Never made biscotti before? Have no fear! They are fairly simple to make, just more time-consuming since they are baked twice. Stay inside where it’s warm, take an afternoon to bake these, and fill your home with the delicious scent of biscotti! These would taste great at any time of year I am sure, but the colors and ingredients fit with the holidays perfectly. Happy eating!


Pistachio, Cranberry, and White Chocolate Biscotti (adapted from Bon Appétit magazine, Dec. 2005)

3 cups all-purpose flour

2 TBSP. canola oil

2 tsp. baking powder

2 ½ tsp. almond extract

½ tsp. salt

¾ cup shelled raw unsalted natural pistachios

1 cup sugar

1 cup dried cranberries

3 large eggs

½ cup chopped high-quality white chocolate (such as Lindt or Perugina)

8 ounces high-quality white chocolate (such as Lindt or Perugina) and/or 8 ounces bittersweet or semisweet chocolate, chopped

Preheat oven to 350oF. Line a large baking sheet with parchment paper. Whisk flour, baking powder, and salt in a medium bowl to blend. Using an electric mixer, beat sugar, eggs, oil, and almond extract in a large bowl until well blended. Add flour mixture and beat until smooth. Stir in pistachios, dried cranberries, and ½ cup white chocolate. Drop dough by heaping tablespoonfuls in two 12-inch long strips on prepared baking sheet, spacing strips 3 inches apart. Using wet fingertips, shape each strip into a 3-inch-wide log, pressing evenly (logs may look slightly lumpy). Bake logs until lightly browned and almost firm to the touch, about 30 minutes. Cool logs for 30 minutes. Reduce oven temperature to 325oF.

Carefully transfer the logs to a cutting board. Use the same parchment-lined baking sheet. Cut each log crosswise into generous ½-inch-thick slices. Stand biscotti upright, spacing about ¼ inch apart, in 3 rows on baking sheet. Bake until pale golden (biscotti may be soft but will firm as they cool), about 20 minutes. Cool completely.

Line another large baking sheet with parchment paper. Place 8 ounces chopped white (or bittersweet) chocolate in medium glass bowl. Microwave for 20-second intervals just until chocolate is soft to touch, about 40 seconds total (do not overheat or chocolate will burn or seize). Stir chocolate until smooth. Dip 1 end or 1 side of each biscotti in chocolate; place on baking sheet. Chill until chocolate has set, about 30 minutes. To store, arrange in single layer in airtight container and chill up to 5 days or freeze up to 2 weeks.  Makes about 3 dozen.

%d bloggers like this: