There’s An App for That | Pasadena Pinwheels

Pasadena Pinwheels | Once Upon a Recipe


Aloha mes amigos!

‘Tis the holidays! At this time of year, every good host and hostess needs a few recipes in his or her entertaining arsenal – tried and true crowd pleasers that can be counted on time and time again. For me, Pasadena Pinwheels is one of those reliable appetizers that everyone seems to love. They are easy to prepare ahead of time, only need a quick nip in the oven before serving, and well, they’re kind of delicious.

Why not give ’em a try this holiday season? Whether you’re hosting a party or attending one and need something easy to take along (yes, we’re all going to be good guests this year), Pasadena Pinwheels are money.

I’ll even walk you through it. Let’s get started!

Pasadena Pinwheels | Once Upon a Recipe


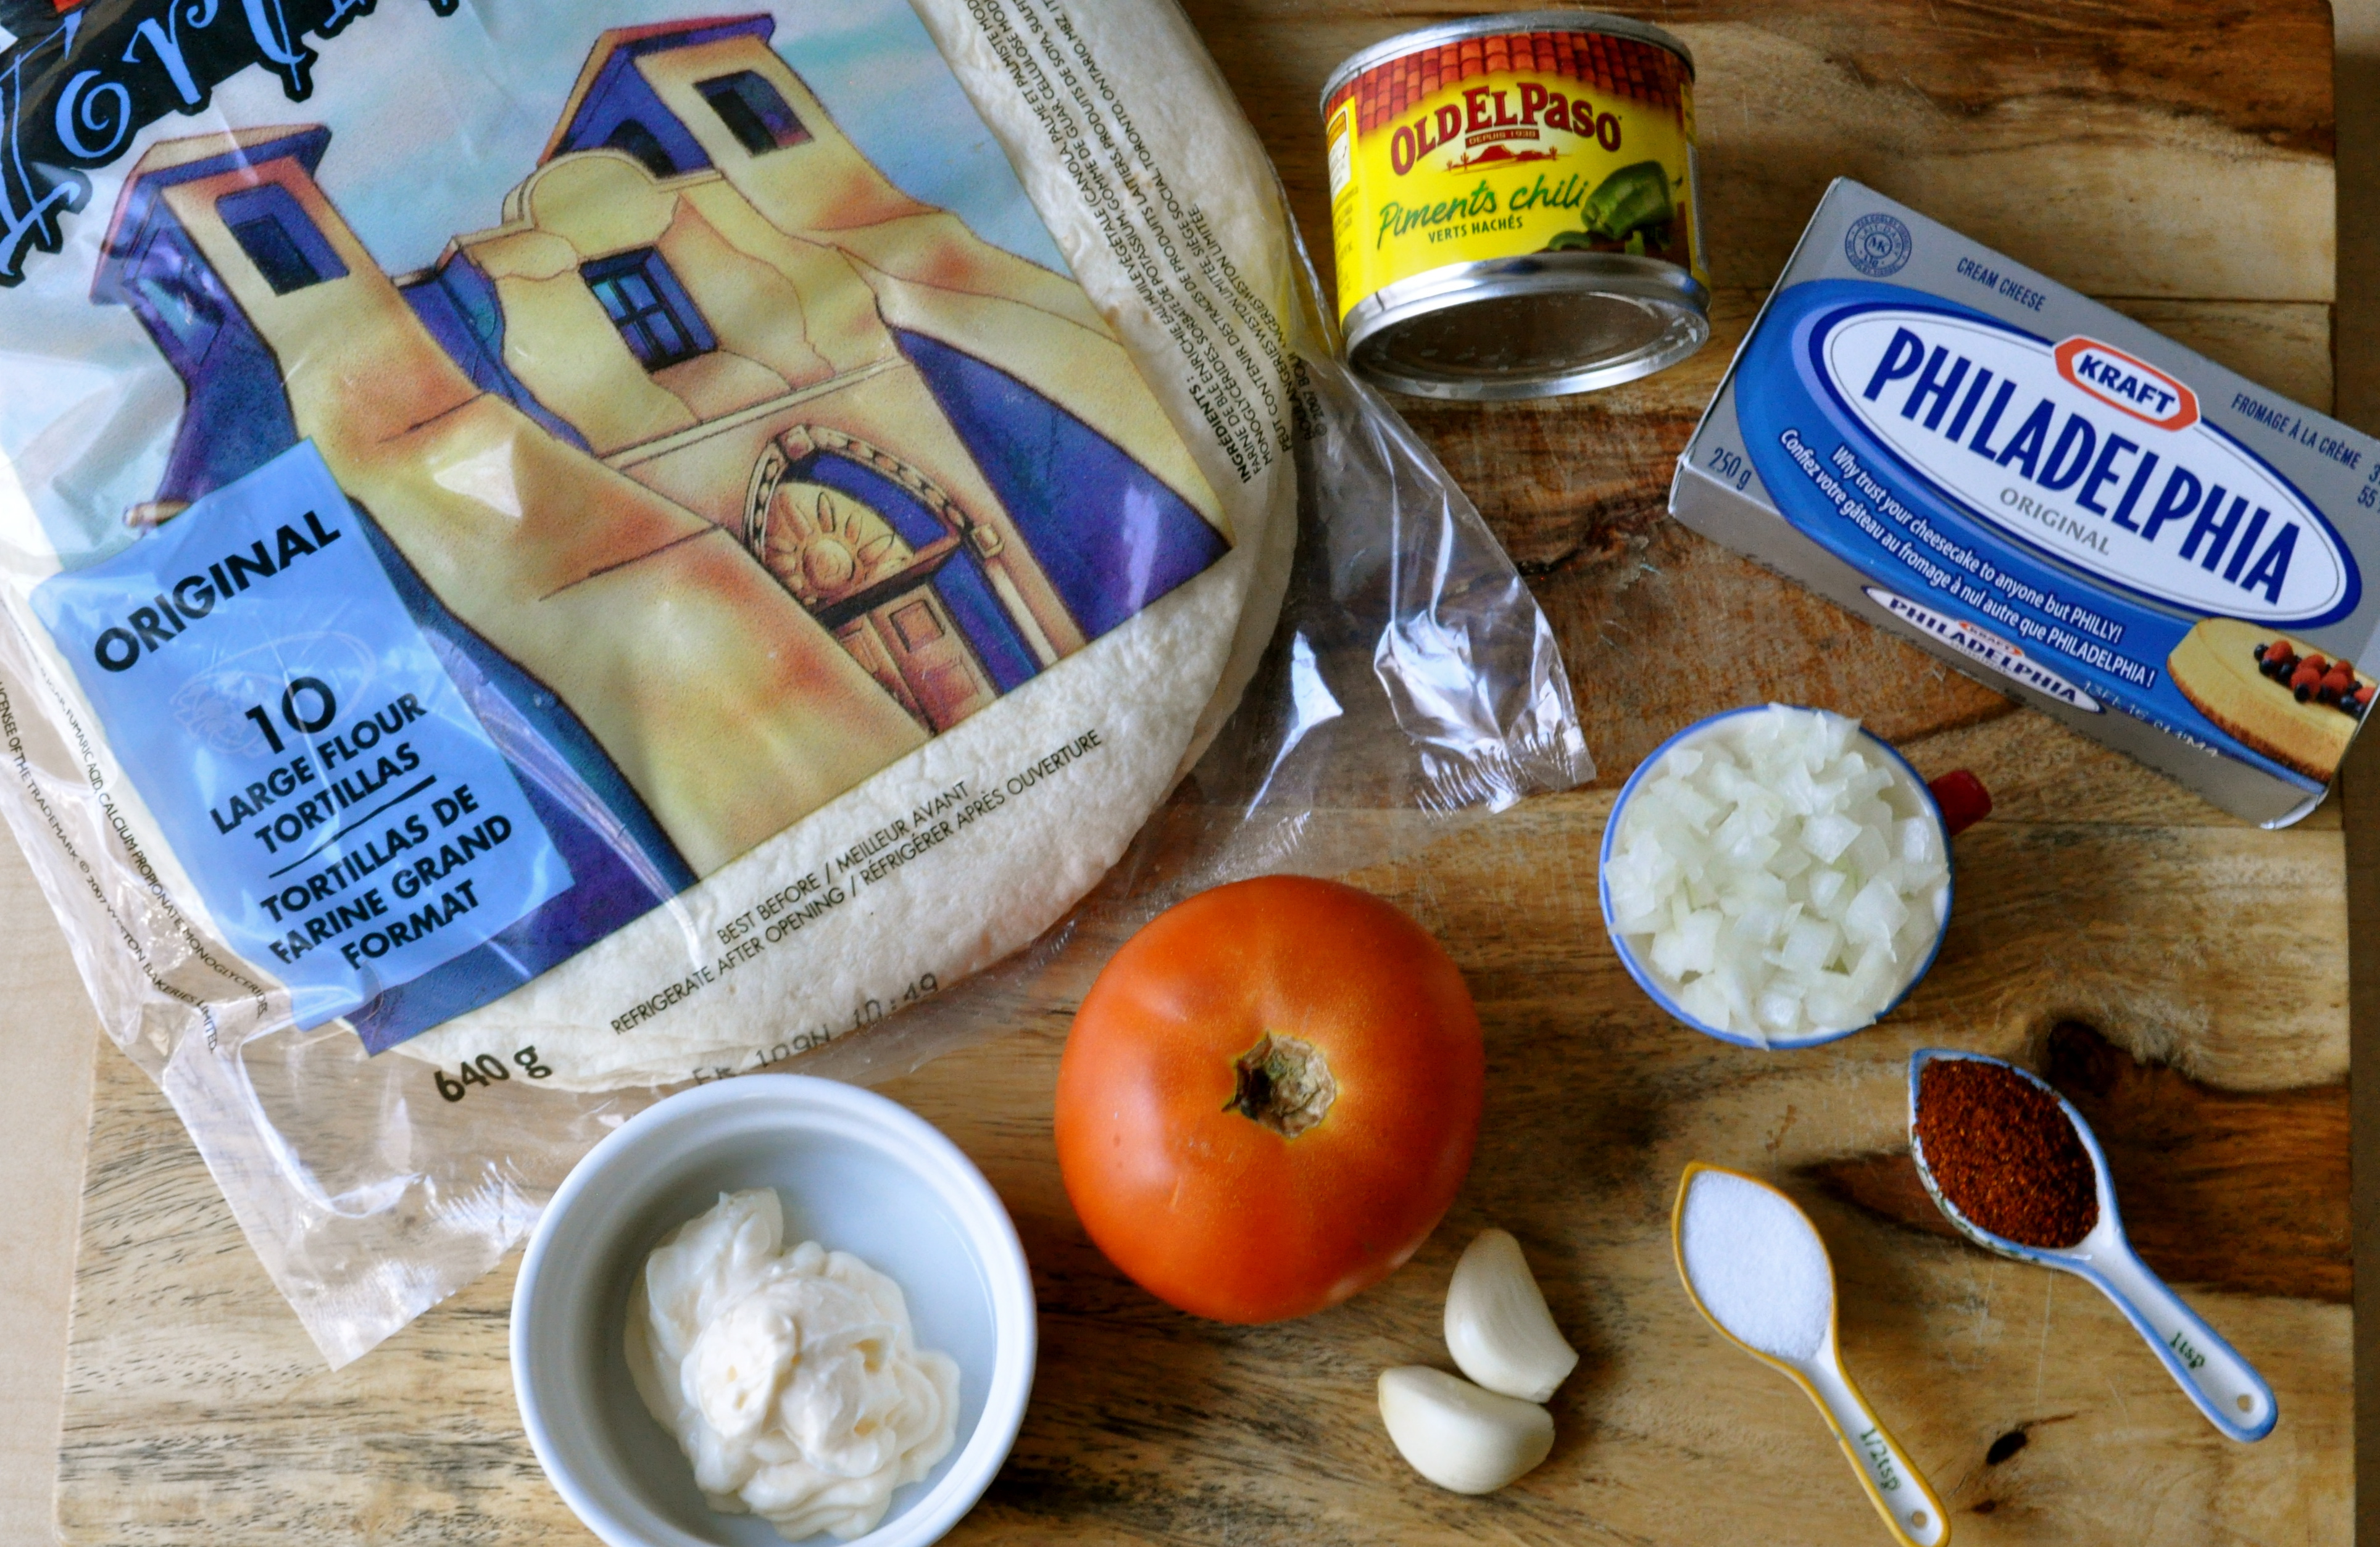
The ingredient list is trés simple. Cream cheese, a lil’ mayo, green chiles, tomato, onion, garlic, chili powder, salt, and tortillas. And some salsa for dipping.

Pasadena Pinwheels | Once Upon a Recipe


Pasadena Pinwheels | Once Upon a Recipe

Pasadena Pinwheels | Once Upon a Recipe

Pasadena Pinwheels | Once Upon a Recipe


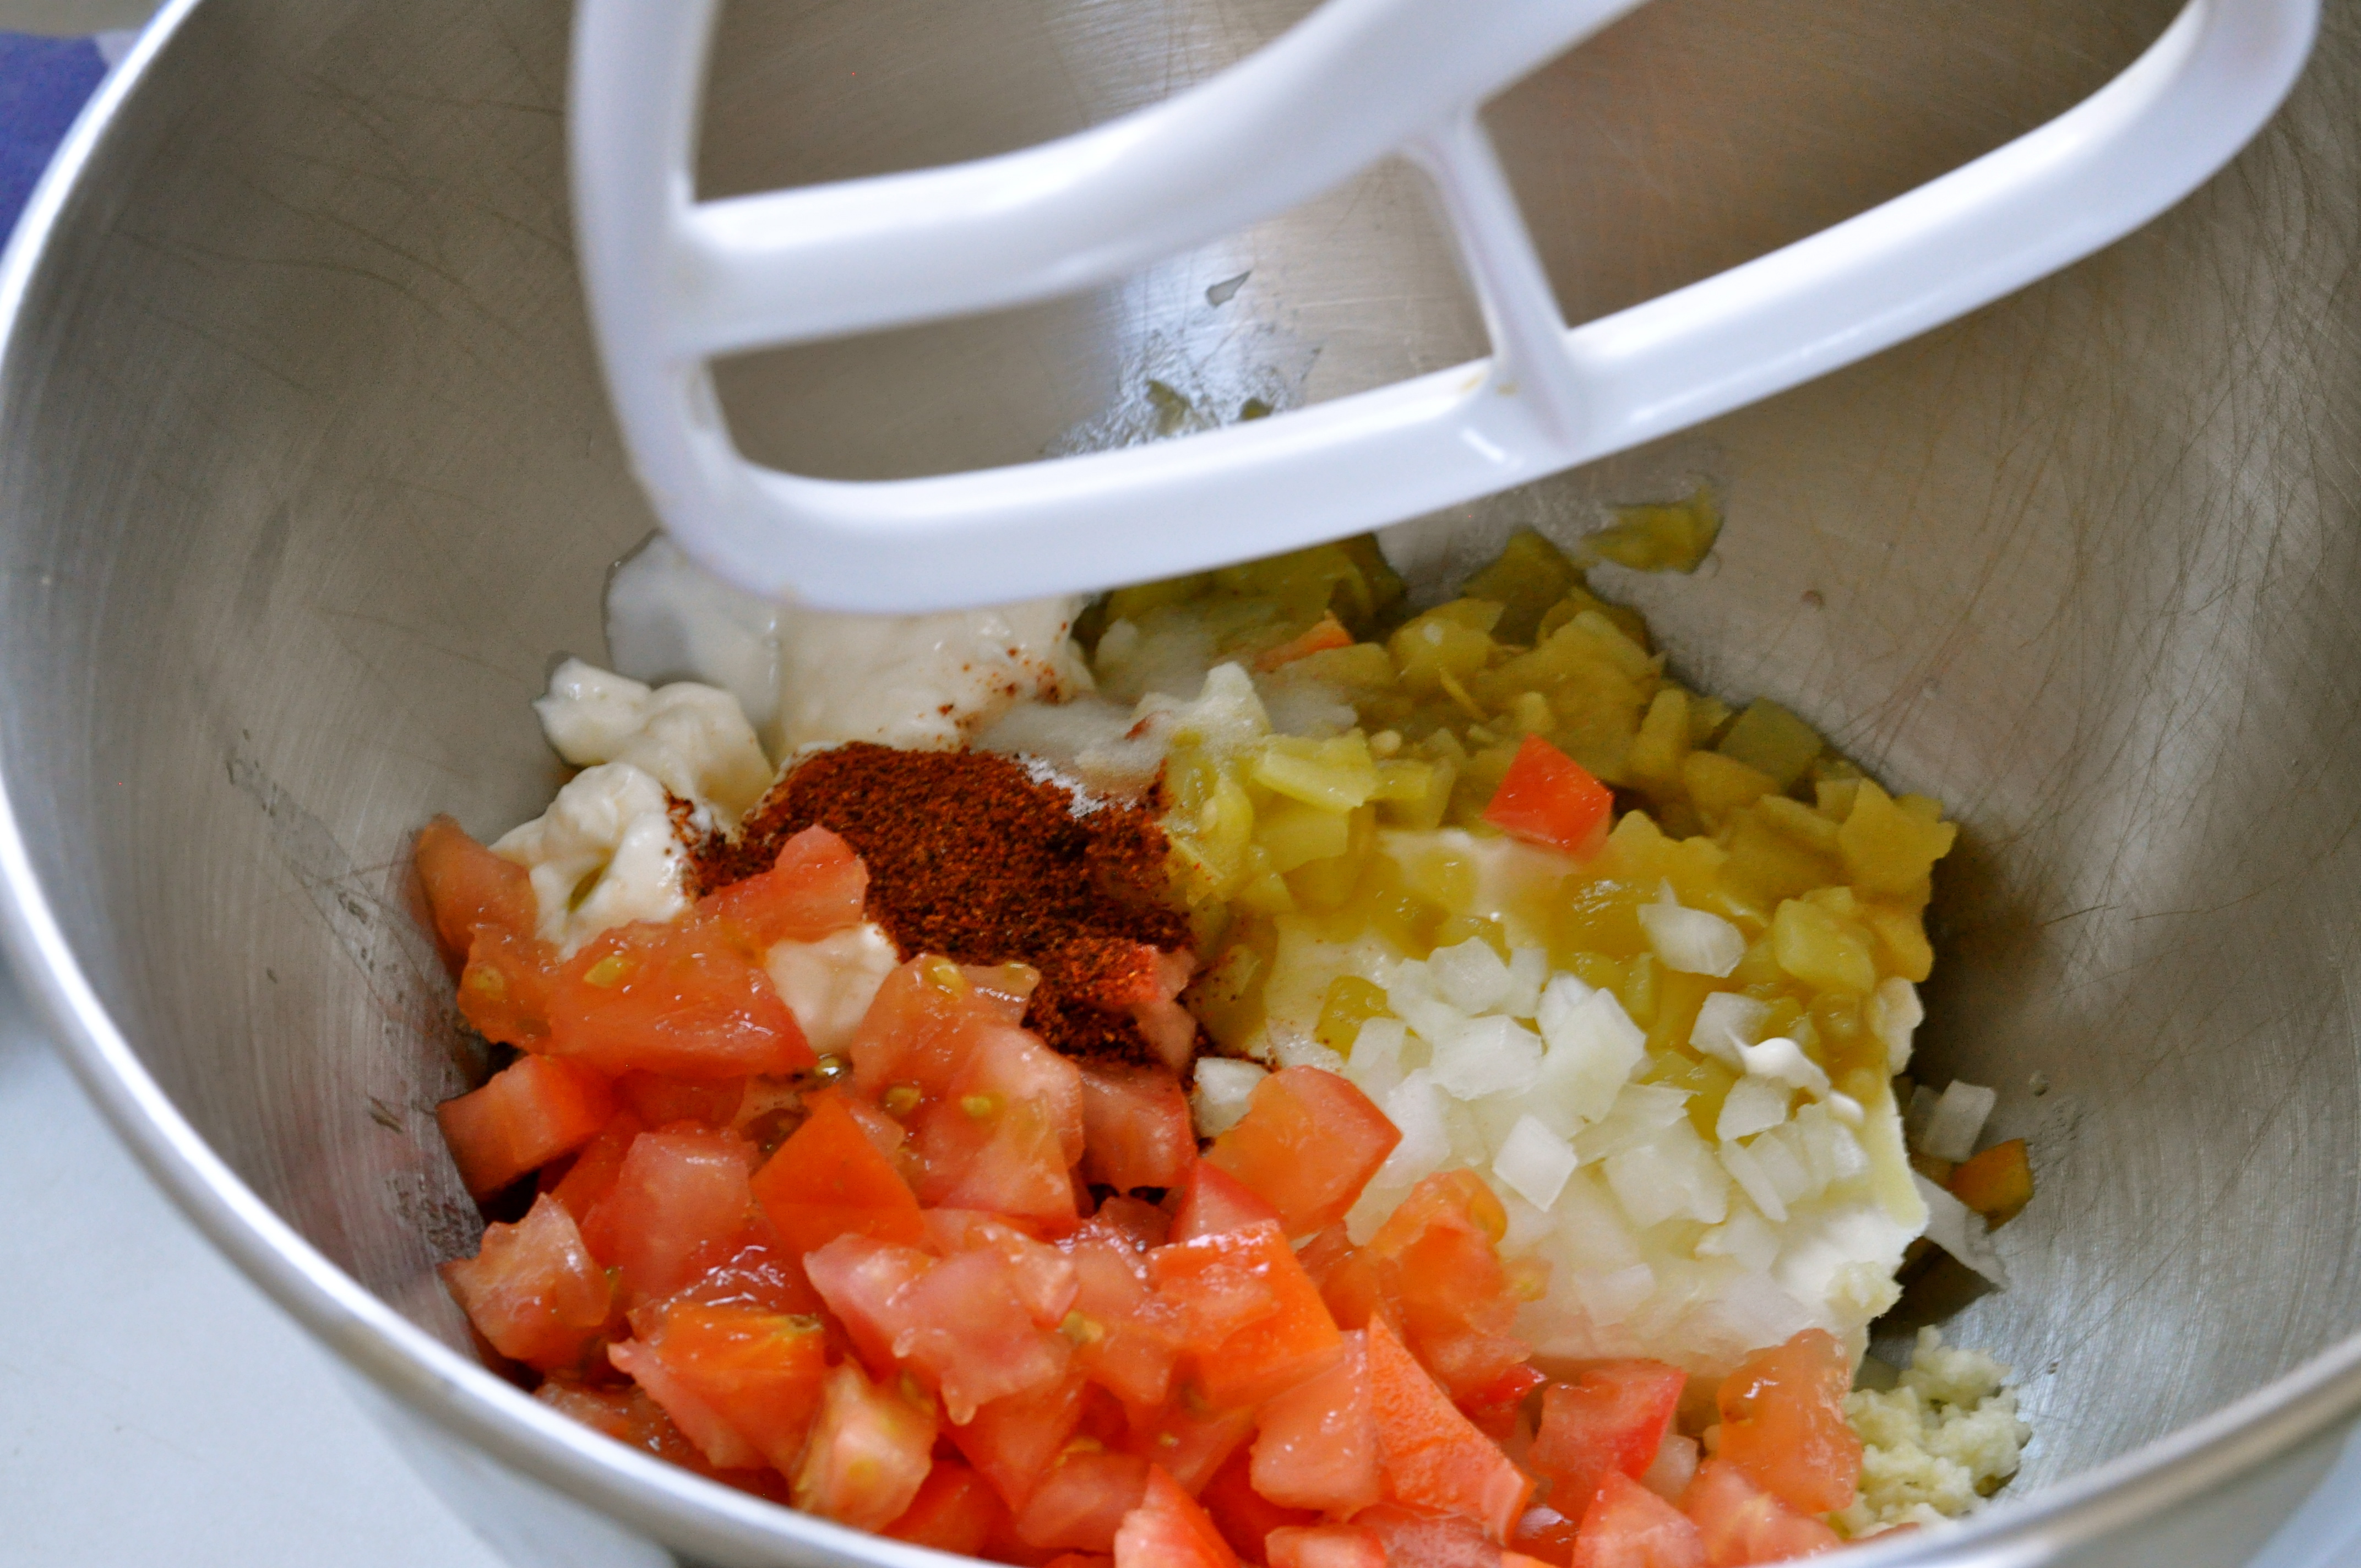
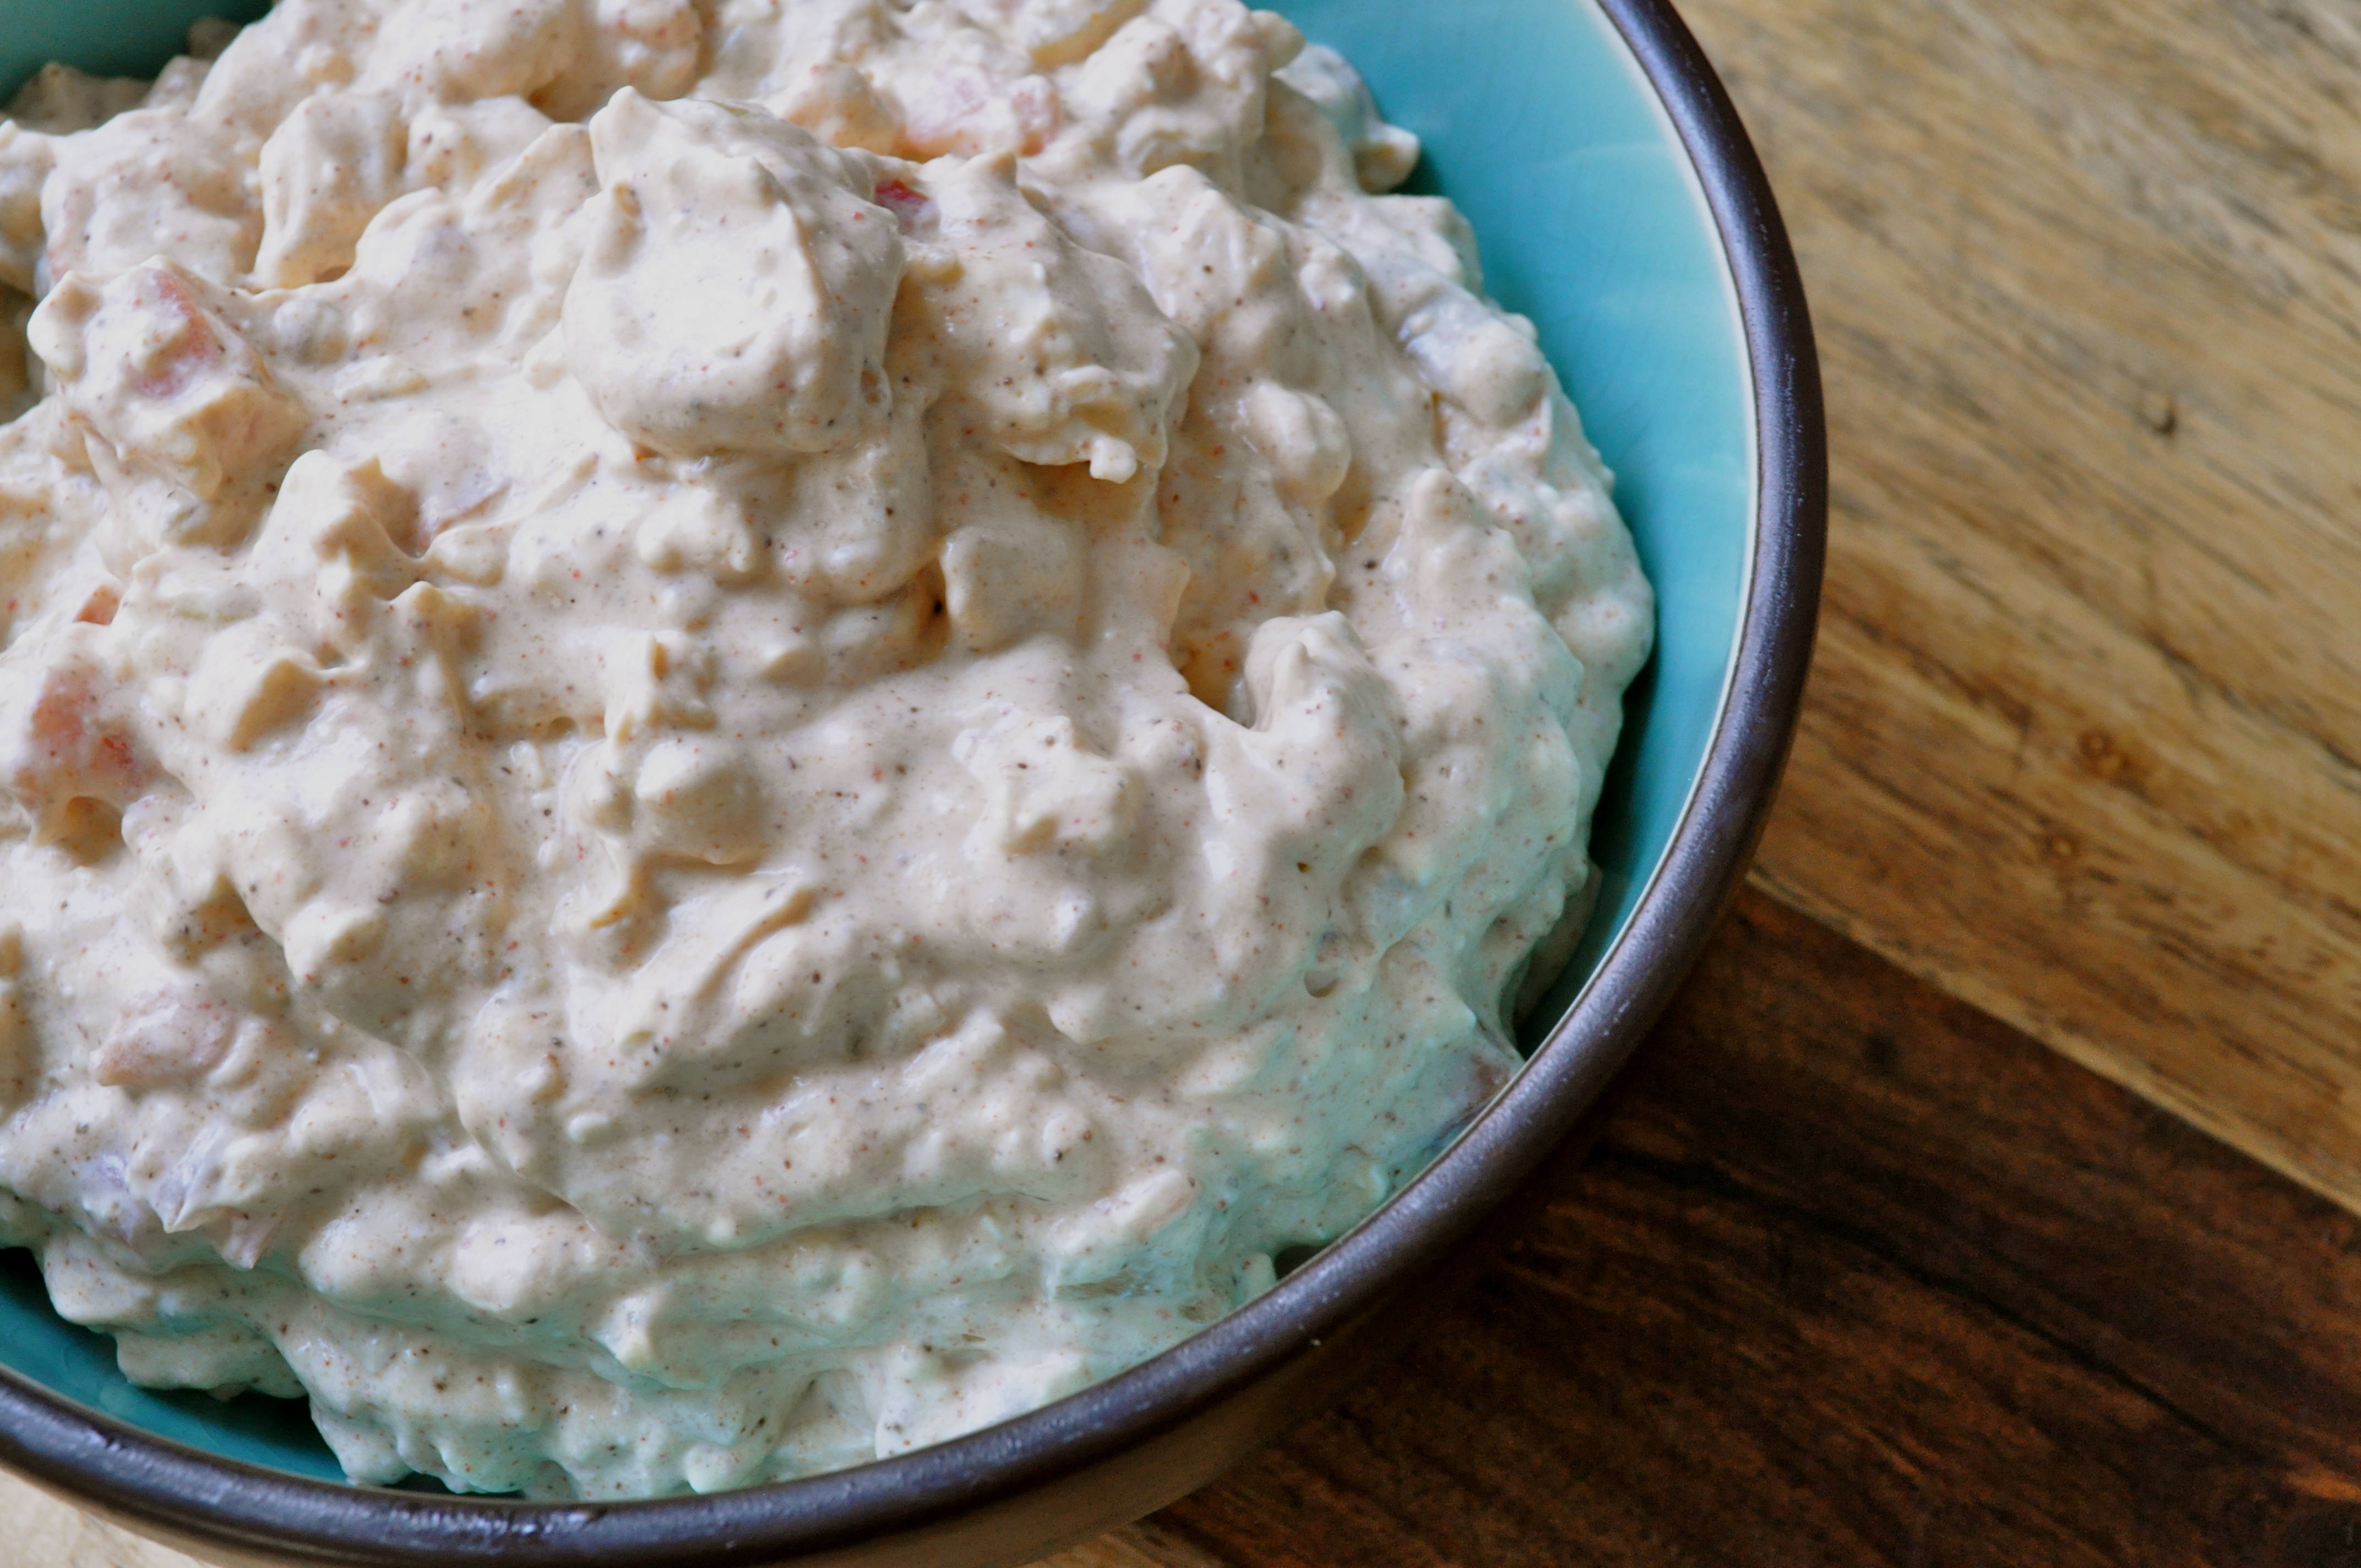
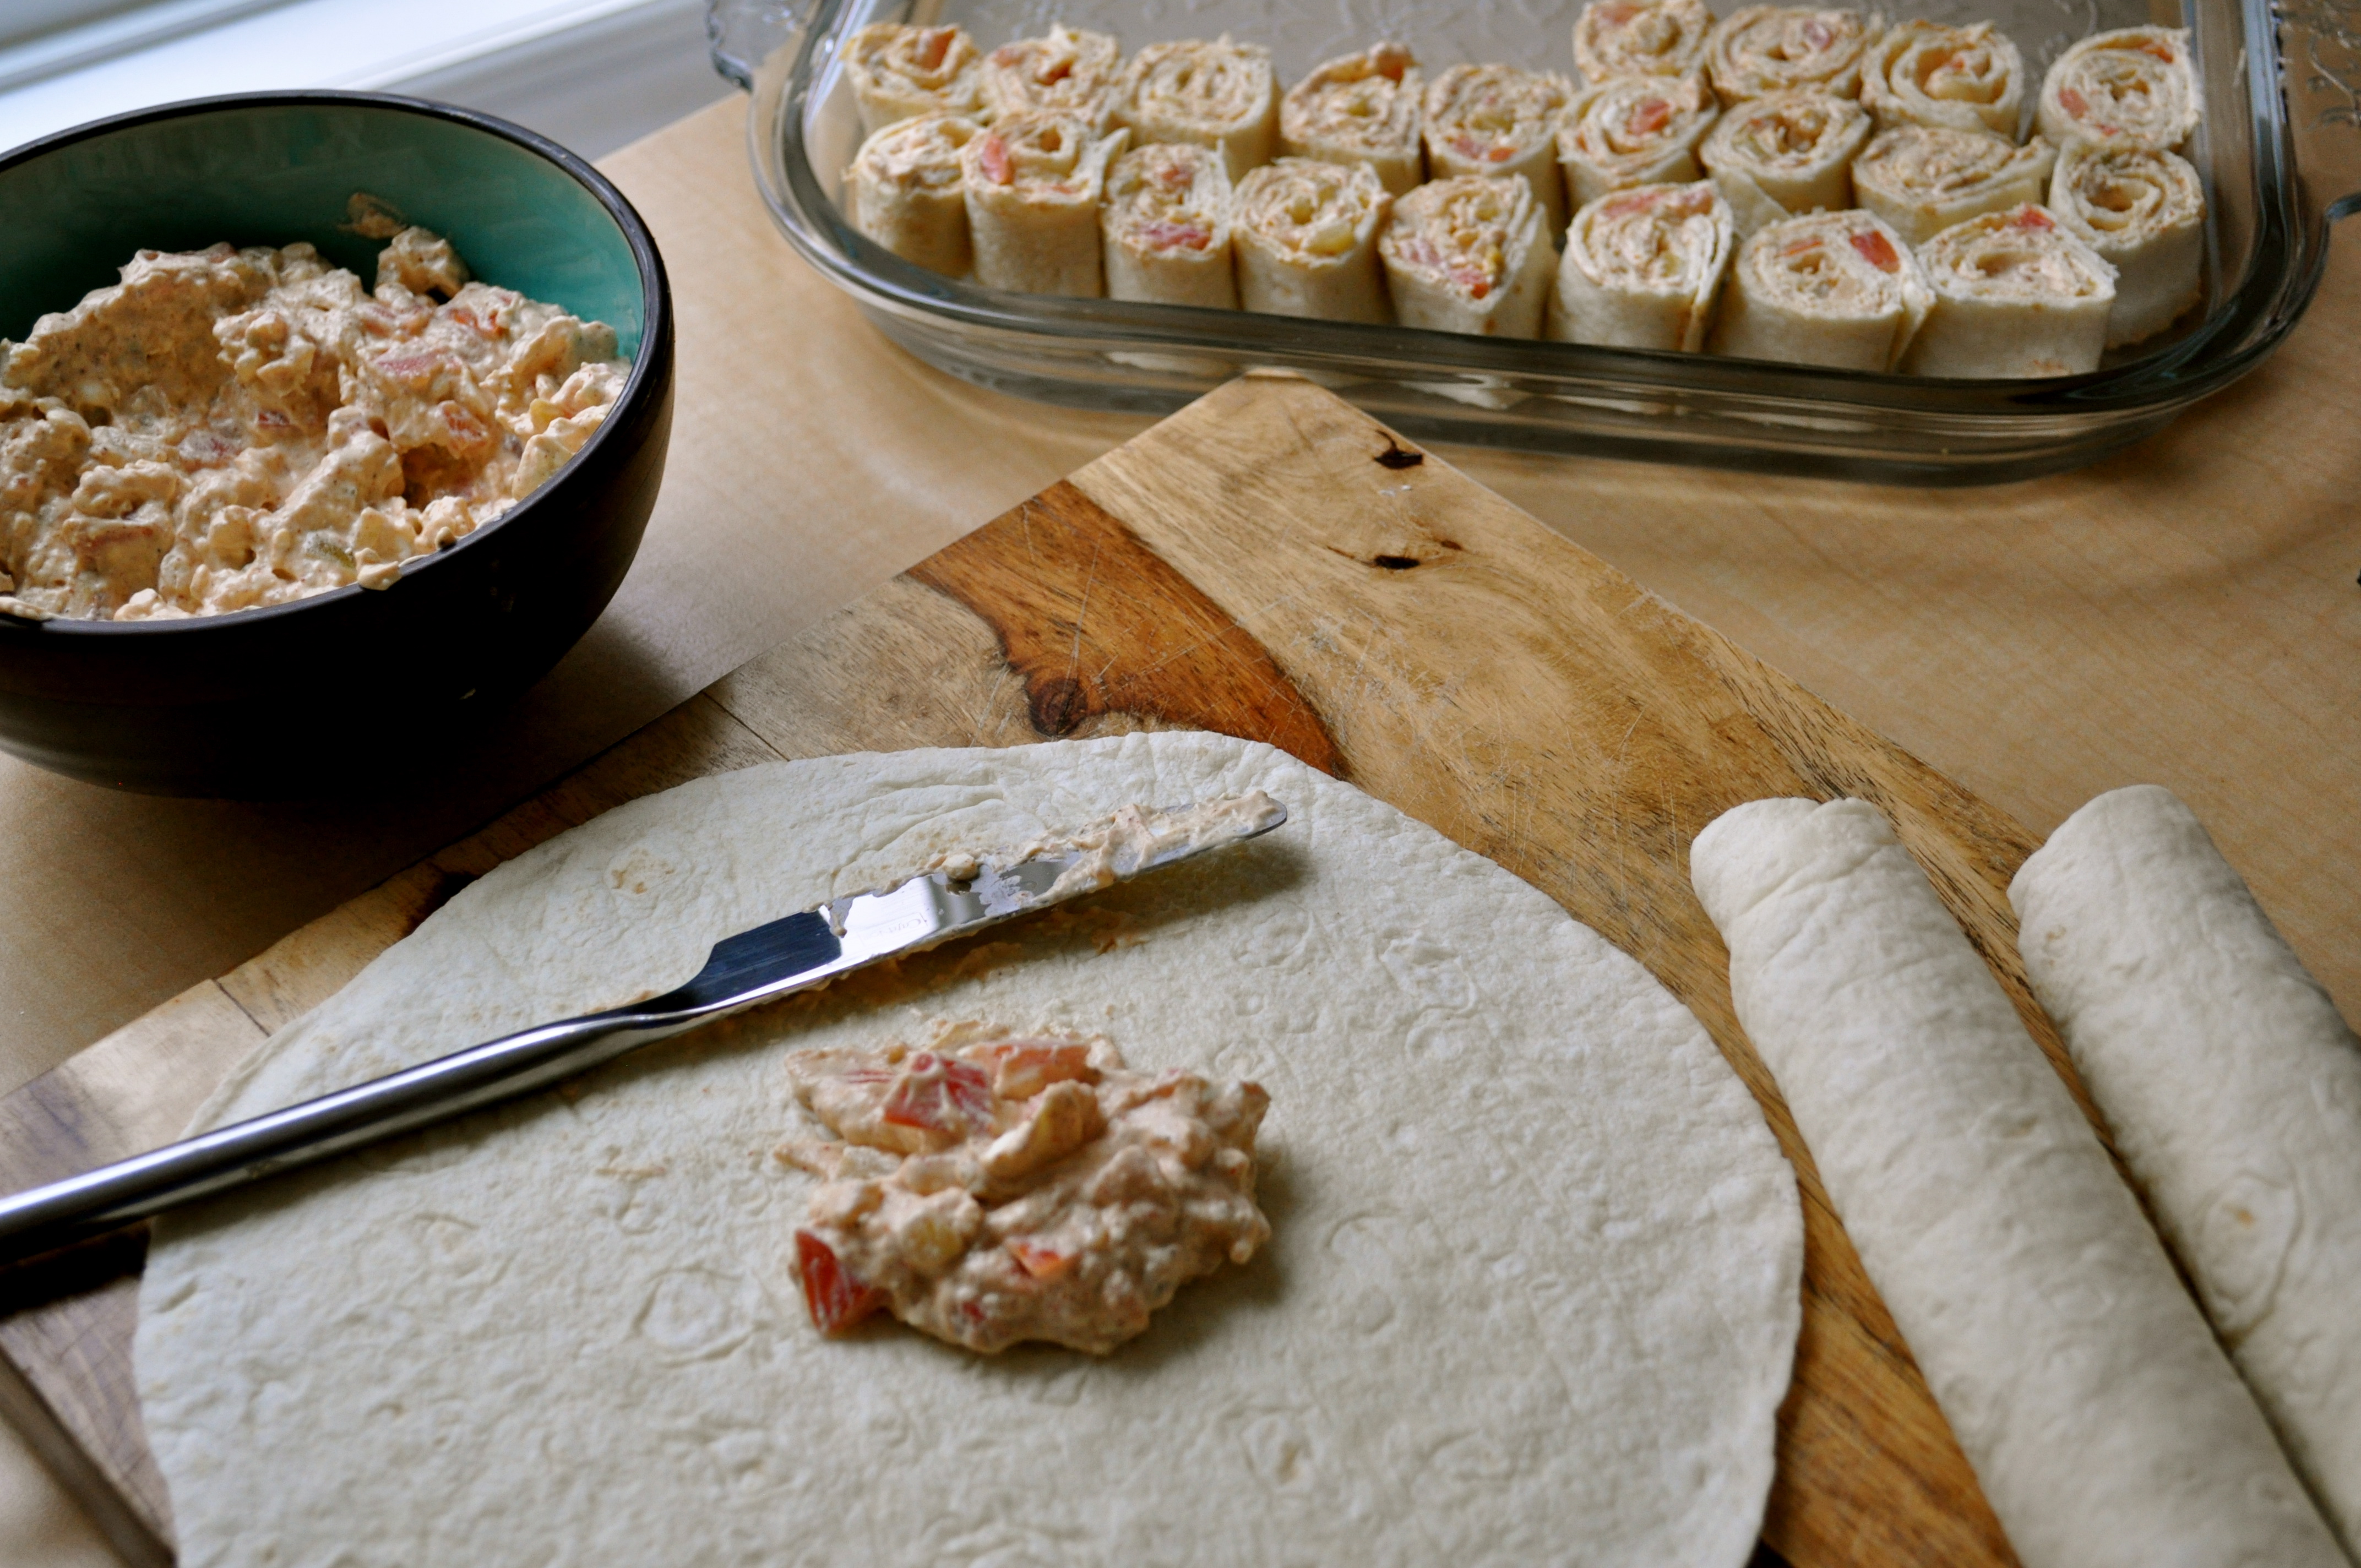
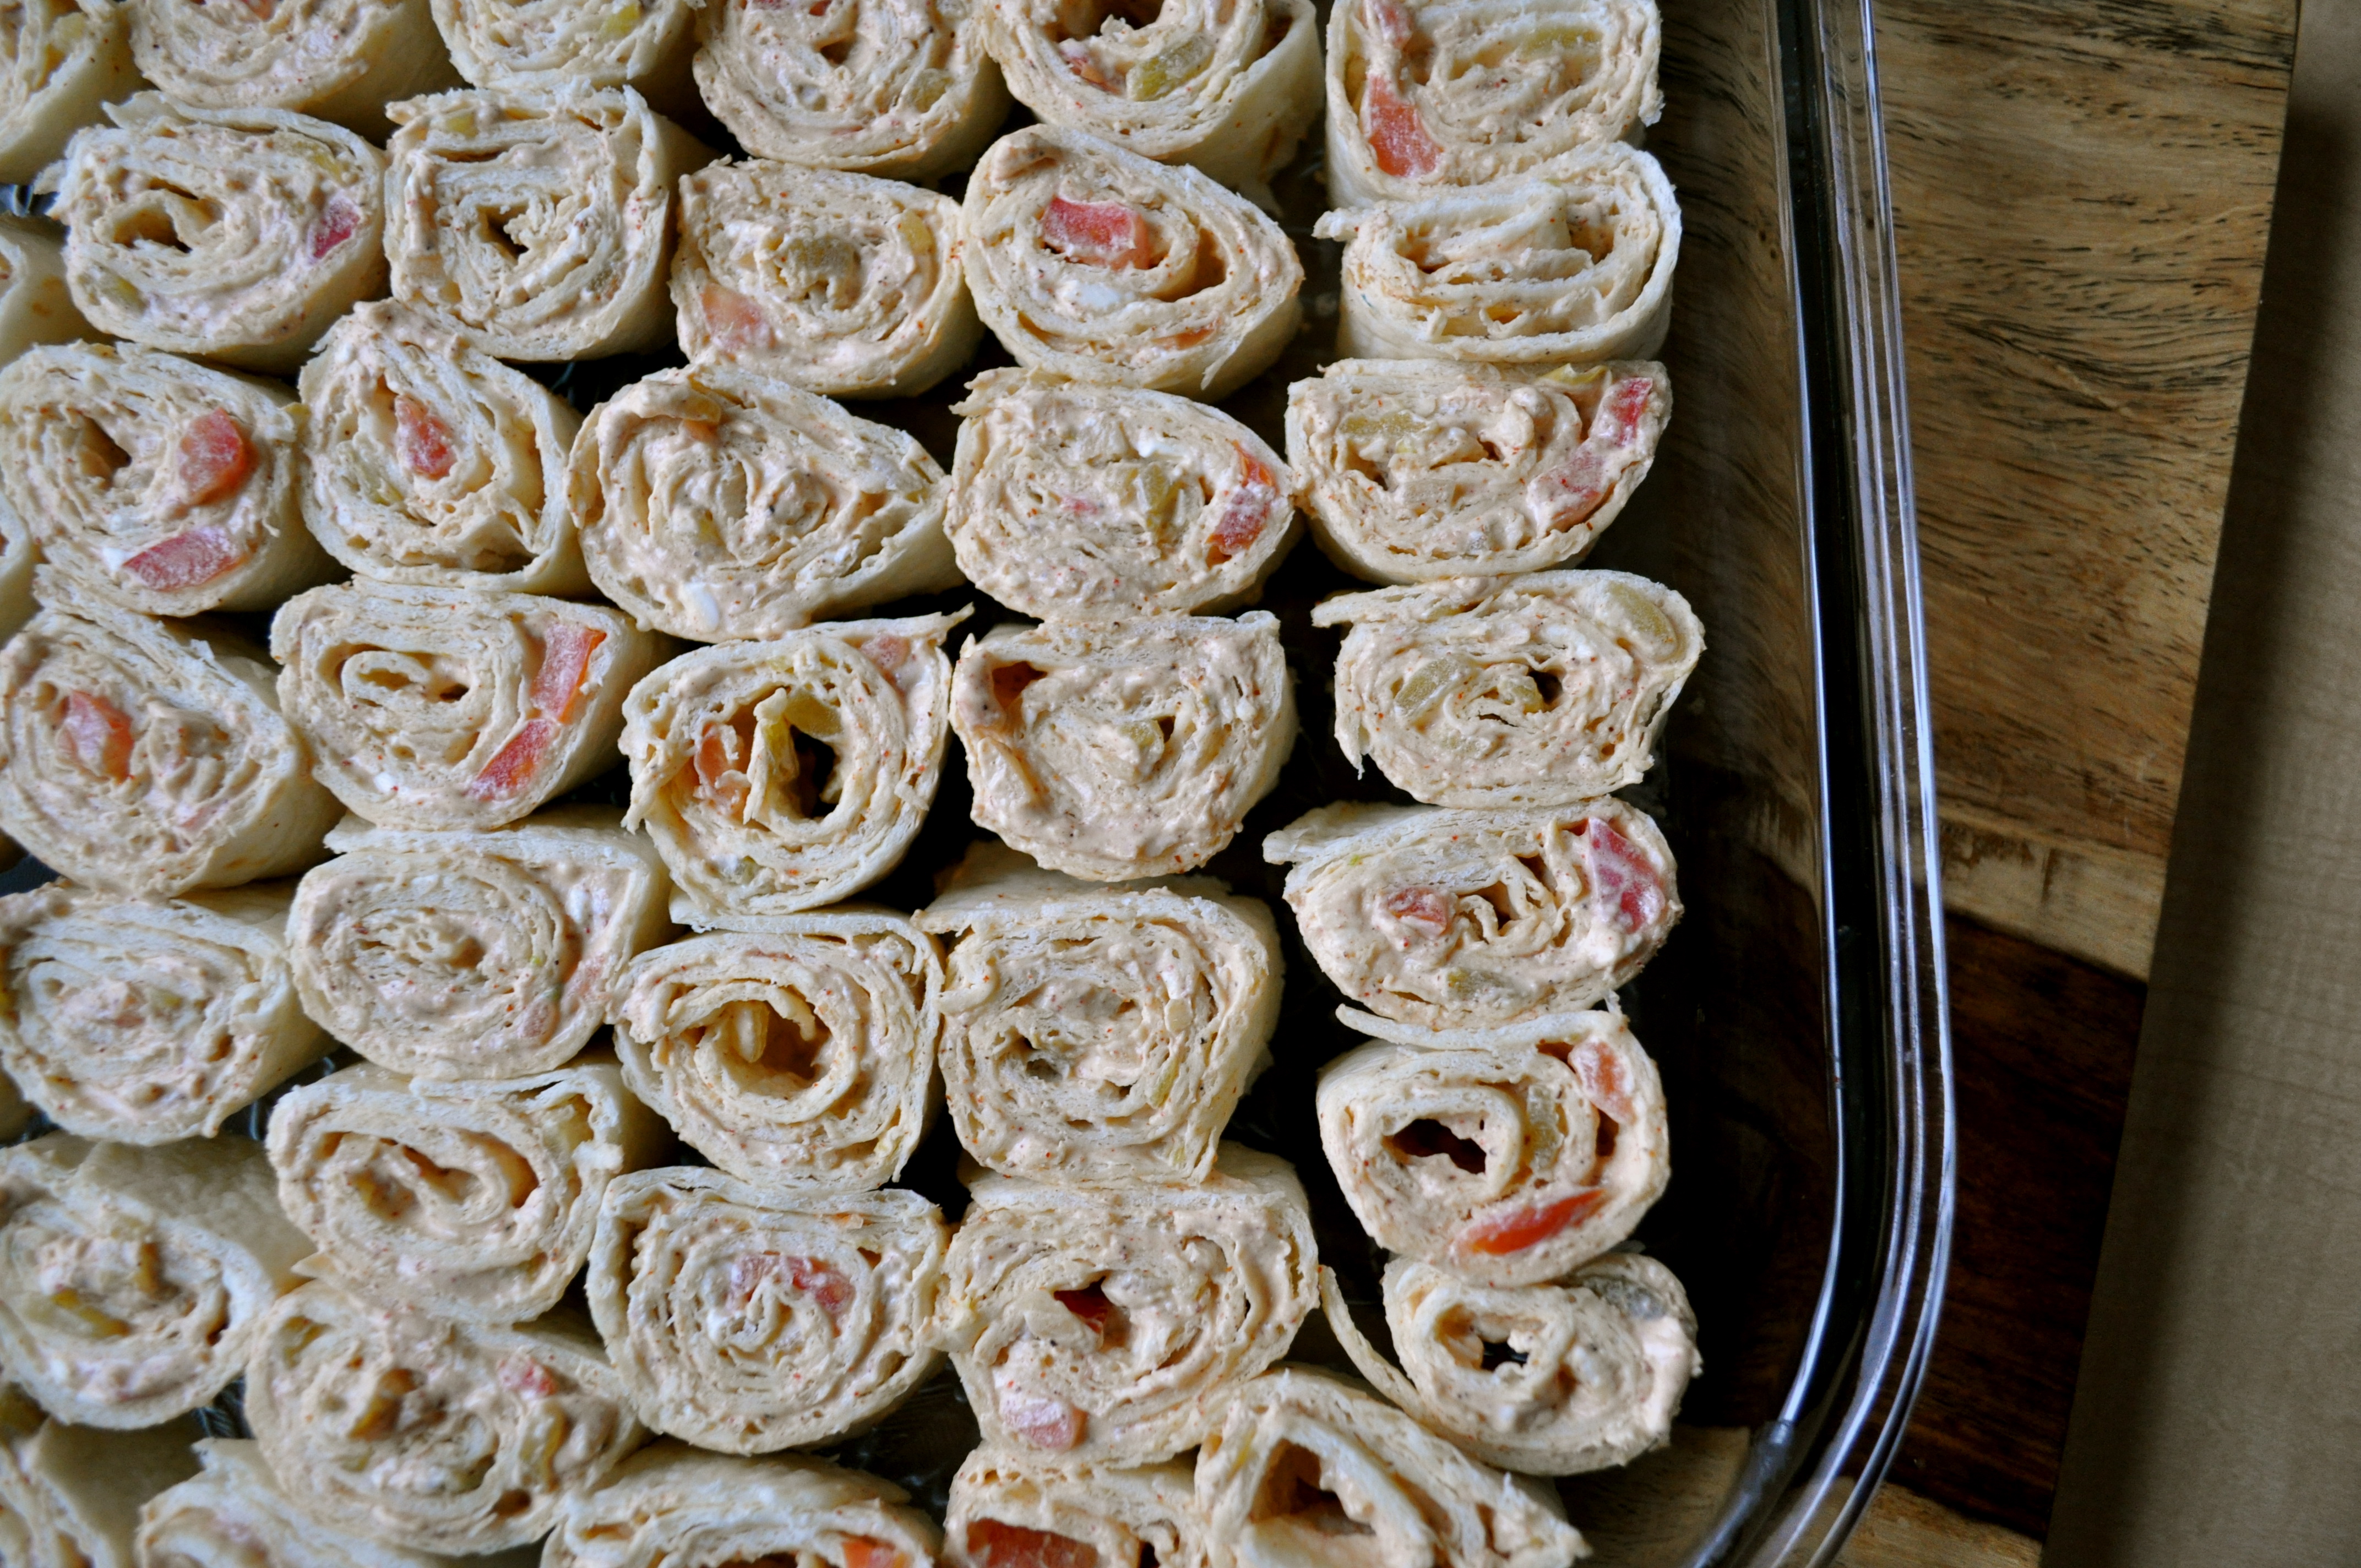
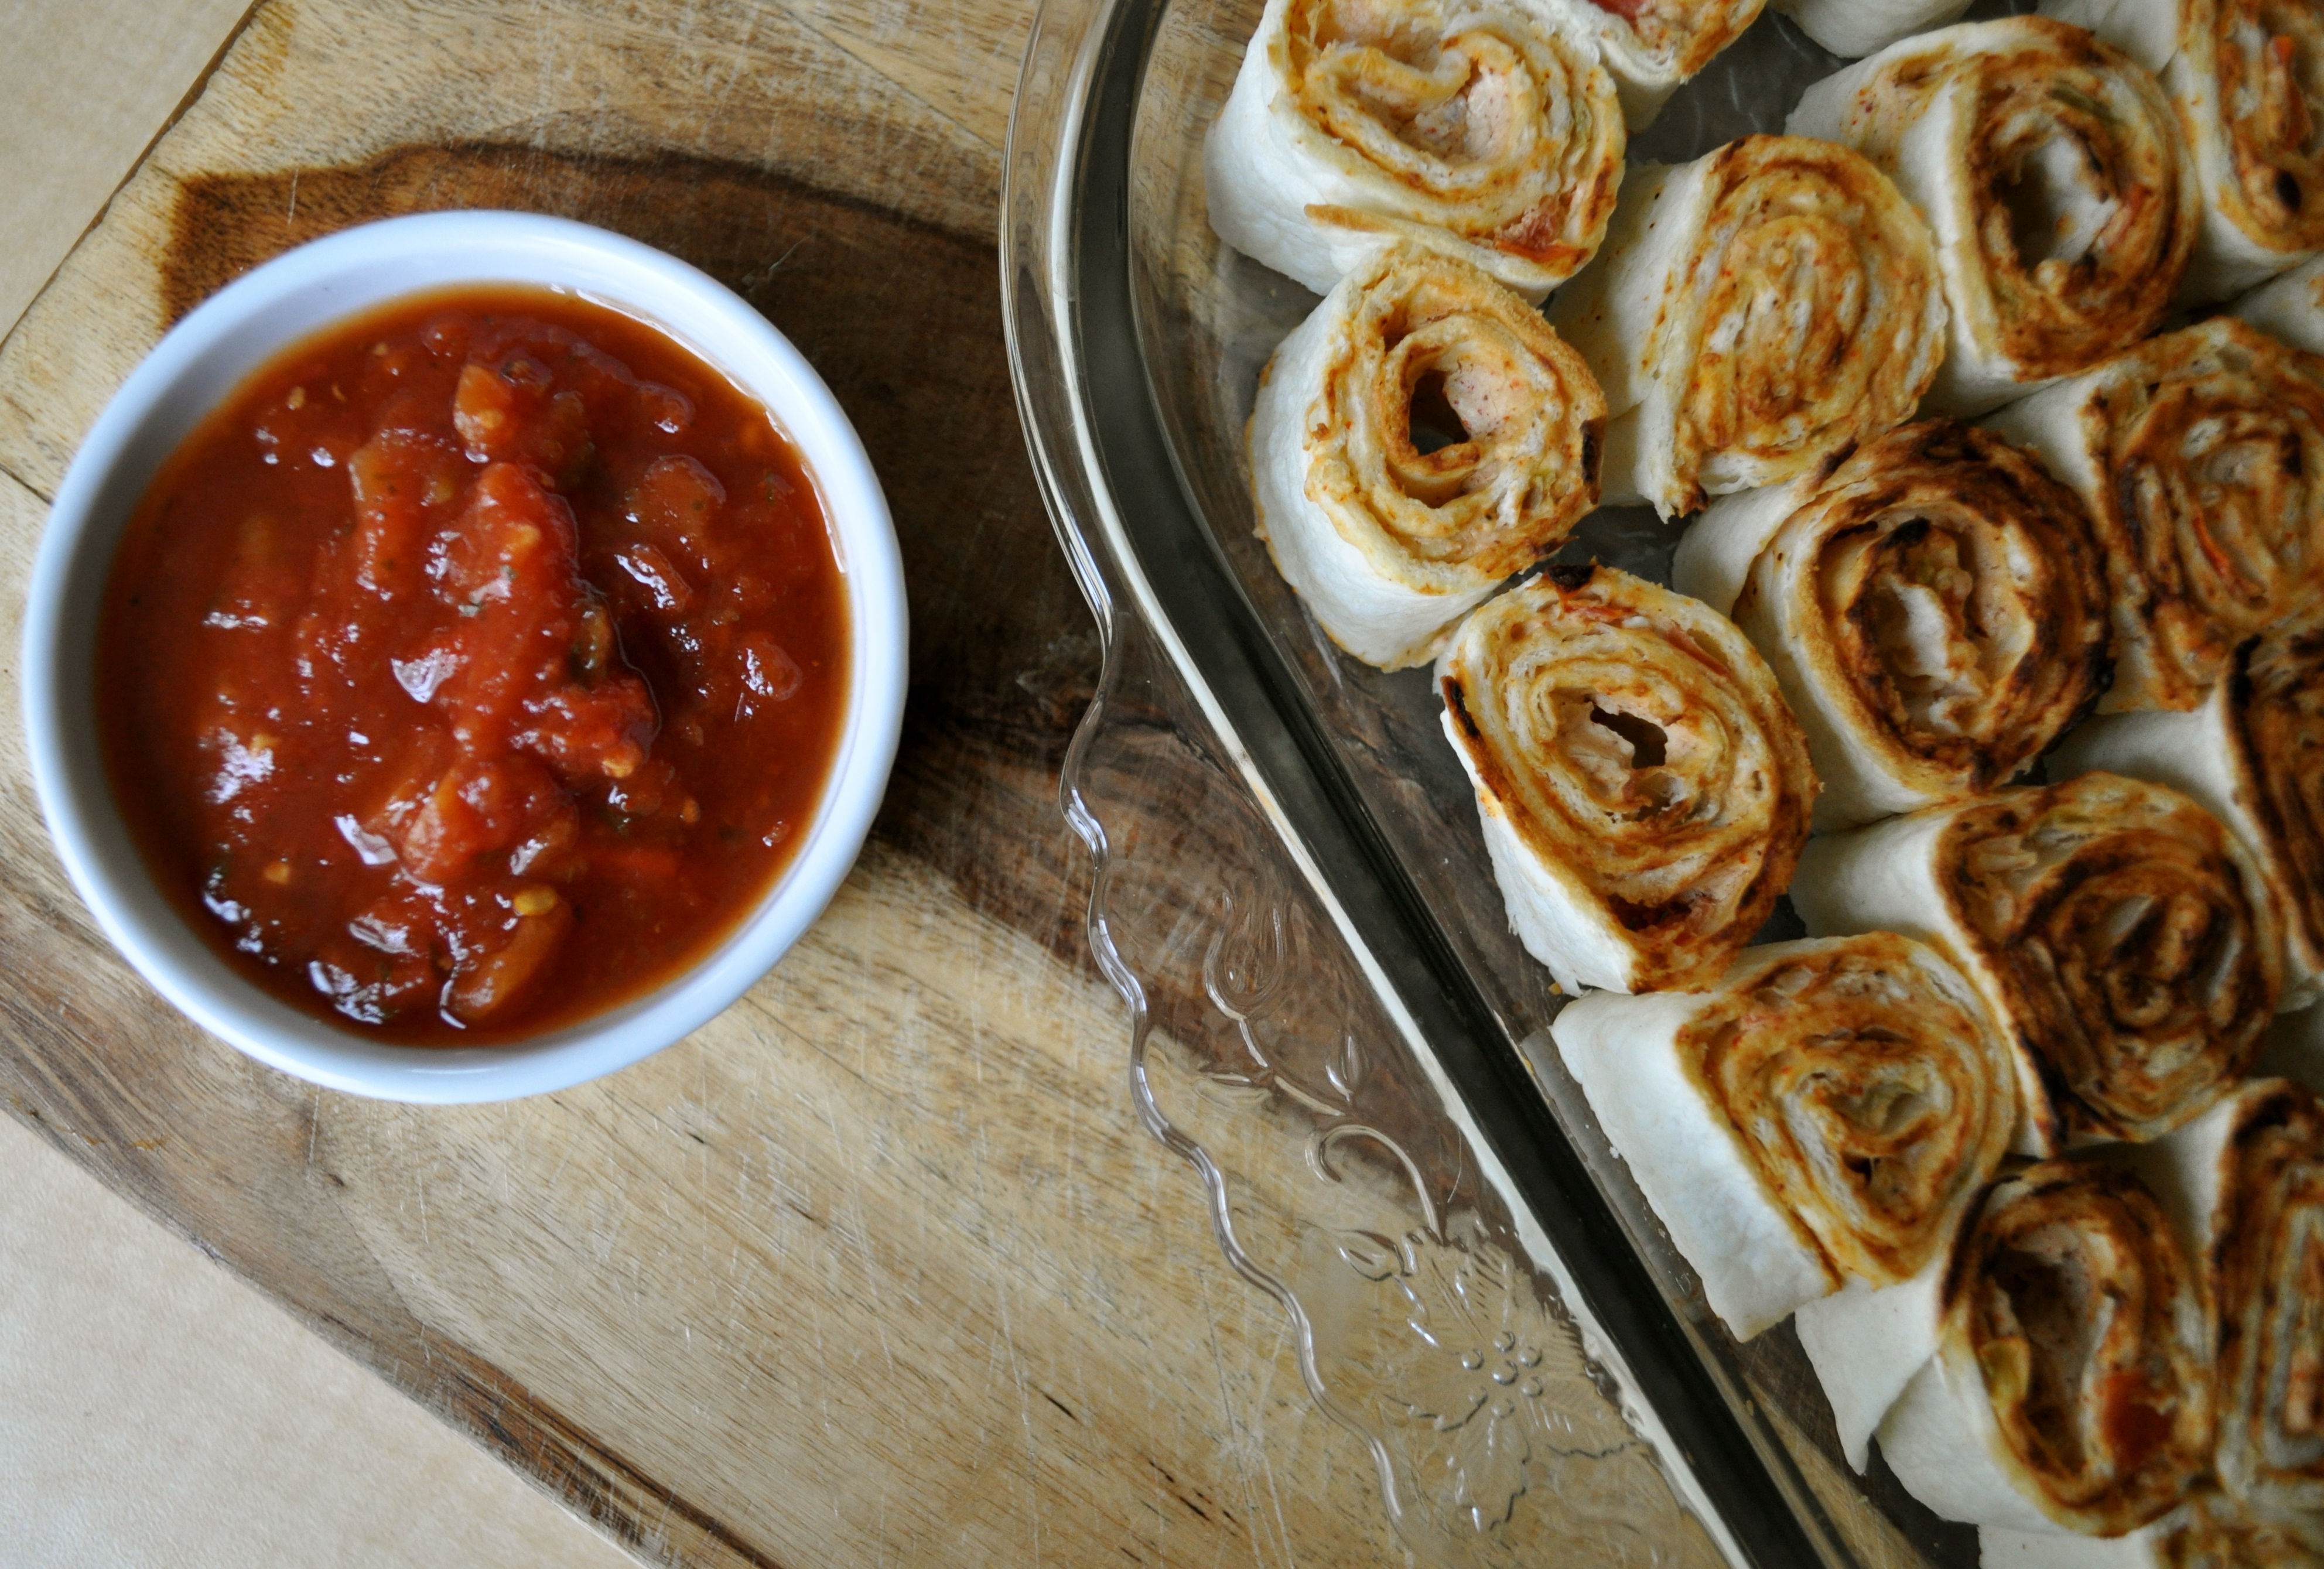
Mix it all together. Spread it on the tortillas. Roll ’em up. Slice. Arrange them all pretty on a platter. Snack on the ends as you’re working. Refrigerate until you’re almost ready to serve. Pour yourself a glass of wine before your guests arrive. You deserve it.

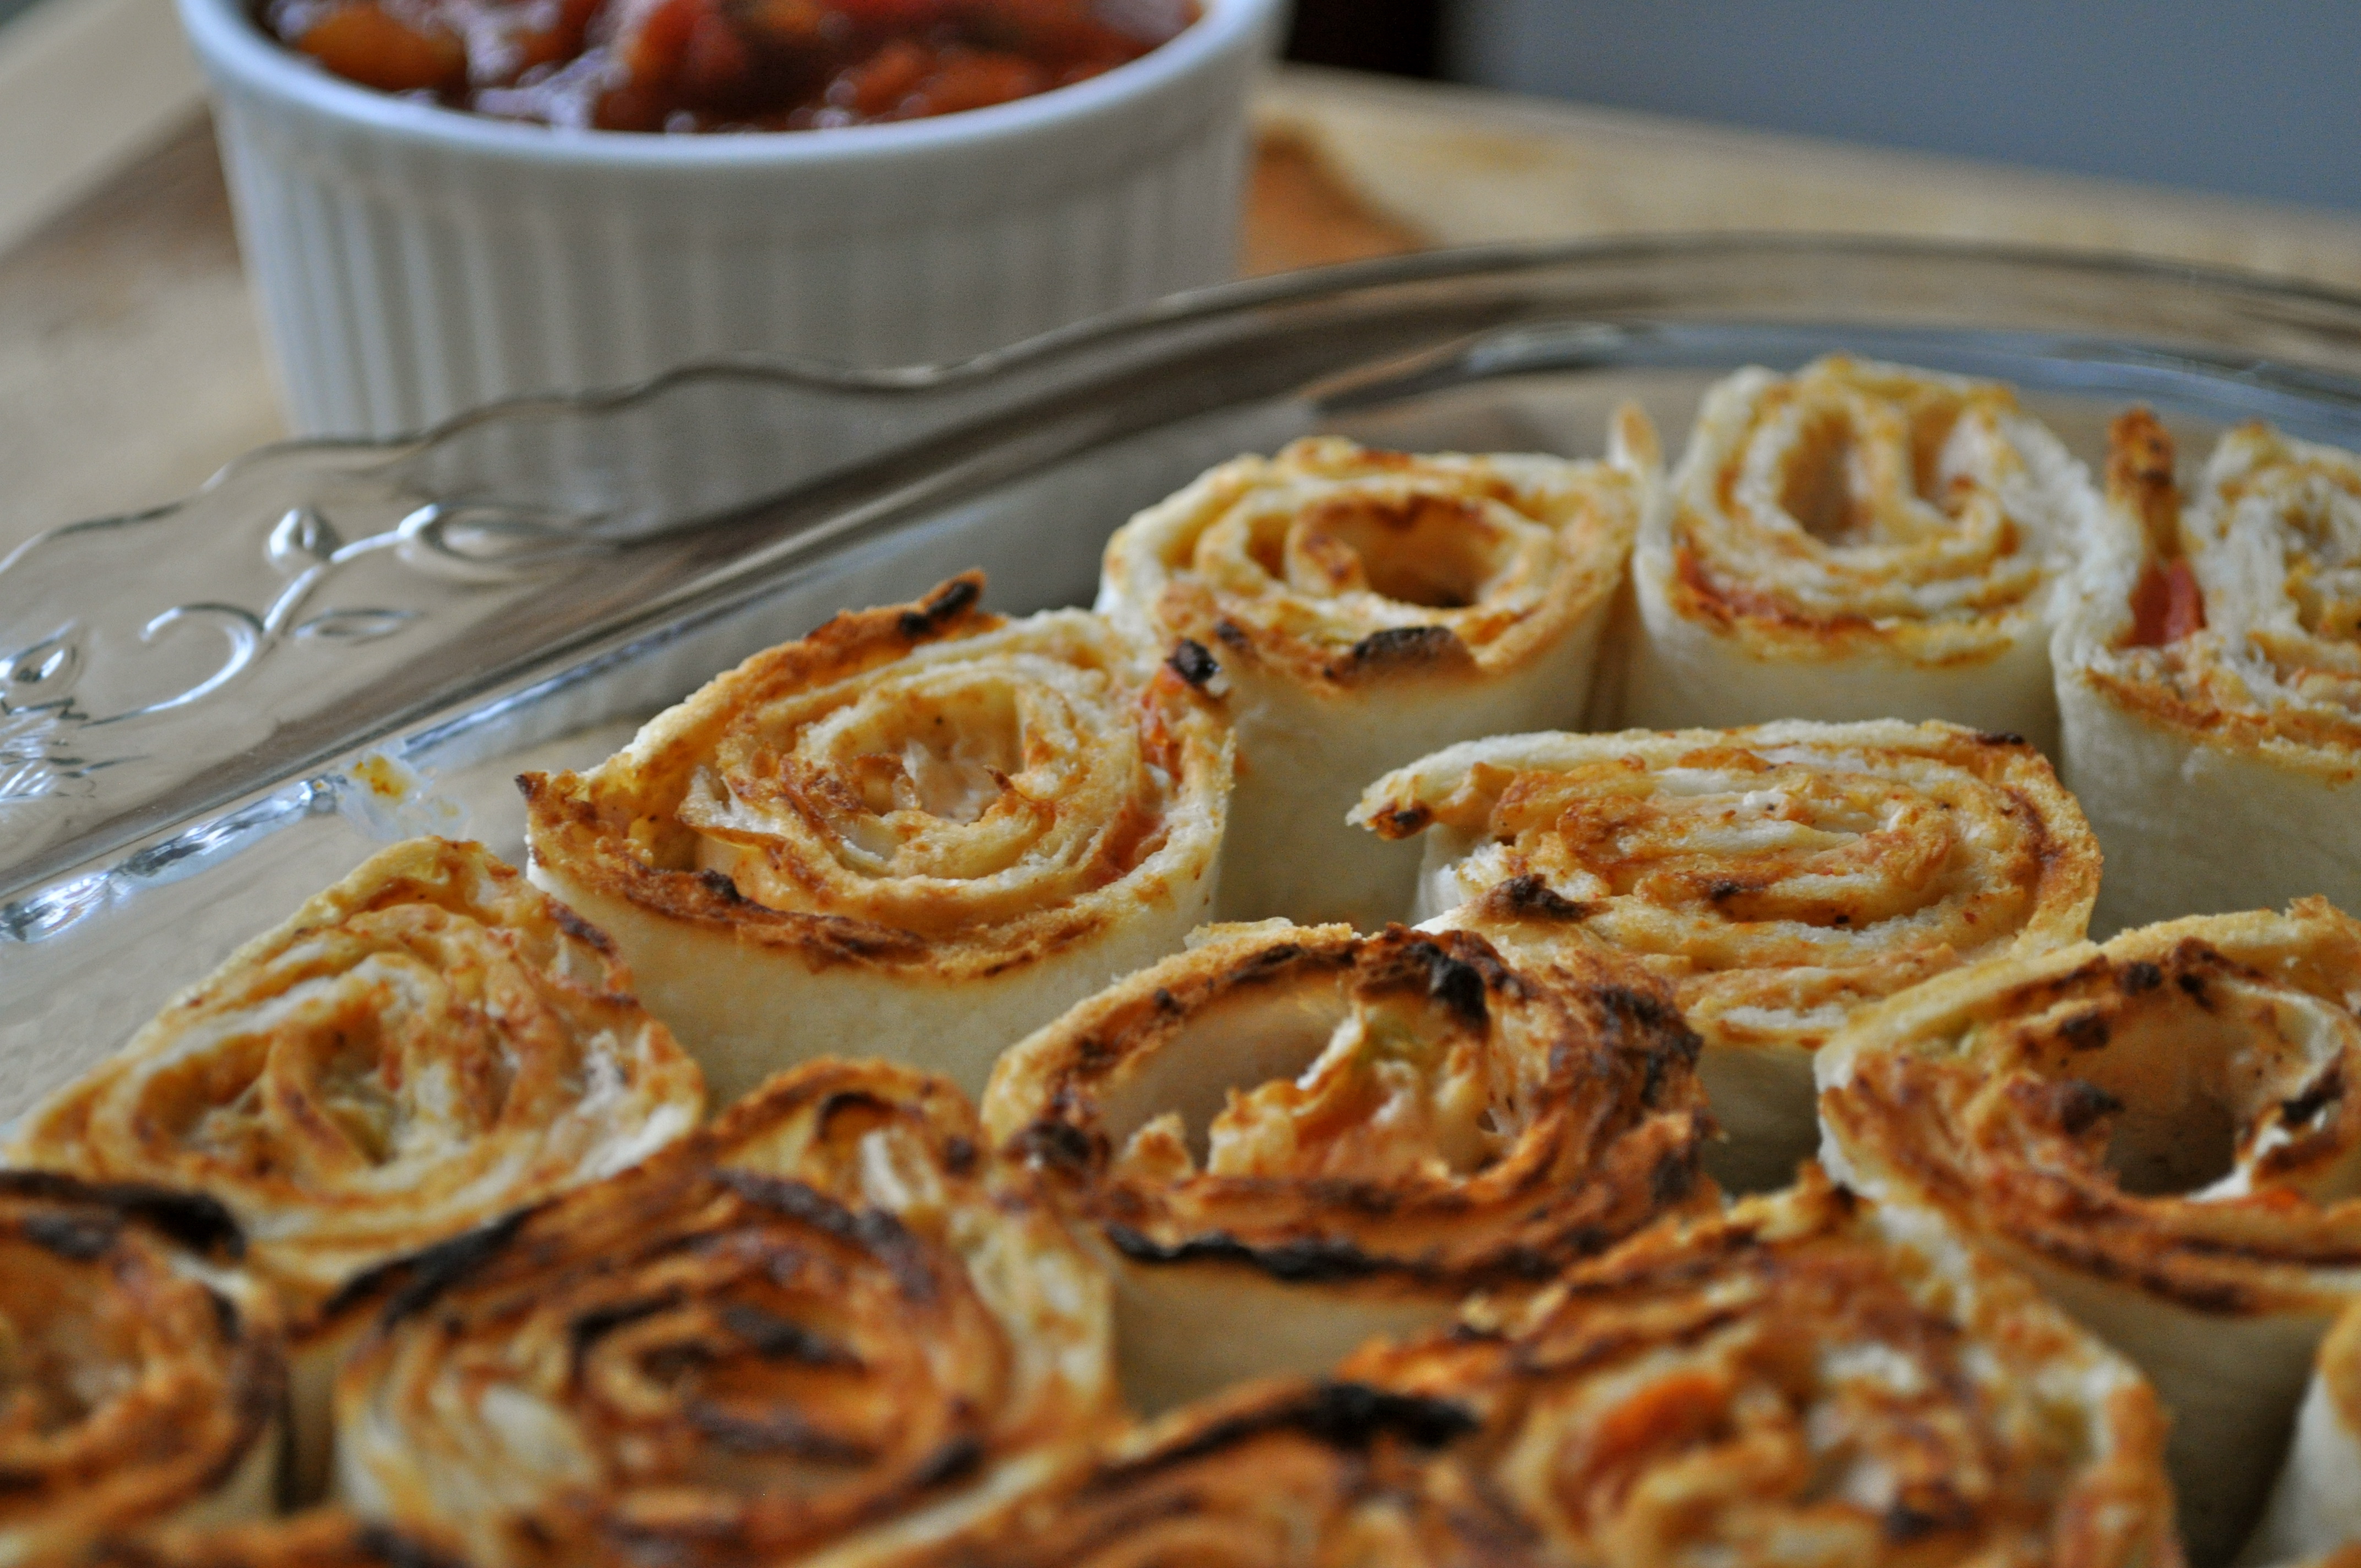
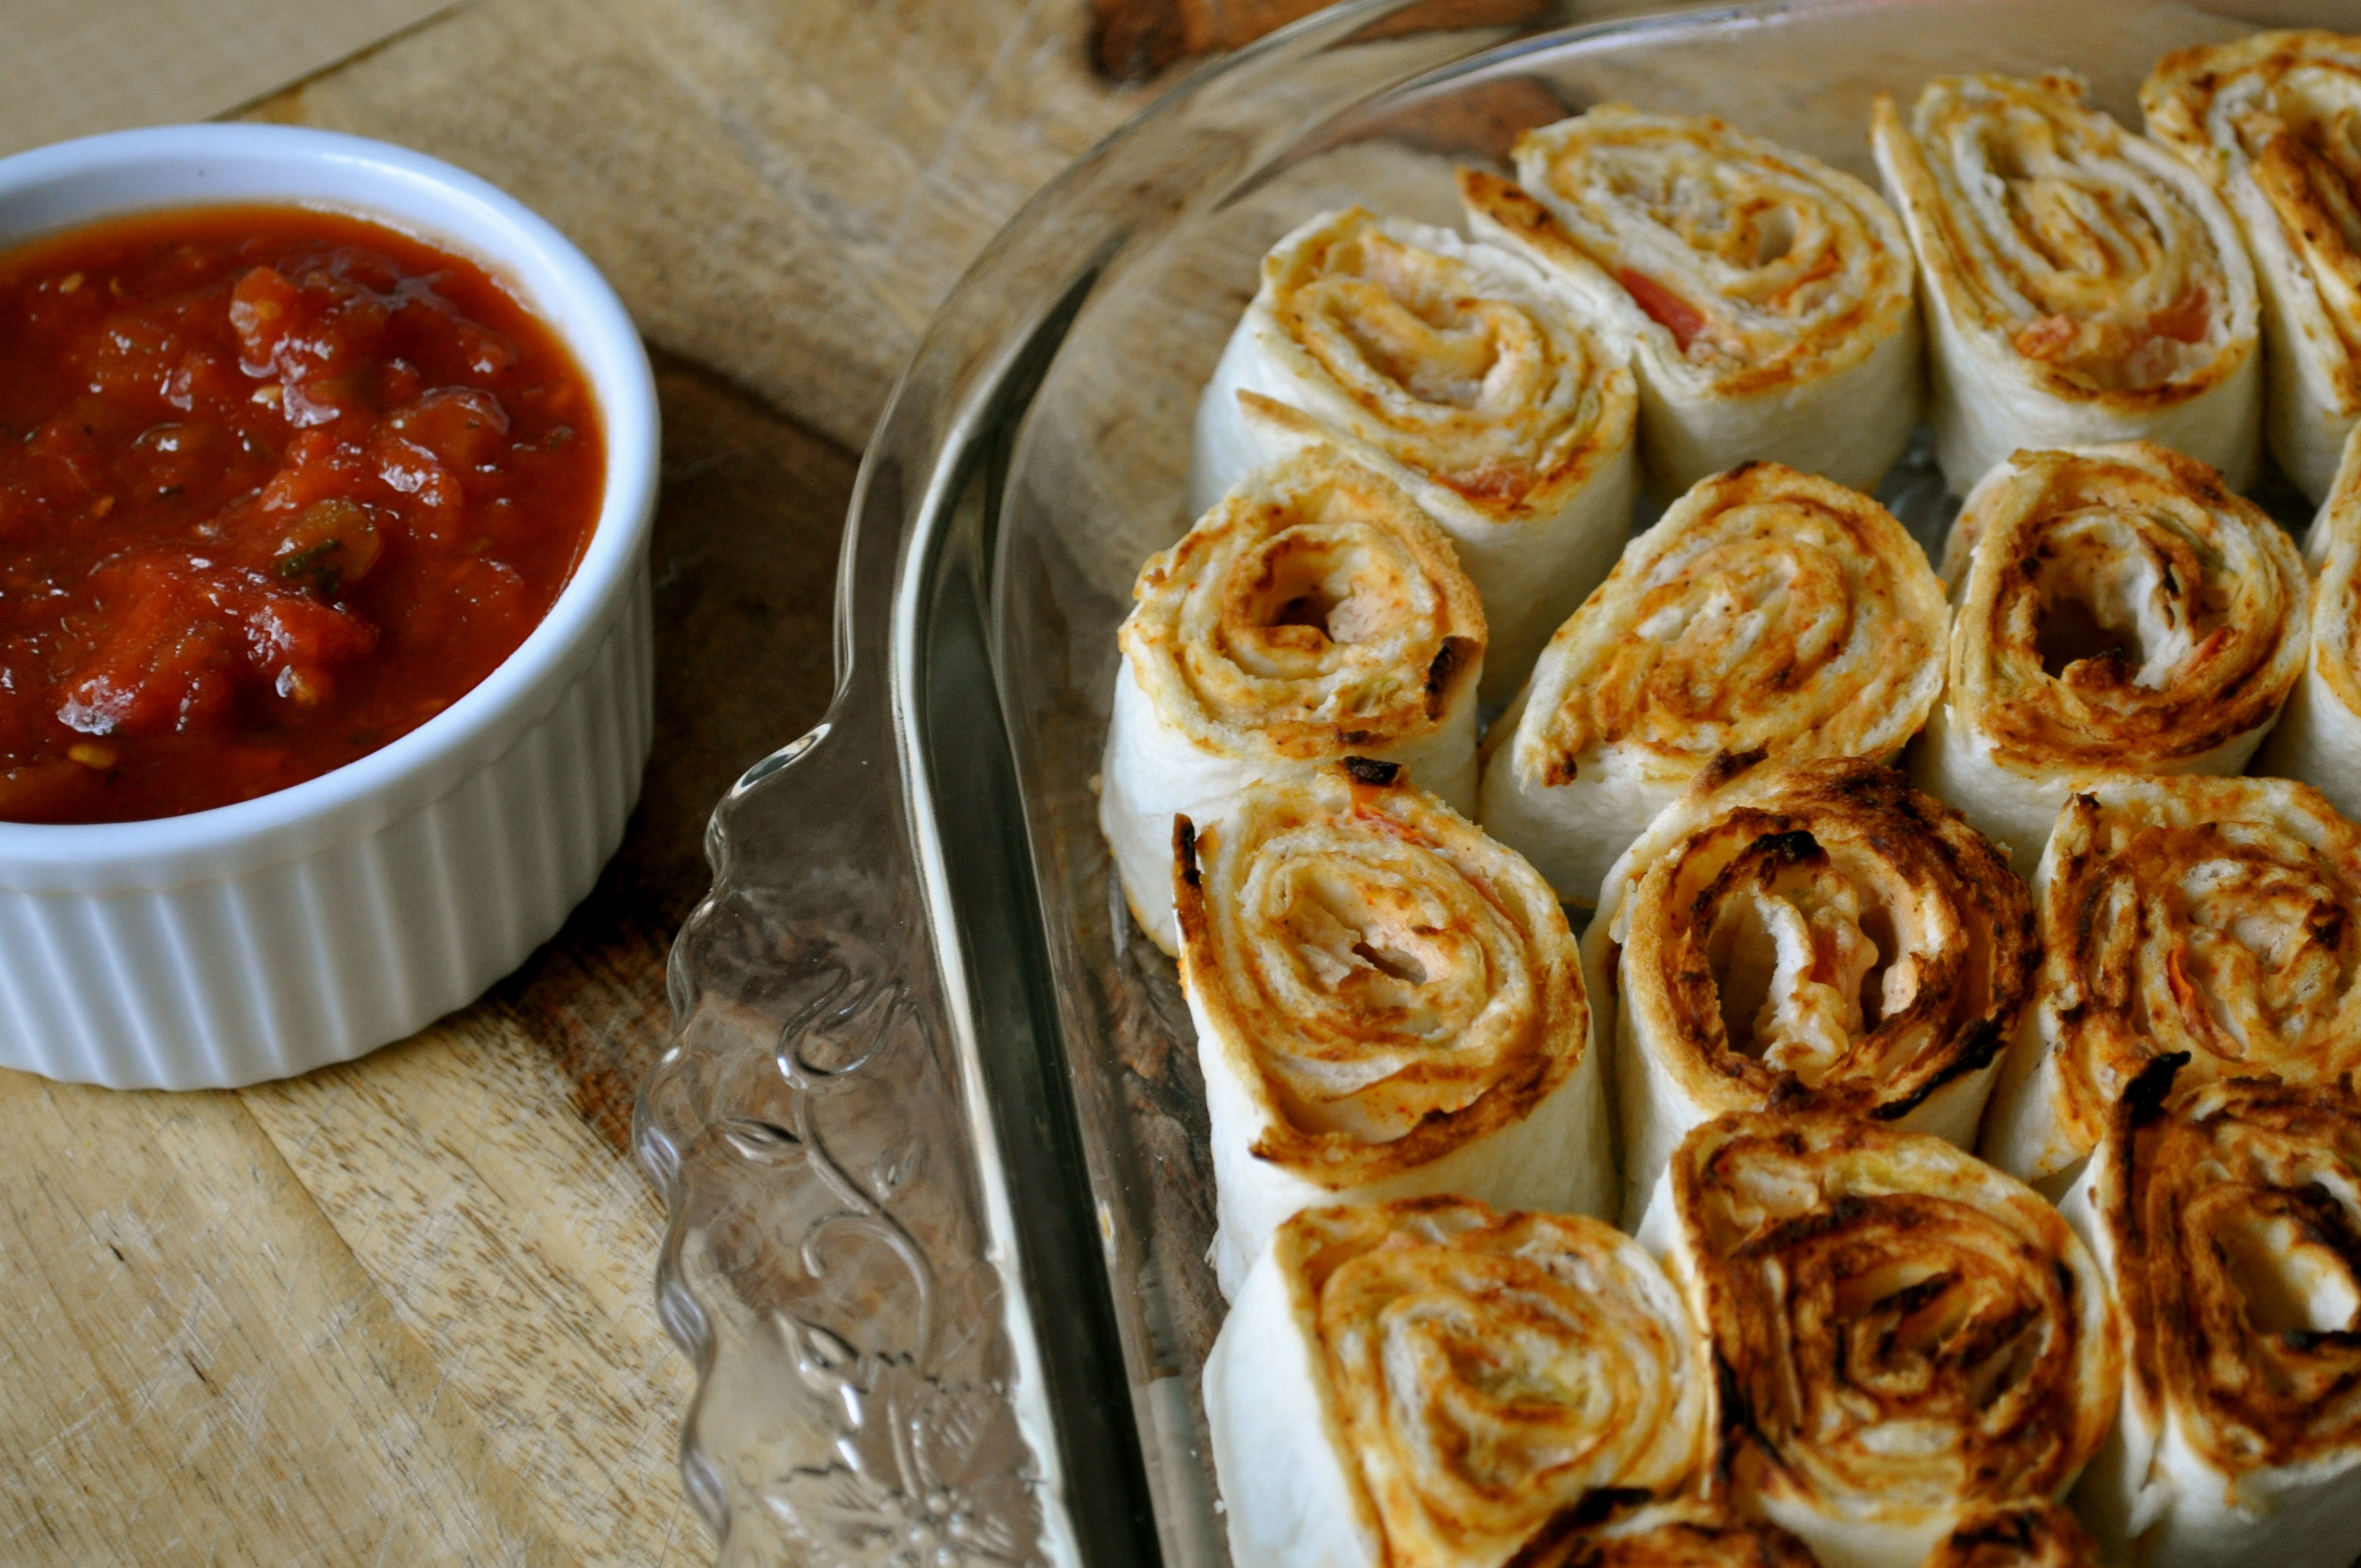
Ten minutes before you want to serve your Pasadena Pinwheels, heat up your oven to broil, pop the whole shebang into the oven for a couple of minutes, just until things are getting toasty and golden. Boom. Dinner Appetizer is served. You can thank me later.

Pasadena Pinwheels | Once Upon a Recipe


Pasadena Pinwheels

8 ounces of cream cheese, softened

2 TBSP. mayonnaise

1 4-ounce can of diced green chiles

1 large tomato, finely chopped

1/4 cup onion, finely chopped

2 garlic cloves, minced

1 tsp. chili powder

1/4 tsp. salt

10 large flour tortillas

Mix everything together (an electric mixer works well). Refrigerate for at least two hours or overnight (to let those flavors mingle!). Spread evenly onto the tortillas, roll each tortilla up tightly, then slice into 1-inch rounds. Arrange on a platter or cookie sheet. Broil until golden brown before serving. Dip into salsa, if desired.

Pasadena Pinwheels | Once Upon a Recipe


What is your favorite go-to holiday appetizer recipe? 

Giving Thanks | Caramel Cream Cheese Apple Dip


Happy Thanksgiving to my Canadian friends!

Today I will be making a concentrated effort to stuff myself to the gills with turkey, mashed potatoes, and pumpkin pie. Actually, pumpkin this, which is what I will be contributing to tonight’s dinner. I can’t wait to try it! Oh, and I don’t doubt that there will be plenty of wine consumption as well. What is a day holiday without wine?


Every Thanksgiving, we are encouraged to think about what we are thankful for. I remember as a young child in grade school, art classes around this time of year were always focused on colorful leaves, turkeys, and giving thanks. Even now, twenty years later, I still take a moment to think about some of the wonderful things in my life at Thanksgiving.

Driving to my parents’ house for Thanksgiving dinner yesterday (the first of two), I passed many houses with cars in the driveways and lining the streets. I thought of all of the families and friends gathering together to share a meal and give thanks for this beautiful life that we live. And I felt so thankful knowing that I had a house full of family waiting for me. I know that not everyone is so lucky.


It’s kind of a shame that we don’t recognize all of these wonderful things more often. It’s so darn easy to get caught up in day-to-day life and to focus on negative things. How tired we are, how much work we have to do, how we don’t have the money to do this or buy that, and the list goes on. We live in a bit of a pessimistic society, no?

So today, I encourage you to think of five things in your own life that you are most thankful for. You don’t have to share them with anyone but yourself. But you might be surprised at just how much you’ve got goin’ on. You’re pretty awesome, in case you need to be reminded.


Whether you’re celebrating Thanksgiving today or not, I do encourage you to try this little number. This dip comes from one of my coworkers (thanks K!) – she brought it to a potluck at work and everyone raved about it. Apparently she always gets requests for “the apple dip” when attending potlucks, and I can see taste why. It is SO delicious! And incredibly simple. And a great way to enjoy Fall’s apple bounty! I brought it to dinner yesterday, and when we ran out of apples, we just used our fingers to finish it off. We’re classy like that.


Caramel Cream Cheese Apple Dip

8 oz. light cream cheese, softened

1/4 cup brown sugar, loosely packed

~1/3 to 1/2 cup caramel sauce

2 Skor bars, finely chopped

Mix the cream cheese and brown sugar together well. Spread evenly into the bottom of a shallow dish (~8 x 10″) or pie plate. Pour the caramel sauce over top and gently spread it out evenly. Feel free to add more or less caramel, depending on your tastes. Top with the chopped Skor bar. You could also top with shaved or chopped chocolate, if you prefer. Cover and refrigerate until consumption. Serve with sliced apples. Pears would be delicious too!


Take good care, friends! xoxo

Dip It | Curried Cream Cheese Dip with Dried Cranberries, Pine Nuts, and Green Onion

Hello friends! Happy Monday. I hope you all had a lovely Easter/spring weekend filled with family, friends, good food, and sunshine. I sure as heck did. If you ate half as much food and chocolate as I did, you have probably been swimming in a food/sugar coma state, like me. And could there possibly be a better cure for such a coma than perusing and drooling over a new recipe? I think not.

Especially when it is an attack-the-tastebuds-in-a-good-way recipe. Enter this seemingly complex, colorful, flavor explosion dip.

Explaining this dip with words is impossible. But I’ll try anyway. It’s creamy, tangy, sweet, and spicy all at once. Plus chewy from dried cranberries and crunchy from toasted pine nuts. I first tried it at a work potluck a couple of years ago, but only recently rediscovered it. I don’t know where the recipe came from, or what the real name of this creation is, so I am calling it like it is.

Take this dip to your next potluck or serve it at your next party. Your guests won’t know what hit ’em.

In a good way of course.

Curried Cream Cheese Dip with Dried Cranberries, Pine Nuts, and Green Onions

8 ounces cream cheese, softened

2 tsp. curry powder

2 tsp. ground cumin

1/2 cup red pepper or red chile jelly, divided

1/4 cup dried cranberries

1/4 cup pine nuts, toasted

1/4 cup green onions, chopped (about 3 green onions)

Combine the cream cheese, spices*, and 3 TBSP. of the jelly until smooth. An electric or hand mixer will make this easy. Spread the mixture into the bottom of a shallow dip dish (roughly 5″ x 7″). Spread the remaining jelly over top of the cream cheese mixture. Combine the dried cranberries, pine nuts, and green onions in a small bowl to mix, then sprinkle evenly over top of the dip. Chill until you serve. I think this dip tastes great with plain rice crackers, but any small cracker will do! Enjoy!

*You can adjust the amount of curry powder and cumin depending on the level of flavor you would like. If you don’t want such strong flavors, use just 1 tsp. of each. If you want the flavors to be very intense you can use up to 1 TBSP. of each, but I find 2 tsp. of each to be a happy medium.


What are some of your favorite potluck or appetizer recipes?

Love Tastes Good | Red Velvet Sandwiches

It’s that time of year again. The time where card, flower, chocolate, and lingerie shops make a killing off of the lovestruck population. Truth be told, Valentine’s Day doesn’t hold that much meaning in my life. Single or attached, I’ve never been blown away by what the love holiday has to offer. I mean, shouldn’t every day be Valentine’s Day? Shouldn’t we take every opportunity we can to show our love for the special people in our lives?

This year, I’m going to share my love via baked goods! Instead of supporting the traditional V-day market, I’m going to make homemade goodies for the special people in my life. What better way is there to share love  than through the belly? I came across this recipe on Bakerella and decided to give it a try, based on two things. 1. It looked easy. And 2. It looked delicious. I had no idea there was a mix for red velvet cake. And unfortunately, my local grocery store didn’t have it, so I decided to improvise with a chocolate cake mix and red food coloring. I was slightly concerned when my cookie dough became a sticky gum once everything was mixed together, but I decided to forge ahead. I’m sure glad that I did, because these babies are rather tasty. My cookies were a bit more dense than Bakerella’s cakey creations, likely due to the necessary changes that I made. So, if you decide to try this (and I definitely suggest that you do), try and find a red velvet cake mix. But if that task proves impossible, try my adaptation! Happy eating! And happy love day! <3

Red Velvet Sandwiches (adapted from Bakerella)

1 box red velvet cake mix (or 1 box chocolate cake mix plus 1 oz. red food coloring)

1/2 cup butter, softened

2 eggs

Preheat the oven to 350°F. Combine all of the ingredients in a large bowl and mix together. Spoon the dough onto prepared baking sheets. Bakerella suggests using a mini ice cream scoop – I just used 2 small spoons. Bake for 10-12 minutes. Cool on wire racks until completely cooled. Fill with the icing recipe below. Makes 24 cookies, and therefore, 12 sandwiches.

Cream Cheese Icing

8 oz. cream cheese

1/2 cup butter, softened

1 tsp. vanilla

1 box powdered sugar

Cream the cream cheese and butter together. Add the vanilla. Gradually add the powdered sugar until desired consistency is reached. Spread between two cookies and sandwich them together. Eat and enjoy!

*This makes a large quantity of icing. I doubled the cookie recipe and found that the amount of icing was just right. However, if you’re just making one batch of cookies, it might be wise to cut the icing recipe in half.

Happy New Year! | Pumpkin Spice Layer Cake with Caramel and Cream Cheese Frosting

Happy New Year! I am still adjusting back to real life after an amazing Christmas with family and friends. I have already had 10 glorious days off from work (and a couple left!), and lots of time spent with the most important people in my life. After having Christmas with my family, I hopped on a plane and joined honey and his family in Manitoba for 5 more days of rest and relaxation. It was so great to get away from the hustle and bustle of the city, and lounge around on a farm for a few days. Thanks to all who made it memorable!

January usually brings with it a sense of dread – the holiday season is over, yet we still have 4 months (or more) of winter left! Yuck. But somehow, we manage to make it through each year, and I know that this year will be no different. I’m sure that planning a trip to an exotic location wouldn’t hurt either…

Over the holidays, I made this pumpkin spice layer cake and brought it to Christmas dinner at my aunt’s house. The cake was deliciously moist, and the caramel and cream cheese frosting added a wonderful richness. This would be a great dessert year round, but especially over fall and winter because of the warm spicy pumpkin flavor. Happy eating!

Pumpkin Spice Layer Cake with Caramel and Cream Cheese Frosting (adapted from Bon Appétit, Nov. 2008)

For the cake:

3 cups all-purpose flour

2 tsp. baking soda

2 tsp. baking powder

1 tsp. cinnamon

1/2 tsp. ground ginger

1/4 tsp. ground cloves

1/4 tsp. ground nutmeg

1/4 tsp. ground allspice

1/4 tsp. ground cardamom

1 15-ounce can pure pumpkin

1 1/2 cups sugar

1 1/4 cups vegetable oil

4 large eggs

2 tsp. finely grated orange peel

For the frosting:

4 cups icing sugar, divided

1/2 cup plus 1 TBSP. heavy whipping cream

1 tsp. vanilla extract

1/4 tsp. salt

1 8-ounce package cream cheese, room temperature

1/4 cup unsalted butter, room temperature

For the cake: Preheat the oven to 350°F. Butter and flour two 9-inch cake pans, tapping out any excess flour. Whisk first 9 ingredients in a large bowl. Using an electric mixer, beat the pumpkin, sugar, and oil in another large bowl. Add the eggs one at a time, beating to incorporate between additions. Mix in the orange peel. Add flour mixture; beat on low speed just to blend. Divide the batter between prepared pans. Bake the cakes for about 35 minutes, or until a toothpick inserted into the center comes out clean. Cool the cakes in the pans for about 10 minutes. Invert onto a cooling rack, then turn top side up and cool completely.

For the frosting: Sprinkle 1/2 cup of icing sugar over the bottom of a non-stick skillet. Cook over medium heat until the sugar melts (do not stir). Continue cooking until the sugar turns a deep amber color, stirring occasionally, about 4 minutes. Carefully stir in 1/2 cup cream, vanilla, and salt (mixture will bubble vigorously). Stir until any caramel bits dissolve. Stir in remaining 1 TBSP. cream. Strain into a small bowl. Cool caramel to room temperature.

Sift 2 cups of icing sugar into a medium bowl. Using an electric mixer, beat the cream cheese and butter in a large bowl. Gradually beat in the icing sugar. Beat in cooled caramel. Gradually add in the remaining 1 1/2 cups of icing sugar until a good icing consistency is reached (you may not need to use all of the sugar). Cover and chill the frosting until firm enough to spread, about 2 hours.

Using a long serrated knife, trim rounded tops from cakes. Place one cake layer on the cake plate, cut side up. Spread 3/4 cup of frosting over top. Place second cake layer, cut side down, atop frosting. Cover top and sides of cake with remaining frosting, creating a smooth surface. You can make this up to two days ahead. Cover the cake and chill in fridge. Let stand at room temperature 2 hours before serving. For an extra garnish, sprinkle candied orange peel over the top of the cake (which I could not find anywhere!).

%d bloggers like this: