Per La Famiglia: Balsamic Roasted Pear Wedges with Prosciutto + A Giveaway! {Giveaway Closed}

Per La Famiglia: Balsamic Roasted Pear Wedges with Prosciutto + A Giveaway! | Once Upon a Recipe

Nothing screams family to me quite as loudly as food.

For as long as I can remember, the special events in my family have always revolved around food – wonderfully, ridiculously, excessively so. A birthday doesn’t go by without the birthday girl or boy having the opportunity to pick the meal for their special day; Christmas isn’t complete without an absolute feast that has been preceded by a handful of appetizers and is followed by an absurd selection of sweets; and Mother’s Day provides the perfect opportunity for me to cook a meal (usually brunch) for my amazing mom, who is so often responsible for filling our bellies at Sunday family dinner. Because of my Norwegian roots on my mom’s side, it is our family tradition to make flat bread and spritz cookies every Christmas, to serve lefse at family gatherings, and a jar of pickled herring occasionally graces the table (something I have not yet developed a taste for and am not sure that I ever will). On my dad’s side of the family, you could almost always expect German cabbage rolls, platz, and my Grandma’s buns at our family gatherings.

Some traditions are not to be messed with. My extended family on my mom’s side has developed a brunch menu that tends to be strictly followed when we get together: gooey pull-apart bread, quiche (at least two varieties), sausage/bacon, and a massive fruit plate, at minimum. It is not uncommon for me to receive a horrified glance if I suggest that we change the menu up a bit and try something new.

Per La Famiglia: Balsamic Roasted Pear Wedges with Prosciutto + A Giveaway! | Once Upon a Recipe

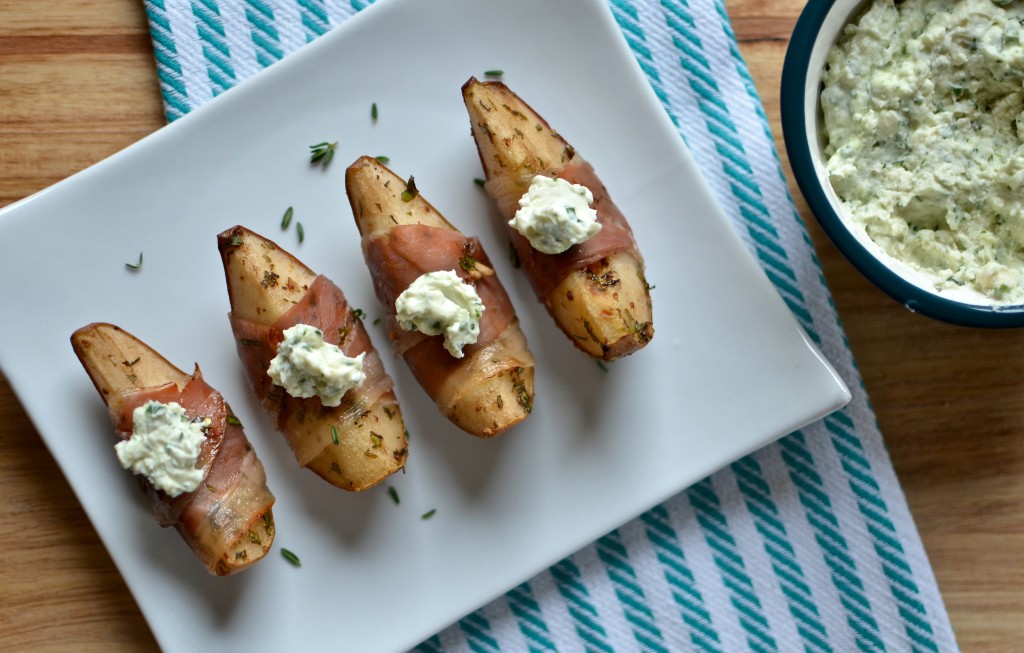
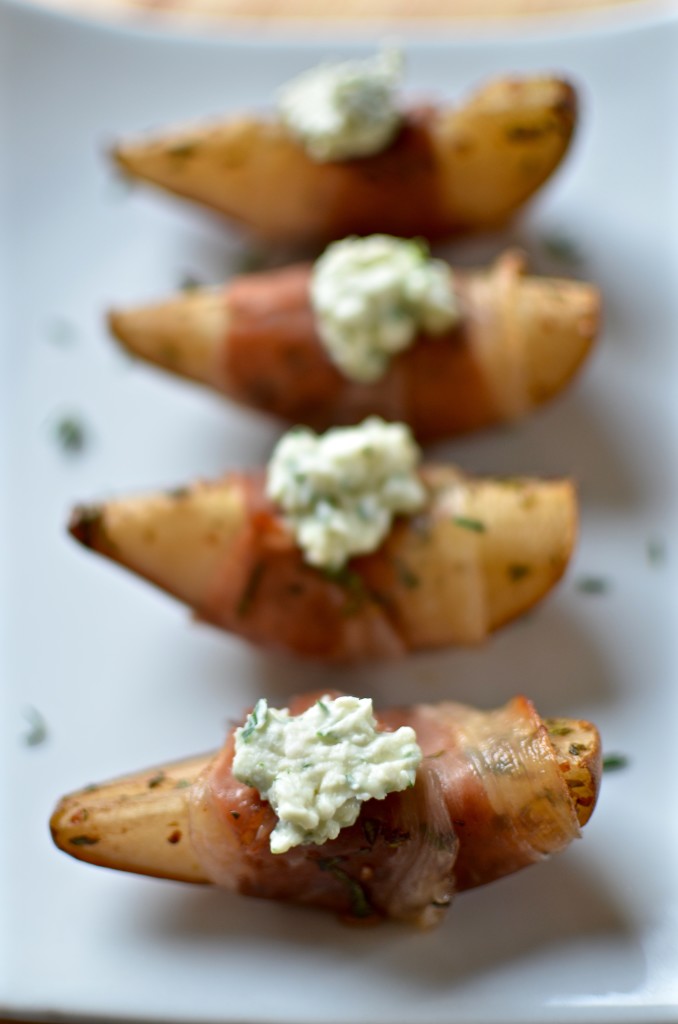
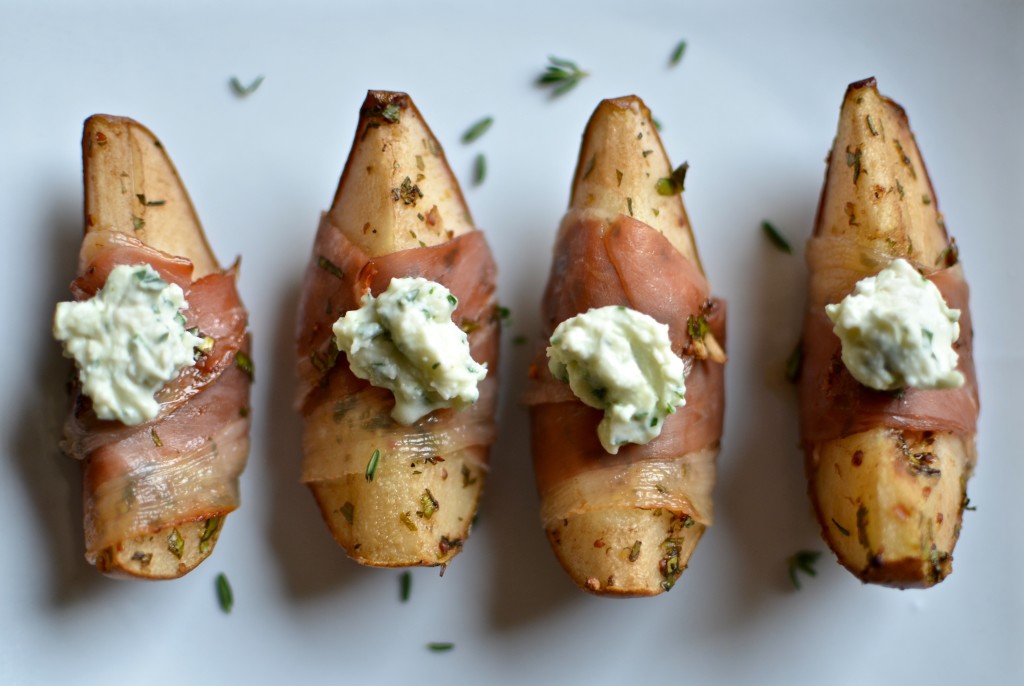
These balsamic roasted pear wedges with prosciutto (and a gorgonzola cream dip) have nothing to do with brunch. However, they come from professional home economist and author, Emily Richards’ latest cookbook, Per La Famiglia: Memories and Recipes of Southern Italian Home Cooking. The Italian translation of Per La Famiglia simply means “for the family.” Many of the recipes I make with regularity today I learned from the women in my family. A wonderful excerpt from Emily’s book states: “Sharing time in the kitchen with mothers, aunts and Nonnas is a way to gather your history in the kitchen. By not spending time in the kitchen with your family members, recipes can be lost. When possible try to get in the kitchen with them and take notes, take part and taste what can become of the ingredients. It’s a special moment to have.” (page 4). I cannot put into words how much I value the time I was able to spend in the kitchen with my Nana, learning to make cinnamon buns, or the times, past and present, spent cooking with my mom or my aunts. I regret not making the opportunity to cook more with my grandma (she recently passed away) and learn how to make her famous rhubarb platz. Per La Famiglia is a wonderful collection of family recipes that highlight the importance of learning how to carry on the food traditions in your family.

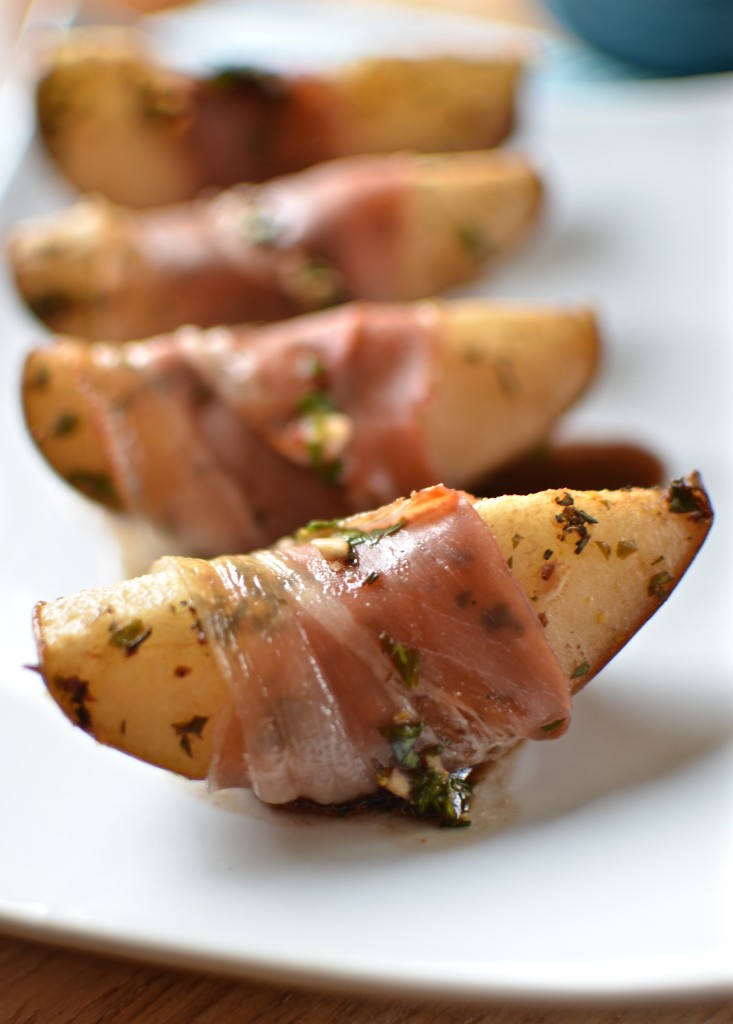
These sweet and savoury pear wedges are incredibly simple to prepare and boast so much flavour! The pears are quickly marinated in a balsamic mixture, then wrapped in prosciutto and roasted to perfection. The gorgonzola cream dip adds another dimension of flavour and provides a creamy and cool accompaniment to the pears.

Per La Famiglia: Balsamic Roasted Pear Wedges with Prosciutto + A Giveaway! | Once Upon a Recipe

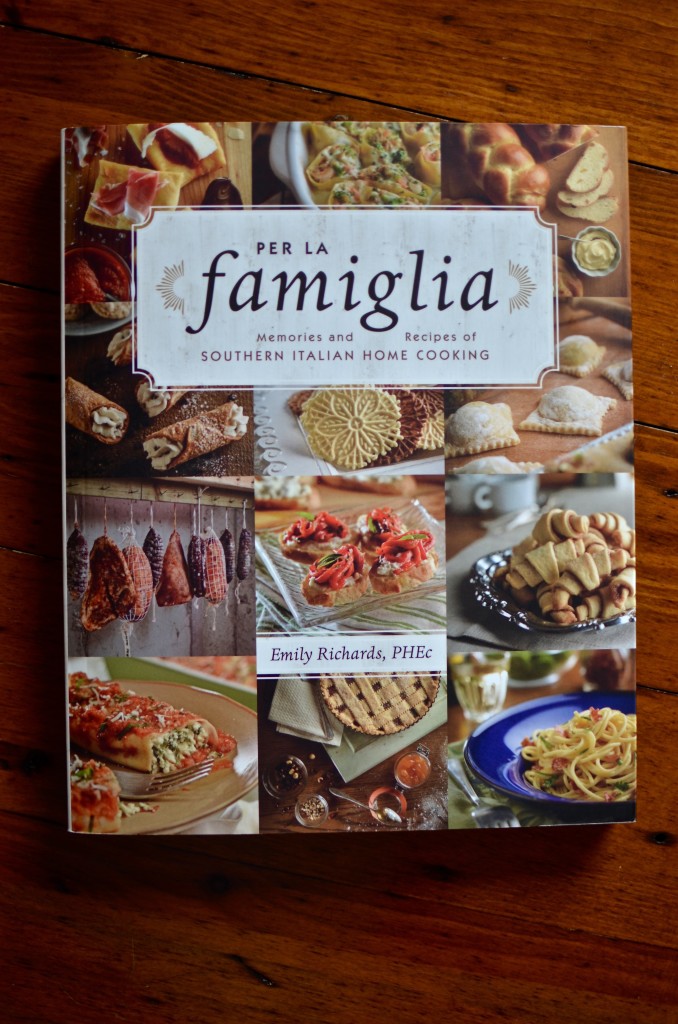
You can find the recipe for these tasty little morsels on page 87 in Per La Famiglia: Memories and Recipes of Southern Italian Home Cooking by Emily Richards. I recall watching Emily on Canadian Living Cooks on the Food Network years ago! I love her approach to food and her emphasis on passing those special family recipes on from generation to generation. I cannot wait to spend more time with this book and try more of Emily’s recipes. She includes recipes for a variety of different holidays (Easter and Christmas), plus sections for antipasti, pizza, bread, first courses and light meals, main courses, veggies and salads, desserts (my fave, obvi), and cookies. And I love the little snippets that Emily shares throughout the book about growing up in a loving Italian family.

Per La Famiglia: Balsamic Roasted Pear Wedges with Prosciutto + A Giveaway! | Once Upon a Recipe

It was not an easy task to choose a recipe to share. With options like Balsamic Lamb Chops, Ricotta Cannoli, and Spinach Ricotta Gnocchi, how was I to pick just one? I want to make everything! I chose these balsamic roasted pears with prosciutto simply because I thought the flavours in the recipe sounded wonderful. And they were! I shared these pears at a family gathering last weekend and they were enjoyed by all.

Per La Famiglia: Balsamic Roasted Pear Wedges with Prosciutto + A Giveaway! | Once Upon a Recipe

Oh, and I have great news! There is an opportunity for one of you lovelies out there to win this amazing cookbook along with a gnocchi board and a three-piece Microplane Elite Grater/Zester set. Oh, happy day!

Good luck to all of you and Happy Easter! I hope you all have the chance to spend time with loved ones this weekend and enjoy some delicious food!

Please be sure to check out more incredible treats from my fellow Per La Famiglia blogger pals in celebration of Emily’s wonderful cookbook!

Jenny from The Brunette Baker made Ricotta Cannoli

Julie from Dinner with Julie made Ricotta and Spinach Gnocchi

Chrissie from The Busy Baker made Amaretti Cookies

Heather from The Tasty Gardener made Squash and Hazelnut Rotelle/Polenta with Sausage and Rapini

Britt from My Daily Randomness made Tiramisu

Libby from Libby Roach made Nonna Ortenzia’s Meatballs

Kristy from She Eats made Egg and Raisin Bread

Gwen from Devour and Conquer made Sweet Potato Gnocchi with Sage Butter

Tiffany from Eating Niagara made Potato Doughnuts

Nancy from Gotta Get Baked made Hazelnut Chocolate-Filled Cookies

Nicole from Culinary Cool made Spinach Ricotta Cannelloni

Carole from The Yum Yum Factor made Pickled Eggplant

Kelly from kellyneil.com made Roasted Tomatoes

Christina from Strawberries for Supper made Baked Pasta with Sausage and Ricotta

And now, for the giveaway!

One lucky reader will win a personally signed Per La Famiglia cookbook by Emily herself along with a gnocchi board (which Emily is best known for), and a three-piece Microplane Elite Grater/Zester set. More details are listed below. Good luck!

Simply leave a comment below and tell me your favourite family recipe. Be sure to click the widget options below for both mandatory and optional bonus entries.

a Rafflecopter giveaway

This giveaway is open to all legal residents of Canada who have reached the age of majority at the time of the contest in the province or territory in which they reside.

Void in Quebec.

No purchase necessary to enter.

Giveaway will run from Wednesday, March 23, 2016 at 12:01am to end on Wednesday, March 30, 2016 at 11:59pm. Winner is chosen at random via Rafflecopter. Winner will be contacted via email and given 48 hours to respond. If not, a new winner will be chosen. Winner selected MUST correctly answer a skill-testing mathematical question. Winner’s name will be displayed on Rafflecopter widget. Email address will never be given out to any third party or anyone for that matter.

Prize value is approximately $75CDN.

A big warm thank-you to Jenny Jack of the Brunette Baker for organizing this blog hop and Emily Richards, Whitecap Publishing, and Microplane for providing this tasty giveaway!

Per La Famiglia: Balsamic Roasted Pear Wedges with Prosciutto + A Giveaway! | Once Upon a Recipe

Disclosure: The Per La Famiglia: Memories and Recipes of Southern Italian Home Cooking cookbook was provided to me by Whitecap Publishing for review at no cost. All opinions are my own.

Fresh Bean Salsa

Fresh Bean Salsa | Once Upon a Recipe

High five friends, it’s Friday!

I say it every week, but I’m so glad that the weekend is here. I have fun plans with friends, a birthday party for my little bro (who’s not so little anymore, btw), and sleeping in on the agenda. There is nothing I love more than not having to wake up to the sound of an alarm. I will also endeavour to keep up with my 2014 goal of reading one book per month. I realize that reading a dozen books in a one year period doesn’t seem like much, but I’m going for achievable here. I’ve read a few great posts on book recommendations, which have directed me to some great reads (if you’re also looking for inspiration, try here, here, and the comments section of this post).

Fresh Bean Salsa | Once Upon a Recipe

Annnnnyways, today I bring you a very humble bean salsa recipe. My friend, Jill started bringing this salsa to get togethers a while back. It always got rave reviews, so I asked for the recipe. Then I started taking it places and it got more rave reviews. It’s super simple, yet extremely flavorful and healthy. All it takes is a little chopping, a little mixing, and a little time for the flavors to mingle together, and you’ve got yourself a great snack, appetizer, or even side dish. My favorite way to enjoy this salsa is with Hint of Lime tortilla chips (either Tostitos or Old Dutch), but I bet it would taste great on nachos (add after baking the nachos so the chips don’t get mushy) or alongside your favorite Mexican dish. I’ve even thrown leftovers on top of a salad. Use your imagination folks!

Fresh Bean Salsa | Once Upon a Recipe

Fresh Bean Salsa | Once Upon a Recipe

Fresh Bean Salsa

This bean salsa tastes best if you give it a chance to chill out in the fridge for at least a couple of hours. It will keep well in an airtight container in the fridge for up to three days. You can use the salsa of your choice. 

2-19 ounce cans of mixed beans, drained and rinsed

1 red pepper, chopped

1 small onion, chopped

1 large tomato, chopped

1 cup prepared salsa of your choice

Salt and pepper, to taste

Fresh cilantro, chopped

Chop. Mix. Allow to sit in the fridge for a couple of hours (or overnight, if possible). Enjoy with tortilla chips!

Fresh Bean Salsa | Once Upon a Recipe

Have the most marvelous weekend!

Just Call Me Fancy Pants | Tequila Shrimp

Tequila Shrimp | Once Upon a Recipe

Despite the fact that all of the holiday parties are over, it is important to have a few recipes on the ready so that you’re always in a position to entertain your friends. (Happy bellies = happy friends). It’s kind of a shame that we smush all of these wonderful parties/gatherings into the weeks surrounding Christmas and New Year’s Eve, no? I mean, it makes for a lot of partying and eating and drinking to do in a short amount of time. Forget the Freshman Fifteen. Hello Christmas Fifteen. Why not spread it out a little?

Tequila Shrimp | Once Upon a Recipe

Friends, I propose that we create a new holiday. Something to get us through the rest of the winter. January and February are such dreary months! Post-holiday lows combined with cold, dark days. It’s all a bit depressing if you ask me. What shall we call our new holiday?

…I am drawing a blank, but one thing I can be sure of is that it must involve lots of good food and beverages. Presents can be optional.

Tequila Shrimp | Once Upon a Recipe

And these tequila shrimp will be a must-serve item. I mean, come on – jumbo shrimp combined with tequila, lime, and cilantro? It’s like a shrimp marrying a margarita and having delicious babies. It’s super simple to create too. Sauté your shrimp with some onion, garlic, and tequila – all of which can be done in advance, no less – and then serve with cilantro, lime, and salt. In a jumbo martini glass (optional – see below). I made these tequila shrimp for a holiday party I hosted a few weeks ago and they were completely annihilated. Fancy pants without being finicky or stressful. Winning! Happy…Partymus!

Tequila Shrimp | Once Upon a Recipe

Tequila Shrimp

1/4 cup finely chopped onion

5 cloves garlic, minced

1/4 cup olive oil

2 pounds fresh shrimp, peeled and tails on (~40 large shrimp)

1/4 cup tequila

1/4 cup freshly squeezed lime juice

1/8-1/4 tsp. salt (to taste)

2 TBSP. cilantro, chopped

Sauté the onion and garlic in olive oil over medium heat for about 3 minutes. Add the tequila and the shrimp. Bring to a boil and cook, uncovered for 3-5 minutes, or until the shrimp are just pink. Refrigerate for at least two hours, or until ready to serve (up to 24 hours).

For the presentation: Combine the shrimp with the lime juice, salt, and cilantro. Toss together and serve over ice, preferably in an over-sized martini glass. Serve with cocktail sauce for dipping, if desired.

PS. While I’ve never tried it, I happen to think that this recipe could be turned into a rather amazing entrée. Add the lime juice, salt, and cilantro while the shrimp are still warm, and serve over freshly cooked angel hair pasta. Throw in some asparagus (or your favorite vegetable) to round out the meal. Does that sound lip-smacking good or what?

There’s An App for That | Pasadena Pinwheels

Pasadena Pinwheels | Once Upon a Recipe


Aloha mes amigos!

‘Tis the holidays! At this time of year, every good host and hostess needs a few recipes in his or her entertaining arsenal – tried and true crowd pleasers that can be counted on time and time again. For me, Pasadena Pinwheels is one of those reliable appetizers that everyone seems to love. They are easy to prepare ahead of time, only need a quick nip in the oven before serving, and well, they’re kind of delicious.

Why not give ’em a try this holiday season? Whether you’re hosting a party or attending one and need something easy to take along (yes, we’re all going to be good guests this year), Pasadena Pinwheels are money.

I’ll even walk you through it. Let’s get started!

Pasadena Pinwheels | Once Upon a Recipe


The ingredient list is trés simple. Cream cheese, a lil’ mayo, green chiles, tomato, onion, garlic, chili powder, salt, and tortillas. And some salsa for dipping.

Pasadena Pinwheels | Once Upon a Recipe


Pasadena Pinwheels | Once Upon a Recipe

Pasadena Pinwheels | Once Upon a Recipe

Pasadena Pinwheels | Once Upon a Recipe


Mix it all together. Spread it on the tortillas. Roll ’em up. Slice. Arrange them all pretty on a platter. Snack on the ends as you’re working. Refrigerate until you’re almost ready to serve. Pour yourself a glass of wine before your guests arrive. You deserve it.

Ten minutes before you want to serve your Pasadena Pinwheels, heat up your oven to broil, pop the whole shebang into the oven for a couple of minutes, just until things are getting toasty and golden. Boom. Dinner Appetizer is served. You can thank me later.

Pasadena Pinwheels | Once Upon a Recipe


Pasadena Pinwheels

8 ounces of cream cheese, softened

2 TBSP. mayonnaise

1 4-ounce can of diced green chiles

1 large tomato, finely chopped

1/4 cup onion, finely chopped

2 garlic cloves, minced

1 tsp. chili powder

1/4 tsp. salt

10 large flour tortillas

Mix everything together (an electric mixer works well). Refrigerate for at least two hours or overnight (to let those flavors mingle!). Spread evenly onto the tortillas, roll each tortilla up tightly, then slice into 1-inch rounds. Arrange on a platter or cookie sheet. Broil until golden brown before serving. Dip into salsa, if desired.

Pasadena Pinwheels | Once Upon a Recipe


What is your favorite go-to holiday appetizer recipe? 

A Guest Post | Goat Cheese Tart with Honey and Figs

Aloha friends. Can I ask you a serious question?

Where the deuce did Summer go? One minute the heat has me more hot and bothered than a lonely housewife reading 50 Shades of Grey at a Magic Mike screening (thanks someecards), and the next minute I’m pulling out my boots, scarves, and turning on my seat heaters during my early morning commute to work. What gives?

Just like that, Fall is here. Don’t get me wrong, I love Fall. Crisp air, gorgeous colors, cozy sweaters, delicious treats (aka. pumpkin everything)…I adore it all. Unfortunately, around these parts, Fall lasts a cool hot minute and then it’s suddenly Winter. For six. long. months.

However…these days I’m focusing my efforts on being a glass half full kind of gal, so let’s nip this Winter talk in the bud and hone in on something positive.

Did you know that fresh figs are in season in late Summer/early Fall? Did you know that if you pair up fresh figs with puff pastry, creamy goat cheese, honey, and fresh rosemary, little tiny leprechauns will do a dance on your taste buds and fireworks will erupt in the sky?

You didn’t?! Well then, get your fannies on over to my lovely friend Kristy’s blog, A Gastronomical Sovereignty, where I tell you exactly how to make this taste bud extravaganza (aka. a Goat Cheese Tart with Honey and Figs) happen. And while you’re there, check out Kristy’s space – where she shares stories about her ethical culinary adventures, and drinks wine while she’s at it. No wonder we get along so well. 🙂

PS. Let’s reminisce about Summer. What was the best thing you did/saw/ate over the past few months?

All Choked Up | Grilled Artichokes with Lemon Garlic Aioli


Friends, can you believe that August is nearly half over? That these glorious, hot, sunshine and thunderstorm-filled days are whipping by us at break neck speed? And before we know it, we will be trudging through another long, cold, snowy winter? *sigh* My apologies for the pessimistic ‘tude that I’m rocking right now. Summer just ain’t long enough!


However, I do have some advice for making the best of the rest of these summer days. Ready?

1.Get outside. Spend as much time out there as you can! Eat outside, drink outside, be active outside (emphasis on eat and drink). Have a bonfire, roast marshmallows, and devour s’mores. Sit outside and read a book. Get out there and soak up summer!

2.Make these. Don’t ask questions, just do it. Preferably in combination with #1.


3.Go to the farmers’ market. Summer farmers’ markets are fabulous. Fresh produce in its prime. Delicious local goods. Supporting your community. All the things!

4.Eat more ice cream. This should not require an argument, but if you have your doubts, Em has you covered. And if you require any inspiration, look no further.


5.Sleep in. It is summer, after all. And while we might not be 16 anymore, with the glory of summer holidays to waste away by sleeping until 1pm, try to sneak in an extra hour or two of slumber and savor a lazy weekend morning. Preferably followed by pancakes and hot coffee.

6.Get away. Even if you can’t swing an exotic summer holiday, get out of town for a weekend. Enjoy a change of scenery! Go to the beach, the mountains, go camping. Just get out. Your mind will thank you.

7.Grill up some artichokes and then dip them in lemon garlic aioli and stuff them into your face. Seriously.

Artichokes are delicious (and beautiful!) things. I had never bought or eaten a whole artichoke prior to trying this recipe. Canned artichokes often find their way into my grocery basket for use in a spinach and artichoke dip or onto homemade pizza. But there’s more to artichokes than their lovely little hearts! They’ve got cute little leaves that you can dip into a tasty aioli and then pull the flesh from with your teeth. With simple flavors like lemon and garlic, and the wonderful char created by a hot grill, these are a great appetizer or side to any summer meal. Get grillin’ friends, and enjoy summer!


Grilled Artichokes with Lemon Garlic Aioli (barely adapted from Food For My Family)

For the artichokes:
3 whole artichokes
2 lemons
1/4 cup extra virgin olive oil
3 cloves garlic
1/2 teaspoon sea salt
Freshly ground black pepper

Fill a large bowl with water, and add the juice from one lemon, saving the rind. Cut the artichokes in half and immediately submerge in the water (to prevent browning). Bring a (very) large pot of water to a boil and add in the squeezed lemon rind. Transfer the artichokes to the boiling water. Boil for 20 minutes, stirring occasionally.

Fire up the grill. In a large bowl, add the juice from the other lemon, olive oil, garlic, salt and pepper. When the artichokes are done boiling, drain them on a paper towel and then toss them around in the bowl to coat them.

With the grill on medium heat, add the artichokes to the grill. Brush the artichokes with the remaining oil mixture in the bowl. Turn every five minutes until artichokes start to char (mine took about 15 minutes). Remove from heat.

For the lemon garlic aioli:
1/4 cup mayonnaise
2 cloves garlic, minced
Juice from 1/2 of a lemon
1 green onion, diced
1/2 teaspoon salt
Freshly ground black pepper

Mix together all ingredients in a small bowl. Refrigerate until ready to serve with the grilled artichokes.


Things might get messy. Have your napkins ready.

The photos in this post were taken with Instagram, an iPhone app. If you are an IG user and want to follow my daily foodie (etc.) life, you can find me at @onceuponarecipe.

Eat and Be Merry | Caramelized Onion and Goat Cheese Tartlets


Ahoy mates! I am THIS happy (x 1000) to be back here!

One piece of advice for all of you lovelies…do NOT, ever, under any circumstances, plan a move for December 1. Now, I didn’t have a whole lot of choice in the matter, and consider myself lucky that things worked out the way that they did. It coulda been a lot worse, and so I’m not going to look a gift horse in the mouth, you know what I’m sayin’? But, please try to avoid a December move if at all possible.


‘Cause then, when all you want to do is enjoy the wonderfuness of this holiday season (the decorating, the baking, the parties, the eating, the shopping), you’ll be faced with the unfortunate task of unpacking and organizing. Not a good time my friends, not a good time.

However, should you find yourself in such a predicament, there is a solution. Listen close friends, this is golden advice. Ready?

Unpack and organize the essentials…your kitchen, your bedroom, and your living room…and shove everything else into a room, shut the door, and don’t go back in that dang room until January. Problem solved! 🙂 Don’t tell me I never gave you any good advice.


On to the good stuff! See these beautiful little tartlets?

Make ’em and take ’em to a party this holiday season. Or throw your own party and give ’em a place at your table. They are quick and simple, but big on flavor. The shallots become so sweet and caramelized, they don’t even taste like shallots! Not that I have anything against the little guys. Mega-delicious. A definite party hit!


Caramelized Onion and Goat Cheese Tartlets (from a friend of a friend)

6 shallots, chopped finely

2 TBSP. olive oil

2 TBSP. balsamic vinegar

3 TBSP. brown sugar

Salt and pepper, to taste

5 ounces of goat cheese, cut into 24 hunks

2 eggs, beaten

2/3 cup milk

24 mini tart shells

Preheat the oven to 350°F. Prebake the tarts for 10 minutes and set aside. Heat the olive oil in a frying pan over medium-high heat. Add the shallots, and sauté for a few minutes, or until they start to turn clear. Add the balsamic vinegar, brown sugar, and salt and pepper. Allow the mixture to reduce and the shallots to caramelize (about 6-7 minutes). Fill each tart shell with a small amount of the caramelized shallots. Top with a hunk of goat cheese. Mix the eggs and milk together, and season with salt and pepper. Fill the remainder of each tart shell with the milk/egg mixture. Bake immediately for an additional 20-25 minutes, or until the tarts are set and golden brown. Serve warm.


There’s just one problem with that awesome advice I was dishing out earlier. I can’t find anything.

This + Beer + a Patio | Smoked Paprika Popcorn

Aloha! I have a proposition for you.

Ready?

You + Me + Summer…

Add in a patio. AKA. A table and chairs. Outside in the beautiful summer sun.

You bring the beer. Cold beer.

And I’ll bring this.

Deal?

I was inspired to replicate this dish at home after munching on it at a local cafe/bar here in Edmonton called Sugarbowl. One of my favorite spots in the city, with a great atmosphere, amazing beer selection, and creative belly-filling options. They’ve had a popcorn appetizer on their menu for as long as I can remember. More recently, Smoked Paprika Popcorn caught my eye and won over my taste buds. I figured it couldn’t be too hard to replicate at home, it’s just popcorn after all! Here’s what I came up with after a couple of tries, and it tastes pretty darn close to the real thing.

This popcorn is great for snacking, and tastes best when served freshly popped, coated, and given a spritz of fresh lime juice. The smoked paprika gives it a wonderful smoky flavor that will have you reaching your hand into the bowl until it’s clean. Finger lickin’ good. Don’t forget the beer.

Smoked Paprika Popcorn

2 TBSP. olive oil

1/2 cup popcorn kernels

1 TBSP. smoked paprika*

1 tsp. garlic powder

1 tsp. salt

1 tsp. white sugar

Fresh lime

Combine the smoked paprika, garlic powder, salt, and sugar in a small bowl. Set aside. Pop your corn. I use a big pot, heat up my oil, throw in the popcorn kernels, let it heat up and pop away, giving the pot a good shake every 15-20 seconds (until the popping is finished). But if you have an air popper, or use another method, go with that. Sprinkle the hot popcorn with the spice mixture, using as much or as little spice as you like (taste test along the way). I usually use all of the mixture, but that’s just my preference. Give the popcorn a squeeze of fresh lime and enjoy!

* Smoked paprika can be found at most local supermarkets in the spice aisle or the bulk section. The smoked paprika really is the star in this little snack, so don’t even bother without it!

If you’re looking for a little kick, I bet this would also be fabulous if you added a pinch of cayenne pepper to the spice mixture.

A Match Made In Heaven | Baked Apple and Brie in Puff Pastry

Holla friends.

Just a quick little ditty for you, I’m off to a family reunion this weekend. In a wee little hall, in a fairly little town.

After I finish making 6 dozen of these. My kitchen is a mess of flour, butter, and cinnamon. I have brown sugar on the bottoms of my feet. It’s delightful.

Speaking of cinnamon and delightful things, check this out.

I came across this recipe on Annie’s Eats a few months ago. Annie calls it Baked Brie en Croûte with Apple Compote. I’m calling it Baked Apple and Brie in Puff Pastry. I’m keeping it simple. I’m a simple girl.

But whatever you call it, the combination of apples, sugar, brie, and puff pastry is delicious. Total party in your mouth. I added a little cinnamon for some extra dimension. It works.

This is an appetizer, to be served with crackers and of course, wine. However, I could honestly eat this for dessert. Or as a meal. It is just so good.

Good good good.

Take it to a party and I guarantee everyone will love it. The peeps at the party I took this to sure did.

Now, if you’ll excuse me, I have some family reunioning and wine drinking to do. Ciao!

Baked Apple and Brie in Puff Pastry (slightly adapted from Annie’s Eats)

1 TBSP. butter

3 golden delicious apples, peeled, cored, and diced small

1/4 cup white sugar

1/2 tsp. cinnamon

A pinch of nutmeg

1 pkg. puff pastry (round or square), rolled to 1/4-inch thickness

1 round of brie (6-8 oz.)

1 egg beaten with 1 TBSP. water

Crackers of your choice, for serving

In a medium saucepan, melt the butter over medium heat. Add the diced apples and cook, stirring occasionally for about about 5-7 minutes. Add in the sugar, cinnamon, and nutmeg. Mix well and continue to cook, stirring occasionally, until most of the liquid has evaporated, about 12-15 more minutes. Remove from the heat and let the mixture cool to room temperature.

Preheat the oven to 375˚F. Prepare a baking sheet (or pie plate, like me) by coating it lightly with cooking spray, or lining it with parchment paper or a silicone baking mat. Transfer the puff pastry to the prepared baking pan. Cut the brie in half horizontally to create two thinner rounds. Place the bottom half of the brie in the center of the puff pastry. Top with about half of the apple mixture. Place the other round of the cheese over top, covering with the remaining apple mixture. Bring the puff pastry up around the edges of the brie-apple tower. Fold and pinch the edges in the centre to hold everything together. Brush the surface of the puff pastry lightly with the egg wash. Bake for about 40-45 minutes, or until the puff pastry is golden brown, crisp, and bubbling with goodness. Your kitchen will smell amazing. Remove from the oven and allow it to cool for about 10 minutes before serving. Eat!

Dip It | Curried Cream Cheese Dip with Dried Cranberries, Pine Nuts, and Green Onion

Hello friends! Happy Monday. I hope you all had a lovely Easter/spring weekend filled with family, friends, good food, and sunshine. I sure as heck did. If you ate half as much food and chocolate as I did, you have probably been swimming in a food/sugar coma state, like me. And could there possibly be a better cure for such a coma than perusing and drooling over a new recipe? I think not.

Especially when it is an attack-the-tastebuds-in-a-good-way recipe. Enter this seemingly complex, colorful, flavor explosion dip.

Explaining this dip with words is impossible. But I’ll try anyway. It’s creamy, tangy, sweet, and spicy all at once. Plus chewy from dried cranberries and crunchy from toasted pine nuts. I first tried it at a work potluck a couple of years ago, but only recently rediscovered it. I don’t know where the recipe came from, or what the real name of this creation is, so I am calling it like it is.

Take this dip to your next potluck or serve it at your next party. Your guests won’t know what hit ’em.

In a good way of course.

Curried Cream Cheese Dip with Dried Cranberries, Pine Nuts, and Green Onions

8 ounces cream cheese, softened

2 tsp. curry powder

2 tsp. ground cumin

1/2 cup red pepper or red chile jelly, divided

1/4 cup dried cranberries

1/4 cup pine nuts, toasted

1/4 cup green onions, chopped (about 3 green onions)

Combine the cream cheese, spices*, and 3 TBSP. of the jelly until smooth. An electric or hand mixer will make this easy. Spread the mixture into the bottom of a shallow dip dish (roughly 5″ x 7″). Spread the remaining jelly over top of the cream cheese mixture. Combine the dried cranberries, pine nuts, and green onions in a small bowl to mix, then sprinkle evenly over top of the dip. Chill until you serve. I think this dip tastes great with plain rice crackers, but any small cracker will do! Enjoy!

*You can adjust the amount of curry powder and cumin depending on the level of flavor you would like. If you don’t want such strong flavors, use just 1 tsp. of each. If you want the flavors to be very intense you can use up to 1 TBSP. of each, but I find 2 tsp. of each to be a happy medium.


What are some of your favorite potluck or appetizer recipes?

%d bloggers like this: