Almond Shortbread Bars

Almond Shortbread Bars | Once Upon a Recipe

Only four days left until Christmas!

Every year, Christmas seems to sneak up on me. This year has been no different and despite the whirlwind of shopping, baking, and holiday-partying, I can’t believe we are so close to the big day. Nevermind the fact that 2014 is rapidly coming to a close. Seriously, where did the year go?

Almond Shortbread Bars | Once Upon a Recipe

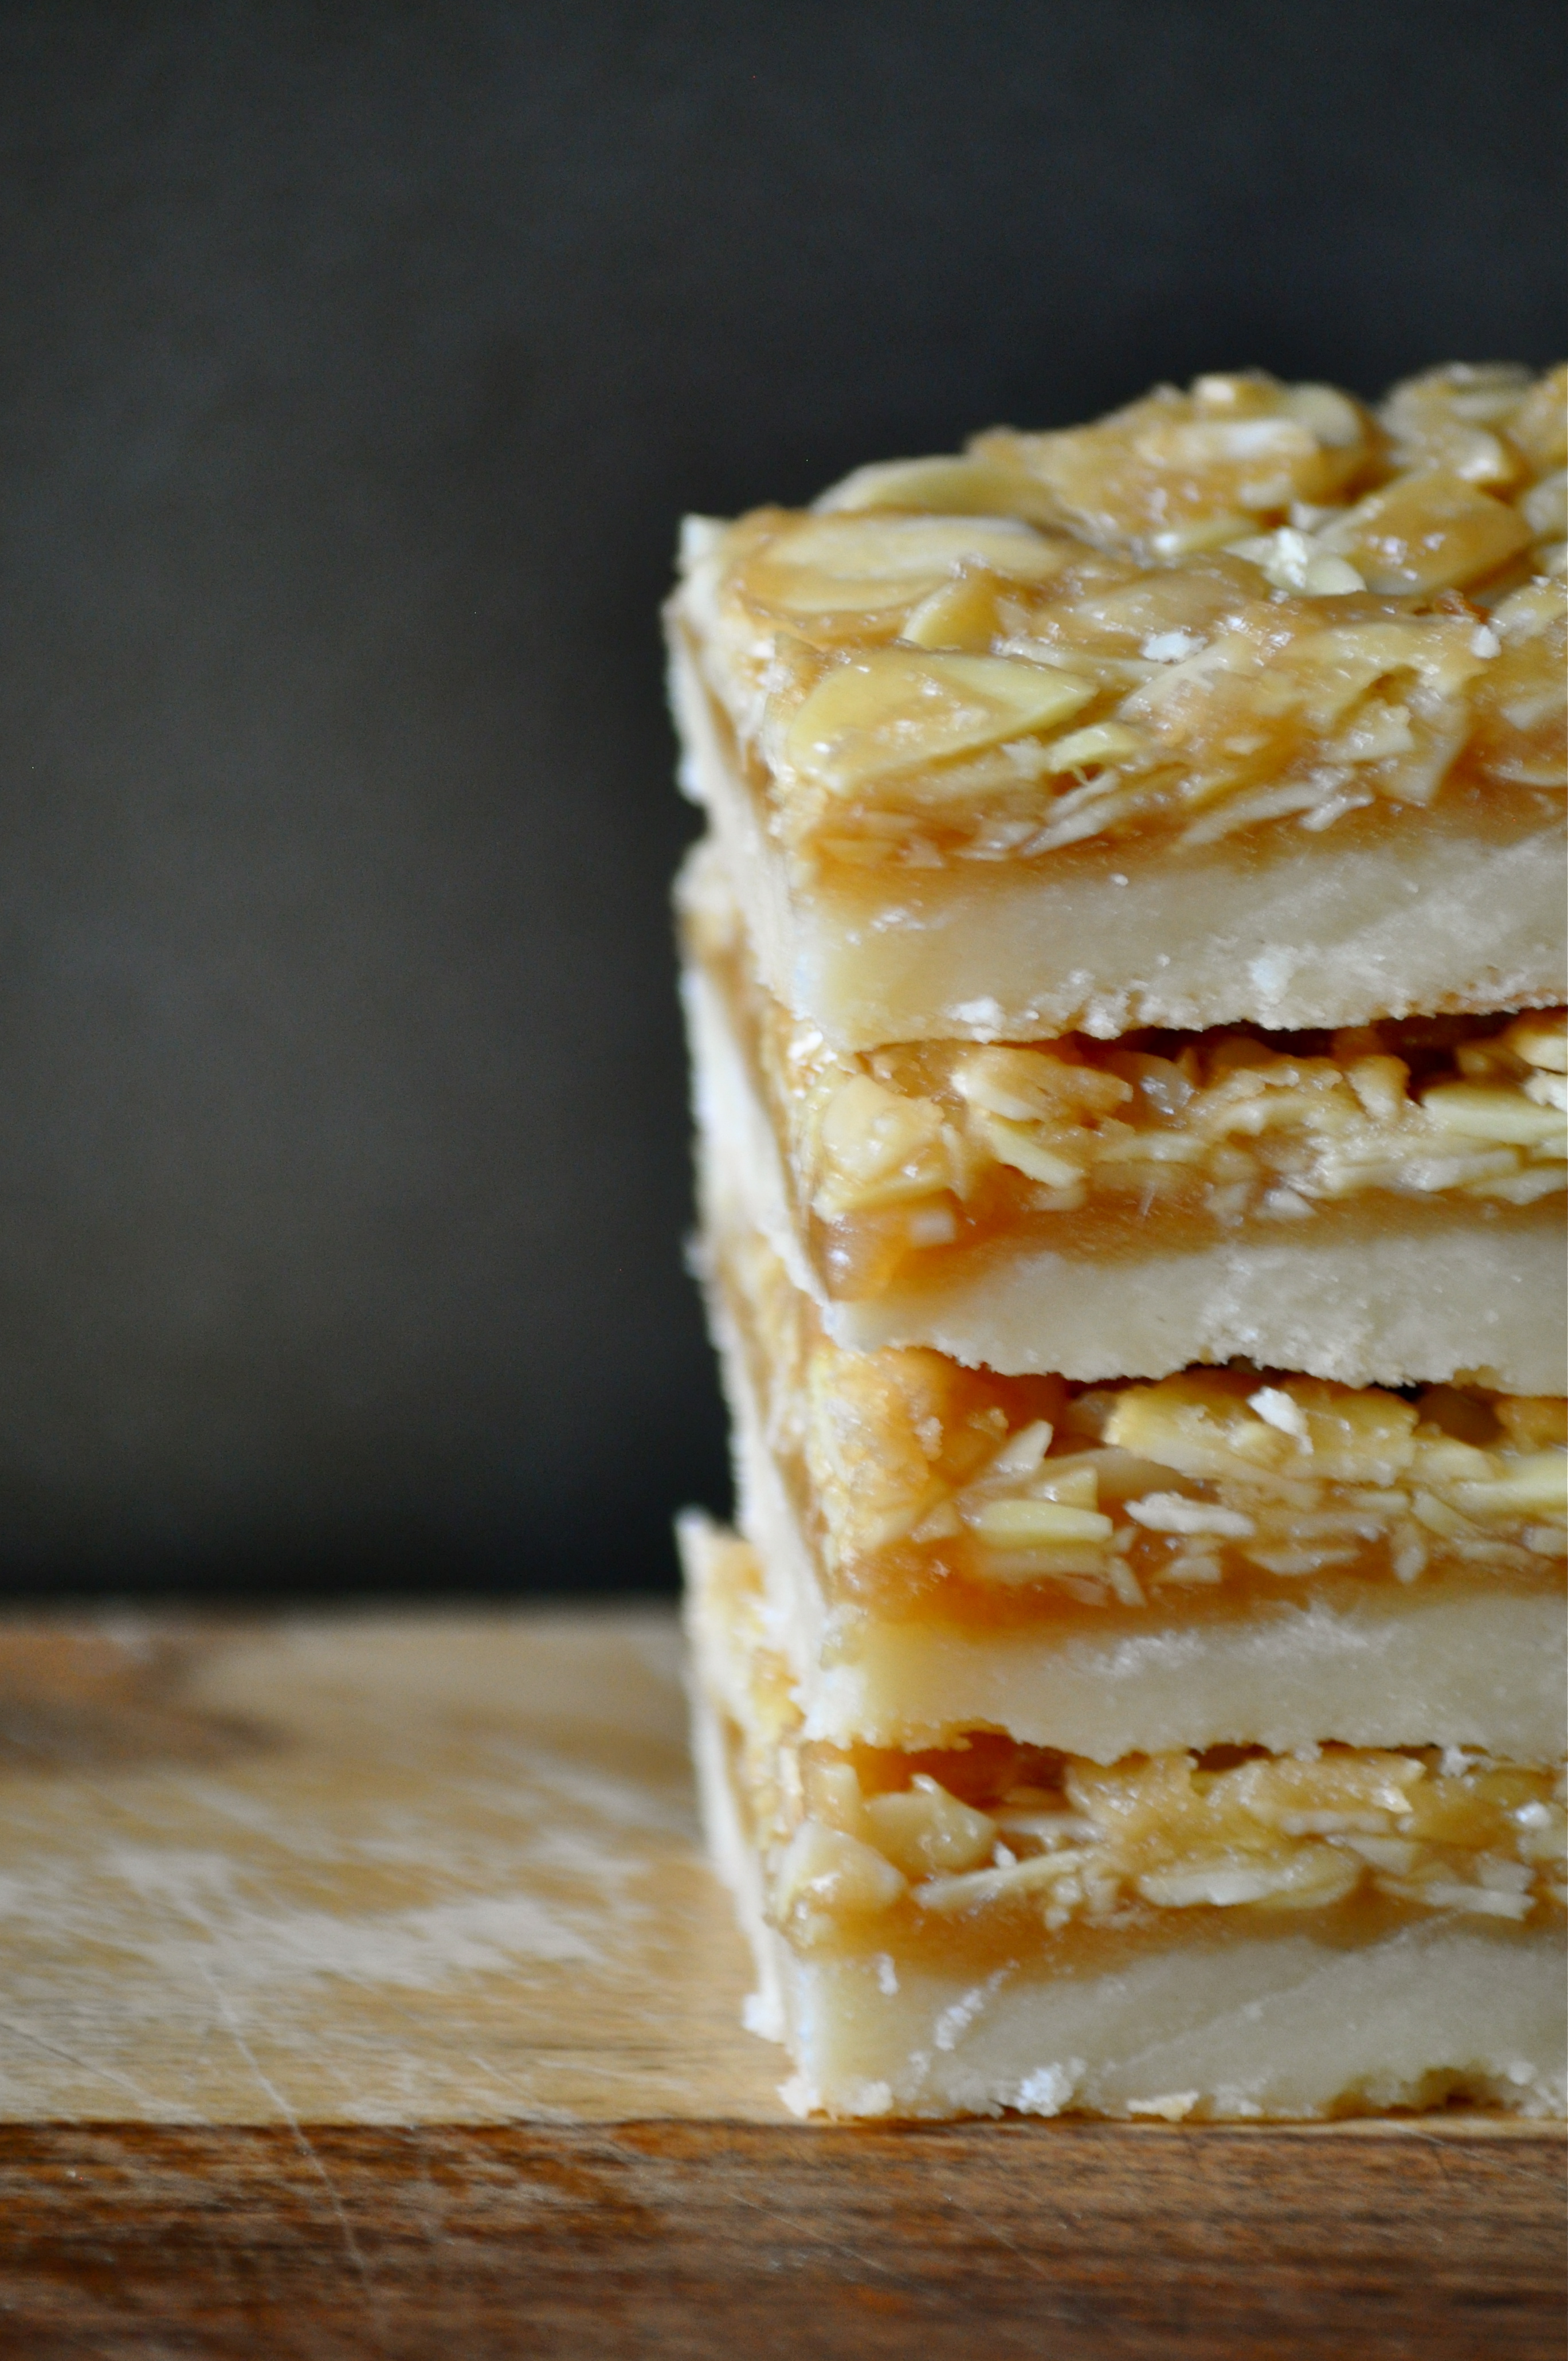
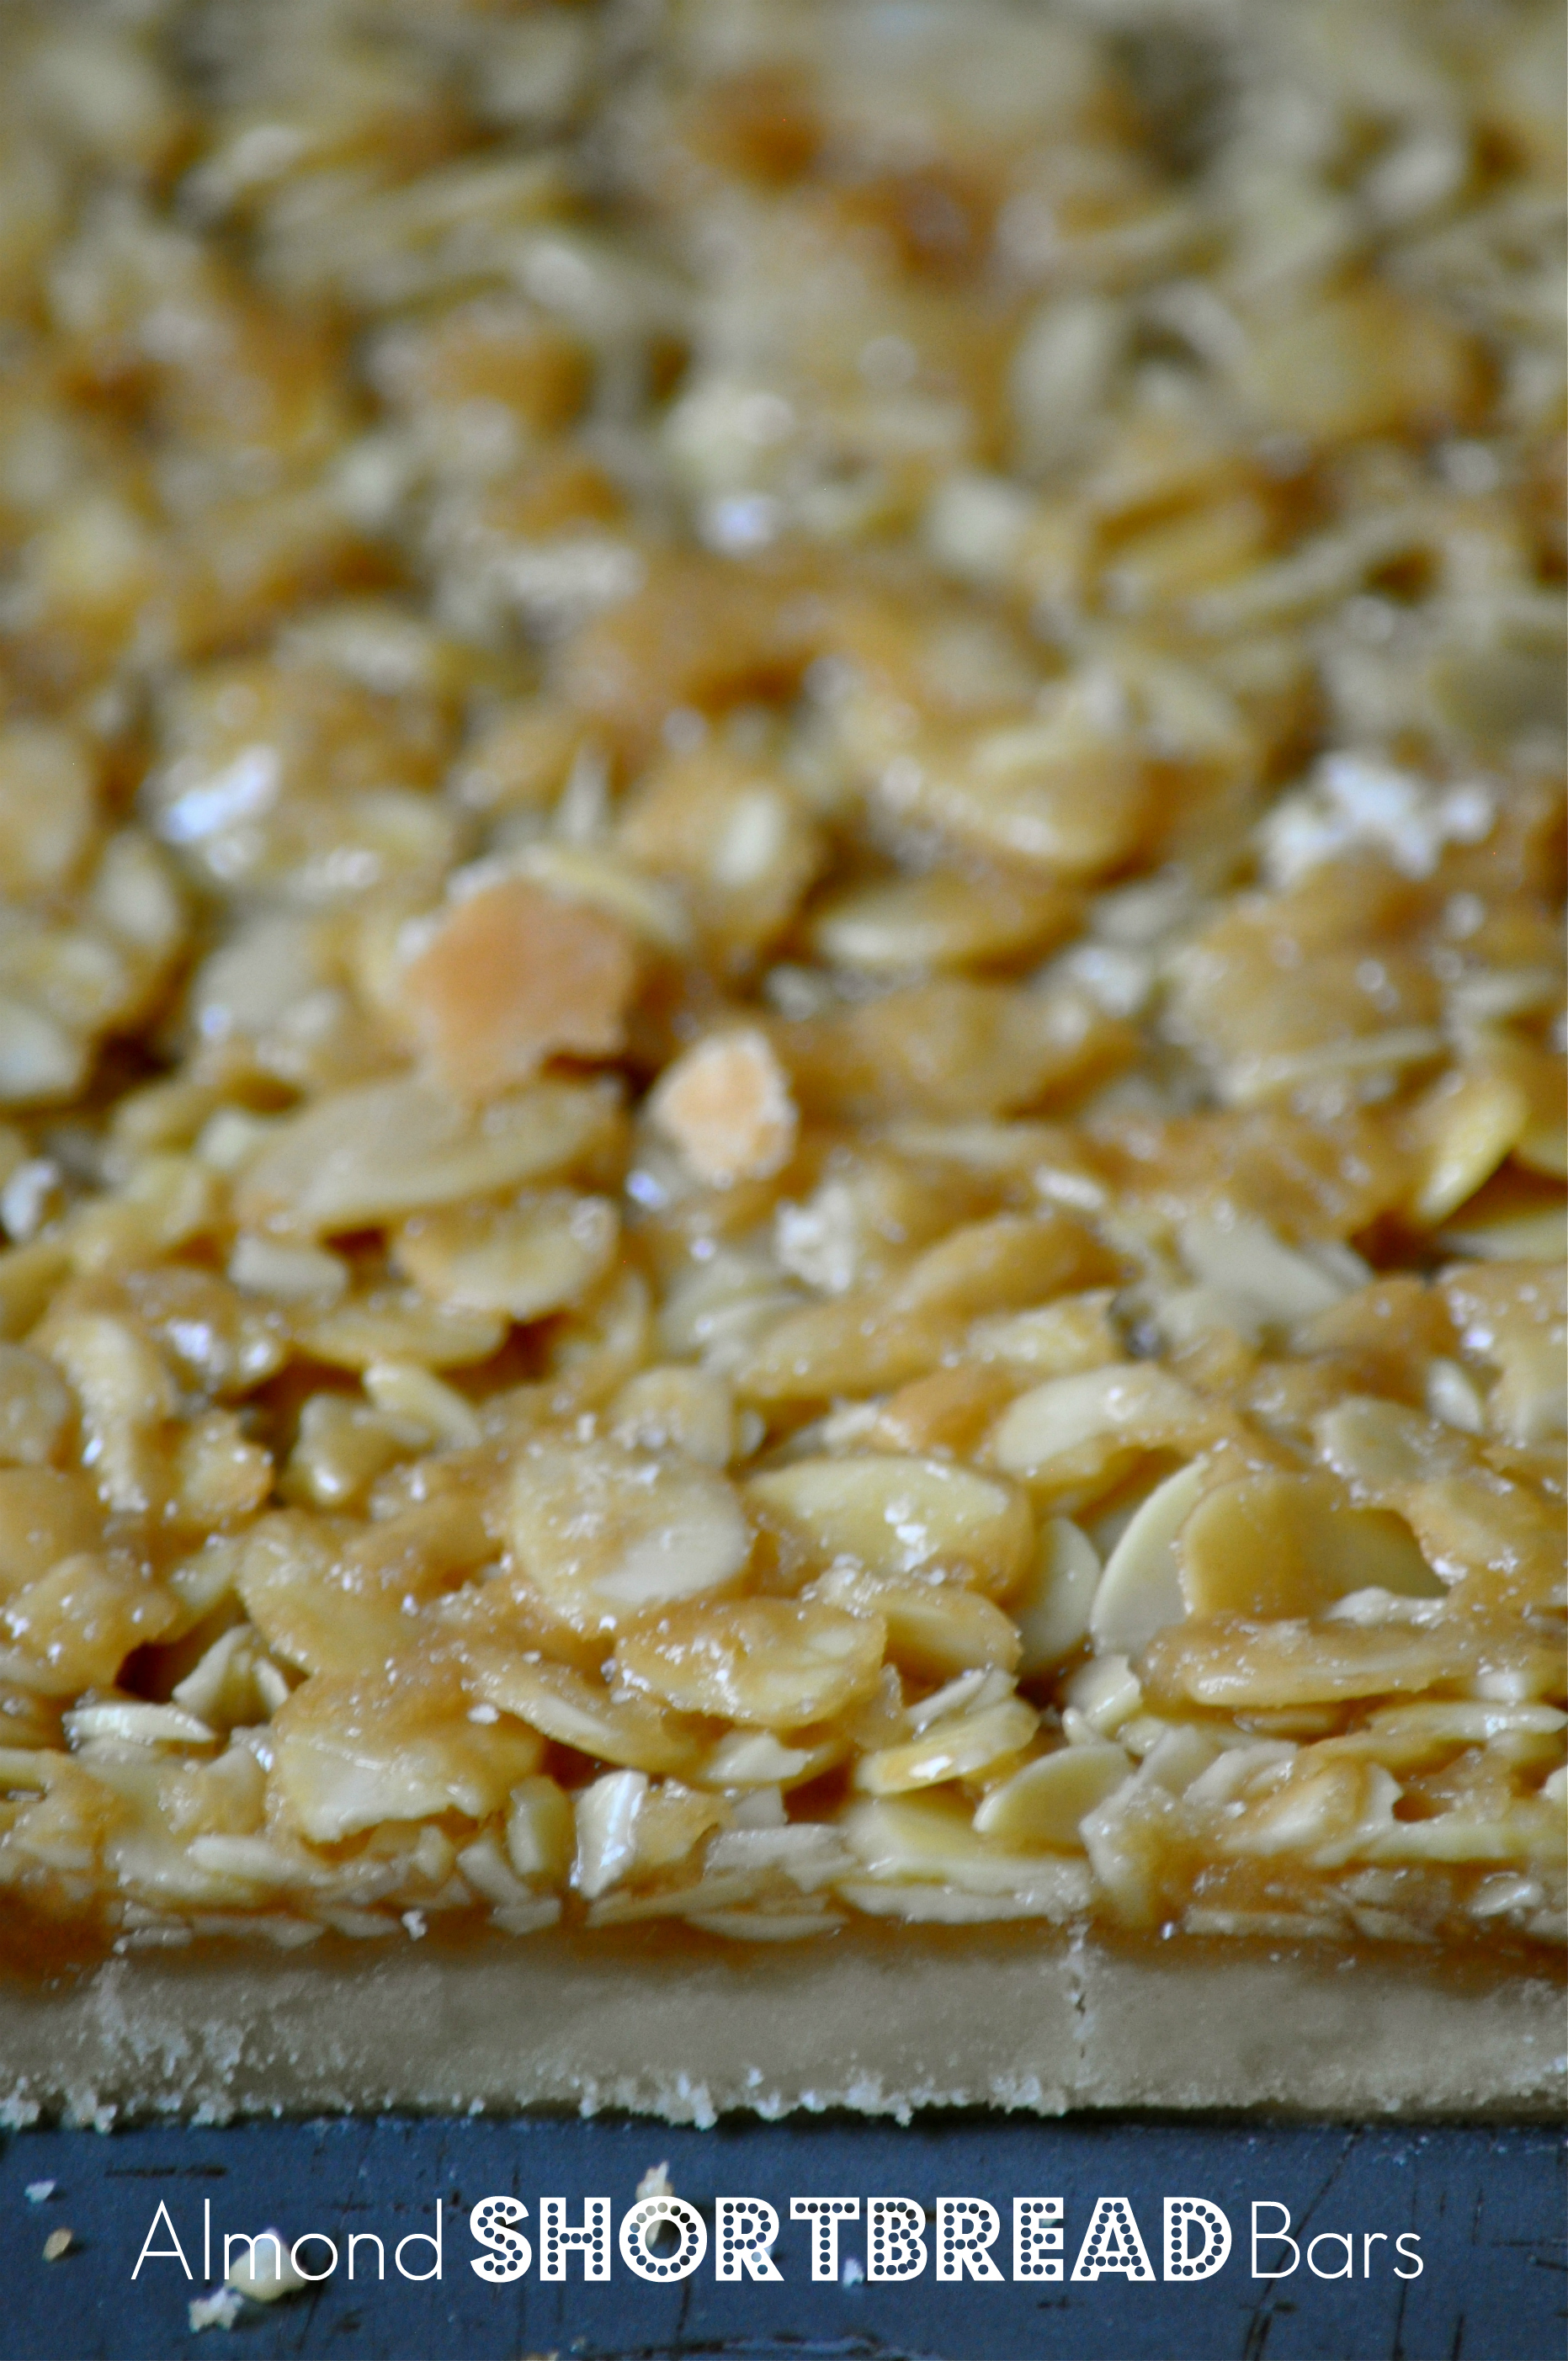
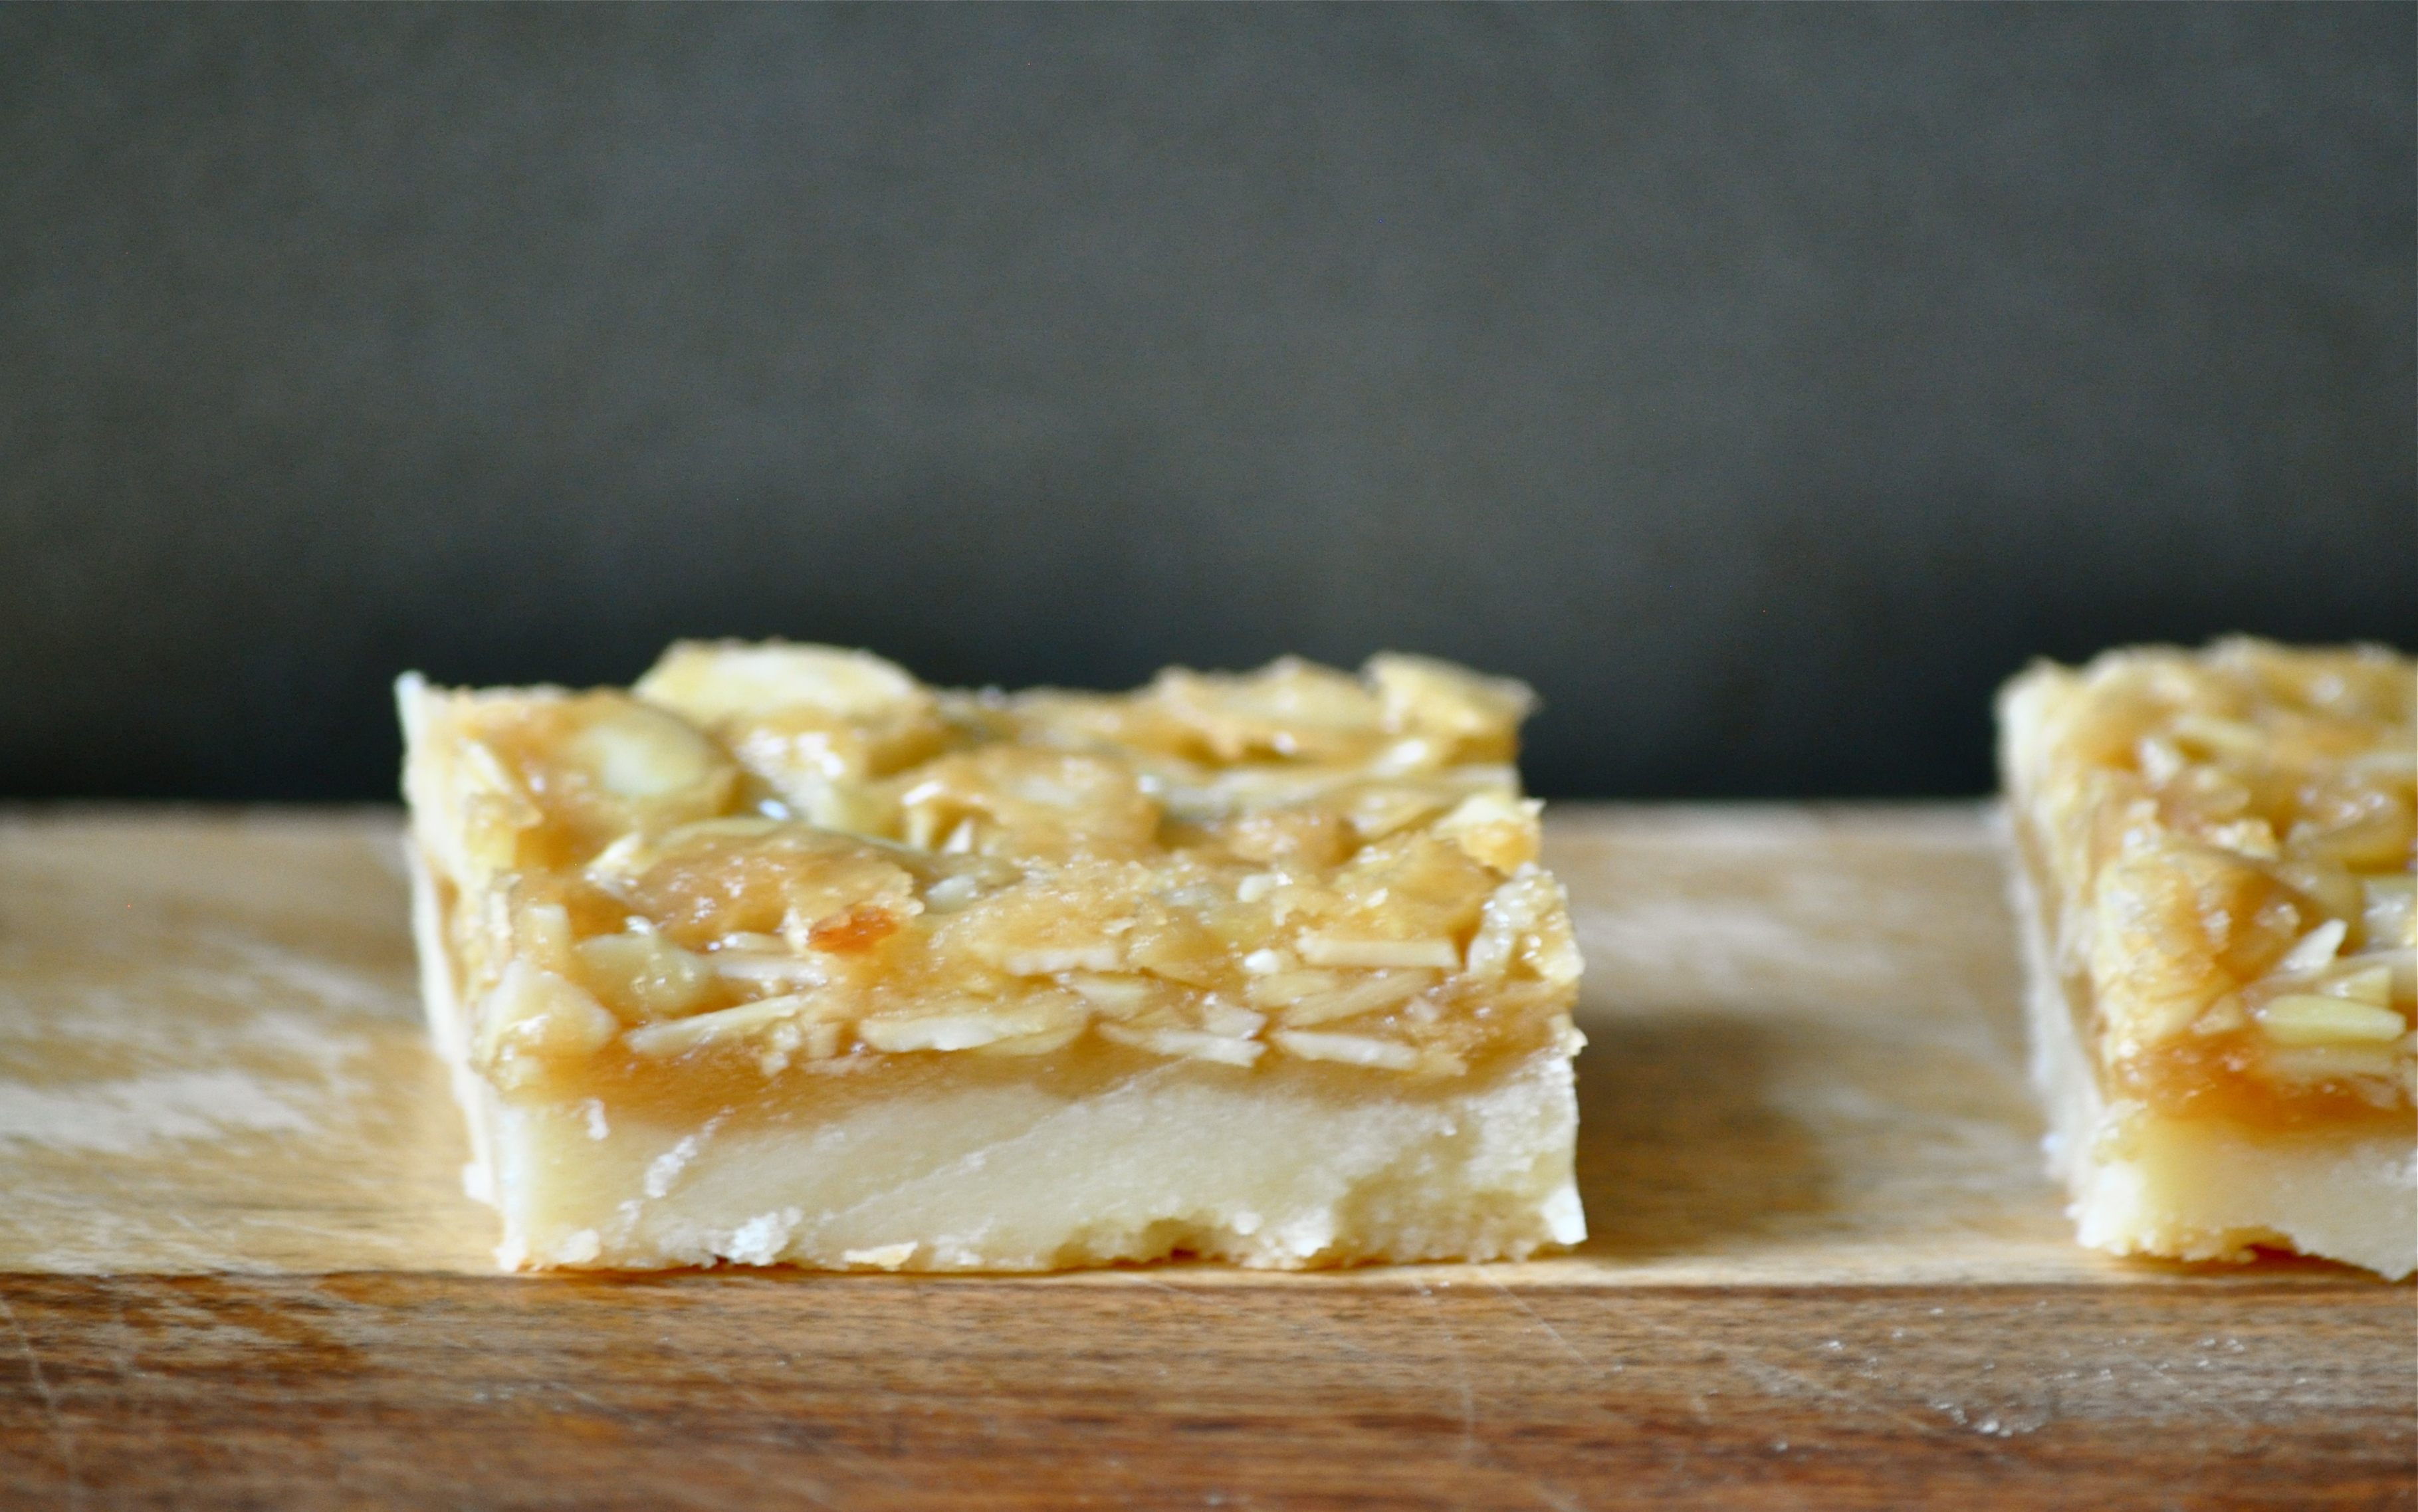
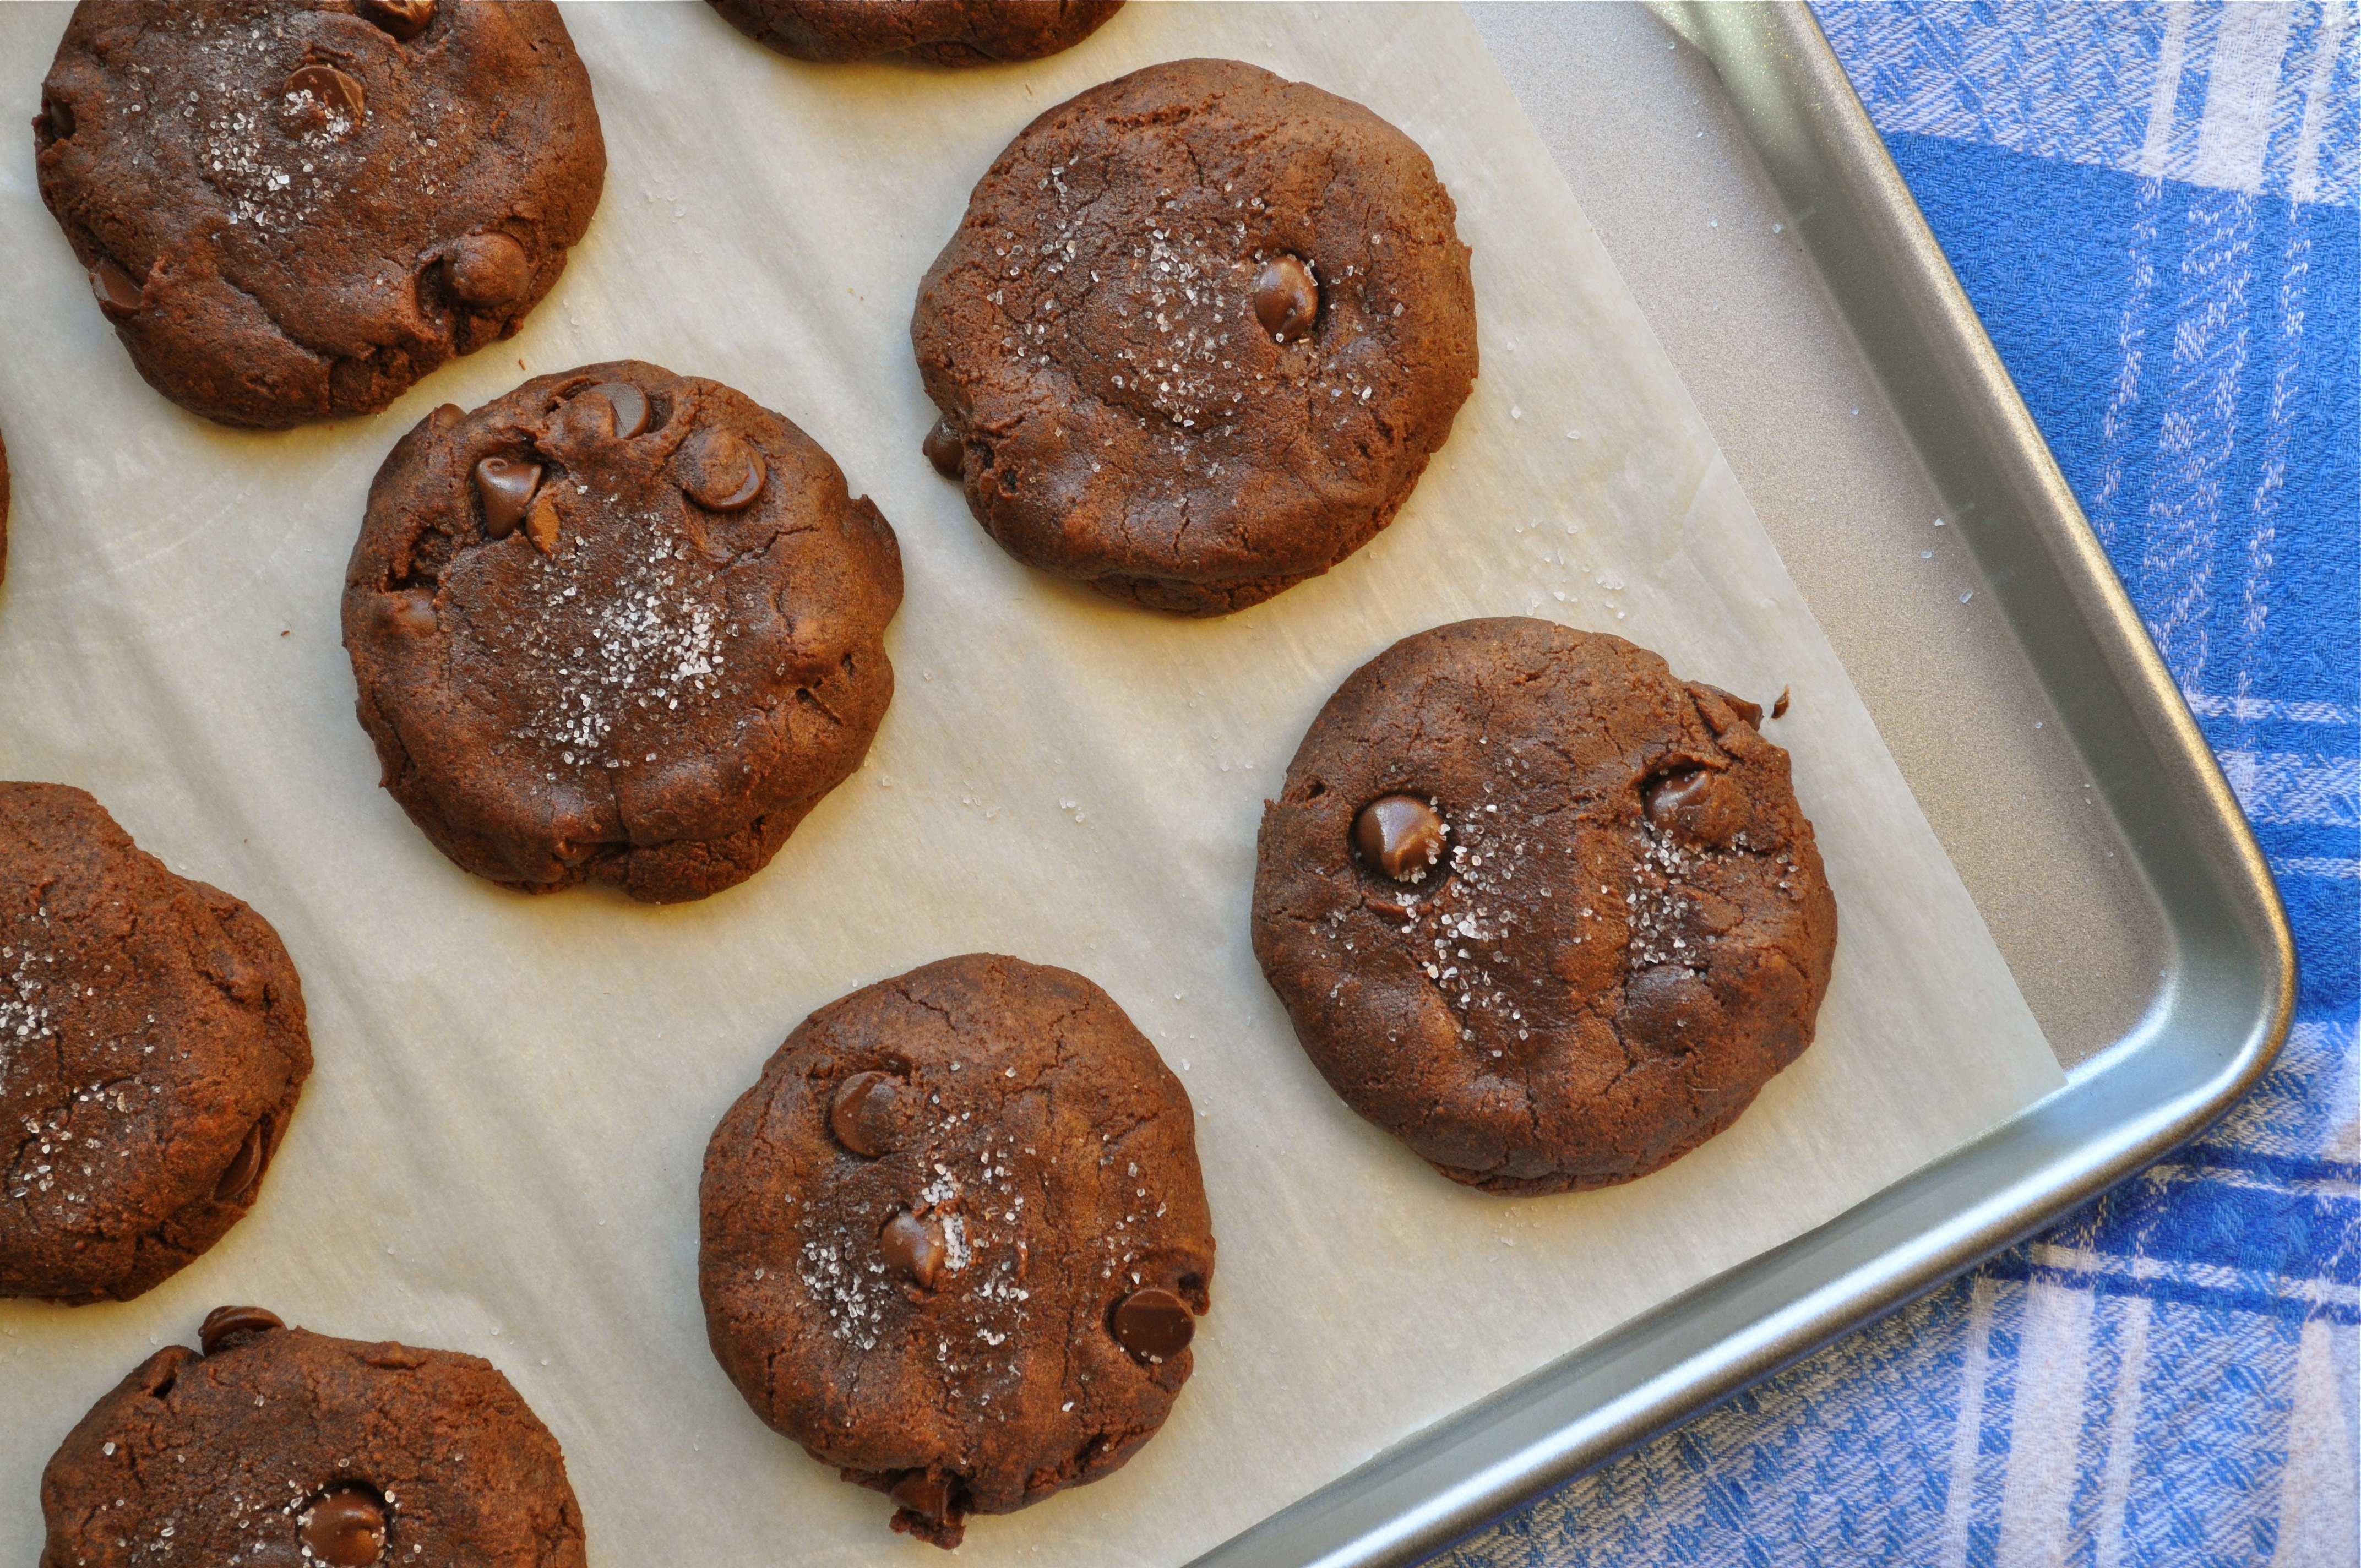
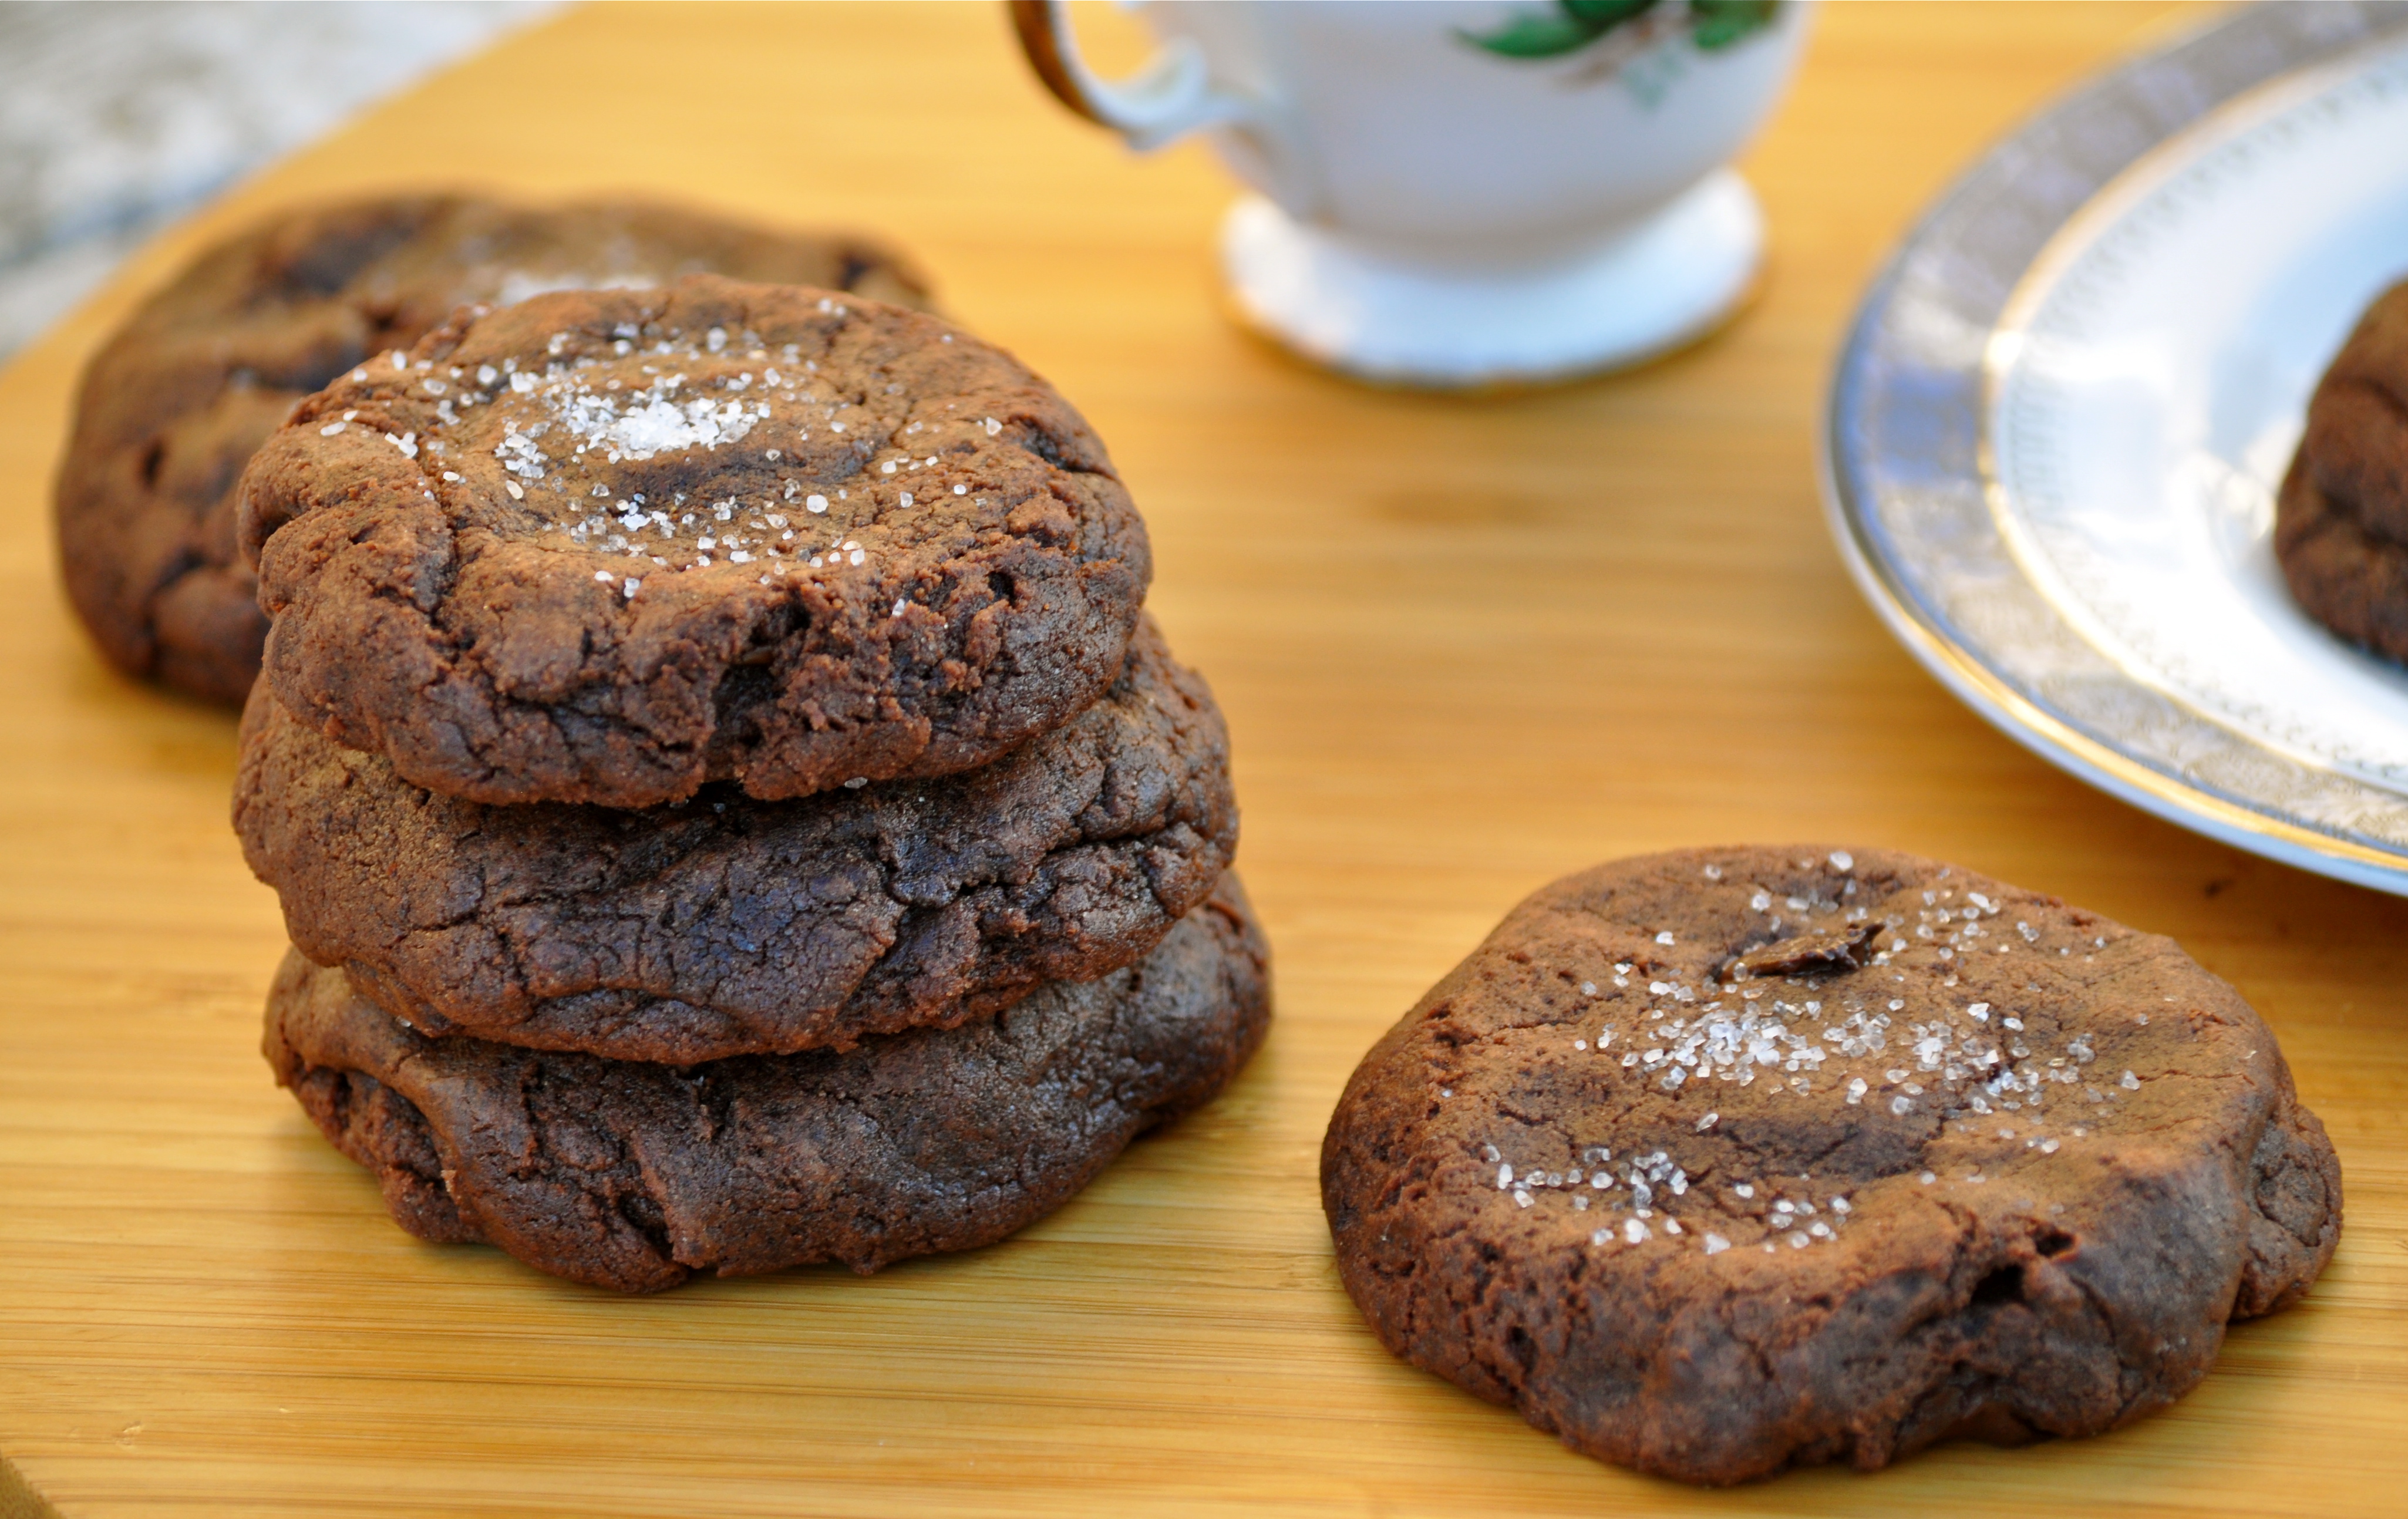
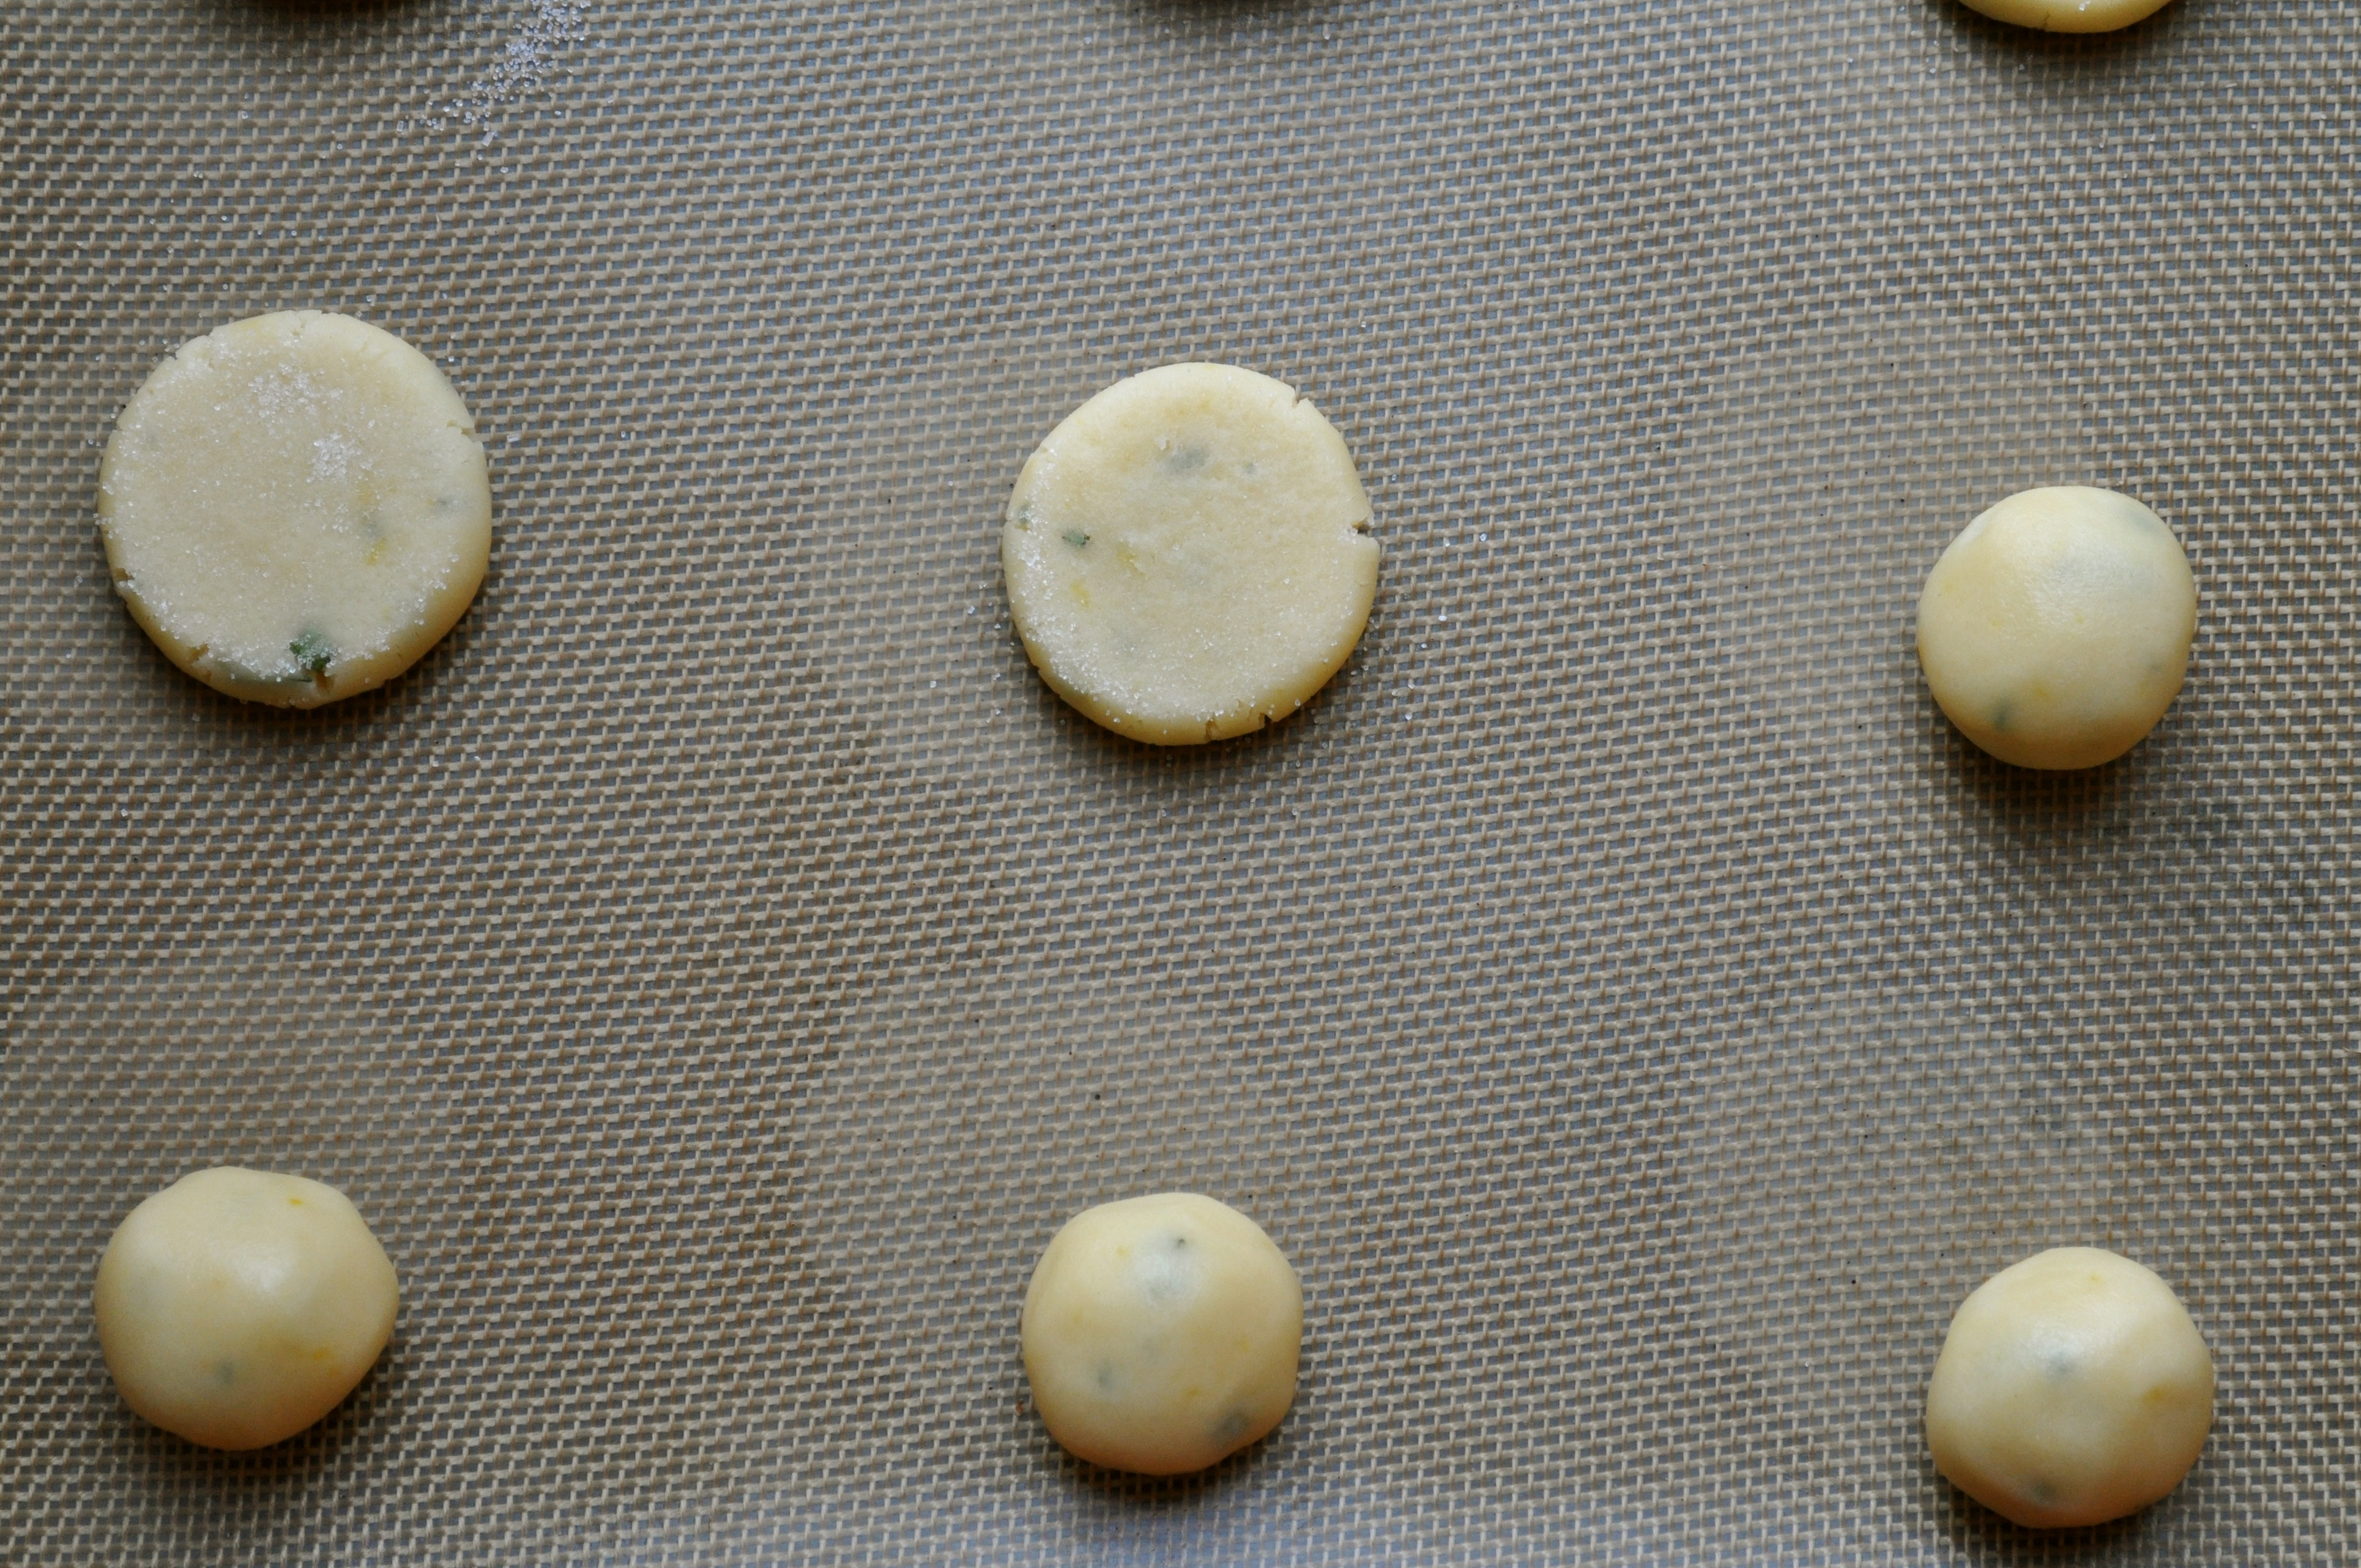
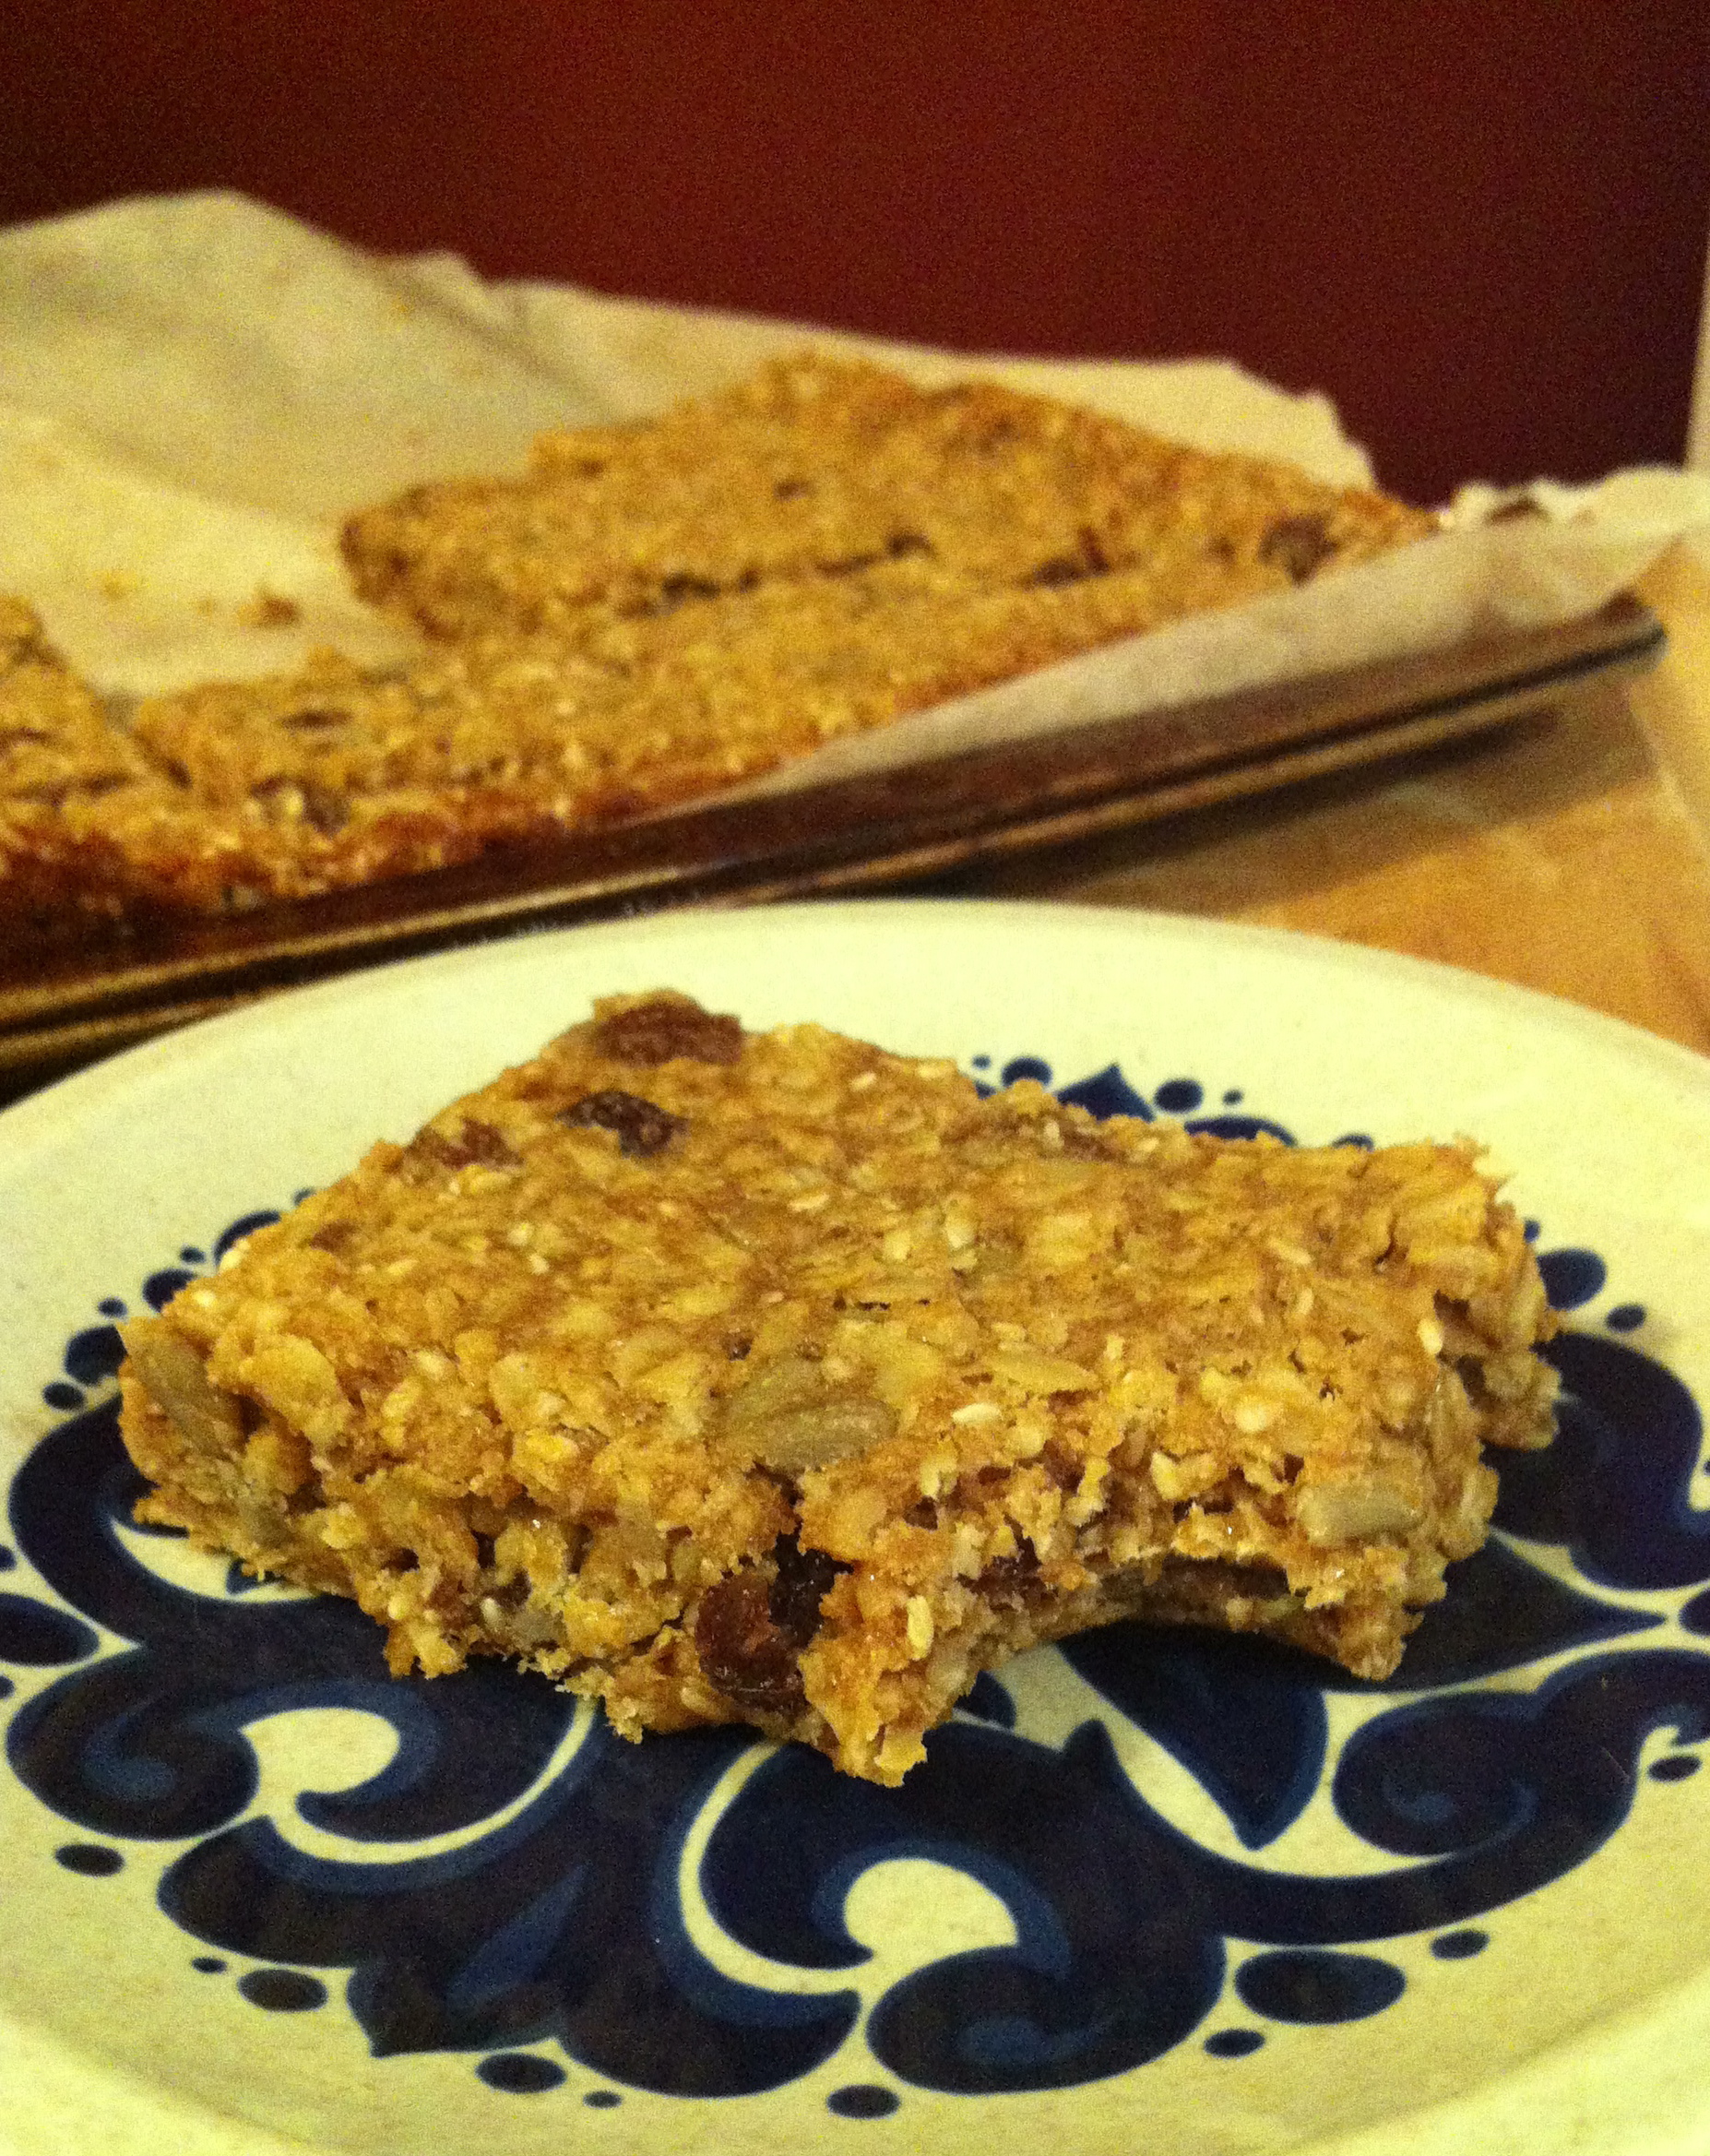
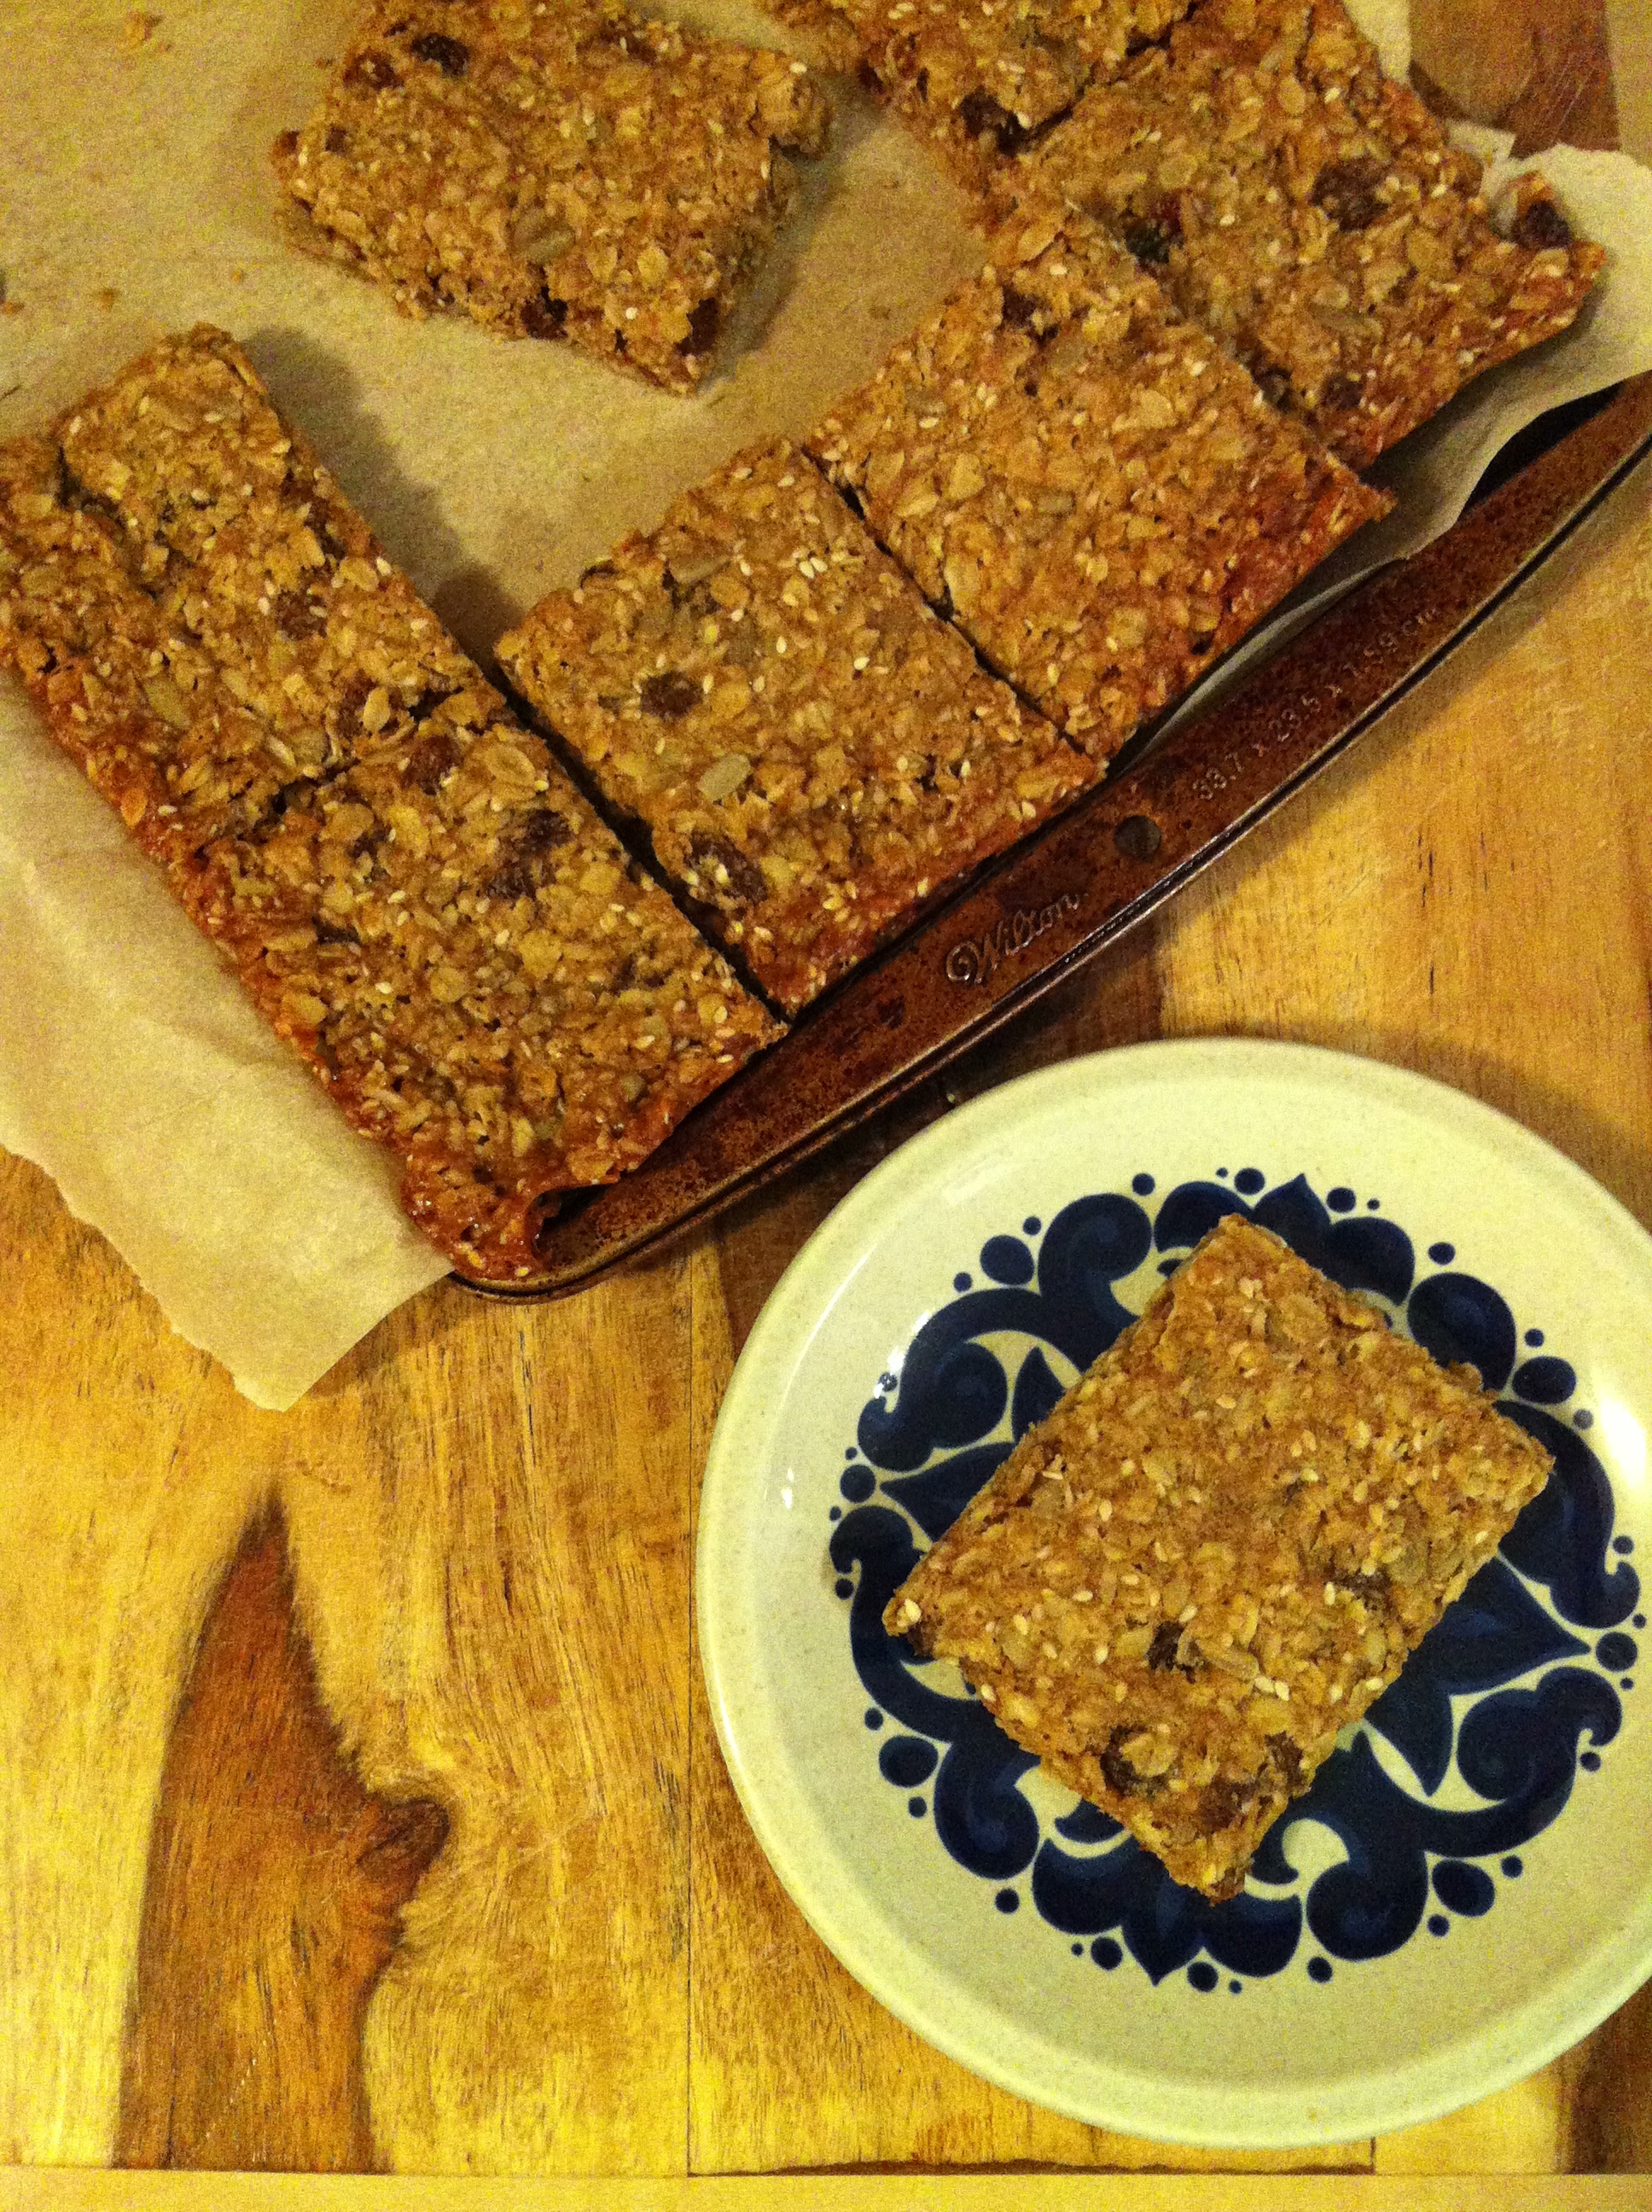
I’m hoping to share a couple more recipes during this final countdown to the big day. If you’re looking for quick and easy sweets to add to your holiday dessert table, look no further. These almond shortbread bars are wonderful. They start with an easy shortbread base and are topped with sliced almonds that have taken a little swim in butter and brown sugar, creating a little caramel-y goodness.

Almond Shortbread Bars | Once Upon a Recipe

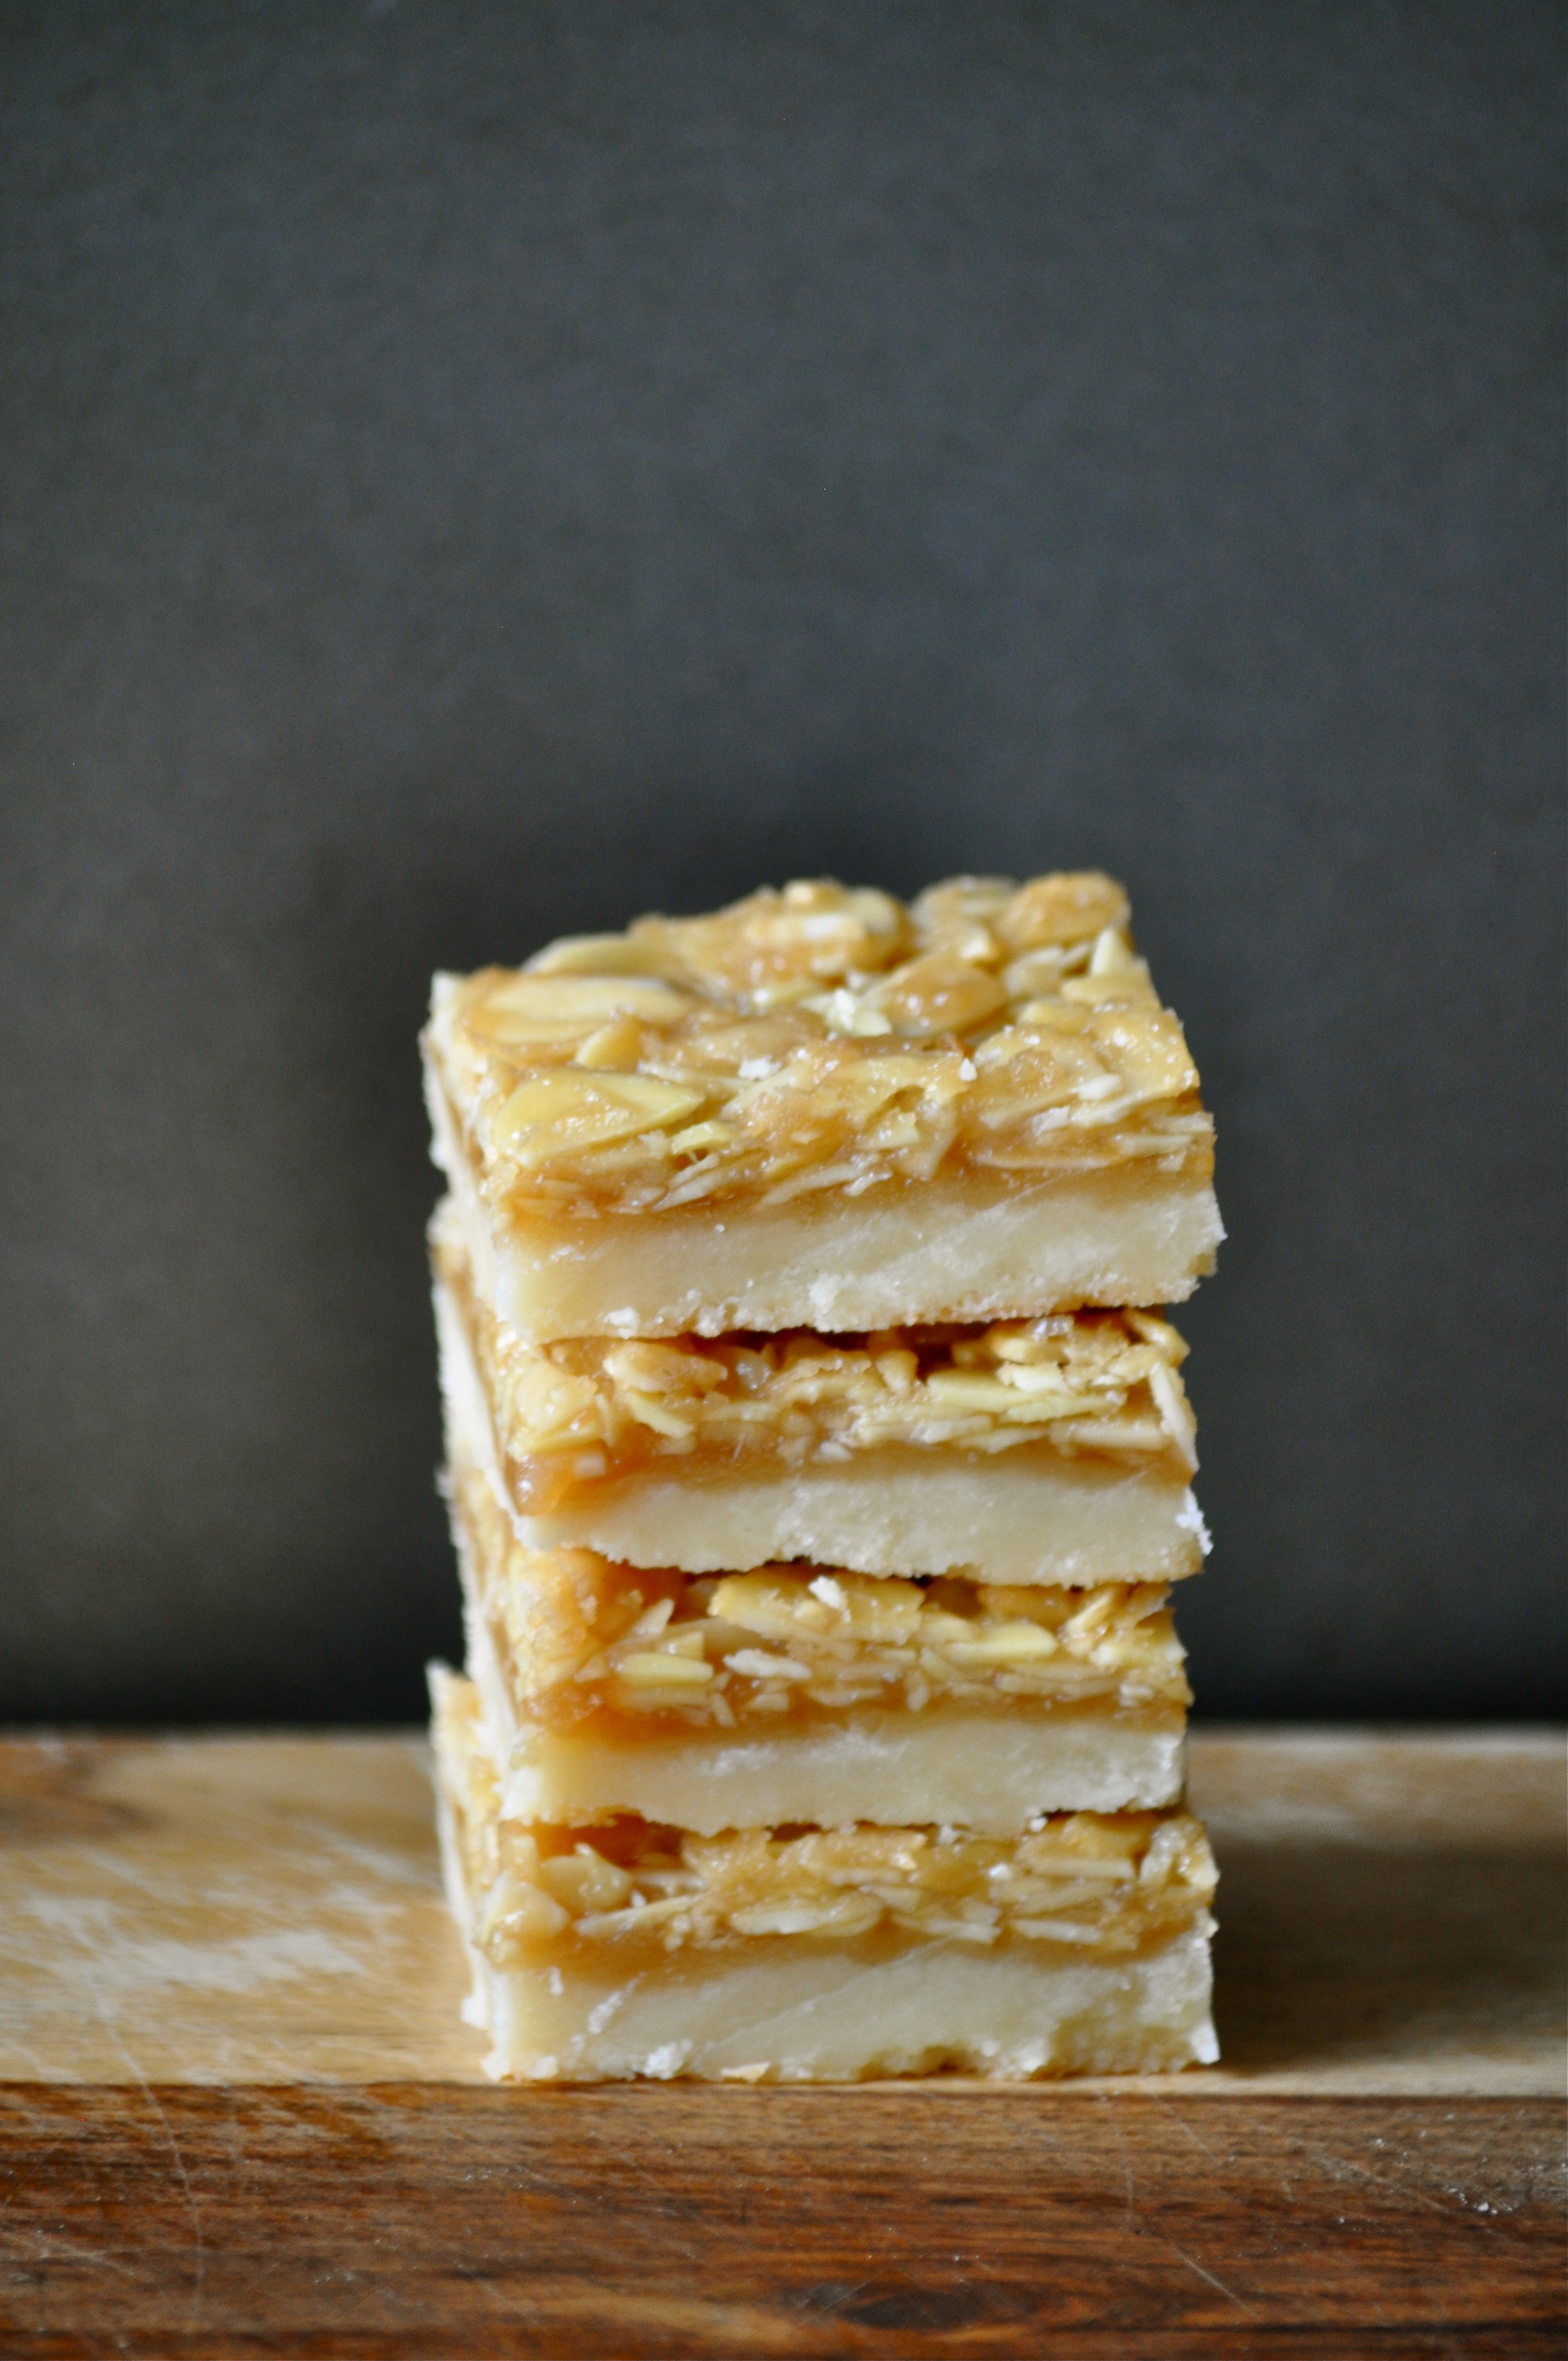
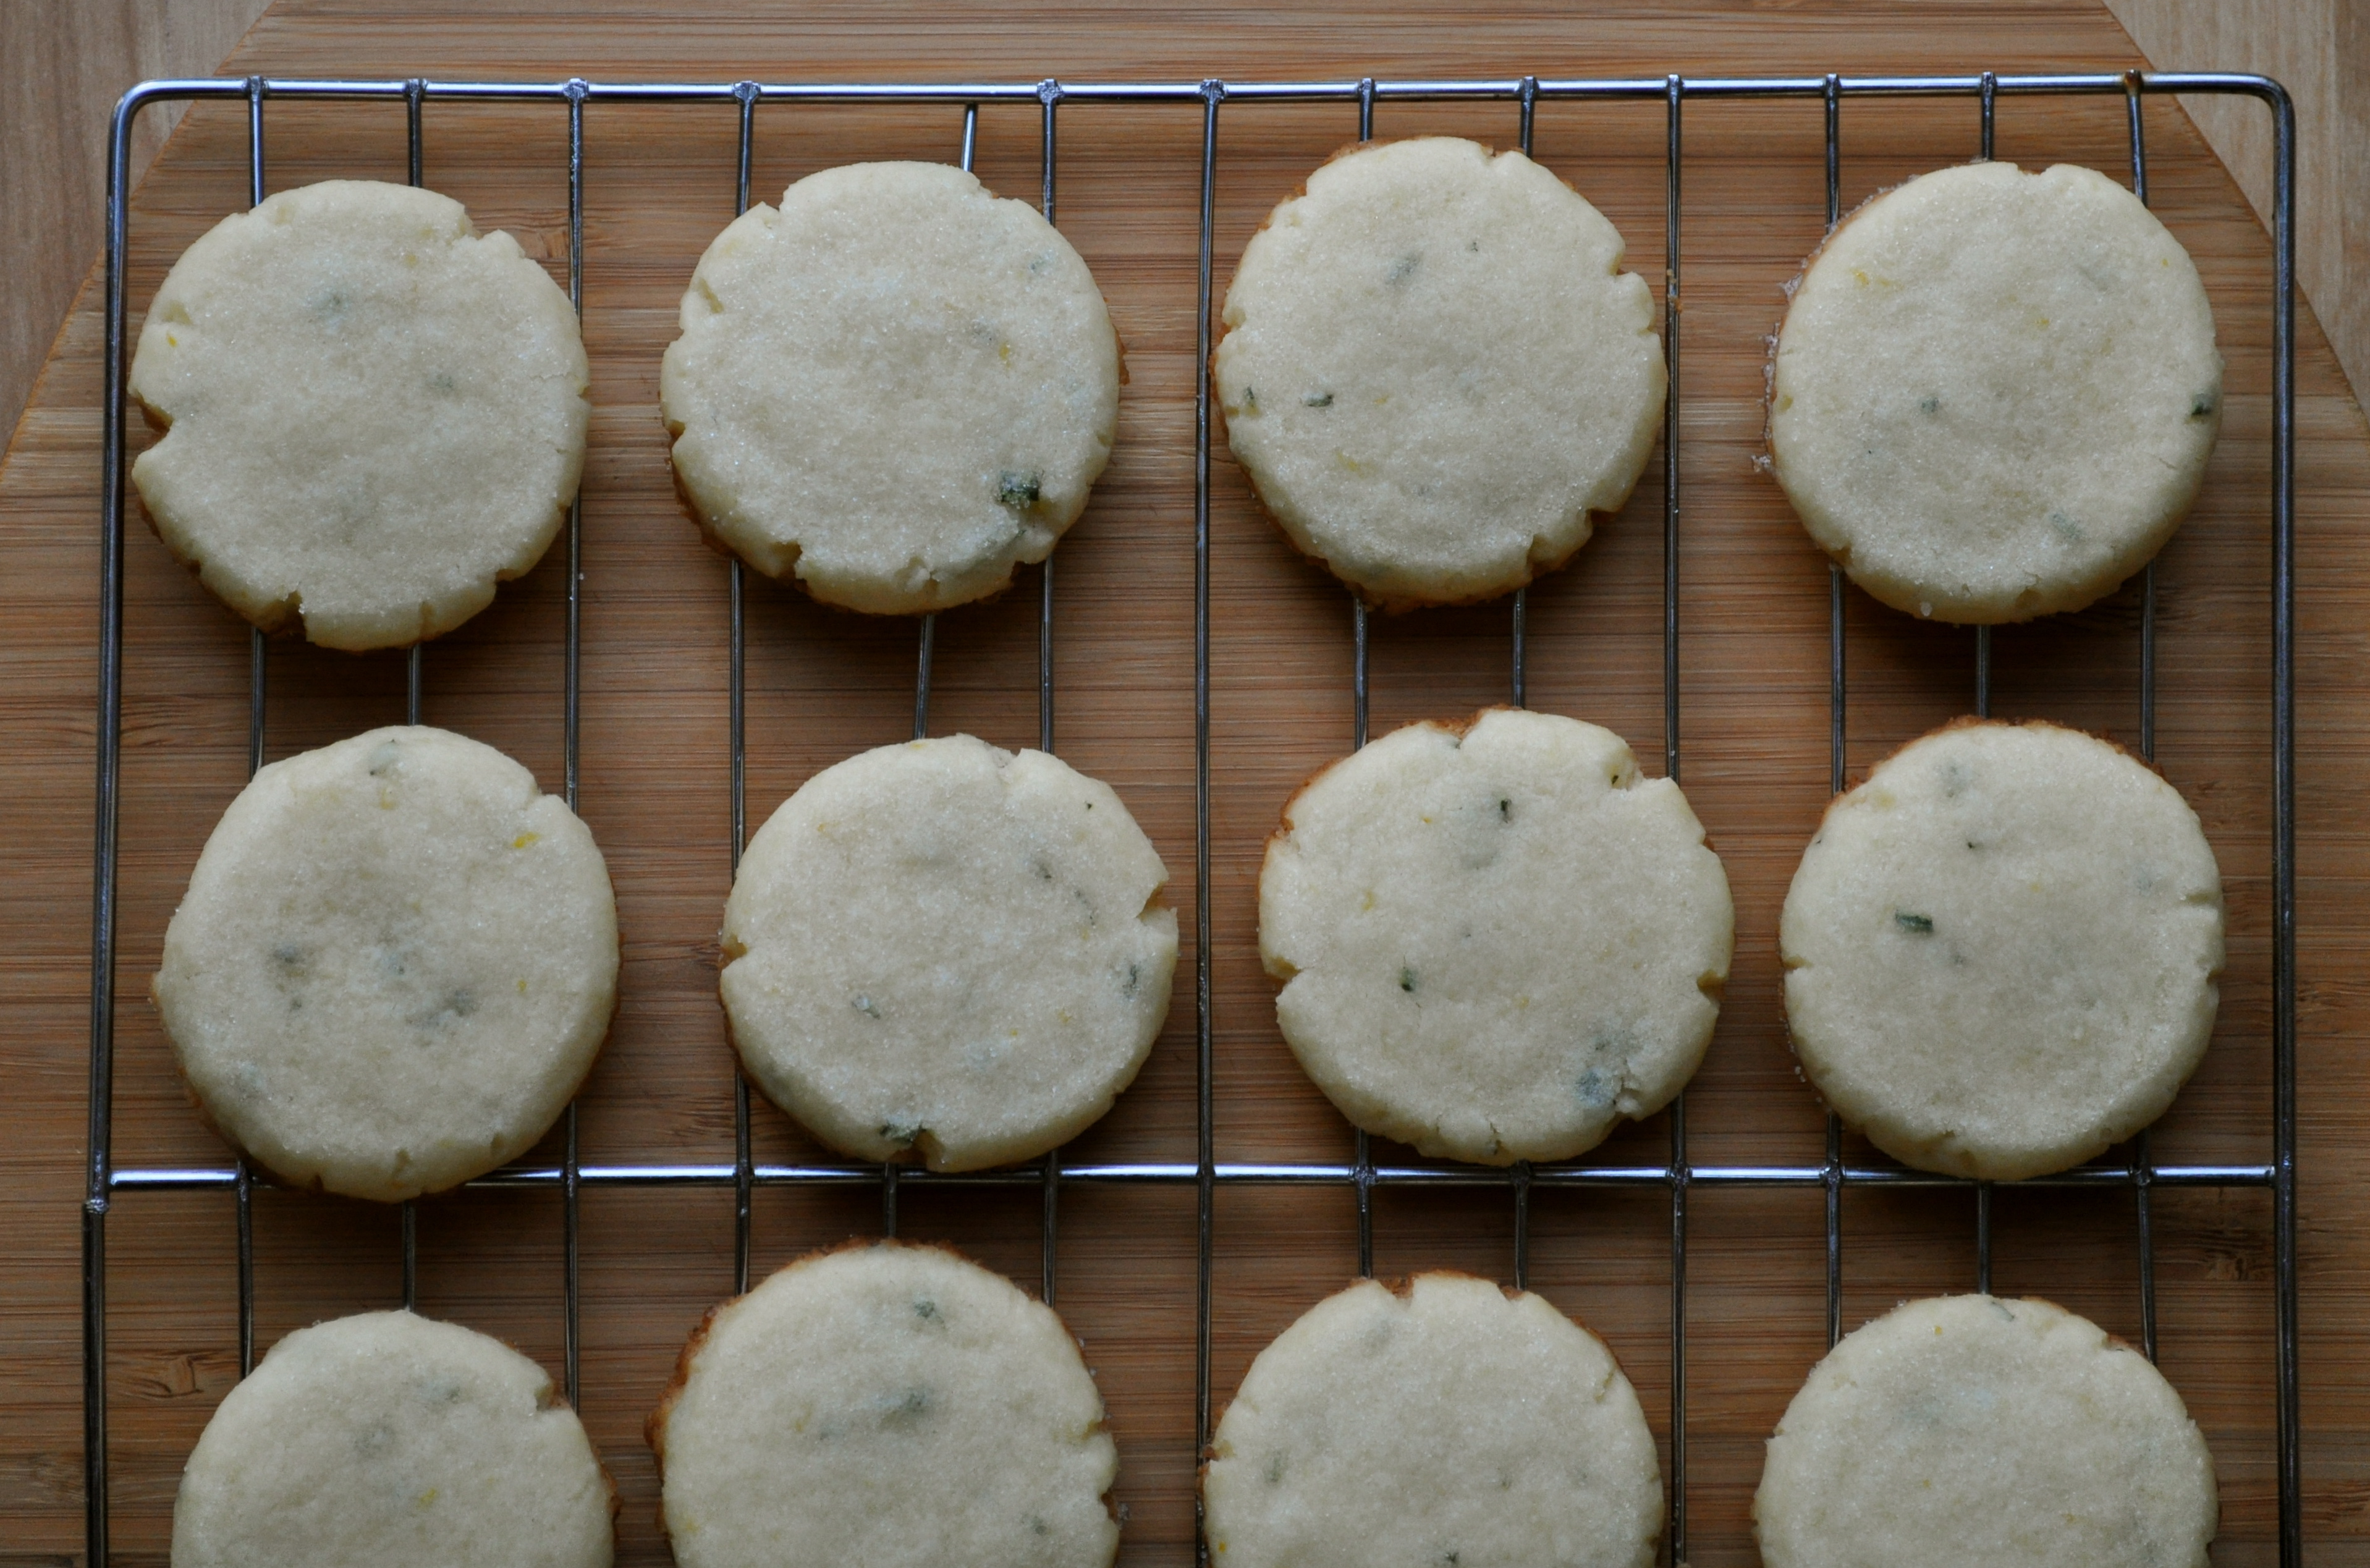
Every Christmas needs a little shortbread, in my opinion. Think of these bars as shortbread’s older, wiser, and hotter older brother. Yeah, you know what I’m talking about.

Almond Shortbread Bars | Once Upon a Recipe

Almond Shortbread Bars (adapted from Love Write Now)

Shortbread bars that get a little extra pizazz from a caramel-almond topping. These bars freeze well when stored in an airtight container. 

1 1/2 cups butter, divided

1 cup icing sugar

2 cups all-purpose flour

Pinch of salt

1 cup brown sugar

2 tsp. lemon juice

1 TBSP. water

1 1/2 cups sliced almonds

1 tsp. vanilla

Preheat the oven to 350°F. Cream together 1 cup of butter and the icing sugar. Add the flour and salt and mix together. Press the mixture into an ungreased 9″ x 13″ pan. Bake for 12-15 minutes or until lightly browned.

In the meantime, melt the remaining 1/2 cup butter in a saucepan over medium heat. Add the brown sugar, lemon juice, and water. Bring to a boil, stirring constantly. Remove from heat and add the almonds and vanilla. Spread the mixture evenly over the base and bake for another 12-15 minutes, until golden brown. Allow to cool and then cut into bars.

What are your go-to last-minute holiday treat recipes?

Salted Caramel Bark

Salted Caramel Bark | Once Upon a Recipe

Bonjour friends!

The Christmas Countdown is on! Only two more days to go until the big day is here.

Salted Caramel Bark | Once Upon a Recipe

Are you ready? Is your house all decorated nice? Have all of your presents been wrapped and placed under the tree with care? Do you have your Christmas menu planned? Is your holiday baking finished? Are you sitting by the fire relaxing with a rum and ‘nog, basking in relaxation? Or are you scrambling around trying to buy and wrap and bake all the things?

Never fear, I’m here to help! I’ve got a last minute gift idea for you. And it can be made and wrapped up in less than an hour.

Salted Caramel Bark | Once Upon a Recipe

Salted Caramel Bark | Once Upon a Recipe   Salted Caramel Bark | Once Upon a Recipe

Three ingredients. Chocolate. Caramel. Sea salt. Boom! Delicious.

Chocolate gets melted and spread on a cookie sheet. Caramel gets drizzled on top. A little sea salt sprinkle, 15 minutes in the freezer to set, and salted caramel bark is born! Break it up, tie it up with ribbon in little gift bags and it’s ready for gifting! Or you can totes just eat it yourself. It will be extremely difficult not to.

Salted Caramel Bark | Once Upon a Recipe

Salted Caramel Bark

You can use the chocolate of your choice in this recipe. I used chocolate wafers found in the bulk section of my local grocery store. Feel free to use higher quality chocolate; however, it tastes pretty darn good when you use the cheap stuff. 

12 oz. (~2 heaping cups) dark chocolate

12 oz. (~2 heaping cups) milk chocolate

12 oz. Kraft caramels

Coarse ground sea salt (~2 tsp.)

Cover a 9 x 13″ baking sheet with wax paper. Melt the chocolate in a double boiler. Place the caramels in a microwave safe bowl with 2 TBSP. water. Microwave for 1 minute, stir, then microwave in 30-second intervals until fully melted and smooth. Spread the chocolate onto the baking sheet evenly. Drop spoonfuls of the caramel over the chocolate and then swirl with a knife. Sprinkle liberally with the coarse ground sea salt. Place the baking sheet in the freezer for 15 minutes, or until set. Break up into pieces.

Salted Caramel Bark | Once Upon a Recipe

If you’re looking for other easy homemade gift ideas, look no further! Check out Christmas Crack, Lemon Butter, or this long-ago post with other last-minute holiday gift ideas.

The Great Food Blogger Cookie Swap: Nutella & Rolo Stuffed Double Chocolate Chip Cookies

Nutella & Rolo Stuffed Double Chocolate Chip Cookies | Once Upon a Recipe

Hello my friends! Happy December!

This year, I participated in the Great Food Blogger Cookie Swap, hosted by two darlings, The Little Kitchen and Love & Olive Oil. The cookie swap brings food bloggers from around the world together to exchange cookies. Basically, you sign up, receive the addresses of three other bloggers, and then you send each blogger a dozen homemade cookies. And then you wait to receive three dozen delicious cookies from those that received your name. Oh, the anticipation!

I must also add that over $13, 700 was raised for Cookies for Kids’ Cancer! Sweet treats and supporting a good cause – what’s not to like?

Nutella & Rolo Stuffed Double Chocolate Chip Cookies | Once Upon a Recipe

Participating in this swap was so much fun! I was introduced to six great new bloggers (even another blogger in my own city!) AND I received three batches of delicious cookies. Total win!

Aaaaaannnnnddddd, I finally had a good excuse to try a recipe that I’ve been waiting to make ever since I first saw it on Izy’s blog, Top With Cinnamon. Dudes, these cookies are one of the best things to ever come out of my oven. Think about a rich chocolate cookie, stuffed with creamy Nutella and a melty Rolo (aka. caramel goodness), and then sprinkled with fleur de sel. Oh, and they’re made in a saucepan. One single dang saucepan. Fewer dirty dishes! My cookie standards have officially been raised to a whole new level.

Nutella & Rolo Stuffed Double Chocolate Chip Cookies | Once Upon a Recipe

A few things: I made these cookies a total of four times. I found the dough a bit difficult to work with the first couple of times. It seemed a little dry and was hard to shape. Don’t worry though, the cookies were still delicious! The third and fourth times, I used my kitchen scale to get more exact measurements (Izy had included weight measurements in her original recipe). BIG difference. The dough was much easier to work with and the final cookie was much more tender. I highly recommend using a kitchen scale if you’ve got one. However, don’t be discouraged if you don’t have a scale, as they will still be incredible.

And next year, all of you should participate in the swap too! Check the Great Food Blogger Cookie Swap website for more details. Happy holiday baking! More recipes comin’ atcha soon!

Nutella & Rolo Stuffed Double Chocolate Chip Cookies | Once Upon a Recipe   Nutella & Rolo Stuffed Double Chocolate Chip Cookies | Once Upon a Recipe

Nutella and Rolo Stuffed Double Chocolate Chip Cookies (slighty adapted from Top With Cinnamon)

These cookies are best when made with good quality dark cocoa powder. Also, the cookies firm up a bit when they cool, so don’t be worried if they appear under-baked after the 8-10 minute mark. These cookies, still warm + a cold glass of milk = perfection. Makes about 18 cookies. 

1/2 cup (110g) butter

1 1/2 cups (350g) light brown sugar

1/2 cup (55g) cocoa powder

2 eggs

1 tsp. vanilla

1/4 tsp salt

3/4 tsp baking powder

2 cups (260g) all-purpose flour

1/2 cup (100g) dark chocolate chips

Fleur de sel, for sprinkling

~1/3 cup Nutella

~18 Rolo chocolates

Preheat your oven to 350°F. Prepare two baking sheets with parchment paper or a Silpat.

In a medium saucepan, melt the butter. Remove the pan from heat and stir in the brown sugar and eggs. Add the cocoa, salt and baking powder and stir until well combined. Add the flour and stir until just mixed. Then stir in the chocolate chips.

Drop dough by the tablespoon onto the baking sheets (no more than 12 per sheet). Use your finger make a large indentation the centre of the dough; fill the indentation with about 1/2 teaspoon of Nutella and top with a Rolo. Take another tablespoon of dough and flatten it with your fingers, then place over top of the dough balls. Seal the edges and very gently flatten just a little bit.

Sprinkle with fleur de sel and bake for 8-10 minutes. Do not overbake. Allow to cool on the cookie sheet for about 10 minutes, then transfer to a wire rack to cool completely.

Nutella & Rolo Stuffed Double Chocolate Chip Cookies | Once Upon a Recipe

PS. If you’re looking for more great cookie recipes, check out the recipes for the cookies I received over at My Life Made Sweet & Saucy (Raspberry  Marshmallow S’mores!), Korena In the Kitchen (Cranberry-Orange Christmas Jammers), and The Snack Dept. (Minty Trader Joe’s Cookie Butter Cookies!).

Well Paired | Rosemary-Lemon Sandwich Cookies

Rosemary-Lemon Sandwich Cookies | Once Upon a Recipe


Well, I hate to point out the obvious, but…we survived. The world goes on.

Hopefully, you’re prepared for Christmas because it’s coming in just three more days and now you really have no excuse for not being ready. However, whether you’ve accidentally left everything to the last minute (or not), I’m here to help.

Rosemary-Lemon Sandwich Cookies


First of all, you must go make some lemon butter. It’s quick! It’s easy! It’s delicious! It makes a wonderful gift! Aside from its extremely high deliciousness factor, it’s darn cute!

But if you want to go the extra mile, make some rosemary lemon shortbread-esque cookies, and then sandwich them together with a creamy mixture of lemon butter and mascarpone cheese. Umm, yeah…you’re going to want to do this, if not for others then for yourself. And don’t fret! If you just don’t have the time or energy to make your own lemon butter, you could certainly substitute store bought lemon curd or even lemon pie filling for the lemon butter. Although I highly recommend going the extra mile and making your own lemon butter. Just sayin’. And please, don’t be afraid of the rosemary in this recipe. It adds a very subtle flavor that complements the lemon beautifully. This ain’t no one-dimensional cookie. This is a multidimensional cookie!

Rosemary-Lemon Sandwich Cookies | Once Upon a Recipe


Rosemary-Lemon Sandwich Cookies | Once Upon a Recipe


Thank you to my lovely coworker, Jenn for sharing this recipe with me. It comes from the latest issue of Better Homes and Gardens. And let me tell you, it’s decadent. I encourage you to double the recipe as one batch only makes about 18 sandwiches. But then again, you will most certainly be tempted to eat these little creatures, so if you don’t plan on getting them out of your house immediately, this may be a case where less is more. Consider yourself warned.

Rosemary-Lemon Sandwich Cookies | Once Upon a Recipe


Make these friends. Share them with some special people. And get back to the celebrations of the season. Much love (and cookies) to you all.

Rosemary-Lemon Sandwich Cookies | Once Upon a Recipe


Rosemary-Lemon Sandwich Cookies (barely adapted from Better Homes and Gardens, Dec. 2012)

Makes about 18 sandwich cookies.

1 cup unsalted butter, softened

3/4 cup granulated sugar + extra for dipping

2 tsp. fresh rosemary, chopped

2 tsp. lemon zest (about 2 lemons)

1/2 tsp. baking powder

1/4 tsp. salt

1 tsp. vanilla

2 1/4 cups all-purpose flour

1/2 cup lemon butter

1/2 cup mascarpone cheese

Preheat the oven to 400°F. Prepare your cookie sheets with parchment paper or a silpat. In a large bowl, beat the butter on medium speed until creamy. Add the sugar, rosemary, lemon zest, baking powder, and salt, and beat until combined. Scrape the bowl to ensure everything is well incorporated. Beat in the vanilla, and then add the flour.

Shape the dough into 1-inch balls, and place on the cookie sheets. With the bottom of a glass dipped in sugar, flatten each ball to 1/2-inch thickness. Bake for about 8 minutes or until the bottoms are lightly browned. Cool completely.

In a small bowl, combine the lemon butter and mascarpone cheese. Spread  on the bottom sides of half of the cookies, and top with the remaining cookies to make sandwiches. Layer sandwich cookies between sheets of waxed paper in an airtight container. Store in the refrigerator or freeze.

Rosemary-Lemon Sandwich Cookies | Once Upon a Recipe

Ho Ho Holiday Gifting | Lemon Butter

Though it all seems so far away, my heart aches for the children, families, and teachers affected by the Newtown school tragedy this past week. At a time when the world seems incomprehensible, I do what makes sense to me. I bake and I share. Thinking of you all and holding you close to my heart.

Lemon Butter | Once Upon a RecipeFriends, Christmas is less than one week away! Are you freaking out yet?

I’m tottttttttally freaking. Suffice it to say that I just started my shopping yesterday. Yes, started. However, after a seven hour suicide mission marathon at the mall I am well on my way to the finish line. I credit that miraculous fact to two things. One, the two meals and large caffeinated beverage that helped me to power through those seven hours and my heavy reliance on homemade gifting this year (which thankfully, I got an early start on).

Lemon Butter | Once Upon a Recipe

Homemade gifts are wonderful to give and receive. What could be more special than receiving a gift that is the product of the blood, sweat, and tears hard efforts of someone you love? I certainly can’t think of a single thing.

The good news is – there are many homemade gifts out there that are really simple and take little time or creativity to prepare. Take edible gifts, for example! Quick, easy, and delicious!

Lemon Butter | Once Upon a Recipe

Don’t believe me? Allow me to demonstrate. With lemon butter! Lemon butter is my family’s take on what most people refer to as lemon curd. It’s creamy, it’s tangy, it’s sweet, and it’s incredible. Four ingredients, less than 30 minutes, and you’ve got yourself a delicious and versatile treat!

Eggs are cracked. We need six. Two cups of sugar are added. Three lemons are zested and juiced. It’s all whisked together with a quick flick of the wrist. Ok, maybe a few flicks of the wrist. Then we cook it all gently in a double boiler on the stove until it thickens up. One cup of butter is stirred in at the end. Boom shaka laka. Lemon butter!

Lemon Butter | Once Upon a Recipe

Pour it into little jars. Tie them up all pretty with some raffia. This recipe will produce four cups of lemon butter – enough to fill 8 of these cute little 4-ounce jars. That’s eight gifts people! Get into it!

Lemon Butter | Once Upon a Recipe

In case I haven’t convinced you already, let me tell you about a few ways you can enjoy this lemon butter.

1. Fill mini prepared tart shells for a quick and delicious dessert.

2. Spread it onto toast. Muffins! Scones!

3. Stir a spoonful into plain Greek yogurt. Seriously good.

4. Eat it by the spoonful. (Trust me, you’ll want to.)

Lemon Butter | Once Upon a Recipe

Lemon Butter

Makes about 4 cups. 

6 whole eggs

2 cups granulated sugar

Juice + zest of 3 lemons

1 cup butter, cut into small cubes

In a double boiler, whisk together the eggs, sugar, and lemon juice + zest. Cook over medium heat until thick, stirring often (this takes about 10-15 minutes). Once the mixture is thick enough to coat the back of a spoon, stir in the butter until melted and incorporated. Remove from heat and allow to cool for a few minutes before pouring into jars. Seal tightly and refrigerate. Consume within a few weeks.

Lemon Butter | Once Upon a Recipe

Come back in a few days and I’ll show you another use for lemon butter. Hint: It starts with a C and ends in ookie.

Oh! And one more thing! Once Upon a Recipe has been undergoing a little facelift behind-the-scenes for the past while. I can’t wait to share it all with you in the new year!

Guest Post: Kristy @ Gastronomical Sovereignty | Rough & Rustic Stuffing

Hi friends! Special treat for you today – Kristy from Gastronomical Sovereignty is here to share a festive recipe. Kristy is one of my favorites. Check out more of her blog after this post and you’ll see why. Bonus: She’s a fellow Canadian. Cheers to that!

Good morning Amanda’s darling readers!

Anyone who knows me knows I love me some Christmas. The tree, the music, the presents, company, that glowing feeling that starts deep in your stomach and radiates through your every pore – that could be the wine. But still, I love me some Christmas! And best of all, at this time of year, I love a good, filling, rough & rustic stuffing.

from above christmas stuffing

There are lots of things you can stuff right now. Stockings. Packages. Feather down pillows. Your face. Random body parts that will remain un-named because not everyone appreciates me talking about vaginas on their blogs. Oops. Sorry Amanda! I said vagina. Oh no.
.
But most importantly – at least while we’re in the presence of family – birds! This year it’s just me and the boyfriend so we aren’t roasting a full turkey. Instead we’re thinking about just 2 breasts. Turkey breasts. What’s wrong with me?
.
You could stuff this stuffing inside a bird if you like but this recipe was simply baked in the oven all by itself. Is it still called stuffing if it isn’t stuffing something? Hm.
This was also less goopy than most stuffings I’ve had. You could add another 1 – 2 cups of liquid if you like your stuffing heavier but this is a nice light-feeling alternative to everything else we eat at Christmas dinner but still loaded with flavor to-boot! Boots are another thing you can stuff. With socks. Or presents. Or….
.
Rough & Rustic Stuffing

(printable recipe) – Serves 6.

.
Ingredients:
1 loaf of sourdough bread, roughly chopped into 1” pieces
1 cup onion, diced
1 cup carrot, skin on & diced
1 cup celery, sliced
1 cup mushrooms, sliced
2 cups apple, skin on, cored & diced
2 cups chicken, beef, or veggie stock
1 lb. chorizo sausage (approx. 3 large links), removed from casings
Handful of fresh parsley, roughly chopped
Handful of fresh sage, roughly chopped
2 TBSP. butter
2 pastured eggs, lightly beaten
Coarse sea salt & fresh cracked black pepper
.
What to Do:
Pre-heat your oven to 300°F. Place chopped bread on a couple of baking sheets. Place in oven and toast until golden, approx 30 minutes. Remove from heat and set aside.Turn the heat up to 350°F and grease a casserole dish with Tbsp of butter and/or non-stick spray. Set aside.Place a large pan over medium heat with 1 TBSP. of butter. Once hot, add the sausage and break up into small pieces. Cook until almost all the pink is gone, stirring often.
.
Add the onion, celery, carrot, mushroom and a good helping of salt and pepper. Allow for the veggies to soften, stirring regularly, until just barely fork tender, approx 10 minutes.
.
Pour in the apples, stock and herbs. Bring to just a boil, scraping any bits off the bottom of the pan. Mmm flavor! Remove from heat.
.
Toss the bread into the casserole dish and pour eggs over top. Mix well. Add the sausage/veggie/stock mixture. Make sure everything is combined.
.
Cover and place in oven. Bake for 45 minutes, remove the cover, and cook a further 10 minutes. Remove from the heat and allow to sit for 10 minutes.
.
Eat.
.
Buen provecho!
Kristy

Snack Attack | Chewy Granola Bars

Granola Bars


Friends, the holiday season is upon us! Have you noticed?

Christmas music has begun to play in the stores, new seasonal drinks are now available at Starbucks and the like (Peppermint Mochas!), and every evening when Bella and I get out for a walk, there are lights twinkling inside and outside of all the houses. (Oh, and it’s also dark by 4:30pm, hence the craptastic photos. Sorry friends, I couldn’t wait to share this recipe!) I love this time of year, but I must say, it really has creeped up on me this time around. Christmas is merely a few weeks away!

Granola Bars


Every year when December hits, I find myself scrambling to bake Christmas goodies, get my shopping done, and partake in fun holiday activities. Sometimes I am scrambling so much that I forget to take a breath and enjoy it all. And really, the main reason I am so in love with this time of year is that there is practically a standing excuse to gather together with friends and family to celebrate. There is something purely magical about coming together, eating delicious food, and toasting to the season with those people that bring joy to your heart. Call me a cheeseball, but I just luuuurrrrrve it.

On my bucket list for this holiday season:

  1. Go on a sleigh ride. I don’t know how I’m going to make this happen, but I’m sure gonna try! Anyone got a horse I could borrow? And a sleigh?
  2. Make a gingerbread house. Even though gingerbread houses never seem to get eaten (who wants to eat all that candy and cookie business after it’s been gathering dust for weeks?!), the process is so darn fun! And by process I mean putting more candy in your mouth than you put on the house. Magical.
  3. Watch one Christmas movie every week from now until Christmas. Top on the list – Elf, A Charlie Brown Christmas, and It’s a Wonderful Life (which I’ve never seen before – how?!)
  4. Fill a huge thermos with hot chocolate and Bailey’s, get a group of my favorite people together, and go tobogganing.
  5. Learn how to play an easy Christmas tune on the guitar. A party ain’t a party without a sing-a-long.
  6. Donate to those in need. I am very inspired by this.

…to name a few. What are some of the activities on your holiday bucket list?

Granola Bars


The holiday parties have begun. Time to get my arse in gear. But in all of this busy-ness, one cannot forget to eat! No problemo, I’ve got you covered with a dense and energy-packed granola bar that you can grab for a quick breakfast or snack on the run. I have been searching for ages for the perfect granola bar recipe. One that is chewy, not too sweet, and somewhat healthy.  The original recipe (taken from Whitewater Cooks) uses corn syrup, but I substituted brown rice syrup with great results. I’d really like to find a way to cut down a bit on the butter and sugar, but for now, it will do. This recipe makes a rather large batch, but they freeze very well once cut and put into an airtight container. I have also cut the recipe in half without issue – just use a smaller cookie sheet.

Feel free to change these up by adding your favorite mix-ins. I definitely recommend including the sesame seeds as they add a delicious crunch to these chewy bars. Any kind of dried fruit can be subbed in for the raisins, and some dark chocolate chips would take them to a whole other level.

Don’t forget to stop and smell the balsam friends. 😉

Granola Bars


Chewy Granola Bars (slightly adapted from Whitewater Cooks)

Makes 24 very generous bars.

1 cup butter, softened

1 ½ cups peanut butter (smooth or crunchy)

1 ½ TBSP. vanilla

2 cups brown sugar

1 cup brown rice syrup

6 cups large flake oats

1 cup shredded coconut, toasted

1 cup sunflower seeds, toasted

1 cup sesame seeds, toasted

2 cups dried fruit/chocolate

Lightly toast the coconut, sunflower seeds, and sesame seeds in a skillet over medium heat, then set aside. In a large bowl, cream together the butter, peanut butter, vanilla, and brown sugar. Add in the brown rice syrup and mix, and then add the remaining ingredients and stir by hand.

Preheat the oven to 350F. Line a large (ie. 12 x 18 inch) cookie sheet with parchment paper and press the mixture into the pan. Bake for 20-25 minutes, or until golden brown around the perimeter and just set in the centre. Let cool slightly and then cut into bars. Freeze if the bars will not be consumed within a few days.

Granola Bars

The In-Between | Cranberry Egg Nog Scones

Holla!

How goes it boys and girls? Did you have a magical Christmas? Did you eat way too much and drink to your heart’s content? Did you get way too little shut-eye over the past few days? Are you totally bummed about going back to work tomorrow? I sure did, and I sure am. Alas, the party must go on.

And there will be another party in, oh…about 4 days. So let’s take a moment to relax and recuperate, shall we?

Yesterday, I took a day for myself. I allowed myself to be a sloth-like couch potato. I didn’t shower. I wore my comfy clothes. I ate dessert for dinner, and dinner for dessert. I watched a Diners, Drive-Ins, and Dives marathon. Which just made me crave poutine and cinnamon-bun french toast, by the way. I probably lost a few brain cells, but they’ll grow back…right?

But the craziest part? I felt bad about it. I felt guilty for being a couch potato when I should have been cleaning, working out, organizing that dang room, and the list goes on. Sometimes we can be so hard on ourselves. But the reality is, there will always be something that needs doing, and unless we press the pause button every so often, we will miss out on opportunities for rest, relaxation, and being kind to ourselves.

This morning, I woke up after a refreshing 8-hour sleep, I went to a hot yoga class, and then I let the rest of my day carry me where it wanted. I put the to-do list away. And clearly the day wanted me to exercise my baking muscle because these scones were born. I had a bag of fresh cranberries in my fridge that I threw into my basket on a whim last week, mostly because they were ridiculously cheap. I also had a carton of egg nog hangin’ out in there. I have to admit, I’m not the biggest fan of egg nog. I like to have a token Egg Nog and Rum (or two) each Christmas, but that’s about all I can handle. Which leaves me with a little too much egg nog on my hands. However, after making a batch of these scones, it might not be enough.

Cranberry and Egg Nog Scones

I love how these scones turned out. They were incredibly light, and honestly, if you weren’t told that there was egg nog in them, you might not be able to guess that it was in there at all. The next time I make these (and there will be a next time), I will add in the zest of an orange – I think it would compliment the flavors so well.

2 cups all-purpose flour

1/2 cup oats

1/3 cup + 2 TBSP. organic cane sugar

1 TBSP. baking powder

1/4 tsp. baking soda

Pinch of salt

1 1/4 cups fresh cranberries, roughly chopped

1/3 cup butter, cold and cut into small cubes

3/4-1 cup egg nog

1 egg white + 1 tsp. water, whisked

Extra sugar for sprinkling on top of scones

Preheat the oven to 400°F. Mix the flour, oats, sugar (reserving the 2 TBSP.), baking powder, baking soda, and salt together. Cut the cold butter into the flour mixture using a pastry blender (or two knives) until the mixture resembles coarse meal. In a separate bowl, combine the cranberries and the 2 TBSP. sugar and toss to coat. Add in to the flour mixture. Slowly add the egg nog to the flour mixture, using only enough to bring it all together. On a lightly floured surface, pat the dough into a rectangle, about 3/4 inches thick. Cut into 8 pieces, and place them on a parchment or Silpat-lined baking sheet. Brush them with the egg white/water mixture, and sprinkle with sugar. Bake for about 15-18 minutes, or until lightly browned. Enjoy immediately!

It’s Five O’Clock Somewhere | Rosemary Gin Fizz

Alert. I am elbows deep in butter and sugar. I went to the grocery store yesterday with a rather large streak of flour on my forehead. I didn’t notice the flour until I got home. Damn it.

As a consequence of the above, I am waist-deep in dirty dishes. Help?

My kitchen is a mess. Every square inch of my dining table is covered with baking, homemade gifts, and cards. I haven’t eaten a meal at the table in days. My floor is covered with wrapping paper and items that still need to be wrapped up all nice and pretty.

It’s quite likely that I’m keeping the local grocery store in business. I have stopped there at least once a day for the past week. How?!

And then there’s the sleep issue. I can’t remember the last time that I slept more than six hours in one night. Don’t get me wrong, I like sleep. I love sleep. But I don’t have time to sleep right now. I’d totally be all good if there were like, 36 hours in a day instead of a measly 24. Clearly, whoever invented 24-hour days didn’t have a very busy schedule!

But I digress. And I’ve learned that when life throws stress and busy-ness and craziness your way, it doesn’t hurt to sit back, take a few deep breaths, and enjoy a tasty beverage. Preferably one that has a decent alcohol-to-mix ratio. You’ve earned it, after all.

It’s quite likely that you’ve been (and will continue) enjoying a beverage or two over the holiday season. ‘Tis the season for eating and drinking, no? Rum and egg nog (yes), spiked cider (yes!), mulled wine (YES!)…so many choices. Well, I’m here to offer you another choice, something a little less sweet, a little bit lighter (on taste, not alcohol…who do you think you’re talking to here?).

I stumbled upon this concoction on…Stumble Upon a few weeks ago and bookmarked it to try. I made it, I drank it, and I loved it. The rosemary flavor is lovely, but not overpowering. I’m ready to serve a few of these fizzies up over the holidays.

Rosemary Gin Fizz (adapted from Sassy Radish)

2 ounces gin (I used Tanqueray)
2 TBSP. fresh lemon juice
2 TBSP. Rosemary Syrup (recipe below)
Ice cubes
Cold club soda
1 rosemary sprig, for garnish (optional)

Grab yourself a beverage vessel. I am obsessed with serving things in mason jars, so I grabbed one of those. Use whatever tickles your fancy. Combine the gin, lemon juice, and Rosemary syrup, and give it a good stir. Add ice cubes to fill the glass halfway, and top with club soda. This is not a sweet drink, so if you want more sweetness, you could always add more syrup, or use tonic water instead of club soda…and then you’d have a mighty delicious beefed up G & T! Delicious, either way. Garnish with a sprig of fresh rosemary, if using.

To make the Rosemary Syrup:

2 cups water
1/2 cup sugar
4 rosemary sprigs, rinsed

Combine all of the ingredients in a medium saucepan. Bring to a boil, then simmer over low heat for a couple of minutes. Remove from the heat and allow the mixture to steep for 10 minutes. Strain the syrup and chill. Store in an airtight container (ie. a mason jar!) in the fridge for up to one week.

Just a note: The first three photos in this post were taken via Instagram, a free app on my iPhone. I adore Instagram, and tend to snap a lot of photos with it on a daily basis, many food-related, but some not. Several of them have made an appearance on the blog before. If you’re interested in following me on Instagram, you can find me under the username “@onceuponarecipe”. Bottoms up!

%d bloggers like this: